GPS Coordinates: 37.64037, -112.16963 Visitor Center
Highway 63 is a scenic road that runs through Bryce Canyon National Park from north to south. It provides access to 14 viewpoints, each more stunning than the last.
A brochure is actually handed out when you enter the park. It lists the locations of all the viewpoints along this road.
It’s safe to say that Bryce Canyon is truly unique and unlike any other park in the American West. In fact, it’s one of the most beautiful parks we’ve visited in the United States.
The drive along this road takes you to the most photogenic viewpoints and gives you a sense of what Bryce Canyon has to offer without having to tackle hikes that can be tough due to the high altitude and semi-arid climate.
GPS coordinates: 37.20183, -112.98678 Start of the trail
GPS coordinates: 37.21830, -112.97401 End of the trail
This 2.8 km (one-way) paved trail starts at the South Campground, just north of the Visitor Center. It runs along the Virgin River in the lower part of the canyon and ends at Canyon Junction.
It’s the only trail in Zion National Park that allows pets (on a leash), bikes, and is also one of the few trails in the park accessible by wheelchair.
The trail is easy to walk and the scenery is really pleasant. The towering cliffs around us are beautifully colored, and the vegetation is lush.
We crossed several bridges overlooking the river, which is quite pretty.
We even had the surprise of encountering a snake that quickly crossed the trail. We took the time to observe it from a safe distance.
We also spotted a mule deer wandering near the campground.
GPS Coordinates: 37.23700, -112.96110 Trailhead
GPS Coordinates: 37.23738, -112.96348 Waterfalls
GPS Coordinates: 37.23869, -112.96406 End of the hike
Sand Bench Trail is a loop trail of about 6 kilometers (3.7 miles) that starts near the Court of the Patriarchs stop. Just take the access road leading to a large water reservoir and the pedestrian bridge over the Virgin River.
The trail first heads west to offer a great view of the Court of the Patriarchs, then turns south, crosses a small stream, and climbs to the top of the rockslide. The total elevation gain to the summit is about 150 meters (490 feet).
For our part, we decided to only do a very short section of this trail. In fact, we covered a total distance of 1.2 km (0.75 miles) round-trip, which still allowed us to see some pretty little waterfalls cascading into the Virgin River and stunning rock formations that Zion is famous for.
The trail is sandy and quite hot and exposed. It’s best to hike it during the cooler months or on a cloudy day to avoid heat exhaustion.
GPS coordinates: 37.25096, -112.95806 Trailhead
GPS coordinates: 37.25096, -112.95806 Lower Emerald Pool
GPS coordinates: 37.25734, -112.96630 Upper Emerald Pool
GPS coordinates: 37.25713, -112.96299 Middle Emerald Pool
Emerald Pools Trail is one of Zion National Park’s iconic hikes. This trail forms a 4-kilometer loop and is packed with incredible viewpoints and breathtaking landscapes along the way.
The main highlights of this hike include water pools and waterfalls.
The trailhead is located in front of Zion Lodge, across the main road. The trail is easy to navigate. However, there’s a 60-meter elevation gain to reach Middle Emerald Pool and another 60-meter gain to reach Upper Emerald Pool.
Keep this in mind if you’re hiking during the summer months, as it can get very hot, making the hike more challenging and exhausting.
Lower Emerald Pool
Lower Emerald Pool is about 1 km from the trailhead. This section of the trail is very easy to walk.
In this area, the vegetation is lush, and the trail leads to a large alcove from the top of which two waterfalls flow into small pools.
When we passed through, the water flow was low. However, the natural scenery is really pretty in this section.
Upper Emerald Pool
Once past the alcove, the trail climbs and becomes more difficult. Steps carved into the rock lead us to the top of the cliff, offering nice viewpoints of the surrounding cliffs.
Upper Emerald Pool is surrounded by the walls of a tall red sandstone cliff, partially covered in ivy. It’s also shaded, allowing us to relax and enjoy a break while admiring the truly enchanting scenery.
The temptation to swim is strong after hiking under the hot sun, but swimming is strictly prohibited here.
Middle Emerald Pool
After taking a break at Upper Emerald Pool, we backtracked and turned right onto the trail leading to Middle Emerald Pool.
This section is also very beautiful, and hikers take the opportunity to rest on the rocks along the stream.
The Return
The trail is steep in some places, and there are no protective barriers. So, be careful with children.
The views are truly stunning, including the one overlooking Lower Emerald Pool below the trail.
The viewpoints of the Virgin River and the surrounding cliffs are also amazing.
UTAH - ZION NATIONAL PARK - WEST RIM TRAIL (TRAIL CONNECTING TO ANGELS LANDING)
GPS coordinates: 37.25927, -112.95139 Trailhead
GPS coordinates: 37.26110, -112.95070 Scenic viewpoint and turnaround (+/- 500 m round trip)
Angels Landing is one of Zion’s summits and one of the park’s most popular hikes. It rises over 450 meters above the canyon floor and offers a stunning 360-degree view of the canyon.
A permit is now required to hike this trail, which is rated difficult due to its steep elevation gain and very narrow sections.
Since we didn’t have a permit for this hike, we only covered a tiny section of the trail to get a glimpse of the scenery in this area.
The trail starts on the other side of the main road at stop #6, The Grotto. You’ll need to cross the pedestrian bridge over the Virgin River and then turn right onto the West Rim Trail, which leads to the Angels Landing trail.
The beginning of the trail is easy to walk and offers lovely views of the Virgin River winding through the valley at the base of this magnificent canyon.
GPS coordinates: 37.28521, -112.94774 Trailhead
GPS coordinates: 37.29675, -112.94828 End of the trail
The last stop in Zion National Park is the Temple of Sinawava. It's one of the most popular spots in the park because this is where the Riverside Walk begins—a 3-kilometer (round-trip) hiking trail that leads to The Narrows, a narrow canyon with towering sandstone walls through which the Virgin River flows.
Riverside Walk is a really pretty, easy, and family-friendly stroll that follows the Virgin River. The farther you go, the closer the canyon walls get. The scenery is absolutely stunning.
Along the way, you can see hanging gardens, desert wetlands, wildlife by the river, and small waterfalls.
There are also several spots along the river to take a break if you need one.
Riverside Walk ends at a patio with stone steps leading down to the river.
This is where The Narrows hike begins. You’ll need to be well-prepared because most of the hike takes place in the Virgin River’s riverbed. The rocks can be slippery, and the water is very cold. Sometimes, the water level can be quite high.
It’s essential to check the weather and the risk of flash flooding before heading into the depths of this canyon.
UTAH - ZION NATIONAL PARK - COURT OF THE PATRIARCHS & BIG BEND
GPS Coordinates: 37.23729, -112.96064 Court of the Patriarchs
GPS Coordinates: 37.27270, -112.94655 Big Bend
Court of the Patriarchs is considered the shortest trail in Zion National Park. To get there, just take the shuttle and get off at the 4th stop.
The trail starts at the shuttle stop. It’s paved and quickly leads to a small viewpoint overlooking a cluster of sandstone cliffs named Court of the Patriarchs.
The three peaks you see are named after the biblical figures Abraham, Isaac, and Jacob. You can also spot two other rock formations known as Mount Moroni and The Sentinel.
Big Bend is the seventh shuttle stop. There’s no trail here, but it’s a super popular spot for photos since you get an amazing view of the canyon, especially Great White Throne with Angels Landing in the foreground.
UTAH - ZION NATIONAL PARK - MOUNT CARMEL HIGHWAY SCENIC DRIVE
The Zion-Mount Carmel Highway, also known as Utah State Route 9, is a scenic road that connects the east entrance of Zion National Park to the village of Springdale.
Unlike the Zion Scenic Drive, it’s open year-round, and personal vehicles are allowed.
This road is a series of switchbacks winding through the canyon at elevations ranging from 1,130 to 2,700 meters. Several overlooks along the way offer stunning views of the canyon.
Over millions of years, water, wind, and ice have shaped this canyon, creating an extraordinary landscape.
While in the Kanab area, we were looking for a spot to relax by the water, and after some searching, we found Jackson Flat Reservoir.
This desert oasis, located about 6 km from downtown Kanab, is the perfect spot for outdoor enthusiasts—and it’s free!
You’ll find a boat ramp, a lovely sandy beach, a volleyball court, and workout stations.
The facilities include restrooms and an outdoor shower.
There are plenty of activities to enjoy here. The calm, clear waters of the reservoir are ideal for water sports like canoeing, kayaking, or paddleboarding.
There’s a paved trail, the Sherry Belle Trail, which loops 5 km around the reservoir. You can walk, run, bike, or even rollerblade on it.
It’s also a great spot for birdwatching—you’ll see waterfowl and many other bird species, as well as frogs, lizards, and even snakes.
UTAH - TOADSTOOLS TRAIL IN GRAND STAIRCASE-ESCALANTE NATIONAL MONUMENT
GPS Coordinates: 37.10125, -111.87330 Parking and trailhead
Located in the Grand Staircase-Escalante National Monument in Utah, the Toadstools Trail, a 2.9-kilometer (1.8-mile) round-trip hike, is perfect for exploration. It’s found along Highway 89 between Page and Kanab.
Actually, the Toadstools are rock formations that strangely resemble mushrooms, and several can be found in this area.
The cap on top of these formations is what sets them apart from other, more common chimney-shaped rocks.
These unique formations are created by Dakota sandstone rocks perched atop Entrada sandstone bases. As the softer Entrada sandstone erodes, the Dakota sandstone forms a cap, like a mushroom, on top.
We can also see Wahweap Hoodoos, which are very similar but have different colors. Their bodies are white while their caps are brown, unlike the Toadstools, which have reddish hues.
To get up close to these famous rock formations, just take the trail starting near the parking area and head north, following a dry riverbed (wash) that winds through a beautiful little canyon.
After leaving the canyon, you enter a valley where these famous rock formations are located. You can even see them up close—they come in different shapes, sizes, and colors.
You might even spot some perched atop the cliffs.
While exploring the park, we discovered a slot canyon passage in the cliff. We ventured inside and felt so small surrounded by walls towering to dizzying heights.
GPS coordinates: 36.92385, -111.47716 Glen Canyon Dam Overlook
GPS coordinates: 36.93570, -111.48552 Glen Canyon Dam Visitor Center
This very short trail (+/- 300 meters round trip) starts near the parking lot. It consists largely of uneven rocky steps. However, a metal handrail is in place to make getting around easier.
It leads to a viewpoint located at the edge of the canyon above the Colorado River, offering a stunning view of the river, the canyon, and the Glen Canyon Dam.
Afterward, we headed to the Glen Canyon Visitor Center and took a walk in the area, as well as on the pedestrian section of the bridge that spans the Colorado River, to get other magnificent views of the canyon.
The Glen Canyon Dam, completed in 1964, was built to hold back the waters of the Colorado River to generate electricity, store water for the arid southwestern United States, and create the vast Lake Powell, a popular recreational area along the Utah-Arizona border.
It took 17 years for Lake Powell to fill completely. It is the second-largest artificial reservoir in the United States.
UTAH - PAGE - GLEN CANYON NATIONAL RECREATION AREA
GPS coordinates: 36.93561, -111.48584 Carl Hayden Visitor Center
GPS coordinates: 36.94299, -111.49347 Entrance via Lake Shore Dr
GPS coordinates: 36.98900, -111.51600 Entrance via Wahweap Blvd
GPS coordinates: 36.96890, -111.49900 Wahweap Overlook
Glen Canyon is located in southern Utah, with a small part of the park also extending into northern Arizona. Its main entrance in Arizona is in Page.
Here you’ll find Lake Powell, which was created by the Glen Canyon Dam on the Colorado River.
Wahweap Bay, accessible by car, is the first bay of Lake Powell and the most visited bay on the lake—not only because of its proximity to the Glen Canyon Dam, but also due to its facilities and its location near the town of Page.
The road through this part of the park offers several viewpoints over Lake Powell, as well as the colorful landscape and majestic rock formations surrounding it.
Lake Powell is a true oasis of coolness in this vast rocky desert. The lake’s waters are very calm, perfect for swimming and water sports.
The Wahweap Marina is a year-round complex that includes a hotel, the Lake Powell Resort, campgrounds, and a variety of restaurants.
You can also rent jet skis and pleasure boats or book a guided boat tour.
Lone Rock is another area of Wahweap Bay. It’s accessible via a road called Lone Rock Rd.
The name refers to the solitary rock that rises to 1,230 meters in the bay. The scenery here is truly stunning.
There are also campgrounds that don’t require reservations, though there are additional fees on top of the entrance fees.
Wild camping is done on a sandy beach or in the dunes. There are no designated sites.
Caution is advised when driving in this area, as the road is sandy. We even saw a car get stuck in the sand.
Additionally, during our visit, we experienced strong winds that blew sand around, significantly reducing visibility. The road was difficult to follow in those conditions.
We also went to Wahweap Overlook. You can drive there. This viewpoint, located at the top of a hill, offers a beautiful panoramic view of the bay and the marina on the stunning Lake Powell.
Horseshoe Bend is a horseshoe-shaped incised meander of the Colorado River. A short and easy walk of about 1.5 miles (2.4 km) round-trip from the parking lot leads to the stunning overlook that towers above the canyon.
This viewpoint lets you admire the Colorado River, with its crystal-clear emerald-green waters, surrounded by towering cliffs in warm orange hues. The scenery is simply enchanting.
If you're visiting Page, this is a must-see!
However, keep in mind that this trail offers almost no shade. There are only two shaded structures along the path, but none at the overlook itself.
Even over such a short distance, the heat can be exhausting. Please come prepared.
The overlook is fenced for safety reasons. You can move to the edge of the cliff on either side of the fenced area to get different views of Horseshoe Bend. That said, be cautious—the sandstone cliffs can be unstable, and the wind can be very strong.
The tiny boats you see on the water really put into perspective just how deep this incredible canyon is.
This popular site has a well-maintained, secure parking area, including spaces for larger RVs.
GPS Coordinates: 36.91807, -111.45952 Check-in at Chief Tsosie Trading Post
Antelope Canyon consists of two slot canyons: Upper Antelope, which is easy to access, and Lower Antelope, which I’d describe as a bit more adventurous.
It’s not possible to visit Antelope Canyon without a guided tour. The tour lasts about 1 hour. Additionally, during our visit, masks were mandatory on the Navajo Reservation.
We booked the guided tour to Upper Antelope Canyon online and checked in at the Chief Tsosie Trading Post located on Lake Powell Blvd in Page.
From there, we boarded a very comfortable, air-conditioned van and headed toward the canyon. The ride took about 20 minutes.
Once we arrived, we followed our guide through the slot canyon, and she showed us the different points of interest. Some rock formations, depending on the light, resemble a rose, a flame, or even a bear.
She even offered to take several photos of each group member and helped us capture great shots of the site. We were really happy with her service.
Upper Antelope Canyon is truly a unique place, especially when the sun’s rays filter into the canyon and illuminate the smooth sandstone walls with their spectacular ripples.
From the outside, nothing suggests that stepping into a narrow opening in the cliff would lead to a deep, winding corridor taking us through several large sandstone chambers. The height of the sandstone walls is truly impressive.
When you see photos of Upper Antelope Canyon, you appreciate the site’s incredible beauty, but when you get the chance to experience it in person, you also feel the serenity it exudes. It’s a pure moment of happiness.
After the tour, we exited the slot canyon and had to climb ramps and stairs to return to our starting point where the van was parked.
The temperature inside the slot canyon is comfortable, but outside, the heat can be overwhelming. That’s why it’s important to bring plenty of water.
ARIZONA - PAGE - NAVAJO CANYON BOAT TOUR AT LAKE POWELL
GPS coordinates: 36.96183, -111.43249 Antelope Point Marina
After a few unsuccessful attempts, we finally managed to book a boat tour on Lake Powell in Navajo Canyon.
The tour departs from Antelope Point Marina, located in the Glen Canyon National Recreation Area. There’s a fee to enter the park.
We left our vehicle in the Visitor Center parking lot and took a golf cart to the marina.
From there, we boarded a houseboat and set off for a two-hour cruise on the calm waters of Lake Powell in the Navajo Canyon area.
The sandstone cliffs, rising 183 meters around us, are truly impressive. They have different shapes and layers of color. Erosion has created a stunning landscape.
It’s great to see these rocks from water level.
Some of the cliff walls are covered with a black layer due to manganese oxides. This layer is called desert varnish or Navajo tapestry.
Canyon X consists of two slot canyons and is located about 19 kilometers east of the town of Page, Arizona, specifically on Highway 98 at mile marker 307.8.
It’s actually in the same canyon as the famous Upper Antelope Canyon and Lower Antelope Canyon.
Tours are only offered by one operator, Taadidiin Tours, which specializes in small groups to provide an exclusive and memorable experience.
Booking isn’t mandatory, but it’s recommended due to limited spots, and we need to arrive 30 minutes before our tour time.
We use our own vehicle to get to the canyon. The vehicles, lined up in a convoy, follow a lead vehicle along a dusty dirt road.
Once there, we have to descend several staircases to reach the entrance of the first slot canyon.
By definition, a slot canyon starts as a narrow crack in the rock. Over millions of years, rainwater and floods have widened and deepened this opening, creating a tall, narrow passage between the plateau’s rocks, sometimes stretching for several kilometers.
With our guide, we enter the first section of Canyon X and discover the same towering walls as those in Upper Antelope Canyon, which we visited the day before.
Erosion has shaped stunning rock formations whose colors shift with the light. It’s truly breathtaking. Canyon X is every bit as impressive as Upper and Lower Antelope Canyon.
We retrace our steps along the same trail, with the guide sharing details about the different rock formations.
Afterward, we take a short hike through a dry riverbed to reach the entrance of the second slot canyon. This one has an X-shaped opening at the top, which is how it got its name.
The rock formations are just as spectacular in this second part of the canyon, and the light filtering in makes them even more striking. The scenery is mesmerizing.
The orange sand underfoot is incredibly fine. We saw this when our guide tossed some sand against the cliff walls, and it cascaded down slowly like a waterfall. It was a beautiful sight.
After the tour, we took the same route back to the parking lot. Bring water—the heat can be overwhelming here.
We really enjoyed the visit and had an excellent guide who didn’t hesitate to share valuable tips for taking photos in this stunning canyon.
ARIZONA - CANYON DE CHELLY NATIONAL MONUMENT - CHELLY CANYON
Chelly Canyon - South Rim
The scenic drive (South Rim Dr Hwy, also known as Indian Route 7) starts at the Visitor Center and ends at Spider Rock, covering a total of about 59 km round trip.
Here are the various viewpoints you can see along the way.
Tunnel Overlook
This first viewpoint is a small side canyon filled with rocks, offering a partial view of the main gorge, which is shallow at this spot.
The trail to get there is very short and starts on the right side of the parking lot. When we were there, the wind was so strong that we stayed near the parking lot to admire the scenery.
If you want to go beyond this viewpoint to explore the canyon, you’ll need to hire a certified guide.
Tseyi (Tsegi) Overlook
Tseyi Overlook offers a stunning view of the canyon, the Navajo farmlands, and the rock formation called Blade Rock, at the base of which lies Chinle Wash.
Junction Overlook
Junction Overlook lives up to its name as it overlooks the confluence of Canyon del Muerto and Canyon de Chelly, providing beautiful views of the Chinle Valley.
Here, with binoculars or the powerful zoom on your camera, you can spot Anasazi ruins.
White House Overlook
White House Overlook, located 100 meters from the parking lot, is a viewpoint where you can see the ruins of the White House, which date back over 1,000 years. With its 80 rooms, it’s one of the largest ruins in the canyon.
The black streaks on the sandstone walls above the White House ruins are called desert varnish. These streaks are formed by water seeping in and reacting with the iron in the sandstone.
A 4-kilometer round-trip trail starts at this viewpoint, descending into the canyon and leading right below the White House ruins.
This is the only trail allowed to be hiked in this park. When we visited, it was closed for safety reasons.
The viewpoint also offers a great view of the canyon and some large buttes upstream.
Sliding House Overlook
Sliding House Overlook is located on a side road. From the parking lot, you’ll need to walk 200 meters to reach the viewpoint. Signs point the way.
Actually, there are two different viewpoints here. The first offers a view of the canyon toward Antelope Point. The rock formations are spectacular at this spot.
The second viewpoint is a short distance from the first. You can see the ruins of a dwelling (Sliding House) built on a precarious slope, which caused much of the cliffside to slide.
The ruin gets its name from the unstable slope it was built on, which eventually caused most of the cliffside to slide. If you zoom in on the photo, you can see pictographs painted on the cliff, likely made from the roofs of rooms that are no longer there.
Face Rock Overlook
Face Rock Overlook is located on the access road leading to Spider Rock Overlook.
The trail to this viewpoint is paved and wheelchair-accessible. It offers a beautiful view of the canyon.
Observation tubes have been installed to help spot certain attractions.
You can see ruins located in different spots, some of which were built in hard-to-reach places.
Spider Rock Overlook
A 7.2-kilometer access road leads to Spider Rock Overlook.
The trail starts near the parking lot and is paved up to the first viewpoint, which overlooks Canyon de Chelly and the monolith called Spider Rock.
According to Navajo mythology, Spider Rock is the home of Spider Woman, a deity who taught the people how to weave.
There are also a few spotting tubes at the start of the trail to help locate the ruins in the canyon.
There’s another viewpoint 125 meters from the first, but it’s not paved, and the terrain is quite rough. From here, you can see other ruins tucked into small alcoves.
ARIZONA - CANYON DE CHELLY NATIONAL MONUMENT - CANYON DEL MUERTO
* North Rim - Canyon del Muerto
The north rim is accessible via Indian Route 64, which stretches about thirty kilometers from the Visitor Center to Massacre Cave Overlook.
This part of the canyon is much less crowded than the south rim. However, the various overlooks along this route offer breathtaking views of the canyon.
Here are the different viewpoints you can see on the north rim of the canyon.
** Ledge Ruin Overlook
GPS Coordinates: 36.16260, -109.46550
The first overlook on the north rim was once Ledge Ruin, but it has been closed for many years due to safety reasons.
From the parking area, the trail loops around for about 700 meters, offering a wide viewpoint where the ruins of Antelope House, built by the Ancestral Puebloans (Anasazis), and other smaller sites can be seen in the canyon below.
Antelope House gets its name from the antelope paintings found on a nearby cliff wall, which date back to the 1830s.
As you continue toward the second overlook, you’ll see a large sandstone island at the junction of Del Muerto and Black Rock Canyons, known as the Navajo Fortress.
This short hike in the area reveals a grand and colorful landscape. Erosion has created numerous alcoves and stunning arches in the cliffs.
** Mummy Cave Overlook
GPS Coordinates: 36.22859, -109.36123
Mummy Cave, with over 80 rooms and three kivas, is the largest Ancestral Puebloan village preserved in Canyon de Chelly.
Located more than 90 meters above the valley floor, it looks like a miniature village clinging to the cliffs.
The Navajo call this place "Tseyaa Kini," meaning "the house under the rock."
Below the ruins, two mummies were reportedly found in funeral urns in 1880, which led archaeologists to name the site "Mummy Cave."
Archaeological evidence indicates that this giant amphitheater, made up of two caves, was occupied from 300 to 1300 AD. The central structure between the two caves includes a three-story building.
** Massacre Cave Overlook
There are three overlooks at this spot. The first two are wheelchair-accessible, while the third is more primitive.
The first overlook, Massacre Cave Overlook, is the site of a cave where, in 1805, a Navajo tribe took refuge during a battle against a Spanish military expedition led by Lieutenant Antonio Narbona.
The location was difficult to access from below but highly visible from the canyon rim. As a result, after just one day of fighting, over 110 people from the tribe were killed.
The second overlook overlooks Canyon del Muerto, and you can also see the third overlook along the rim below.
The third overlook offers a nice viewpoint of alcoves that house the ruins of Yucca Cave and a granary.
GPS coordinates: 36.98216, -110.11186 Visitor Center
Monument Valley is a legendary natural site located on the border between Arizona and Utah in the United States. It’s home to the Navajo people, who live off agriculture, sheep farming, and selling handmade crafts.
The Valley Drive, a 27-kilometer dirt road, loops through the park and lets you see many truly spectacular rock formations.
* The Mittens and Merrick Butte
GPS coordinates: 36.98045, -110.10374 East & West Mitten Overlook
GPS coordinates: 36.97667, -110.09706 Merrick Butte
These are the most famous rocks in Monument Valley. The best viewpoint for these formations is from the Visitor Center terrace.
* Elephant Butte
GPS coordinates: 36.9685, -110.0896
Elephant Butte, as the name suggests, looks like an elephant.
* Three Sisters
GPS coordinates: 36.96038, -110.08722
On the way to John Ford's Point, you’ll see three tall rock spires called the Three Sisters.
Camel Butte, as the name suggests, looks like a camel.
* John Ford's Point
GPS coordinates: 36.95350, -110.08747 Parking
GPS coordinates: 36.95441, -110.08737 John Ford Point
This spot is dedicated to the work of John Ford, who used Monument Valley as a backdrop for several of his Western films. Many other directors, including Sergio Leone, have also filmed here.
* The Hub Point
GPS coordinates: 36.93590, -110.07834
The Hub is a unique 45-meter-high rock formation. At its base, you’ll find Navajo dwellings.
* Bird Spring
GPS coordinates: 36.93644, -110.06139
Bird Spring Overlook, near Sand Springs, offers a panoramic view of the Totem Pole and Yei Bi Chei rock formations.
* Sand Springs
GPS coordinates: 36.9398, -110.0630
Sand Springs is an area of the park where the orange hue of the desert’s sandy soil can be seen in every direction.
* Totem Pole and Yei Bi Chei
GPS coordinates: 36.9384, -110.0592
Totem Pole is a tall, narrow rock spire next to a cluster of thicker spires called Yei Bi Chei.
* Spearhead Mesa
GPS coordinates: 36.94154, -110.06302
This imposing mesa-type rock formation lines the road leading to Artist's Point.
* Artist's Point
GPS coordinates: 36.9573, -110.0593
Artist's Point is a viewpoint in Monument Valley that offers a stunning view of the desert and several rock formations you’ve seen along the way.
* North Window
GPS coordinates: 36.95712, -110.07279
North Window is a spot where you can get a clear view of East Mitten Butte, between Elephant Butte and a smaller formation called Cly Butte.
* Cly Butte Overlook
GPS coordinates: 36.95137, -110.06657
Cly Butte is a monolith near North Window Overlook and The Thumb Overlook.
* The Thumb
GPS coordinates: 36.95235, -110.07272
This rock looks quite different from the others. Its rounded shape gives it the appearance of a thumb. The Thumb is also the last officially marked rock on the Monument Valley tour.
GPS coordinates: 37.14727, -109.85408 Access to the San Juan River
GPS coordinates: 37.17644, -109.84892 First viewpoint
GPS coordinates: 37.17107, -109.84899 Second viewpoint
Mexican Hat gets its name from a geological formation near the village that resembles a sombrero (a hat originating from Mexico).
In the small town of Mexican Hat, we first took a dirt road of about 650 meters to reach the edge of the lovely San Juan River, with its emerald waters, which is also ideal for water activities.
We then went to see the rock formation shaped like a sombrero, located on the northeast outskirts of the town.
Two dirt roads accessible by regular car allow us to get different views of this natural monument, which is 3.7 meters high and 18 meters wide.
On the way to Goosenecks State Park, we stopped at the intersection of routes 163 and 261 to admire mountains of exceptional beauty. Erosion has created unique geometric shapes on these mountains—it looks like they’ve been painted.
We also saw a dust devil form at the foot of a cliff. These form in fair weather when dry, unstable air starts rotating and lifts sand from the ground.
Located in Mexican Hat, Utah, Goosenecks State Park offers a spectacular view of amazing rock formations created by erosion over more than 300 million years.
The San Juan River has carved its way through a deep canyon in the desert, creating impressive meanders through a series of cliffs and terraces.
The landscape here is truly exceptional. The site reminds me of Horseshoe Bend, but with multiple examples.
The viewpoint is easily accessible since you can park just a few meters from the edge of the cliff.
When we visited, the entrance fee for Goosenecks State Park was $5 per vehicle.
There are also eight campsites available for $10 per night. No reservations accepted—first come, first served. There are no services, except for pit toilets.
GPS coordinates: 37.23500, -109.81450 Start of the scenic road
Valley of the Gods isn’t a park, but rather public land managed by the Bureau of Land Management (BLM). Entry is free.
A leveled gravel and clay road forms a 17-mile loop. It has a few tight turns and crosses several washes (often dry riverbeds).
This scenic drive lets you discover stunning Cedar Mesa sandstone monoliths, spires, and other geological formations. It’s like Monument Valley, but on a smaller scale.
Several rock formations have been named for their resemblance to things, like Seven Sailors, Setting Hen Butte, Rooster Butte, Franklin Butte, Battleship Rock, De Gaulle and His Troops, Castle Butte, Rudolph and Santa Claus, and Lady in the Bathtub.
It’s a paradise for photography lovers.
Plan for about two hours to explore. The road is suitable for regular cars when dry, so it’s essential to check weather conditions and road status before heading out.
Due to its remote location, it’s important to be self-sufficient and carry emergency supplies—there are no services, shops, or gas stations.
When we visited, we only came across a few other travelers. If you love wide-open spaces and quiet spots, this is the perfect place.
GPS Coordinates: 37.27248, -109.94428 Start of Moki Dugway (at the base of the cliff)
GPS Coordinates: 37.27396, -109.93956 Muley Point Overlook
Moki Dugway is a 3-mile stretch of steep, unpaved switchbacks on UT-261 in Utah, climbing to the top of Cedar Mesa plateau.
It was built in 1958 as a haul road for transporting materials extracted from Fry Canyon to a processing plant in Mexican Hat, Utah.
This stretch is also part of the "Trail of the Ancients," a national scenic byway where travelers can see multiple archaeological sites and truly unique geological formations that played an important role in the history of the Native Americans of the Southwest who once inhabited this region.
It’s a fairly easy road to navigate if you drive slowly and carefully and the weather conditions are favorable.
Additionally, the state of Utah recommends that only vehicles under 28 feet in length and weighing less than 10,000 lbs attempt this road.
If you’re afraid of heights, it might be best to plan an alternate route. There are no guardrails on this road.
Muley Point Overlook is a viewpoint located at the very top of this road. It offers one of the most stunning panoramas in the American West!
From this spot, you can see The Valley of Gods in Utah, Monument Valley in Arizona, Sleeping Ute in Colorado, and the canyons of the San Juan River and Shiprock in New Mexico.
UTAH - BLANDING - NATURAL BRIDGES NATIONAL MONUMENT
GPS Coordinates: 37.60938, -109.97709 Visitor Center
Natural Bridges National Monument is located in southeastern Utah. The park features three natural bridges named Kachina, Owachomo, and Sipapu in honor of Native Americans, as well as numerous Native American ruins.
Sipapu and Kachina are actually considered the second and third largest natural bridges in the world, behind Rainbow Bridge located in Glen Canyon National Recreation Area in Utah.
These natural bridges were carved by a riverbed in very ancient rocks, unlike arches which result from rock erosion caused by weather.
A 14-kilometer scenic drive, Bridge View Drive, provides access to all the attractions in this park.
* White Canyon
GPS Coordinates: 37.61404, -110.00450
Natural Bridges National Monument is situated at the confluence of White Canyon and Armstrong Canyon. Over time, water has sculpted swan necks in the sandstone.
Natural bridges formed when floodwaters broke through the rock walls of the canyon’s horseshoe bends.
The landscape is breathtaking in this area. You can even see Sipapu Bridge when you're at the top of White Canyon.
Sipapu Bridge Trailhead is a 1.9-kilometer round-trip trail that leads to the base of this natural bridge. We only did a section of this trail to reach the overlook above it.
Sipapu Bridge is the largest and most spectacular of the three bridges in the park. Sipapu is a Hopi term meaning "door" or "opening between worlds." It’s older than Kachina Bridge but younger than Owachomo Bridge, having taken thousands of years to form.
* Horsecollar Ruin
GPS Coordinates: 37.61140, -110.02018
A hike (1 kilometer round-trip) leads to an overlook that offers a view of one of the best-preserved Anasazi sites in the region.
This site was abandoned over 700 years ago. The ancestral Pueblo structures are remarkably well-preserved and include, among other things, a kiva with its original roof and two rounded structures.
* Kachina Bridge
GPS Coordinates: 37.59738, -110.02843
A 400-meter round-trip hike leads to the overlook above Kachina Bridge. It’s larger than Owachomo Bridge but smaller than Sipapu Bridge.
In June 1992, approximately 4,000 tons of sandstone fell from the inside of the bridge’s opening, widening it.
There are petroglyphs and pictographs at the base of this bridge depicting Kachina dancers.
* Owachomo Bridge
GPS Coordinates: 37.58443, -110.01369 Owachomo Bridge Overlook
GPS Coordinates: 37.58235, -110.01406 Owachomo Bridge 400 m round-trip
GPS Coordinates: 37.58147, -110.01297 Owachomo Bridge Photo Point 600 m round-trip
Owachomo Bridge is the smallest and thinnest of the three natural bridges and is considered the oldest.
Owachomo means "rock mound" in Hopi and was named after the rock formation at the top of the bridge’s east end.
You can observe it from the overlook near the parking lot or take a short hike to get closer.
We did this hike to get near the bridge, but we were on our guard because there was a sign warning that a rattlesnake had been spotted in the area. Fortunately, it didn’t make an appearance during our visit.
The Hite Crossing Bridge is an arch bridge that carries Utah State Route 95 across the Colorado River northwest of Blanding, Utah, United States. The bridge informally marks the upstream limit of Lake Powell and the end of the Colorado River’s Cataract Canyon, but when the lake is at normal elevation, water can back up more than 30 miles upstream into Cataract Canyon.
The bridge is the only road bridge spanning the Colorado River between the Glen Canyon Bridge, 185 miles downstream near the Glen Canyon Dam, and the US Route 191 bridge, 112 miles upstream near Moab.
The bridge is located near Hite Marina on Lake Powell, and a small airstrip is immediately adjacent to the north side of the bridge.
The Colorado River served as a major barrier to early settlers and explorers in the region. In 1880, a prospector named Cass Hite established a ford near the mouth of the Dirty Devil River, about 2 miles downstream from the bridge’s current location. This ford, called "Dandy Crossing," was one of the few places in the area where travelers could cross the Colorado River. The settlement that formed at the crossing took its founder’s name, Hite.
In 1946, a settler named Arthur Chaffin built a car ferry using an old car engine and a thick steel cable to keep it in place. The ferry operated for 20 years before rising waters from Lake Powell flooded the Hite settlement.
The bridge was completed as part of the realignment of State Route 95, which was approved in 1962 due to the construction of the Glen Canyon Dam and the subsequent flooding of Lake Powell, submerging the original road alignment and the original river crossing at Hite. The bridge was inaugurated on June 3, 1966.
UTAH - LAKE POWELL - GLEN CANYON NATIONAL RECREATION AREA - HITE OVERLOOK
GPS coordinates: 37.8815, -110.4081
Hite is a remote district located at the top of Lake Powell, near the confluence of the Colorado and Dirty Devil rivers in Utah.
Jeep trails, hiking, canyoning, mountain biking, cycling, canoeing, kayaking, boating, and fishing are just a few of the many recreational opportunities available. Rafting on the famous Cataract Canyon from Moab to Hite (permit required) is also a favorite.
Hite Overlook is a short hiking trail that follows the edge of Glen Canyon and offers stunning panoramic views of Glen Canyon, the Colorado River, Lake Powell, and Hite.
When Lake Powell’s water level is high, the reservoir extends beneath the overlook and further north into Cataract Canyon. The Hite Marina and boat ramp are visible on the east side of the canyon.
When the water level is low, the Colorado River flows freely below, leaving the marina and boat ramp unusable.
Before Lake Powell existed, this spot was the site of the small town of Hite, originally settled by a man named Cass Hite.
UTAH - CAPITOL REEF NATIONAL PARK - CHIMNEY ROCK LOOP TRAIL
GPS Coordinates: 38.29143, -111.26194 Visitor Center
Capitol Reef is located in south-central Utah. The park encompasses the Waterpocket Fold, a geological uplift of the Earth's crust that dates back over 65 million years and stretches nearly 100 miles.
* Fruita Area
This park has three sectors. However, Fruita Area is the most accessible and most visited. In this area, you’ll find a desert dotted with red rocks, lush mountains, colorful canyons, domes, monoliths, arches, and natural bridges.
Two roads cross this area. UT-24 (free access) is the main road that runs east-west through the park and allows for a quick visit to the Waterpocket Fold.
The Scenic Drive (paid access) is a 10-mile scenic route heading south into Capitol Reef.
The historic Fruita district lets visitors learn more about the people who have called this green valley home for thousands of years.
** Chimney Rock Loop Trail
GPS Coordinates: 38.31564, -111.30401 Parking
The Chimney Rock Loop Trail is a 3.3-mile loop hike leading to a memorable viewpoint over the valley. Considered moderate, it can be more challenging due to the lack of shade and the steady, fairly steep climb.
The trail starts on sandy ground, winds through colorful mounds, and climbs to a plateau offering a great view of Chimney Rock—a tall, eroded red sandstone pillar—as well as a stunning panoramic view of the surrounding area.
The trail then heads east, featuring several short ascents and descents. This section provides lovely views of Capitol Reef and the Waterpocket Fold.
It then curves northeast, offering a view of Mummy Cliffs—beautifully colorful rock formations—and descends into Chimney Rock Canyon toward Spring Canyon.
The trail reaches a junction where you turn left (west). It gradually climbs for about 1 mile and brings you back to the trail intersection at the top of the hill.
From there, just descend the steep switchbacks back to the trailhead.
UTAH - CAPITOL REEF NATIONAL PARK - HICKMAN BRIDGE TRAIL
GPS Coordinates: 38.28870, -111.22773 Parking and trailhead
A 2.7 km trail that ends with a loop around a natural bridge. Challenging at first, then moderate.
Here are some highlights you can see along the way:
Fremont River
GPS Coordinates: 38.28825, -111.22581
The Fremont River was and remains at the heart of the topography and human history preserved in the park. The erosive action of the river and its tributaries continues today, especially during floods. For nearly 2,000 years, the river supported agricultural communities on the arable lands near its confluence with Sulphur Creek.
Capitol Dome
GPS Coordinates: 38.28896, -111.22535
Just ahead is Capitol Dome, which resembles the U.S. Capitol building in Washington, DC. The other part of Capitol Reef’s name comes from a regional use of the nautical term "reef" to describe steep ridges that act as obstacles to transportation.
Pithouse Foundation
GPS Coordinates: 38.28888, -111.22571
Walk about 30 paces northeast on the side trail. You can spot the remains of a pithouse foundation by the ring of black rocks. The prehistoric Fremont people inhabited the Capitol Reef area, settling in these pit structures between 300 and 1400 CE. The Fremont people left many of these sites and other cultural traces of their life here.
Wash
GPS Coordinates: 38.29083, -111.22980
You’re walking through a wash, so named because water flows through here during storms. Between rains, the sand acts as insulation to limit evaporation, and enough moisture is retained below the surface to support large trees and shrubs. Near the post, you’ll find sturdy examples of piñon pine, Fremont cottonwood, skunkbush, juniper, and Utah serviceberry. Washes and narrow canyons are prone to flash floods, especially during thunderstorms.
Fremont Granary
GPS Coordinates: 38.29063, -111.23048
Look at the base of the cliff to the north. The remains of a granary built by the Fremont people are nestled in the layers of the Kayenta Formation. Here, they stored their food and had a view of their crops of corn, beans, and squash, which they grew in the rich soil of the floodplain below.
Nels Johnson Natural Bridge
GPS Coordinates: 38.29056, -111.23116
A small natural bridge below the trail showcases the erosive power of water. Floodwaters, loaded with sand and pebbles acting as grit, do most of the work. Erosion has widened the canyons carved by flowing water. The small bumps on the trail ahead are erosion-resistant iron deposits.
Solution Cavities
GPS Coordinates: 38.29043, -111.23176
The rock wall across the canyon is dotted with many holes called solution cavities, which form as slightly acidic groundwater dissolves the calcite that cemented the sandstone grains together.
Hickman Natural Bridge
GPS Coordinates: 38.29116, -111.23321
Hickman Natural Bridge stands ahead. It’s 40 m long and 37 m high. It was named after Joseph Hickman, a local school administrator and Utah legislator. Hickman was an early advocate for this area, which he called "Wayne Wonderland."
Kayenta Formation
GPS Coordinates: 38.29131, -111.23406
This is a good spot to observe how the natural bridge formed. The Kayenta Formation consists of hard beds alternating with much softer layers. The bridge is made of firm sandstone, while next to the trail is crumbly red shale that erodes easily.
During wetter periods, water flowed behind the fin where the bridge was cut and eroded the soft shale until it broke through. Later erosion widened the span.
The trail then passes under the bridge and turns left to form a small loop that brings you back to the main trail, which you’ll follow in reverse to return to the parking lot.
To get to the trailhead, you’ll need to drive just under a kilometer on a gravel road. While it’s definitely doable with any vehicle, there are sections that are pretty rough and bumpy.
Once you’ve parked, look for the sign marked "Sunset Point Trail 1/3 Mile" to find the start of the trail.
The trail is easy to hike and gains a little elevation as it climbs up to Sunset Point.
There are benches along the way where you can take a break and enjoy some nice views.
The overlook at the end of the trail offers spectacular views of the park and is indeed a perfect spot to watch the sunset.
One side of the overlook gives you a sweeping view of Sulphur Creek Canyon. On the other side, you’ll find an outcrop of large, flat rocks that are fun to climb.
From Panorama Point, just take the unpaved road leading to Goosenecks Overlook.
This viewpoint, accessible via a trail of about 130 meters (one way), offers a stunning panoramic view of the winding bends of Sulphur Creek Canyon.
The stream has carved a deep and colorful gorge that includes three distinct rock layers: the Moenkopi formation and the Kaibab limestone from the Permian era, and the white sandstone, the oldest strata represented in the park.
UTAH - CAPITOL REEF NATIONAL PARK - VIEWPOINTS - FRUITA AREA
Twin Rocks
GPS Coordinates: 38.32235, -111.33763
Twin Rocks is an amazing rock formation shaped like mushrooms.
Panorama Point
GPS Coordinates: 38.30620, -111.29593
Panorama Point offers a breathtaking view of the massive sandstone cliffs. This viewpoint is easily accessible from Highway 24, just 4 km west of the visitor center.
From the parking lot, a very short walk leads visitors to a 360-degree view.
The stunning landscape can be seen at any time of day, though the colorful cliffs become especially vibrant as sunset approaches.
This high point also provides astronomers with an excellent view of the night sky.
The Castle
GPS Coordinates: 38.2984, -111.2640
This rock formation is located near the Visitor Center. It’s named for its resemblance to a castle.
Fruita Historic District
GPS Coordinates: 38.28811, -111.24818
The Fruita Historic District was once home to an old Mormon farming settlement that was active from 1895 to 1947. The Fruita School, built in 1896, still stands on the site. You can’t go inside the school, but you can peek through the window panes.
The Fremont culture lived in what is now Utah for about a thousand years, from 300 to 1300 AD. The petroglyphs (images carved or pecked into stone) are one of the most visible remnants of their culture. They’re accessible via two wooden boardwalks.
Capitol Dome
GPS Coordinates: 38.28750, -111.22173
Capitol Dome, the park’s iconic landmark, is an 1,870-meter peak located 4 kilometers from the visitor center.
It’s a majestic white sandstone formation that strangely resembles the United States Capitol building. The park was partly named after this landmark.
Less than 1 kilometer from Behunin Cabin, a parking area on the left side of the road provides access to a unique and beautiful section of the Fremont River.
UTAH - CAPITOL REEF NATIONAL PARK - VIEWPOINTS - SCENIC DRIVE
This 13-kilometer scenic road starts near the Visitor Center. It's paved, but it ends in a dead end, so you'll have to backtrack the same way.
It lets visitors see many of the park's famous formations and also provides access to the most popular trails like Grand Wash and Capitol Gorge, which are reached via two dirt roads.
Danish Hill
GPS Coordinates: 38.26679, -111.24496
This viewpoint offers stunning views to the north and south of the Wingate Cliffs and the Chinle slopes.
Slickrock Divide
GPS Coordinates: 38.22441, -111.22043
Slickrock Divide separates two large watersheds. On either side of this hill, stream beds channel runoff and debris toward Grand Wash to the north and Capitol Gorge to the south.
When it rains in Capitol Reef, it often pours. Large expanses of bare rock and thin layers of soil can't do much to absorb and retain the water.
Eph Hanks Tower
GPS Coordinates: 38.20833, -111.19443
Eph Hanks Tower is a peak with an elevation of 1,990 meters located at the mouth of Capitol Gorge where the Scenic Drive ends.
It’s named after Ephraim Knowlton Hanks, a Mormon pioneer and the first permanent settler in the Capitol Reef area. Along with his family, he settled in the Pleasant Creek area of Capitol Reef in 1881.
On the Road
The end of this video lets you see the colorful landscapes of the Scenic Drive, as well as a bighorn sheep we spotted along the way.
UTAH - CAPITOL REEF NATIONAL PARK - CASSIDY ARCH TRAIL
GPS Coordinates: 38.26374, -111.21590 Parking
GPS Coordinates: 38.26376, -111.21568 Start of the hike
GPS Coordinates: 38.26591, -111.21332 Left junction
GPS Coordinates: 38.26095, -111.22597 Arch
From the scenic road, a 2 km dirt road leads into the Grand Wash. Cassidy Arch Trail starts near the parking lot at the end of this road.
The arch was named after the famous Butch Cassidy, who hid multiple times in the Grand Wash in the late 1880s.
The trail to Cassidy Arch is 5 km round trip. You first take the Grand Wash Trail, which is bordered by the impressive Wingate and Navajo sandstone walls of the Grand Wash Canyon.
After covering about 1.2 km, you turn left to follow the Cassidy Arch Trail.
The trail climbs up the cliffs to the arch, which sits on a slickrock plateau about 150 meters above the wash.
The hike along the cliffs offers breathtaking views, but the elevation gain is very quick, and the trail includes steep slopes, switchbacks, rough terrain, and areas that aren’t clearly marked.
Cassidy Arch Trail ends above the arch itself, providing great photo opportunities.
To start this hike, you’ll need to take Scenic Drive, which leads to Capitol Gorge, and then follow a 3.7 km (2.3 mi) dirt road to the parking area where the hiking trail begins.
This is a 3.6 km (2.2 mi) round-trip trail that winds through impressive canyon gorges.
Right at the start of the hike, you’ll spot petroglyphs along the canyon walls, including handprints and a petroglyph panel that, unfortunately, has been vandalized.
A little further on, at the top of the right canyon wall, you’ll see inscriptions left by surveyors working in the gorge in 1911.
As you continue, you’ll reach Pioneer Register, marked by a sign. These are carvings left on the rock walls by pioneers who traveled through the valley. The oldest inscription appears to date back to 1870.
A bit further, you’ll turn left toward the formations called Tanks. These are natural reservoirs carved into the rock by erosion, filled with water that allows local wildlife to drink.
Avoid touching the water to prevent contamination.
This section of the trail has a steep slope and is much rougher. You’ll also need a good sense of direction to reach these reservoirs.
Pay attention to the cairns along the trail—they’ll help guide you to them.
I’ve marked their locations to make it easier for you to find them.
The scenery in this area is stunning, and you’ll also spot a small natural bridge below one of the reservoirs.
When we visited, access was set at 25 $ per person for a 2-hour slot, and reservations were required.
The site features two concrete pools and six vintage cast-iron bathtubs filled with water from the hot springs.
The first pool is 2 feet deep and has a waterfall created by minerals cascading down the side of the pool.
The second pool is 4 feet deep and provides the perfect spot to float on the surface.
The water temperature in these different bathing areas ranges between 37 and 43°C, making it pleasantly warm.
The bathtubs are drained and cleaned several times a day, while the pools are drained and cleaned every two weeks.
With a constant flow, the water stays clean and hygienic. Its cloudy appearance is natural due to the minerals in the water, and there’s no sulfur present.
If you’d like to enjoy a breathtaking sunset view while soaking in these warm, relaxing waters, just book a reservation for that time slot.
Just before reaching Glenwood, a viewpoint on State Route 119 offers spectacular views of Rainbow Hills, a series of colorful hills on the east side of the Sevier Valley.
I-70 West - San Rafael Swell Area
West of Green River, Interstate 70 cuts through the San Rafael Swell, which features mesas, buttes, petrified sand dunes, and canyons—much of it carved into Navajo sandstone and dotted with juniper and sagebrush.
Aside from the highway, very few roads access this remote area, and those that do are unpaved.
There are several rest areas on both sides of the highway, allowing you to take a break and enjoy incredible views of the region.
We traveled westbound on this highway, so below are the locations of these rest areas.
Sand Bench View Area
GPS Coordinates: 38.82921, -111.11521
Devil's Canyon View Area
GPS Coordinates: 38.84911, -110.92570
Ghost Rock View Area
GPS Coordinates: 38.86154, -110.81161
Spotted Wolf Canyon View Area
GPS Coordinates: 38.93250, -110.47219 Parking
GPS Coordinates: 38.93089, -110.46924 Viewpoint +/- 484 m round trip
I-70 East - San Rafael Swell Area
San Rafael Reef View Area
GPS Coordinates: 38.92124, -110.43091 Climb the small hill to the right of the parking area
We also stopped at this rest area on the opposite side of the highway. The view is stunning, but we had to take a long detour afterward to head back west since crossovers are rare on this highway.
UTAH - MOAB - ARCHES NATIONAL PARK - PARK AVENUE TRAIL
GPS Coordinates: 38.61654, -109.61992 Visitor Center
GPS Coordinates: 38.62443, -109.59952 Parking lot and trailhead
GPS Coordinates: 38.63645, -109.60009 End of the trail
Reservations are required depending on the time of year. A limited number of tickets is available for purchase one day before entry at 6:00 PM MT/8:00 PM ET via Recreation.gov. Since these tend to sell out quickly, it’s best to make a reservation in advance.
Located 8 kilometers northwest of Moab, Utah, this park features a wide variety of geological formations, including over 2,000 arches, which you can explore from scenic viewpoints along the park road or by hiking the park’s trails.
Courthouse Towers is the first section of the park, just past the Visitor Center. The massive, isolated monoliths in this area were sculpted by wind and water.
From the Park Avenue parking lot, a paved path leads to a viewpoint offering a stunning view of the canyon.
You then descend stone steps to the canyon floor and continue along a dirt trail that eventually gives way to slickrock and sand.
This 1-mile (1.6 km) linear trail lets you admire many photogenic rock formations.
At the start of the trail, you’ll spot a formation called Queen Nefertiti because it truly resembles the profile of an Egyptian queen.
Since this is a linear trail ending at the Courthouse Towers viewpoint along Scenic Drive, you can start at one point and get picked up at the other. Otherwise, you’ll need to hike round-trip, doubling the distance.
Don’t forget to bring water—it gets hot in the canyon!
UTAH - MOAB - ARCHES NATIONAL PARK - COURTHOUSE TOWERS SECTION VIEWPOINTS
*** Moab Fault
GPS coordinates: 38.61807, -109.61062
This roadside viewpoint offers a spectacular view of the Moab Fault, created by intense upward pressure that caused the Earth's crust to shift about 240 million years ago.
*** Park Avenue
GPS coordinates: 38.62523, -109.59979
From the parking area, a paved path leads to this viewpoint overlooking a stunning canyon with impressive sandstone rock formations.
*** La Sal Mountains
GPS coordinates: 38.6263, -109.5912
This viewpoint offers a 360-degree view, including the La Sal Mountains—the second-highest mountain range in Utah—as well as the magnificent rock formations in the Courthouse Towers area.
*** Courthouse Towers
GPS coordinates: 38.63689, -109.60006 Parking
GPS coordinates: 38.63645, -109.59852 The Organ
GPS coordinates: 38.63578, -109.60377 Three Gossips
GPS coordinates: 38.63957, -109.60656 Sheep Rock
GPS coordinates: 38.64120, -109.60190 Tower of Babel
This viewpoint provides a grand view of four rock formations: The Organ, Three Gossips, Sheep Rock, and Tower of Babel.
*** Petrified Dunes
GPS coordinates: 38.63648, -109.60005
Over 200 million years ago, northwest winds carried tons of fine sand into this region, creating a vast desert. After a long process, the sand was cemented into rock.
This viewpoint also offers a breathtaking view of the La Sal Mountains.
UTAH - MOAB - ARCHES NATIONAL PARK - BALANCED ROCK, POTHOLE ARCH, HAM ROCK & GARDEN OF EDEN
The Windows Section is the second part of Arches National Park. A 4-kilometer road winds through this area, which contains a high concentration of arches and stunning rock formations.
**Balanced Rock**
GPS Coordinates: 38.70168, -109.56632 Parking
This rock formation is one of the park’s iconic landmarks. A large boulder perched atop a narrow stone pedestal defies gravity.
A trail about 490 meters long loops around it, offering a close-up view of this phenomenon.
This natural arch is located at the top of Ham Rock. It can be seen from a distance from the road.
**Ham Rock and Garden of Eden**
GPS Coordinates: 38.69800, -109.55030 Parking
GPS Coordinates: 38.69964, -109.55371 Ham Rock
GPS Coordinates: 38.69849, -109.54749 Garden of Eden
Ham Rock is a rock formation that resembles a canned ham. It’s a climbing spot, but you’ll need to get a permit from the visitor center.
Garden of Eden is the perfect place to see numerous spectacular rock formations. There’s no designated trail—it’s more of a hiking area where visitors can explore the different geological structures at their own pace.
An easy 800-meter round-trip hike leading to a truly spectacular double arch. You can climb the rocks for a bit of elevation and get a nice viewpoint over the valley.
Fun fact: you can see this arch in *Indiana Jones and the Last Crusade*!
** Cove Arch **
GPS coordinates: 38.69340, -109.54267
Cove Arch is a small arch, 10 meters high, embedded in a cliff.
A 1.1-mile loop hike that’s a must-do if you’re visiting this park, as you’ll get the chance to admire the stunning beauty of three incredible arches.
The dirt trail is wide and easy to follow.
We first headed toward Turret Arch while enjoying amazing views of North and South Windows.
Turret Arch is the smallest of the three, but it’s part of a rock formation that looks like a castle with a turret (hence the name).
There are two holes in this formation—one you can walk through and another higher up on the rock face.
North and South Window are arches in the same sandstone fin. South Window is the larger of the two, standing 65 feet tall, and it’s the third-largest arch in the park.
These two arches are also known as "the spectacles" because the formations resemble a face wearing glasses.
Delicate Arch Trail, located in Arches National Park, is a 3.1-mile round-trip hike that’s super popular. The trail starts at Wolfe Ranch parking lot.
The path steadily climbs and passes by the Wolfe Ranch cabin and a wall of petroglyphs depicting riders, bighorn sheep, and small animals. These are believed to have been carved between 1650 and 1850.
The trail then winds through massive sandstone domes. Cairns are placed along the path to mark the way.
The trail climbs to the top of a cliff. It’s narrow and follows the edge of a rock wall.
Just before reaching Delicate Arch, you’ll spot another arch on your right known as Twisted Doughnut Arch. By carefully climbing onto its ledges, you get an amazing view of Delicate Arch.
Delicate Arch, at the end of the trail, is a widely recognized symbol of Utah and is also famous worldwide.
The opening under the arch is 46 feet high and nearly 33 feet wide, making it the largest freestanding arch in the park. It’s stunning, and the surrounding landscape is absolutely breathtaking.
You can walk under the arch to take photos, but since it’s such a popular spot, you’ll want to do it quickly to allow other hikers access.
Check the weather conditions before starting this hike, as summer heat can be overwhelming since there’s almost no shade along the way.
Delicate Arch is the park’s most famous arch and a must-see for many visitors.
This trail lets you enjoy some great views of Delicate Arch without having to hike the full trail to the arch itself.
The Lower Delicate Arch Viewpoint is the first overlook on this trail. At just 61 meters round-trip, it’s very easy to walk and wheelchair-accessible.
From here, the arch is clearly visible. It’s about 1 kilometer away from this spot. With a zoom lens, you can get a decent shot of the arch perched on a distant rock wall.
The trail to the second viewpoint, Upper Delicate Arch Viewpoint, is 800 meters round-trip.
Considered moderate, it climbs a rocky outcrop using stairs and rock slabs, ending at the edge of a steep canyon.
It obviously offers a better view than the previous overlook, even though the arch is still far away.
It’s important to note that there’s no way to reach the base of Delicate Arch from this trail. To get to the base, you’ll need to take the Delicate Arch Trail from Wolfe Ranch.
UTAH - ARCHES NATIONAL PARK - FIERY FURNACE SECTION - VIEWPOINTS
Viewpoints - Fiery Furnace Section - Arches National Park - Moab - Utah
Fiery Furnace is a maze of very narrow sandstone canyons. This section of Arches National Park, located between Delicate Arch and Devils Garden, is a popular hiking destination named for the reddish hue it takes on at sunset.
A permit is required to visit this area, either an individual permit or one with a ranger.
However, a few roadside viewpoints let you take in the stunning landscapes that make up this region.
*** Salt Valley Overlook
GPS Coordinates: 38.74022, -109.57104
A short drive on this side road leads to a breathtaking view of the lower Salt Valley.
*** Fiery Furnace Viewpoint
GPS Coordinates: 38.74273, -109.56600 Parking and trailhead
GPS Coordinates: 38.74228, -109.56471 Viewpoint (130 m round trip)
This viewpoint offers a stunning panorama of the many incredible rock formations found in this area, as well as the La Sal Mountains visible in the background.
*** Skyline Arch Viewpoint
GPS Coordinates: 38.77200, -109.59098
A quick stop by the roadside gives you a lovely view of Skyline Arch. It’s named that way because it can be seen from many spots in the park.
Sand Dune Arch is located in the northern part of Fiery Furnace. This arch can't be seen from the road. Its name comes from the sand dune found in this spot.
The trail, about 500 meters round-trip, leads to a narrow passage in a canyon that takes you to this secluded arch surrounded by sandstone fins.
When we were there, the wind was blowing really hard in the canyon. The pretty orange sand, swept up by the wind, was blinding us, and we even had to cover our mouths and noses to keep the sand out.
But it was totally worth the trip because the area is really beautiful.
GPS coordinates: 38.77202, -109.59094 Parking and trailhead
GPS coordinates: 38.77440, -109.59012 Skyline Arch
GPS coordinates: 38.77629, -109.58934 Also accessible via the amphitheater
A short 600-meter round-trip hike on a well-defined trail leads to this arch perched atop a high cliff.
This area also features many beautiful rock formations.
Please note that you can't access the base of the arch from this trail.
However, if you head to the amphitheater, you'll get a completely different perspective of the arch, and you can also take a trail that leads to its base.
Be cautious, as the rocky surfaces can be slippery, and a fall could be fatal.
Devils Garden is the second most visited section of Arches National Park, after Delicate Arch. It also features the park’s longest trail, which is actually a 12-kilometer loop that includes several spectacular arches.
We only hiked part of the Devils Garden Trail. Actually, we covered a distance of 3.9 km round-trip to see the following arches: Tunnel Arch, Pine Tree Arch, and Landscape Arch.
Tunnel Arch and Pine Tree Arch are located on a small side trail about 400 meters from the start of the main trail. This path is easy to walk.
Tunnel Arch is a double arch with a larger hole toward the center of the fin and a smaller one on the upper left corner. It can only be seen from a distance, but it’s worth the look.
Pine Tree Arch is more accessible, and you can see it up close since it’s possible to reach the base of the arch.
To get to Landscape Arch, you need to return to the main trail, which is relatively flat with hard surfaces to walk on.
There’s no significant elevation gain, just moderate hills up and down. The trail winds through tall rock formations until you reach a spectacular view of Landscape Arch.
Landscape Arch is the longest natural arch in the world. It spans 89 meters and stands 32 meters tall. At its thinnest point, it’s only 3.35 meters wide and 1.80 meters thick. It’s truly breathtaking.
UTAH - DEAD HORSE POINT STATE PARK - WEST RIM TRAIL
GPS Coordinates: 38.48765, -109.73555 Visitor Center
Dead Horse Point State Park, located in southern Utah, is crossed by the Colorado River and features stunning landscapes.
This park has several viewpoints and a network of trails for mountain biking. Most of the viewpoints are only accessible by hiking the East Rim and West Rim trails.
However, Dead Horse Point Overlook and the viewpoint from the Visitor Center are accessible by car.
The West Rim Trail is the longest hiking trail in Dead Horse Point State Park.
We parked our vehicle at the Dead Horse Point Overlook parking lot and hiked this trail all the way to the visitor center, covering a total distance of 5.2 km when visiting the three viewpoints mentioned above.
This trail is easy to hike. It runs along the edge of the cliffs that form the western boundary of the park and is generally less crowded than the East side. It’s marked by cairns placed on the exposed sections of sandstone and smooth rock.
It offers beautiful views of the canyon and the Colorado River.
** Meander Overlook
Meander Overlook is located about 50 meters off the main trail. From there, you can see the meanders of the Colorado River.
** Shafer Canyon Overlook
Shafer Canyon Overlook is about 370 meters off the main trail. The views are similar to Meander Overlook. You can see the Colorado River, which is 610 meters below the viewpoint, and enjoy lovely views of the canyon.
** Rim Overlook
Rim Overlook is about 435 meters off the main trail and also offers great views of Shafer Canyon.
Je vais donc débuter un carnet sur le superbe RT effectué en Aout 2022 avec un grand circuit dans l'Ouest US. Voici ce que j'avais posté sur un autre forum de…
Après avoir séjourné à Aruba en novembre 2023, nous avons récupéré notre van aménagé que nous avions laissé dans un stationnement d’un hôtel à Miami en…
Nous voilà revenus de notre Road trip de septembre 2025, cette fois pour découvrir l’Arizona et le Nouveau Mexique et il est temps que je commence mon carnet…
Tout a commencé en décembre dernier, après une nouvelle alerte prix de Gilou pour des vols United/Lufthansa à 250 € au départ de Paris pour San Francisco. Et…
C’ est avec beaucoup de nostalgie que j’entame ce carnet de voyage de l’Ouest des Etats-Unis. Tout d’abord, merci à tous ceux qui nous ont permis, grâce à…
Hi everyone, I’m Patrick, 67 years old, a seasoned traveler (already 22 trips outside Europe).
In autumn 2025, I took my first 3-week trip to Japan, with stops in Tokyo, Kamakura, Matsumoto, Kamikochi, Takayama, Kanazawa, Kyoto, Nara, Osaka, Koyasan, Tokyo again, and Nikko.
I wanted to go back in May 2026 and explore some lesser-known places to complement my first trip.
Last year, there were four of us traveling together to discover Japan (a fairly classic itinerary). This time, I’ll be traveling solo for part of the trip and with a couple of French friends for the rest.
The weather was gorgeous in May, averaging around 25°C, with two very hot days in Kyoto and only two rainy days.
As usual, I organized everything myself, gathering plenty of information from various sites, including this one.
Transportation:
An ICOCA card is essential.
I got a 5-day Kansai-Hiroshima pass because I took the shinkansen between Hiroshima and Osaka three times, and it paid for itself quickly.
Accommodations:
Mostly through Booking. No issues at all. Average cost was 46 € per night.
Meals:
For breakfast, I alternated between buying food at a konbini to eat in my room or on the train and grabbing something at local cafés.
For lunch and dinner, I tried to vary my meals as much as possible—lots of sashimi, sushi, and ramen.
Okonomiyaki in Osaka and Hiroshima.
Oysters in every form (raw, grilled, fried) in Onomichi and Hiroshima.
A variety of seafood (shrimp, shellfish) in Hiroshima and Matsumoto.
Fish whose names often escaped me, but notably mackerel and eel (unagi).
Tempura and gyoza.
Chicken skewers (yakitori) and one teppanyaki meal.
One omakase meal (9 different dishes).
In the end, not much meat aside from a few yakitori skewers. No splurges on super expensive wagyu or Kobe beef.
Average dinner cost: 4,800 yen, drinks included.
The Itinerary:
Day 1: Departure from Brussels
Day 2: Arrival in Osaka
Day 3: To Himeji, then Kurashiki
Day 4: To Fukuyama, then Tomo no Ura, then Onomichi
Day 5: Cycling the Shimanami Kaido
Day 6: To Takahara, then Hiroshima
Day 7: To Kyoto to attend the Aoi Matsuri parade
Day 8: To Miyajima
Day 9: Hiroshima, then Kyoto
Day 10: Southern Kyoto
Day 11: Northern Kyoto
Day 12: Final day in Kyoto, then to Nagatsugawa
Day 13: Start of the Nakasendo Trail (Magome to Tsumago)
Day 14: Second day of the trail (Kiso Fukushima)
Day 15: Third day of the trail (Narai), then Matsumoto
Day 16: To Mt. Fuji (Kawaguchiko)
Day 17: To Tokyo
Day 18: Excursion to Enoshima and Kamakura
Day 19: Flight home, with a 10-hour layover in Hong Kong
Day 20: Arrival in Brussels
My buddy Christian and I (Patrick) are off for 28 days in Argentina in March.
We’ve already shared several trips as a duo (Bolivia Peru, Namibia, Laos, Costa Rica).
Since we’re starting from the idea that at our age (65) we won’t be coming back here—there are just too many other corners of the world to discover—we did the "grand tour" of Argentina, with 6 domestic flights to make the most of our 28 days.
Here are our stops:
1) Departure from Brussels to Buenos Aires via Madrid
2) Arrival and first contact with Buenos Aires
3) Early morning flight to Ushuaia. Boat trip on the Beagle Channel
4) Ushuaia: hikes in Tierra del Fuego National Park
5) Ushuaia: last hike and flight to El Calafate
6) El Calafate to El Chaltén by bus. First hike
7) El Chaltén: hike
8) El Chaltén: hike
9) El Chaltén: hike and bus back to El Calafate
10) El Calafate: Perito Moreno Glacier
11) Flight to Bariloche. Car rental and surrounding areas
12) Seven Lakes Region
13) Nahuel Huapi National Park region
14) Flight to Salta. Car rental
15) To Tilcara
16) To Humahuaca
17) To Purmamarca
18) To Jujuy via the salt flats
19) To Cafayate
20) Around Cafayate
21) To Cachi
22) Back to Salta
23) Flight to Iguazu
24) Waterfalls on the Argentine side
25) Waterfalls on the Brazilian side and flight to Buenos Aires
26) Buenos Aires
27) Return flight
28) Morning arrival
Happy reading!..
"So, my little wanderers, back at the decks? What’s this mystery destination you’ve got in store for us at the start of the year?"
Yes, the schoolyard bell’s ringing again! We’re hitting the road... or rather, the skies! At first glance, our destination might surprise more than a few. First off, simply because I was here exactly twenty years ago, and I don’t usually like retracing my own footsteps. Secondly, because the name of this place screams mass tourism—basically the opposite of what Flo and I look for.
Despite that, in this land of backsheesh, I’d promised myself I’d come back one day to experience it my way. And since Flo told me, during our wanderer chats, that this destination straddling Africa and the Middle East was in her top 2 travel dreams, the stars aligned for this roots-style trip to quickly make it onto our pharaonic festivities program! Unless you’re totally clueless in general knowledge, you’ve probably guessed by now—we’re off to Egypt! Of course, a few classics will be on our itinerary, but above all, we want to soak up a culture that can’t be appreciated in four-star resorts or on a Nile cruise boat. And let’s be clear, these next two weeks won’t be a walk in the park—neither for our two daughters who are joining us, nor for our bodies!
And that’s clear from the get-go: after our first flight, eight hours of trying (and failing) to sleep on Milan airport’s metal seats, our second flight, landing, passport stamps, our Uber ride, and our first Cairo kilometers, we finally drop our exhaustion at the little guesthouse we booked in Giza. Doesn’t all that energy deserve a little reward?
Oh, absolutely! And here it is: a full-on slap in the face for everyone! But just look at this view from our hotel terrace? For 20 € a night for four, even with this incredible view, I figured the room must be pretty shabby, right? Nope... Is the staff rude, then? Nope... Okay, so what’s the catch? You’re gonna tell me breakfast is included too? Well, yes! Honestly, this Egypt trip is off to a great start.
And the rest of the afternoon, spent rubbing shoulders with locals, only confirmed this vibe. After digesting our pyramid view, we dove into the hustle and bustle of our neighborhood with the goal of exchanging money, eating at street stalls, and testing the hospitality of the locals. Ten out of ten!
Eight little sun breads with baba ganoush and falafel? 80 pounds, or 1.5 €. A dozen Middle Eastern pastries? Same! 80 pounds! Two hawawshis, those little pita breads stuffed with meat and spices? 10 pounds each, or about twenty cents! Not to mention all those smiles and free "welcomes" left and right!!!
What a welcome! We end this first day with a sunset over the three sisters of Giza—where we’ll obviously be gawking tomorrow...
Hi everyone, we're back from a DIY USA road trip we organized from July 31, 2026, to August 26, 2026.
The destination: The Southwest USA, including Texas, Arizona, and New Mexico. Roughly 7,000 kilometers covered.
The car: A Chevrolet Equinox for two, rented through BSP Auto and Avis. Inside, we had 2 suitcases, a travel bag, two carry-on bags, a Walmart cooler, photo gear, and water bottles (a 40-pack).
The route: Dallas DFW, Fort Worth, Houston, Austin, San Antonio, Alpine, El Paso, Tucson, Sedona, Albuquerque, Amarillo, and back to Dallas to finish with a departure from DFW.
The travelers: Two seniors well advanced in years (73 and 75) but still active (nothing too physically demanding—to stay alive and fund our trips), fully independent physically, though a bit less so mentally. Big USA fans, a country where anything is possible. More walkers than hikers, preferring 3-star hotels over roadside motels, Italian restaurants over US food, frequent stops for photos, museums over nothing, naps over forced marches. Not too whiny, just enough to stay French in the land of the "great Satan," as they say.
Not great with languages—street English (but handy), and my Spanish is non-existent except for: "Hola! Una cerveza por favor!" That’s about it. My wife understands everything but refuses to speak.
The cost of the road trip: Around 12,000 €, including AF flights, the car, gas, gifts, visits, and everything else. Well managed, since we’d budgeted 13,500 € initially.
The positive side: A delight, with those endless open roads. Museums to discover. The realization of the Hispanic presence and its important history in this part of America. Lovely locals. Tourists who were more or less friendly. A terrible Texan accent that was hard to understand. Gas stations that were like real stores, with prepared food, alcohol sold in Arizona and New Mexico, and employees who were always up for a laugh!
The negative side: The heat throughout the trip... 43°C in Dallas at the end. Impossible to walk the streets. Lots of homeless people in downtown Dallas. Hotel breakfasts that were always the same. You get used to it.
So, it was positive overall, but the concept is starting to wear us out. We might rethink the DIY road trip model for next time. If the man upstairs grants us more time.
Next up, we’ll wait for the first batch of sorted photos to go through the wringer.
If I close my eyes and think of the Sultanate of Oman, I first smell a light scent of incense, feel the warmth of a sunbeam on my skin, before sand slips through my fingers. I taste the sweetness of a date, a real candy, then the flavor of coffee with a hint of cardamom and rosewater... I hear the desert wind whistling in my ears, the distant call of a muezzin, then the murmur of water. I open my eyes to see smiles, welcoming gestures, a turquoise sea, rocks ranging from ochre to purple, deep wadis where torrents burst forth, orange dunes, white sandy beaches where tiny crabs scurry at full speed. I see incredible oases emerging between arid mountains. I see abandoned villages that I’d dream were full of life, imposing fortresses overlooking valleys, and lively souks where offers are delicate and negotiation is a mutual courtesy.
All that, and so much more.
This is what I tried to capture in my illustrated travel journal, which I’ll fill in here and there with photos.
I drew this journal “cold,” after my return (actually, I made it this summer, while our trip was last winter). It’s a pretty special format—I bought it in Japan without really knowing what I’d do with it. Well, it found its purpose! Below is a photo of this accordion-style journal: here, it’s only partially open, because when fully unfolded, it’s 5 meters long!
For drawing enthusiasts: The accordion format is both a constraint (each sheet is 9 cm x 27 cm) and a freedom (you can create a fresco). The paper is also a bit special: it doesn’t allow for fine lines, but it takes ink well (liner pen). However, everything has to be done almost in one go (with a very light pencil sketch) because it erases poorly. It absorbs too much water for coloring with markers or watercolors (unless you avoid soaking it), but it works well with oil pastels and their use with a brush and solvent. Since it’s yellowish, it allowed me to create contrasts even with white pastel.
On the right, the "welcome marker"—those dates offered everywhere as a sign of hospitality. On the left, a tribute to those stunning doors worn by time, admired all over the old quarters, including the abandoned ones.
Oman is one of the world’s largest producers of frankincense resin. Incense burners are everywhere, from the simplest clay ones to the most precious handcrafted silver ones...
Hospitality will often lead you to accept a small coffee, an "Omani coffee," very light, subtly flavored with cardamom, maybe a touch of saffron, and occasionally rosewater.
Here, I’ve depicted a man in the common everyday attire of Omanis: the dishdasha, mostly white (during the week and daytime; colors are more common in the evening or on Fridays and Saturdays). While you’ll see some men dressed in Western clothes, they’re very few. The white dishdasha is truly the shared attire of all men. The dishdasha, which has no hood, is distinguished by a small pom-pom attached to the collar, the furakha, which is soaked in perfume. And believe me, Omanis go overboard with it! "It smells like the pom-pom" is an expression that’s now part of our shared language, my husband and I.
Another must of men’s attire is the kuma, a small round head covering, usually white with brightly colored patterns. The keffiyeh is also worn (but without the cord called an agal in Arab countries), and it’s mostly worn by those with roots in the desert, from what I understood.
And what about the women, you might ask? Some are veiled, some in full black (but not a burka—more like a chador + abaya), due to the influence of Saudi Arabia and the United Arab Emirates, whereas the traditional outfit used to be a layering of very colorful dresses. Most of the women we saw wore neutral clothing, a plain veil over their hair, but with their faces uncovered. We also saw many saris and colorful veils—don’t forget that 40% of the population consists of Indian, Nepalese, and Bangladeshi immigrants, who work a lot in tourism, hospitality, restaurants, services, and construction.
Just to clarify, as a tourist, there’s no pressure to wear a veil, and never any disapproving looks. Of course, you’ll save the mini shorts, plunging necklines, bare shoulders, and midriffs for the hotel terrace—but I’d say that’s the same for men and women, and with the sun being strong, it’s better for your skin too.
Here’s the introduction! In the next post, I’ll tell you about my itinerary, and we can dive in!
The latest travel journal about Turkmenistan dates back to 2019. Here’s a quick update on this vast desert country, which is now a bit easier to visit than before.
This is my first travel journal. If you have any questions, don’t hesitate to ask. The country is slowly opening up, but it’s still possible to visit sites where you’ll be completely alone. In five days, I saw two Hongkongers, a few Germans, and a Chilean at the crater, ten Chinese people in a capital bazaar, and that’s it!
It’s possible to visit Turkmenistan from Uzbekistan. The easiest and most economical way is to take a taxi to the border from Bukhara. The trip takes a little over an hour.
Crossing the border takes quite a while because many Turkmen bring back items bought in Uzbekistan to resell in Turkmenistan. For example, diapers, baby products, or beauty products.
It took me over 2.5 hours to cross the border. To visit Turkmenistan, it’s mandatory to have a guide and go through a travel agency. British agencies often offer three-, five-, or seven-day trips for over 1,500 or 2,000 €.
But if your budget is more limited, you can contact a few Turkmen agencies directly by email, and they’ll make you an offer between 700 and 1,300 € for three to seven days. I took a five-day trip from Turkmenabat in the northeast of the country to Dashoguz in the north. The goal was to visit the main UNESCO-listed sites, including Merv, and archaeological sites like Nisa or Gonur Tepe.
Your guide will also be your driver. They’ll pick you up at the border. The formalities are very long because customs officers have to stamp multiple documents, and obtaining the visa you previously requested from your travel agency requires several checks. But the process goes relatively smoothly, even if each step takes a while.
Once on the other side, the first surprise is the brand-new highway all the way to Turkmenabat. A very long line of trucks stretches for several kilometers on the Turkmen side to cross the border into Uzbekistan. According to my guide, Turkmen trucks transport gas and cotton (though not this season, since the harvest is in September), but they mainly fill up their tanks because fuel is much cheaper in Turkmenistan. A full tank for a car costs about 3 €, which is unbeatable.
From the Farap border post, the goal is to reach the city of Mary, which is home to the UNESCO-listed site of Merv in its suburbs, about thirty kilometers away. This city is known as a foundation by Alexander the Great in the 4th century BC under the name Alexandria of Margiana. Several fortresses are visible.
After more than three hours on the road, we have lunch at a Turkish restaurant called Aladdin. Several quotes from the president are visible along the highway, but the road is in good condition, and we move along easily. This will be by far the best road in the country—things will get much worse later.
Roundabouts are particularly interesting because they feature emblems of Turkmen culture, like the dog, a carpet, the Ahal Teke horse, or Muslim symbols, even though the presence of Islamic artifacts is quite limited.
I’m sharing a little recap of this new 4-week trip to China—nothing fancy, just my experience.
We’re taking advantage of the extended visa exemption to return to China for the 4th time. I loved last summer’s trip so much that I’m a bit worried about being disappointed this year. Plus, I’ve had a few hiccups before this departure: my WeChat account got blocked, and I couldn’t recover it (luckily, Alipay still works fine); I couldn’t verify my 12306 account for weeks; Trip.com failed to book our second train; and I’ve got an injury that’ll slow me down during the trip... Ugh, I hate starting a trip with these kinds of issues. Then, oh surprise! Just before leaving, my 12306 account got verified! Super easy to use from that point on—I could book a few train tickets without fees.
We’re sticking with Free’s e-SIMs, which work great in China.
August 2–3
Anyway, on the morning of August 2nd, we took the RER to CDG. As usual, we couldn’t check in online. It’s always a bit frustrating, especially since we didn’t have any checked luggage. We flew with Air China. We arrived at the check-in counter at 9:50 AM, 2 hours and 40 minutes before the flight. The line for our check-in stretched 300 meters across the airport in both directions. What a joke!! We spent 1 hour and 45 minutes in that line just to reach the counter and get our boarding passes. By then, it was 11:35 AM, and boarding had already started at 11:20 AM. The screens showed a 25-minute walk to our gate—on the other side of the airport, of course—plus we had to go through passport control and security... Long story short, the plane didn’t leave without us 🙂 We boarded among the last passengers, and we took off at 12:30 PM. We’d flown Air China four times before, but this time, it felt *really* low-cost. The check-in chaos, the cramped seats (12 seats per row), no music by artists known outside China, mediocre food, and a boarding area at Beijing Airport with only 10 seats—worthy of Ryanair or EasyJet. And yet, the price was sky-high. Again, D.’s vacation requests were denied outside of July and August, so we’re traveling from August 2nd to 30th. We couldn’t have picked a worse time for inflated prices, and with the situation in Iran, we got hit with a 390 € fuel surcharge. I’ve never paid so much for flights—I felt like I’d bought business class, but nope, far from it!!
We landed in Beijing around 4:15 AM. It was 28°C with thick fog. We drove and drove and drove for 20 minutes, as usual in Beijing. Then we went through a first check, a second check, a third check, and waited for our connecting flight at 6:40 AM. A small Airbus A320, but way more space than in the Boeing 777 from the first flight. We landed in Kunming, Yunnan, around 10:15 AM in the rain.
We headed to the subway. You can’t pay at the machines with Alipay here either, so we set up the transport QR code directly in Alipay to scan at the subway gates. The process is a bit long the first time if you haven’t entered your info before, but once it’s done, it’s *so* much easier! We took Line 6 to the terminus for 6 yuan each.
We’d booked a hotel nearby, on the 16th floor. It’s actually studios on different floors of a huge residential building. The view’s pretty nice from here. We settled in quickly—back to those wooden beds, or rather, mattresses as hard as wood, which we *hadn’t* missed...
Then we went out for our first bowl of noodles of the trip and wandered through the shopping streets of the old town.
It was crowded, and the weather was cool—around 19–20°C. We tried a local specialty: milk skin, thick, dried, then grilled with rose jam. Yeah... we won’t be having that again. The taste and texture of the milk skin... no thanks.
We saw a lot of wild mushroom hotpot too. It’s on our list for later. We also passed through the Jinma and Biji gates, where I played with reflections in puddles. I *love* doing that 🙂
At the end of the day, we headed to a temple advertised as open 24/7 on Amap. Of course, when we got there, it was closed. We’ll go back tomorrow. That was the first of many disappointments with Amap this trip—I hadn’t had that issue on previous visits.
We were exhausted after that sleepless flight. Night was falling, and we decided to grab a quick bite without much appetite. We shared a delicious vegetable fried rice for 12 yuan—we even left half of it. The portions are *huge*.
After a couple of small purchases, we headed back at 9 PM, wiped out, after walking 17 km between the airports and these first steps in Kunming. I expected to see quite a few Western travelers here, but we didn’t spot a single one. Instead, we met lots of curious Chinese people, many of them super friendly and helpful—almost *too* eager, like when they’d run to serve us as fast as possible. It’s a bit much, but it’s great to be back!
After as many weeks as I have fingers on my right hand, we're hitting the road again, fully recovered from our pharaonic adventure. Back in France to drop off our daughters (sorry, girls!), this time it's just the two of us, ready to be welcomed by a new destination. They say it offers one of the richest cultural heritages in the world for those willing to put in the effort. It's the land of the ancient Silk Road, where we'll follow a journey steeped in history and discoveries straight out of *One Thousand and One Nights*. A former Soviet bloc region independent only since 1991, we'll be walking in the footsteps of Genghis Khan, Tamerlane, Alexander the Great, Marco Polo...
Another fun fact about this country: it's strictly forbidden to import porn on your phone. True story. The same goes for painkillers! Unless it's about sodomy—though the two don’t seem connected, that’s just how it is. Don’t ask me why! Anyway, I’m getting off track. Here’s the big question: Where do you think we’ve just landed?... To give you a hint, the locals are known for being incredibly welcoming. No sooner said than done—our first taxi driver, proud to transport French travelers, refused to let us pay for the ride. Great vibes for these two weeks ahead. So, any guesses?
Uzbekistan!!!
"How about a Christmas market this year, huh? A little romantic weekend getaway...
- Yes! That’d be cool! Strasbourg? Colmar?
- Feels a bit déjà vu, doesn’t it? Plus, slim chance of snow there... And I’d love something a bit more exotic with a touch of originality..."
"Okay, Google, give me the list of the five most beautiful Christmas markets in Europe.
- In fifth place, the Christmas market in Vilnius, the capital of Lithuania.
- Save your breath! Lithuania, here we come!"
We wanted cold, and cold is exactly what we got the moment we set foot in this new, unknown land. As for landscapes, forests and lakes stretch as far as the eye can see across this vast plain, its vegetation scorched by the frost of a winter that’s clearly already well underway here.
Lakes, in fact, set the scene for our first visit to Trakai Castle, whose brick-red towers and walls rise proudly against the azure sky of our first day. Lakes, because this castle was built on an island and is only accessible on foot via a series of walkways spanning half-frozen lake offshoots. I couldn’t have picked a better spot to build my castle! Translation: We’re totally sold! Proof is we spend two hours hiking around the area, alternating between forests, reeds, and cozy houses tastefully decorated for Christmas.
This time, I landed in Monastir on a direct flight from Nice, again with Tunisair. We left about ten minutes late, and the flight lasted around 1 hour 30 minutes. A meal was served on board (cucumber salad with Edam-like cheese, carrots, and two small portions of dishes I couldn’t identify—semolina with peppers, olives, and parsley, two small rolls, a square of processed cheese, and a chocolate cake). It’s worth noting because it’s not common on flights this short.
In February, France and Tunisia were in the same time zone, but now Tunisia is one hour behind. This time difference and the flight duration work perfectly for a short 15-day trip since it takes me a few days to adjust to jet lag.
Luckily, I’d asked my hotel about the taxi fare from the airport because the drivers (there were several around me) didn’t hesitate to quote outrageous prices. The actual fare is 20 dinars, but one asked for 120 dinars. I refused, and another offered 60 dinars. I replied, "That’s too expensive—I’ll take the metro!" (Having tried the Tunis metro, I had no desire to repeat the experience in Monastir with a suitcase!). I started walking toward the metro, and one of the drivers caught up with me, saying, "20 dinars is fine!" I’ll skip the details, but the negotiation took a little while.
When I arrived at the hotel, I told the receptionist someone had asked for 120 dinars. He put his hands to his head and said, "They’re awful!" He remembered our phone call two days earlier when I’d booked (he’s the one who told me I could take the metro).
The Mezri Hotel isn’t expensive. I got a sea-view room for 75 dinars (22 €). (I’d booked a balcony room for 90 dinars but wouldn’t have had time to enjoy it.) It’s well-located but noisy because there’s no double glazing.
The receptionist is a very kind older gentleman. He called a friend whose wife is from Tozeur to find out if I should take a bus or a *louage* tomorrow and what time.
I arrived at the hotel around 7:00 PM and had time to stroll along the corniche to the ribat. Despite some run-down buildings, the seaside seemed livelier and cheerier than Sousse’s.
Monastir is the hometown of former president Bourguiba. I passed his mausoleum by taxi. There are Tunisian flags along the avenue by the sea because every year on April 6—the anniversary of Habib Bourguiba’s death—the president of the Republic visits the Bourguiba Mausoleum in Monastir to pay respects.
The taxi driver mentioned other Tunisian presidents. He complained about rising prices and insecurity, blaming President Kaïs Saïed (I’d already heard that security was better under Ben Ali).
At the end of my stay, I’ll take time to explore Monastir, but tomorrow morning, I’m off to Tozeur—a long bus ride awaits me.
With my girlfriend Christelle, we’ve chosen South Africa for our first trip to Southern Africa, focusing on safaris—after a long debate with a Cape Town/Kruger combo.
But that would’ve meant cutting out St Lucia, which would’ve been harder to fit into another trip.
And St Lucia—thanks to Michel and all those travel journals—we really wanted to go there.
So our 11-night itinerary ended up like this, mostly shaped by school holidays:
- 3 nights in St Lucia
- 1 night in Hluhluwe
- 1 night at Mkhaya Game Reserve (Eswatini)
- 1 night at Hlane Royal National Park (Eswatini)
- 3 nights in Kruger (Berg en Dal / Satara / Tamboti)
- 1 night at Shindzela Tented Camp in the Timbavati private reserve
- 1 final night in Kruger at Lower Sabie
All of this in the off-season and rainy season, just a month after catastrophic floods that killed over 150 people and seriously damaged Kruger’s infrastructure.
I’ll jump straight to St Lucia and skip the loooong journey to get there (with a layover in Frankfurt, landing in Johannesburg, a domestic flight to Durban, and the rest by rental SUV—First Car Rental, perfect, no complaints).
To motivate readers—especially some familiar faces here—I’ll drop in a first photo.
Here we go!!!
I left home at 4 AM on October 31st and headed to Barcelona. Driving through Barcelona on the ring road stresses me out a bit, but at 6 AM the traffic is smooth, and I arrive at the airport without any issues. I call the valet, who quickly comes to pick up my car. He takes photos of it from all angles before letting me go.
Baggage check-in hasn’t started yet, and there are already several of us waiting.
Once free, everything happens very quickly. The flight to Abu Dhabi is on time and goes smoothly. I’ve never had any problems with this airline, which I’ve been using for several years.
The flight to Bangkok arrives at 7 AM as scheduled. This is my first time in Thailand and Bangkok. I’m used to traveling in India, and I notice that everything here is well organized—the customs process is quick, and the luggage is already on the carousel.
I booked a taxi on Booking. All I have to do is find the right exit and door based on the agency’s instructions. A large sign with the names of people who booked is posted on a wall. A hostess greets me and calls the taxi, which arrives 5 minutes later. I booked one night at the Lost Inn BKK hotel in the Phra Nakhon district, and we arrive at 9 AM. The welcome isn’t warm, and I have to wait until noon, sitting on a chair, before I can check into my room. I’m exhausted, and sleeping sitting up isn’t ideal. Noon finally arrives—the room is small but clean, which is fine for one night. I quickly take a shower to wake up because I plan to spend the afternoon visiting the Grand Palace. First, I need to exchange some money, and the banks are all close together on the same street, which is very convenient. When I enter one, a hostess gives me a ticket and invites me to sit down. There are about twenty counters, and I wait quietly until my number is called. The exchange is quick, so I can head out to find the Royal Palace. It’s actually very easy, and the walk is pleasant.
Entry to the Royal Palace (500 baht).
It’s magnificent and grand, and there are quite a few of us visiting. The sky is gray, it’s very humid, and a shower interrupts the visit. It’s a vast complex of temples and palaces. The buildings are colorful and sparkling, with a great sense of serenity (without the tourists, of course). I quietly enjoy the place and try to take photos without tourists, which isn’t easy.
Very close to the Grand Palace is Wat Pho, one of the oldest Buddhist temples in the capital.
It’s very famous for its 46-meter-long reclining Buddha statue.
Walking around the temple, you can see different representations of Buddha, all covered in gold leaf.
Inside the temple, on one side, monks recite their prayers, while the other side is reserved for tourists who come to meditate in silence.
Before returning to the hotel, I have dinner at an Indian restaurant. I go to bed early because tomorrow’s wake-up call will be very early again.
Saturday, November 2nd
Wake-up at 4 AM, departure from the hotel at 4:30 AM. The taxi I booked via Booking is waiting for me and takes me to the airport. The trip is fairly quick—he takes small roads, and at this hour, there’s no traffic.
The flight to Phnom Penh is on time. Before boarding, I realize I left my fleece jacket on the carousel, but it’s too late to go back for it.
The flight goes well, and customs is quick.
At the exit, I take a tuk-tuk to Julieka’s GH near the museum. The welcome is friendly. I won’t be able to check into my room until noon, so I take the opportunity to exchange some euros on the market street. The street is lined with restaurants, and I’ll have my first meal there.
The museum is right across the street, so I don’t waste any time visiting it.
The representations of Hindu deities are very different from those in India, and I don’t recognize them. Many beautiful Buddhas are on display.
The museum is very pleasant, and there aren’t too many people, which is a plus.
At the exit, I return to the GH, settle into my room—which is decent and clean.
The Royal Palace is 1 km away. I walk along a garden, and at the end of the street is the Tonlé Sap, but I turn right. I arrive at a large esplanade and see the buildings with tiered roofs and glazed tiles. The entrance to the palace is a little further away.
At the entrance, I notice there isn’t the same crowd as at the one in BKK.
Khmer architecture is magnificent. The complex consists of gardens, palaces, pagodas with golden roofs, and slender spires.
The Silver Pagoda houses the small Emerald Buddha, which is actually made of jade. The silver flooring is covered with carpets. Photos are not allowed.
The walls surrounding the pagoda are covered with frescoes depicting scenes from the Ramayana.
My partner and I traveled from Sunday, July 5, 2026, to Wednesday, July 22, 2026.
We spent a long time debating whether to rent a car or use public transportation. In the end, after reading so many posts about travelers getting scammed by police or rental companies—even those recommended by blogs and reviews—we decided to stick with public transport. It worked out really well. Sure, we had a little less freedom to go where we wanted, but it was way less stressful for us.
Sunday, July 5:
Arrived at Cancun Airport. Withdrew cash from the ATM in the terminal just before exiting. The ADO bus counter (they pronounce it "A-Jee-O") is right behind you when you're facing the ATM. Bus to downtown Cancun cost 145 pesos per person.
Stayed at "Rose 5," booked on Booking. The studio was super clean and perfect for one night. The owner’s instructions for accessing the place were very precise, with photos included. Check-in was self-service with a code. The ADO bus terminal isn’t far, and there are shops and restaurants nearby. We really appreciated that the AC was already on when we arrived. By the way, I’d recommend always booking places with AC—it’s *really* hot in Mexico.
Monday, July 6:
Bought a SIM card with data from a TELCEL store. My partner, who’s on Free Mobile, was able to use her regular plan. Just so you know, I found the network pretty unstable. As soon as we left the cities, neither of us—me with TELCEL or her with Free—had any signal.
Another thing to watch out for: roaming charges. I had to turn my SIM back on for less than 30 seconds to get a bank SMS code, and my phone apparently connected to the internet—resulting in an 8-euro roaming fee.
Left on an ADO bus to Chiquila for 278 pesos per person. During our trip, ADO buses were always on time, comfortable, and clean. The AC is *cranked* though, so bring something to cover up with—it gets cold. Some routes were fully booked even in the low season, so try to reserve 1 or 2 days in advance either via the app (when it works) or at the counter.
When we arrived at the ADO terminal in Chiquila, the ferry company counters were right next to it. Ferries leave every 30 minutes, alternating between companies, so no need to book ahead. Just take whichever one is leaving next (330 pesos per person).
When we got to Holbox (pronounced "Hol-bosh"), we’d booked a place via Booking called "Casa de Nana." It was a huge studio with a fridge, cooking plate, and utensils. The best part? The *location*. It was 100 meters from the beach and 200 meters from a Chedraui supermarket. They provided bath towels and beach towels, and the AC worked perfectly. There’s a key box so you can leave your keys inside when you go out. The only downside was that no one was there to let us in when we arrived, so we had to wait a while. The Wi-Fi was good, which was lucky because during our 4-day stay in Holbox, the phone network *never* worked. According to locals, that’s pretty common in Holbox, along with water outages.
Luckily, I’d had the good idea to download an offline map, which helped us find our way back to the place more easily. You can walk there from the dock.
The restaurant next to our place (La Barracuda) was great if you like seafood—I’d recommend their octopus dishes.
Tuesday, July 7:
We did a kayak tour in Holbox’s mangroves at 6 AM. We were looking for a sunrise kayak tour with a French-speaking guide. That’s exactly what we got with "Kayaking Holbox," where Diego, the owner, speaks English and French. He was joined by Gustavo, another guide.
We’d booked for a group tour, but we were the only ones. Diego still went ahead with it instead of canceling due to lack of participants, so we got a private tour at the group rate—really professional of him. They showed us this amazing ecosystem for over 3 hours. We saw all kinds of birds: pink flamingos, pelicans, egrets, frigatebirds... rays, a horseshoe crab, and a little crocodile that was *so* well hidden. Diego and Gustavo have a real eye for spotting animals—I could’ve passed by the crocodile 100 times and never seen it, it blended in so well. Their explanations about the flora and fauna were super interesting. We also got a little break where we tasted mangoes and bananas that taste *nothing* like the ones in France. A real treat—those little Mexican yellow mangoes! I’d definitely recommend Diego and his agency for a French-language kayak tour (1000 pesos per person).
In the evening, we walked to Punta Coco to see the bioluminescence. No need for a guided tour—if you really don’t want to walk, you can take a taxi. At Punta Coco, you have to pass the beach bar/restaurant and then go left into a kind of inlet that forms a lagoon. You have to wiggle your feet or move your hands in the water to create movement, which makes the light appear. Just don’t expect the kind of photos you’ve seen online—they’re all edited! It’s fun to see, but you won’t be dazzled by the light...
Wednesday, July 8:
Whale shark tour with "My Holbox Tours." Why recommend this agency over others for swimming with whale sharks? Simply because Valérie surrounds herself with top professionals to make your experience unforgettable. We were with Captain Fernando, who does everything to position the boat perfectly and make your swim easier. In the water, we were with Humberto, who also goes above and beyond to make sure you have an incredible time. He doesn’t just "supervise" like some guides from other companies who leave you on your own. No, Humberto reads the whale shark’s trajectory and guides you—all you have to do is follow him. He really puts in the effort, even holding your hand to guide you through this quick but intense encounter. Humberto also films the moment and will offer to show you the videos and sell them to you. His footage is really high quality.
Fernando and Humberto also prepared food for us. Special mention for their guacamole! Valérie is there to make sure everything goes smoothly on the boat and to answer your questions in French, English, or Spanish about these animals. If you choose My Holbox Tours, you can be sure you’ll get a top-notch experience.
About the tour itself: before you go, you should know that the sharks can be *really* far away. The day we went, it took 3.5 hours by boat to reach them. The boats are small, and let me tell you—on the way there, when we weren’t going with the waves, it was *rough*. Out of 9 passengers, 4 got seasick. But once you’re face-to-face with the shark, you forget all about that. Even if swimming with a whale shark isn’t exactly a walk in the park—they swim pretty fast, so you need some endurance to keep up. You’ll usually get 2 turns. Our first swim lasted a little over 4 minutes, and the second about 2 minutes because the shark was moving fast and we were still tired from the first swim. It might seem short, but when you’re swimming, it feels *long*. Either way, it’s an experience you *have* to do—but choose your company wisely. On the way back, there’s a stop at Cabo Catoche. Honestly, the snorkeling is pretty disappointing if you’ve done it elsewhere in the world. But the lunch stop at Cabo Catoche is really nice for relaxing (white sand and hammocks).
Thursday, July 9:
Short morning walk to Punta Mosquito at 6 AM. Really nice.
Ferry to Chiquila (330 pesos per person) + ADO bus to Valladolid (300 pesos per person).
In Valladolid, we booked "Casa Lucia" via Booking. The hotel is gorgeous, with a colonial style, and very close to the ADO bus terminal and downtown. It’s super quiet and clean. There’s a shared kitchen you can use with a fridge, microwave, and water dispenser, plus a big table by the pool and a nice indoor terrace. Breakfast was simple but included. The only small downsides were the tiny room and bathroom, no mirror in the room, and a noisy fan.
Friday, July 10:
Not far from the ADO bus terminal is the colectivo station for Chichen Itza. They offer a round-trip to Chichen Itza with an option to stop at Ik Kil cenote on the way back and then drop you off in Valladolid for 370 pesos per person (Ik Kil entrance included).
For the Chichen Itza visit, we’d booked a tour with a guide often mentioned in groups—his name is Juan Pat. He’s a Maya who lives near the site and speaks excellent French. He reserves spots in advance for you and queues up to be the first on-site. It cost 500 pesos per person + entrance fees. His tour lasts 2 hours and focuses mainly on the main pyramid and the ball court. He’s passionate and fascinating, even if some of his claims, as a Maya, might be a little biased. I think it’s *really* important to have a guide—otherwise, you’ll miss so much. You can contact Juan Pat on WhatsApp at +52 985 121 2381.
Afterward, we went to Ik Kil cenote (showers and life jackets mandatory, lockers available). It’s *very* crowded, but still really beautiful with its lush vegetation.
Saturday, July 11:
Since we didn’t have a car but still wanted to visit other cenotes that seemed hard to reach by public transport, we decided to book a taxi for the day. We agreed on 1200 pesos to take us to 3 different cenotes and wait for us at each one. (To find taxis, just look where they park near the ADO bus station.)
He picked us up at Zaci cenote, which we’d walked to. We got there at opening time and were the first ones there—had the place to ourselves for a while! 150 pesos per person. A pretty cenote in the city center with lush vegetation. It’s a bit like Ik Kil but without the deep cylindrical effect.
Cenote Xcanahaltun: the most beautiful cenote we visited. Entry 250 pesos per person. It’s a closed cenote with a hole that lets light in—a cave-like setting. You can kayak inside. There are little fish at the edge that nibble dead skin off your feet. Since it’s closed, the water is *freezing*!
Cenote Palomitas: entry 250 pesos per person. Another stunning closed cenote, even more enclosed than Xcanahaltun. The hole in the ceiling is smaller, so it was pretty dark when we arrived—kind of an eerie vibe. But when the staff turned on the lights, it looked like a "Gothic cathedral" full of bright stalactites.
Cenote Sac Aua: entry 290 pesos per person. The ticket includes a guided cave tour (tip-based). This cenote is really unique with its central island and way less crowded than Suytun. Just so you know, the water is *really* cold in cenotes. In these three, in July, we had the place to ourselves for a while and never saw more than 2 families at once—so peaceful!
Sunday, July 12:
ADO bus to Bacalar (536 pesos per person).
In Bacalar, we stayed via Airbnb with a host named Luli, who offers several rooms with shared bathroom and kitchen.
The room is nicely decorated in a pleasant setting. It’s ideally located near the lagoon and downtown. The shared kitchen is handy. The mosquito net over the bed is useful because there are *a lot* of mosquitoes in Bacalar. Luli provides a water jug, which is really nice. The only big downside is the lack of water pressure in the shower—we had to rinse off by filling a bucket. Also, there’s no real door separating the room from the bathroom. We never met Luli in person, but she was very responsive via messages. The terrace in the middle of the vegetation is lovely.
From the ADO terminal to the place, we took a taxi for 40 pesos. Since this driver was honest about the price (we’d checked beforehand), we decided to use him every time we needed a taxi in Bacalar. Here’s his WhatsApp: +52 983 184 3585.
Monday, July 13:
We did a boat tour on the lagoon with "Bacalar Francophone Activities." Since we were just the two of us, it cost 3500 pesos. If we’d managed to be 4 people, it would’ve been 1000 pesos per person.
We had a private 4-hour tour on the lagoon with Steeve and his very comfortable boat. He’s from Quebec, so his French is perfect. During those 4 hours, Steeve showed us the lagoon’s iconic spots *and* places other boats don’t go. He told us about the lagoon’s history and gave great tips on where to go and where to eat. As a little bonus, he gave us a video taken with his drone during our swimming break.
Tuesday, July 14:
We went to Los Rapidos by taxi (400 pesos round trip) and entry was 225 pesos per person. It’s *very* touristy but really beautiful. You can eat there (expensive), relax, and go down the "rapids" as many times as you want. It’s worth it if you spend a few hours there. You can’t bring in food or drinks—you leave them at the entrance and pick them up on the way out.
Wednesday, July 15:
On Wednesdays, navigation is banned on Bacalar Lagoon, so we’d planned another excursion.
Visit to Calakmul from Bacalar with ABCtours (WhatsApp +52 983 319 8359).
This agency organized a trip from Bacalar to Calakmul with a French-speaking guide. Communication beforehand via WhatsApp was smooth. Mr. Checo, the driver, and Fernando, the guide (who spoke great French), picked us up on the day. Mr. Checo drove very carefully on the long road and always made sure we were comfortable. Fernando is passionate about flora and fauna—he’s a biologist with a degree in ornithology, so he knows *everything* about animals. The slightest sound or song, and he knows what it is. He’s got an eye for spotting them, from the biggest to the smallest.
During the trip, we stopped at km 27 for a short forest walk, then went to see the two main pyramids on the site. On the way back, we stopped at the bat cave for the magical spectacle of millions of bats flying out at dusk. In the end, we saw or glimpsed (some briefly) spider monkeys, howler monkeys, a toucan, 2 tapirs, turkeys, 2 deer, and lots of birds. If, like us, you’re more into flora and fauna than archaeology, I’d *highly* recommend this agency and tour with Fernando.
It’s not cheap, but the road between Bacalar and the site is *long* (3.5 hours). Price: 3900 pesos per person for 2 (3500 for 3, 3200 for 4).
Thursday, July 16:
ADO bus to Playa del Carmen (614 pesos per person).
In Playa del Carmen, we stayed in an Airbnb. The building is on the town hall square, next to the casino.
The best thing about this place is the *location*—super close to Fifth Avenue (La Quinta). The kitchen is pretty basic, but the fridge works well. There are supermarkets nearby. The rooftop pool is really nice. The two big downsides, though, are the soundproofing (you can *hear* the neighbor’s alarm and all the events on the square) and the *total* lack of water pressure in the shower. We had to fill a trash can with water to pour over ourselves. When we told the owner, he said it wasn’t normal and someone would come fix it, but we never heard back. Based on previous reviews, this seems to be a known issue that never gets resolved.
Playa del Carmen is *very* touristy on Fifth Avenue, but in a fun, musical vibe—we never felt unsafe. There are *tons* of little souvenir shops for tourists on this street. There’s a beautiful monumental sculpture on the beach (the two figures meeting in the air), next to which you can see the Voladores show (men climbing a pole, tying themselves with ropes, and descending headfirst while "flying" around the pole). The show is tip-based and happens several times a day. In our opinion, Calle 38 is prettier than Fifth Avenue—it’s lush, green, and quieter, with the sea at the end. Great for an early evening stroll. We had really good meals at great prices at "El Tio Noy" tacos, just a few meters from Fifth Avenue in a side street.
For souvenirs, we’d recommend going to Walmart instead of Fifth Avenue—you’ll find skulls, tequila, mezcal, keychains, mugs, glasses... at good, fixed prices.
Friday, July 17:
We did the excursion to Isla Contoy. Isla Contoy is an uninhabited, highly protected island. Only 200 people are allowed to land per day on a rotating basis, so only a few companies have permission to dock there. Most agencies subcontract the day to a third-party company.
We booked through VRM (Viviendo Riviera Maya), but it was Ocean Tours Mexico that handled the tour. Contoy is a little paradise. We were accompanied by multilingual guides, including French speakers, throughout the day. Steffy gave us info about the island during a short walk on the marked trails, and Leño Tlatemoa kept the mood up on the boat rides with music and dancing. Isla Contoy is *truly* stunning, and the lunch was delicious: grilled fish and chicken, guacamole and tortilla chips, rice, fruit, drinks (everything is brought and taken back by the guides). The snorkeling part was pretty disappointing if you’ve done it in Cozumel, though. The stop at Isla Mujeres isn’t very interesting either—it’s too short to explore, and the island is *extremely* touristy. Still, the excursion was very well organized, and we had a great day (2970 pesos per person).
Saturday, July 18:
We wanted to go snorkeling in Cozumel but thought the prices from French-speaking agencies were too high. Plus, for snorkeling, we figured we didn’t *need* a French-speaking guide.
So we found a much cheaper solution by taking the ferry from Playa del Carmen ourselves and choosing an agency in Playa. The round-trip ferry cost 663.50 pesos per person. Then we took a taxi to the snorkeling boat (100 pesos). The agency we chose is called Mystic Snorkel—they don’t have a physical office. The tour cost 1400 pesos per person. It was a small boat, but that day we were the only ones, so we got a private tour at the group rate. We stopped at 4 different sites, all very different and beautiful. We saw all kinds of fish, corals, a nurse shark, and turtles. El Cielo, with its huge starfish, is *exceptional*. If you’re going snorkeling in the Yucatan Peninsula, this is *the* tour to do—the other sites are pretty "poor" in comparison.
Sunday, July 19:
Morning dive with Triton Diving. I chose the Cozumel dive option. Great experience.
Booking via WhatsApp was easy. On the day of the dive, Selene, who speaks French, was our guide. She’s *very* attentive to the group’s safety. The briefings are clear and precise. In Cozumel, we did 2 very different sites: the first was a drift dive with lots of life—beautiful corals and fish. The second was a wreck, the C53, a 56-meter boat you can enter. Not much marine life, but a beautiful wreck intentionally sunk for divers—still in great condition. An unforgettable moment. Selene even took videos during the dive, which the club sends you for free afterward. I’d *highly* recommend this club.
Just so you know, in Playa del Carmen, the beaches were full of sargassum during our stay, despite barriers and daily cleanup. Locals told us the problem is getting worse and the sargassum is arriving earlier in the season. Tourism has taken a *big* hit this summer, and they’re wondering if tourism can even survive the sargassum season anymore. A lot of tourists are heading to the islands—Isla Mujeres and Cozumel—to enjoy the beaches, as the west side of those islands is sargassum-free.
Monday, July 20:
Colectivo to Puerto Morelos. First, a colectivo toward Cancun that drops you off between Puerto Morelos town and Puerto Morelos beach (40 pesos per person), then another from that junction to the beach (10 pesos per person).
In Puerto Morelos, we’d booked a room via Airbnb at "Piedra del Caribe." *Best* place we stayed in Mexico. It’s an aparthotel. Our room was ready before check-in, so they let us in early. The place matched the description—spacious, with a comfortable king-size bed. The shower had *great* pressure, which isn’t a given in Mexico. The staff was super friendly and welcoming. They let us use the pool, restrooms, and rooftop shower after check-out while we waited for our ride to Cancun Airport. They even kept our luggage. I *highly* recommend this place.
In Puerto Morelos, there was *way* less sargassum than in Playa del Carmen—it was actually swimmable.
We did the snorkeling tour with the fishermen’s cooperative for 450 pesos per person for 2 hours. The reef is close to the beach (you’re not allowed to swim there), so the boat ride is short. It’s not as pretty as Cozumel, but it’s nice and affordable. On Puerto Morelos’s page, you can also access a small, not-very-well-preserved reef. There’s also a cenote in the sea where fresh water mixes with saltwater—the water is murky there. We had a great dinner and excellent cocktails at "La Choza del Puerto."
Tuesday, July 21:
Wandered around Puerto Morelos (check out the church and read everything—it’s entertaining!), relaxed by the hotel pool, and left for Cancun Airport by taxi (400 pesos) booked via InDrive to head back to France.
Our highlights:
- Holbox
- The whale shark tour
- The cenotes
- The local flora and fauna (so present!)
- Isla Contoy
- Cabo Catoche (except for the snorkeling)
What we liked least:
- The bioluminescence (barely visible despite good conditions)
- The food—we found it not very diverse in taquerias
- The constant tipping
- The lack of water pressure in showers (fixed, wall-mounted, no hose or showerhead)
Don’t hesitate to ask if you have any questions while it’s still fresh in our minds.
Traveling with just one spare pair of underwear, considering a hot shower a miracle, never staying in the same place too long by sleeping wherever night catches us, taking whatever local, improbable, and rickety transport we can find—this is the DNA of us wanderers. Except this time, the script for our movie is going to be a whole different genre. On paper, the destination doesn’t exactly scream epic adventure: Réunion! And what’s more... we won’t be two, or four, or even ten. We’ll be a solid thirty. All from the same family. Yes, thirty. At this point, it’s not just a trip—it’s a summer camp on the move! Why inflict this on such a peaceful island? Because my brother decided to get married there with his lovely bride. A great idea, you might say... especially when it involves relocating the equivalent of a small Ardennes village 10,000 kilometers from home for three weeks! So who’s stepping up to be the guide and wave the little flag?
So, for an exceptional trip, exceptional stories! Don’t worry, the debates at the supermarket over whether to choose plain chips or roast chicken chips, the beach picnics washed down with ti’ punch, and other rougail sausages to digest by the pool will only make it into the family archives. Here, I’ll stick to the tales of our beautiful escapes, the ones where we explore the wild corners of this little volcanic rock planted in the middle of the Indian Ocean. So where exactly are we headed?
For the first week—the subject of this first installment—we’re taking it easy. We’ll start by rediscovering the coastline, from the Souffleur in Saint-Leu to the Hermitage lagoon, before a little trip to the Cirque de Cilaos and its legendary road with 400 turns, just to get our legs warmed up.
This travel journal is therefore intended solely for my photos, to present a consistent style.
All the shots were taken with a simple Samsung Galaxy smartphone and with whatever was at hand.
All stays combined, I’ve spent the equivalent of three years at most in Thailand, and I’m not a big expert on the country.
However, after many trips, lots of reading on VoyageForum and other sites, and conversations with many locals as well as expats, my view of the country is becoming clearer, though it’s constantly evolving. You never stop discovering and learning.
I guess I wanted to piece together a puzzle, mainly for those who want to get an idea of the country here and for those who miss it.
I don’t know if this minimalist sharing will interest anyone, but it’ll do me good to put it together. After so many months without traveling and then these other long months with VF closed, there’s plenty of material available.
There’ll be a mix of places, periods, and subjects, but it might well be intentional.
I suspect many Thais have dogs because they make excellent guards for the home. Nothing better to deter burglars or to signal the presence of a snake. You’ll often see Thais tapping the top of their dog’s head, but don’t be fooled: it’s a sign of affection from them. Judging by the dogs’ reactions, they’re used to it.
Thailand is one of the countries on the planet where rabies is still present, so keep that in mind. It’s not just bites that can be dangerous, so don’t let just any dog lick you. Especially on a wound, of course.
Even though dogs often fear humans—this dangerous and unpredictable predator—we still need to stay cautious.
Be careful when walking into alleys because the dog will defend its master’s big property, be careful at night, and be careful when they’re in packs.
It sometimes crosses our minds that Thailand isn’t really made for walking around, and dogs are one of the reasons.
That said, it’s not uncommon to see them chasing bikes or scooters. Cars, though, are much rarer—they’re too big.
It seems Thais prefer to give their dogs freedom by not locking them behind gates. Though sometimes the gate is closed, the little side door is wide open. Oh, and sometimes there’s no gate in front of the property, or it’s been broken for years.
You’ll often see dogs sleeping on the side of the road, sometimes right on the road. When you arrive, they move aside nonchalantly—or not at all. It’s less funny when they suddenly appear from thick vegetation, which reminds visitors not to drive too fast. As a result, you’ll notice that dogs with injuries or missing legs aren’t that rare.
Since they believe in reincarnation and respect for all forms of life, they don’t chase dog packs away too much, and they don’t sterilize them enough. Seeing a small pack roaming freely in the countryside, you might think it’s best not to cross paths with them at the edge of a field.
A darker side of this is that euthanasia isn’t often practiced. Twice, we saw dogs at temples on the brink of death, enduring terrible suffering. No one did anything about it. The image (and the smell) of one of them, dying and emitting the stench of death, still comes back to me sometimes.
Some of you may have seen the YouTube vlog of a French woman living in Phuket who was given a little pig by her Thai friends. The well-fed animal quickly became a happy, enormous beast with its own garden. Yet, it didn’t take long for it to fall seriously ill and become incurable. In her video, the French woman described how difficult it was to find a vet willing to perform euthanasia.
You’ll often see bowls by the side of the road. Thais leave food and water in them for stray cats and dogs. Overall, they have a big heart for animals.
If you ever pop into a shopping mall, you might see people pushing their small dogs in strollers. It’s not a gimmick—it’s just that these strollers are provided for customers to put their pets in, otherwise you can’t bring them inside. It looks a bit odd when you expect to see a baby.
It was winter, a winter with beautiful weather,
A season that only exists in the southwest of America,
I remember very well what I told you that morning
A month ago... A century ago, an eternity ago...
We’ll go... wherever you want, whenever you want...
Well, yeah, back from our adventure in our enchanting American West just a month ago, we’re already taking a bite out of one of its lesser-known competitors. "Flo, if you had to pick just one reason to justify your love for the U.S., what would it be?" The greasy, dripping burgers? No, I don’t think I’m going out on a limb by saying it’d be the wide-open spaces... And that’s exactly what our new quest is taking us to—a land on the other side of the globe where the horizon also seems endless, where silence tastes like salty wind and sand, where freedom is measured in kilometers of desert tracks, where the GPS is mostly there to confirm you’re lost in the middle of nowhere... Add to that magic formula the fact that you’ll see more zebras, giraffes, wildebeest, and elephants than people per square kilometer, and you can imagine us setting foot in Southern Africa for the first time, more precisely at the small airport in Windhoek, capital of... of...? Brush up on your geography, damn it! We’re landing in Namibia!!!
To be honest, Namibian landscapes have been flirting with me for ages. So how did I resist this island of temptation for so long? First, the budget. Let’s just say that for the same amount of effort (and kidneys), the bank lets you choose two other adventures almost anywhere else on the planet. Then there were my girls. Yeah, back then, they were too little to dose up on Malarone, the only malaria remedy at the time... Long story short, ten years later, all the planets have aligned. First, I won the Euromillions! Well, almost... Let’s just say my girls are now old enough... not to take Malarone, but to stop following me on all my adventures! Jackpot! "Flo, how about a little two-person caprice, just the two of us, tackling the Namibian tracks?"
As we landed on the runway, first wow effect: The horizon is immense. It’s flat as can be, incredibly flat... So much flat space! Did I mention it was flat?... Looking into the distance, it feels like your gaze could circle the Earth without hitting a single obstacle—until you end up staring at your own backside. "Oh, what a nice view!" Well, it’s the first time I’ve seen my butt from this angle! Touching moment... Sorry, I’m rambling—must be the exhaustion from the three-flight marathon we just powered through via Ethiopia and South Africa... And yet, no time to philosophize about my anatomy. As usual, we want to rack up our first kilometers to be front and center at dawn tomorrow. After wrapping up the tedious Namibian immigration formalities and meeting the 4x4 that’ll be our companion day and night for the next fifteen days, we’re off! We’re not exactly fresh, but we’re ready to tackle the next five hundred kilometers in night mode, cruise control set due south! Just outside Windhoek, the local wildlife—a jackal—welcomes us with a smile: "Welcome to Namibia!" That’s what it said! Honest... Okay, first endless straight road, first flaming sunset, first corrugated dirt track, first Milky Way with zero light pollution... You get it—it’s definitely the day of firsts... First night camping, too, in the big trunk of our Toyota Fortuner parked by the side of the track... The real adventure, the kind that smells under the arms, can finally begin...
Here we go—finally, the big day has arrived! A trip the whole family (my two kids, my husband, and me) had been looking forward to for so long.
To keep it short, we left from Nice, arrived in Namibia on June 25, 2025, and left again on the 21st—four weeks later.
We used an agency for all the camping reservations, activities, and the car rental. At least that side of things was taken care of. Michaël was our contact throughout the planning and the trip itself.
We spent our first night at Londiningi BB. A bit out of the city center but very quiet. The rooms were spacious and clean, and we could eat on-site that evening. Perfect for recovering from the flight.
This travel journal is our second on VoyageForum, following last year’s where we recounted our four weeks in Vietnam.
The goal remains the same: since some members on this site share tips, experiences, and great deals that help us prepare for our trips, we do the same after returning—both to give back a little and in the hope that our experiences might be useful to others in some way.
Our route was as follows: Bangkok, Siem Reap, Krabi, Suratthani, Koh Phangan, Koh Tao, Chumphon, Bang Saphan, Prachuab Khiri Khan, Sam Roi Yod, Hua Hin, Phetchaburi, Bangkok.
Beyond rediscovering Bangkok, our objectives were the long-held dream of seeing Angkor and exploring southern Thailand, much of which isn’t overly touristy.
A quick big thank-you to Barbot, who took the time to answer several of our questions.
12/07/2013
The cheapest flight we found earlier this year was a Paris-Bangkok route with a layover in Moscow for 1440 €, total for two people.
So, this time we tried Aeroflot. Airbus A318 for the first leg, A330 for the second. Nothing particularly annoying to report—the passengers were very calm, the cabin temperature was comfortable, and we had enough legroom.
That said, the quality of the meal trays was pretty mediocre, and the flight attendants weren’t exactly comedians.
We’d like to remind everyone that it’s best to exchange as little money as possible at the airport upon arrival, since the rate is about 5% worse than at city banks.
Of course, we made sure to take the airport exit where you can catch official taxis to avoid getting scammed. So, we queued up, a little lady gave us the ticket, and off we went with the driver.
Generally, this system works well because these drivers are registered, know their duties, and the risks they face if they break the rules. Except that day, right off the bat, we got the scammer of the day. His first move was to snatch the ticket from my wife’s hands—the one you’re supposed to keep in case of a complaint. My husband saw it, but after a full day of travel, we were a bit out of it, and honestly, there was no reason to be suspicious. But once we started driving, the guy refused to turn on the meter. We insisted more and more firmly, but nothing. So, I used the famous method of opening the door and starting to step out of the car. At 40 km/h, that scares the driver more than the passenger. He finally turned on the meter, but that didn’t calm him down—quite the opposite. For the next half-hour, he ruined the ride by demanding extra fees here and there. Having dealt with several scam attempts last year in Vietnam, this wasn’t exactly new, and we were proud of ourselves for staying pretty zen. Still, this guy was a little scary—he was completely wired and aggressive. Honestly, it was hard not to think he was on something. He’d be perfect for a *Scarface* remake. When we finally arrived at the hotel, he followed us to the entrance. We paid the two tolls (25 and 45 baht), gave him the usual 100 baht extra for the ride, and stayed polite but firm. So, meter: 245 baht + 100 baht + 25 and 45 baht for tolls—we paid the exact amount, no way we were tipping this guy. He left furious, but he was already like that before picking us up... Anyway, avoid Mr. Chartree Chidchen, number 089 826 7308, car E2663!
We were so relieved to finally settle in at Feung Nakorn Balcony hotel in the temple district. 42 € per night, great reception, all the staff is friendly. The AC works fine, the bed seemed hard at first but turned out to be comfortable. The hotel is quiet, away from the nightlife, but at this time of year, many places are less crowded than in high season. Even with a nice fish pond and outdoor breakfast area, it’s a decent hotel, though we felt we could’ve found something better.
After a night on the plane, the first afternoon is always a bit of a slog. We napped for a few hours, and when we woke up—guess what—we were starving. We visited a temple across from the hotel (nothing special) and then decided to take the Chao Phraya Express, the river shuttle that serves many piers along the river. It was a really enjoyable experience. The steel gangway wobbles when you board and disembark, the boat sits low in the water, and sometimes you get splashed. During peak times, you’re packed in like sardines, but most of all, there’s that exotic urban landscape passing by, especially the temple rooftops.
At that exact moment, the boat was packed. We didn’t see a ticket booth at the pier, and we tried in vain to pay the few baht for the ride. The cashier on the boat was too busy, and another employee we called didn’t have time to help us. Oh well, we weren’t going to force the issue. Still, this mode of transport is super practical for avoiding traffic, and at the piers, the lines with station names are clearly marked, with colors matching the flags on the boats. Combined with a map like the *Routard* guide, it’s easy to navigate.
We easily made it to the restaurant *Harmonique*, located near one of these piers. It’s a unanimous favorite on this forum, and let us tell you—it’s well-deserved. What a wonderful experience that evening! We only saw the outdoor gazebo because there was no way we were dining inside. It’s not flashy, so those looking for a luxurious setting should look elsewhere.
That night, the staff was a bit slow, and we had to track them down several times to move things along. But oh, my friends—what a feast on the plate! Start with the appetizer platter for two at 250 baht, featuring four specialties, each more tempting than the last, followed by their famous crab curry for 200 baht. There’s *so much* crab in there! The dish is so delicious and rich that when you finish, you feel—how to put it—like it was almost *too* good, to the point where you’re almost put off eating for days. And also, oh yes, we *will* be back. Their satay chicken is just as amazing, and it would be a crime not to mention their generous dessert with ice cream, warm banana, and chocolate, plus their *excellent* almond milkshake.
Later, we took a taxi to Kao San Road, mainly to book a Ko Tao-Chumphon trip for 600 baht per person at the Lomprayah counter. In hindsight, we should’ve booked all three of our trips there right away.
Kao San Road is *ultra*-touristy—better for younger crowds, but it’s still worth seeing. There’s rock ‘n’ roll, hippies, and crowds everywhere.
We walked back to the hotel, and when we got a little lost near a canal, a really nice older Thai man spontaneously appeared out of the night to kindly point us in the right direction.
Finally, a real long night of sleep ahead—we cranked up the AC. Sweet, the vacation has begun!
Hi there,
I just got back from a trip to Sri Lanka from December 18th to January 1st with 2 adults and 2 kids (12 years old).
If it helps, here’s my itinerary.
We left on December 18th from Madrid with Qatar Airways. No complaints. I booked my tickets back in March for 800 € per person. (I flew from Madrid because I live near the Spanish border and was too worried about strikes in France.)
We arrived on December 19th at 4 PM (local time). Before leaving France, I’d booked a taxi through MyTransfer for 59 € to Sigiriya. A van was waiting for us at the airport exit.
A never-ending 3-hour drive to Sigiriya. We stayed at Samana Guesthouse—very simple, clean, with a pool and an excellent Sri Lankan breakfast. Shower and straight to bed.
Friday, December 20th: Beautiful weather, but very humid and hot. We visited Lion Rock (36 € for adults) and then Pidurangala.
I loved both sites—they’re a must-do in my opinion.
Spent the late afternoon by the pool.
Saturday, December 21st: Another gorgeous day. The guesthouse manager offered us a free 2-hour tuk-tuk tour. We first visited a lake, rice fields, the temple, and the Sigiriya market, plus the usual tourist trap—the botanical garden (no pressure to buy anything at the end).
Then we took a tuk-tuk to Dambulla Temple, the Golden Buddha, and the wholesale market.
Sunday, December 22nd: Still beautiful weather. I’d booked a taxi for 8 AM. We did all the long trips by taxi to save time. I’d ask for prices from 2 or 3 WhatsApp taxi agencies 2 days or the day before—super responsive, always got replies within 5 minutes. We headed to Ella (4-hour drive) for 22,000 LKR.
Arrived in the afternoon at Rest Full Homestay—a small, family-run guesthouse. Clean, cozy, and an amazing Sri Lankan breakfast.
In the afternoon, we went to Nine Arches Bridge. It was a Sunday, a Sri Lankan holiday, so it was *packed*—mostly locals and very few white tourists! Even though it was crowded, it was cool because it was all Sri Lankans. We waited an hour for the train. It’s worth seeing, but honestly, I didn’t think it was that amazing.
Then we headed to the station to check if we needed to book tickets for the train to Haputale—turns out, no.
Monday, December 23rd: Beautiful weather. We hiked Ella Rock—a gorgeous trek. The final stretch is steep but shaded, so it wasn’t as tough as I’d read. The whole hike is stunning from start to finish. We saw the train pass twice (one blue, one red) and lots of women picking tea.
After that, we did Little Adam’s Peak. It’s not hard, but it was *packed* with tourists—meh. Luckily, at the top, you can walk a bit farther (down one side and back up) to get some space to yourself.
What I *didn’t* like was the commercial vibe at the big café/restaurant with a pool at the entrance of Little Adam’s Peak. Loud music, all that money being made right next to little souvenir stands run by Sri Lankans or tea-picking women. Felt off.
Ended the day buying souvenirs at one of the few shops we found during the trip.
Tuesday, December 24th: Beautiful weather. Took the train to Haputale. We got to the station 30 minutes before the 9:30 AM train. We could’ve taken 2nd or 3rd class—I went with 2nd (160 LKR per person).
It was crowded, but we managed to get seats—first 2, then 3. Only a 1-hour ride, but I *loved* it—windows and doors open the whole time.
Arrived in Haputale around 11 AM, and the mist was already rolling in.
We walked to our guesthouse, The Mist Holiday Bungalow. Simple but clean, with a great view of the tea plantations. The owner’s wife is Vietnamese and used to work for French tour operators, so her French is still pretty good—helpful for us since our English is terrible. They booked us a tuk-tuk for 4:45 AM the next day (2,000 LKR) to Lipton’s Seat.
Spent the afternoon wandering around Haputale. Not much charm, but there’s a nice fruit and veggie market and a short walk through the tea plantations.
Wednesday, December 25th: Beautiful weather. The tuk-tuk was on time to take us to Lipton’s Seat. We were the first ones there—the sky was just starting to turn pink. In the end, only about ten of us watched the sunrise. The guesthouse had packed us breakfast, and we walked back down (half on the road, half through the plantations). Didn’t see any tea picking since it was Christmas, but the walk was still incredible. We took detours through villages full of kids.
After that, we visited the tea factory. The tour was really interesting, and we took the bus back down to Haputale. Such a great moment—whole families were heading to mass, dressed up and made up. All so beautiful.
At noon, we left for Udawalawe National Park. Taxi for 14,000 LKR. Stayed at River Inn Safari Cottage. *Warning*: It’s the same place as Eagle Safari Cottage. I don’t recommend it. We’d always stayed with families before, but here it was just staff—totally different vibe. The pool was nice but not very clean (water was murky). The bungalow was big and fine, but it was brand new—so new the asphalt floor wasn’t fully dry. It’s in the middle of nowhere, so we had to eat on-site. Couldn’t leave a review on Booking because they never confirmed we’d stayed, and they canceled our reservation the next day.
Thursday, December 26th: Beautiful weather. I’d booked a safari through the hotel for 5:30–10 AM for 54 USD. Honestly, yes, there are a lot of jeeps, but it was great. The kids loved it—we saw everything there was to see.
Left by taxi at 11:30 AM for Welligama (12,000 LKR).
We didn’t stay in Welligama city but at Coconut Beach, between Welligama and Midigama. *Total crush* on the guesthouse: Sky Mountain Café with View. Such a lovely family. The mom makes amazing meals at reasonable prices. The view from the hill over the sea is unreal.
Spent the afternoon walking along the beach.
Friday, December 27th: Beautiful weather. My kids are surfers. Unfortunately, there weren’t any boards their size to rent at Coconut, so we took a tuk-tuk to Welligama Bay (1,000 LKR). They surfed from 8 AM to 5 PM—rental was 5,000 LKR for the day. Meanwhile, we walked the beach and swam. Water was 29°C.
Saturday, December 28th: Beautiful weather, rain from 4 PM until midnight. Same surf day. They were so well-behaved the whole trip, so this was their reward.
Sunday, December 29th: Beautiful weather. Beach day at Coconut. *Warning*: It’s a reef break. For surfers, there are three spots (Coconut Left, Middle, and Right). The boys bodysurfed (with fins) all morning, and at 1 PM, we took the bus to Hikkaduwa.
Stayed at Hotel Universal Beach. Nothing special—right on the water, but the rooms were dark even though they were clean. The manager was super nice, but the rest was meh, and breakfast was mediocre compared to what we’d had before (2 eggs and 3 slices of toast). Plus, it was late—8 AM.
First impression of Hikkaduwa wasn’t great—way too many Russians for our taste.
Monday, December 30th: Beautiful weather. Spent the whole day exploring. Turtle Beach, then the other side of the beach (toward Galle) near the fishing port. The beach there is much wider, with scattered hotels and super quiet. It’s beautiful—I should’ve booked somewhere in that area. Ended up having a great day away from the crowds.
Tuesday, December 31st: Overcast, then beautiful, rain at 4 PM. Had to end the year (and the trip) with some surf. Rented boards for the kids (3,000 LKR per board for the day). Bad luck—the waves were on a reef break but small. Not great for them, but no big deal. They still got out of the water by 2 PM. Walked the beach (which is gorgeous), had a juice, and went for a swim. Then back to surfing in the rain at 4 PM.
Wednesday, January 1st: Left by taxi at 5 AM (18,000 LKR). Flight at 10 AM. Arrived in Madrid at 8 PM.
I could have titled my travel journal like Carmen: "Some trips are born twice." Indeed, we had considered this destination back in February 2020. However, an honest tour operator advised us against traveling at that time due to the climate. So, we gave up and opted for Guatemala instead (see "On the Mayan Lands" on this site).
So, why this title? When I was in primary school, over 65 years ago, the illustrations in my history books (Machu Picchu) and geography books (Lake Titicaca) made me dream, and those images stayed in my mind. It took until 2026 to finally make this dream come true!
We prepared our trip with Tout Pérou, a French-speaking "agency." Everything was handled via email and WhatsApp exchanges with our contact: Laurent, who was both competent, friendly, and full of good advice.
For 200 €, Tout Pérou provided us with drivers and guides whenever we wanted, helped us buy our domestic flights (cheaper when purchased in Peru), booked shuttles between airports and hotels, and got us a discount on the train ride to Aguas Calientes, as well as on the buses between Chivay and Puno and between Puno and Cusco. In short, Laurent took care of all the logistics and the Machu Picchu tickets. It was up to us to book our hotels. Tout Pérou provided a list, but we weren’t obliged to follow it. Another advantage of the package: we didn’t have to pay in advance; we paid the service providers directly day by day.
We didn’t meet Laurent in person because he was on vacation in Europe. Before his departure, he gave us a briefing, provided a summary table with the entire program, the service providers, their phone numbers, their fees, the schedules, and gave us plenty of advice (money, exchange, safety, etc.). After returning at the end of our stay, he kept checking in on us.
Lastly, we had also gathered information from Arnaud Lagadec, who runs a hotel in Cusco and offers tours of the region. He gave us a lot of useful information. Another contact: Thomas Montaigne, very friendly, who runs an agency in Arequipa (Agence Pérou Exclusif).
Day 1 – Paris to Lima
Foreword
I’ll share our trip without any pretension—I don’t have the talent of some contributors on this forum—and I’ll illustrate it with a few photos (taken with an ordinary smartphone). My comments are personal and only reflect my own views. So, please be kind! Feel free to comment on my story as you like, but let’s avoid pointless debates.
Even though we live in the south of the Paris region, true to our habits when the flight is in the morning, we chose to spend the night before our departure in a hotel near CDG and parked our car in a parking lot in Garches. This way, we avoid the stress that often comes with traveling around Paris (accidents, roadworks, traffic jams, etc.).
Check-in and border control went smoothly on that Sunday morning. Our Air France flight was uneventful. In Lima, border control took a particularly long time, and for the first time, we didn’t get an entry visa stamped in our passports.
As planned, a driver took us to the Miraflores district, where our hotel was located. We were surprised by the numerous signs about possible tsunamis, having forgotten that Peru is prone to such events and regularly experiences earthquakes. We’d see the consequences of these during our journey.
Exhausted from the early wake-up, the 13-hour flight, and the 7-hour time difference, we had dinner at the hotel before a restful night.
Note that this day was Peru’s presidential election day. As a result, we weren’t served beer—the sale of alcohol was banned that Sunday.
We did the Langtang trek (hike) from September 10th to 17th, with the first and last days being the trip from Kathmandu and back—so 6 days of actual walking. It’s a fairly well-known trek but certainly not as famous or crowded as those in the Annapurna or Everest regions, which is why we chose it.
In theory, it’s mandatory to have a guide for this trek. In reality, it seems there are ways to bypass the regulations: we met at least two people hiking without a guide—a South Korean, a New Zealander, and possibly also a couple of English women and an American couple, though we’re not sure if they had a guide.
The agency we booked with had told us it was an affordable trek for relatively older people in good shape—which is our case (I’m 72 myself). I have to say upfront that we found it quite challenging, maybe because we didn’t have good weather—it was the end of the monsoon season. To be clear, no matter your fitness level, I’d say doing this trek in the middle of the monsoon season would be suicidal.
Day 1 – Journey from Kathmandu to Syapru Besi
On Monday, September 8th, there had been violent protests in Kathmandu against the government, which had, among other things, blocked access to social media and been accused of nepotism and corruption. There were 19 deaths. The situation was very tense on the day of our departure, Wednesday the 10th. The agency warned us that public transport was very unreliable. So, we decided to take a jeep, at an additional cost of $100 ($160 minus what was already budgeted for the bus).
We left a little before 7 a.m. and it took us a good hour just to reach the outskirts of Kathmandu. Along the way, we saw several houses and vehicles set on fire by protesters.
The road to Syapru Besi is only 120 km, but it’s frankly awful. It’s always narrow, winds through endless mountains, and the shoulders range from bad to confusing to nonexistent. Several sections are just dirt tracks. We didn’t regret opting for the jeep, as we could stop several times at our convenience—if only to let Y (my Thai partner) throw up everything she had. She’d taken her usual motion sickness medication, but the constant turns, accelerations, and braking eventually made her terribly carsick.
In Nuwakot, we stopped for breakfast at a nice little restaurant, Jimbu. It was around 8:30 a.m., and we’d barely covered 60 km. The restaurant has a lovely garden overlooking the Trishuli Ganga, the river flowing down from Syapru Besi. First photo: the river in the bottom right corner, mist and clouds over the mountain on the other side.
An hour later, my second photo: the hills along the Trishuli Ganga. You can see the different crops—lush green rice paddies in the lower right and corn, already yellowed and likely harvested, in the foreground on the left. And of course, the mist and clouds through which you can glimpse the mountain on the other side of the river.
When we started looking for a summer destination a few months ago, our first criterion was to avoid extreme heat and heatwaves. We had already been to Norway two years ago and are considering going back in the future for other occasions. So, we had some fun asking ChatGPT which destinations enjoyed a mild climate during the summer without going too far. Among the list provided by the AI were the Canary Islands... The idea of a place we wouldn’t have thought of first, both not too far away and exotic enough, appealed to us: “Hmm, why not?”
This destination had never really attracted me, though Magali was a bit more interested. Five years earlier, COVID had caused a short break in my professional activity, and I had planned a trip because the flight price was attractive, and I was looking for a destination different from what usually appeals to me, more than out of deep interest. From a distance and with a social judgment I acknowledge (it’s not great, but it’s not completely wrong), I had the image of a destination for party-goers enjoying the sun without the slightest interest in local culture, with concrete coastlines and denatured landscapes—everything I detest the most. Still, I had done some quick research on the different islands and spotted Lanzarote for its beautiful volcanic landscapes, hiking trails, beaches, and the impression of a good balance between activity and fewer crowds than Tenerife or Gran Canaria. Then I dropped the idea of going, without ever reconsidering traveling to the Canaries...
Until now! Because we started researching the different islands of the archipelago to see which ones might appeal to us the most. It was La Gomera, the third smallest island of the archipelago, more praised for its hiking trails and preserved nature than for its beaches, away from mass tourism (fifty times fewer tourists than Tenerife) but still a bit more developed than its wild neighbor El Hierro, that caught our attention. Contrary to what might be suggested later, I’m not at all addicted to AI, but I use it from time to time to synthesize quick research or simply for experimentation. Since ChatGPT had started anticipating my tastes lately as if it had become my buddy (often successfully, sometimes off the mark), I asked which Canary Island would suit me best for a trip with my family. The tool answered first with... La Gomera. So, I tested it and teased it a bit to see if this suggestion was well-founded, as the method sometimes makes it contradict itself. But no luck: “You’d appreciate the wild nature of El Hierro, but with family, you’ll find little activity for the kids. You won’t like the touristy vibe of the big islands like Tenerife, Gran Canaria, Lanzarote, and Fuerteventura. You could consider La Palma, but it’s really La Gomera that will suit you best, based on your interests and the criteria given.” So, we dug deeper into our research and were convinced without a shadow of a doubt that this island was the one waiting for us.
Without knowing it, we had Canarians in our circle who revealed their origins when they heard about our travel plans. One from Tenerife insisted we’d be better off choosing Tenerife (obviously...) because it also has preserved spots and that La Gomera, “you can explore it in two or three days, you’ll get bored quickly...” The other, a colleague from Gran Canaria who had never visited La Gomera, still recommended it without hesitation because it turned out her parents had just gone there on vacation: they loved it and had encountered few tourists. She also tended to think this destination was usually the subject of short stays, but according to what her parents told her, taking your time there was also a great idea. However, in our research, the idea that La Gomera is an island you can explore in three or four days max kept coming up. So, we considered combining its visit with La Palma or El Hierro, the other two that caught our eye. But hopping between islands by ferry represents a significant budget for non-Canarians, even more so for a family of four. Then, scrutinizing Google Maps, it seemed obvious that two weeks were too short to discover two islands as they deserve, and that there seemed to be plenty to see in La Gomera, given its very unique culture. After all, we read that some people spend several months a year there, others never even leave... Finally, these landscapes and this atmosphere, which seemed to us a mix of Europe, North Africa, and Latin America, tempted us. So, it would be two weeks in La Gomera, deal!
La Gomera is therefore the second... well, the third smallest island of the Canaries since La Graciosa was recently recognized as a fully inhabited island. It has the shape of a rough circle about 20 to 25 kilometers in diameter and has just over 20,000 inhabitants, half of them in its capital, San Sebastián de la Gomera, the only real town. Like its Canarian sisters, La Gomera is a volcanic formation that rose about 10 million years ago. The island is very mountainous and rugged, covered with red and black rocky landscapes. Geological activity has shaped, between the sprawling massifs that end in steep cliffs in the ocean, six coastal valleys with tropical vegetation that have favored human settlement. They divide the island like slices of a cake; from the north clockwise: the agricultural Vallehermoso, the rustic Agulo, the green, humid, and fertile Hermigua, the sunny capital San Sebastián de la Gomera, the southern and isolated Alajeró-Santiago, and the seaside Valle Gran Rey. They constitute the six municipalities (more like cantons to our French understanding) of the territory.
The large solidified magma massifs that shape the heart of the island have created a large depression more protected from the sun at its center, allowing the growth of a vast laurel forest, today grouped within the Garajonay National Park, La Gomera’s green lung, which has earned it the status of a World Biosphere Reserve. Its completely European appearance contrasts sharply with the rocky and tropical landscapes of the rest of the island. Thus, the climate varies greatly from one point to another on the island: in summer, you can quickly go from a dry and sunny valley at 35°C to a humid forest area at altitude at 18°C.
La Gomera was populated late. As with the rest of the Canaries, human presence is thought to have begun about 2,000 years ago. Groups of animist Berbers, probably fleeing persecution, gradually populated the archipelago, especially the western islands and La Gomera, becoming its small aboriginal population: the Guanches (or later Gomeros). The animist and pastoral civilization of the Guanches thrived until the Spanish takeover in the 15th century, which, after a short period of harmony and mixing with the indigenous people, suddenly ended in bloodshed... La Gomera later became the “Columbus Island” after Christopher Columbus’s stopover, increasing the blending of populations. In the 20th century, many Gomeros emigrated to Cuba and other Latin American countries in search of a better life, bringing back a mix of cultures and traits quite palpable in today’s Gomeran culture. It is, however, in La Gomera that the vestiges of Guanche culture seem to have left the most traces, in the language, gastronomy, social practices... Moreover, most Gomeros, especially in remote villages, have a particular identifiable type and proudly claim their ancestral roots, even making La Gomera a bit exotic in the eyes of other Canarians.
Perhaps that’s why it has never really wanted to develop its tourist infrastructure too much. If we set aside the tourists who visit for the day by bus or boat from Tenerife on a marked itinerary (and whom we ultimately rarely encounter), La Gomera has remained a hidden gem, a destination focused on nature discovery that attracts hikers, nature-loving divers, and scientists for its fauna and flora, and to a lesser extent, beachgoers who don’t seek overly developed coastlines. Tourist activity is therefore limited. Roughly speaking, you’ll find a majority of Spaniards, including a substantial number of residents from other Canary Islands, many Germans who have a particular fondness for La Gomera and spend long stays there or own second homes, to the point that the German cultural footprint is clearly noticeable in some places (it’s said to be Angela Merkel’s favorite holiday spot), and still quite a few French. The presence of other nationalities seemed negligible to us. Most travelers come mainly for hiking, but it’s also a prime spot for whale watching. Additionally, the seaside resorts of La Gomera—San Sebastián, Santiago, and especially Valle Gran Rey—are well-known destinations for hippies, especially German ones, ranging from chic boho hippies to old-school hippies who’ve been there for decades, quite similar to those you’d meet in India in Goa, Rishikesh, or Paharganj. Thus, practices like naturism, vegetarianism, and local organic production are quite well established in some areas.
Some practical info:
- The round-trip flight from Paris to Tenerife cost us 365 € per person (outbound with Transavia, return with EasyJet), including checked luggage and three seats reserved side by side.
- We chose two bases to explore the island: one week in Valle Gran Rey, reputed to be the most pleasant of the three seaside resorts, and one week in Hermigua, more mountainous and close to the natural park. We booked two houses with balconies and views: the first at 120 € per night, the second at 99 €.
- The round-trip ferry between Tenerife and La Gomera cost us 270 € with the company Baleària Canarias, including discounts for children aged 4 and 12, but I don’t have the exact details. It was a bit cheaper than with the other company, Fred Olsen.
- Finally, we rented a car through the agency Cicar for 360 € for 16 days, which comes to 22.50 € per day.
- Apart from that, we didn’t plan anything and decided the day before or even the morning of what we wanted to do. We didn’t invest in any paper guide on the Canaries, as information on La Gomera was scarce, but we used the very comprehensive site La Gomera Travel, a travel guide published by the Canary Islands Tourism Council, a real goldmine of almost exhaustive information on the island.
Alright, off we go for 16 days of adventure discovering La Gomera!
Last October, we landed in Marrakech to spend a few days with family exploring Morocco’s roads.
Transport: a rented Dacia.
Accommodations: small guesthouses.
Our first stop was just a few kilometers from Marrakech, at a lovely house perfect for relaxing and recharging before continuing. It’s called Bleu House, a little paradise on the outskirts of Marrakech. The welcome was very warm, with a beautiful pool and a lovely garden.
Next, we headed toward the Tichka Pass. The road has really improved in recent years—it’s much easier to drive now. No more getting stuck behind trucks, and today, the construction is practically finished.
Morocco has turned green after the recent rains. It’s a joy for the herds and shepherds.
I hesitated about writing this travel journal...
This summer, we only did the classics (the 3 northern parks and Zanzibar) and let a local agency take care of everything from start to finish.
No craziness, no risks, no sleeping under the stars, no self-drive, no venturing off the beaten path, no incidents, and not even any delays in the pre-planned itinerary...
But don’t think we were disappointed!
The whole family (there were 6 of us) came back with smiles and memories of great moments spent together.
So, if you're looking for a "classic" way to discover Tanzania, this is the place to be.
Our 2-week itinerary:
- Arusha (1 night upon arrival)
- Tarangire (1 night)
- Ngorongoro (2 nights in Karatu then Irmisigiyo)
- Serengeti (3 nights in Robanda, Togoro Plains, and Seronera)
- Zanzibar Stone Town (1 night)
- Zanzibar Matemwe (3 nights)
- Zanzibar Jambiani (3 nights)
Come along, I'm taking you to this country where it's so nice to wander and slow down...
This trip was in 2023, but when I wanted to write my travel journal, VF was still closed to contributions...
So, now that I've just finished my Japan travel journal here, I figured it was high time to honor this destination we came back from so enchanted.
Disclaimer 1: This is a written travel journal. There’ll be text! Too much, for some!
Disclaimer 2: This is an illustrated travel journal. There’ll be photos! Too many, for some!
I have to say, every time I try to discipline myself, to keep it shorter, to include fewer photos... I end up adding more. It feels like my dear Aunt Nicole, who exhausted us with her slide-show evenings in the 70s/80s, decided to take her revenge. The upside for you, readers, is that you can slip away anytime without offending Aunt Nicole. I won’t even notice!
Anyway, since I love maps, here’s one to give you an idea of where I’m taking you. As you can see, we only saw a tiny part of Laos (the areas circled in red); we only had 3 weeks for ourselves (my husband’s newly retired, I still work), and we prefer taking our time over rushing around like crazy.
In broad strokes, it was very classic:
First, we “settled in” at Luang Prabang (8 days), because we wanted and needed to.
From there, we took three days to venture a little further north—not far in kilometers, but as we know, distances aren’t just about km!
Then we flew south to Paksé, letting ourselves drift down to the 4,000 Islands while stopping by the pre-Angkorian archaeological sites.
We wrapped up with the Bolaven Plateau.
A few practical notes: We arrived via Bangkok, then took a Bangkok-Luang Prabang flight, having picked up our luggage in Bangkok to check it in for Luang Prabang. No issues—the Bangkok airport, which many of you know, is very well organized.
We got our visas on arrival in Luang Prabang. Quick, but to be fair, we were on a “small” plane, and the big flights had arrived earlier, so we weren’t too crowded in line!
At the end of our trip, we didn’t fly out of Paksé but from the nearby airport in Thailand, Ubon Ratchathani (a 2.5-hour drive from Paksé), then Bangkok and Paris.
You’ll notice we skipped Vientiane to stay longer in Luang Prabang. That said, there’s now a high-speed train between Vientiane and Luang Prabang—good to know—and soon the (Chinese) train will go all the way to Bangkok and even Kuala Lumpur!
With that intro out of the way, let’s dive into the heart of the matter.
To be continued: Slowing down the pace... in Luang Prabang
It’s an ancient city that breathes, a living spring.
Here, no kitschy signs like “I miss you in Fengyu,” nor mass-produced fake antiques.
The century-old houses still bear the marks of wind and rain; in the morning, you hear roosters crowing, and at dusk, smoke gently rises from the kitchens.
This city doesn’t try to please anyone—like the spring water flowing through it, it simply keeps living at its own pace.
Located in Eryuan County, in the Dali Prefecture of Yunnan, the ancient town of Fengyu is a nationally designated historical and cultural city. It’s nicknamed the “land of scholars and ink”—during the Qing Dynasty, the Fengxiang Academy produced four *jinshi* and eleven *juren* in the imperial examinations. The Bai families made studying and farming a true legacy. Even on market days, you’ll find stalls of calligraphy and paintings, while lintels and screen walls are covered with family mottos.
Fengyu was also an important stop on the ancient Tea Horse Road. It preserves the second-largest Bai architectural complex in China, just after Xizhou. The famous traveler Xu Xiake spent seven days here and compared it to the “peach blossom paradise.”
I’m inviting you on a stroll through my drawings—a completely subjective, far from exhaustive, and totally personal take, since it’s based on my own sketches. I put this travel journal together after returning in late 2024, mostly using felt-tip pens and pencils, with a few collages thrown in. I worked from our personal photos.
Let’s start with the shotengai...
Our first "wow" moment came as we stepped out of the subway in Asakusa, the Tokyo neighborhood where we’d booked our hotel for our first five nights. Exhausted after our long flight, we finally arrived and took an exit that led straight into a shotengai—one of those covered shopping streets that pop up in city centers and flourished between the 1950s and 1980s.
It was an instant aesthetic shock, like a close encounter of the third kind between the modern city, a typical Asian market with its street stalls, the vintage vibe of the arcade, the sheer abundance of goods, and the bustling crowd—a mix of tourists, pilgrims (thanks to nearby Senso-ji Temple), and locals (it’s a very working-class area).
In the end, it set the tone for a feeling we’d experience throughout the trip. Wherever we went, shotengai turned out to be fantastic spots for finding little restaurants, shops, or even fresh produce. Some are like real mazes, like in Kyoto, where we spent ages trying to relocate a restaurant we’d loved ;-)
In Kanazawa, the Omicho Market:
And in Kyoto, Nishiki Market:
Preamble:
Africa was calling to me, so a year ago, with our usual travel companions, we decided to return to the continent we love so much.
Where to go?
Uganda quickly caught our attention—wildlife we’re used to seeing, plus gorillas and the shoebill we missed in Zambia.
We got in touch with Paul, who’s been mentioned several times on the forum back in September, booked our flight tickets, secured the gorilla permits, and by early October, the most important things were done.
We still had plenty of time to hold our "prep meetings" for the final itinerary.
Three days before departure, I sprained my ankle (my weak spot, as you’ll recall from our Colombia trip).
I wasn’t in great spirits, but after a year of waiting, nothing was going to stop me.
We’d see how it goes!
Off we went for our new adventures
If you're looking for great tips and offbeat spots, if you love exploring uncharted parts of a country, if the exotic is your adrenaline, then move along!
Our 15 days in early May in this part of Turkey (a country I first discovered during a city trip to Istanbul in 2017) will only tread well-worn paths and revisit popular routes. Simply because I kept hoping until the very end that our flight to Jordan wouldn’t be canceled. Events in the Gulf proved me wrong, so we left with:
Zero preparation.
Not a single hotel booked (well, except the first one), no visits planned, just a flight ticket bought three weeks earlier. No guidebook, no app—just the desire to explore southern Turkey and Cappadocia, whose images and the chance to stretch our legs had caught my eye.
Oh, wait—I did bring along a new guide: Gemini! Yes, my friends, generative AI was my chief advisor throughout the trip for sites to visit, accommodations, routes, and even restaurants! An experiment I wanted to try to form my own opinion on using this new technology. And what better way to test it than a Turkish getaway?
The verdict? You’ll have to wait for the trip recap to find out!
The main idea of the trip is also relaxation.
So, the plan is Antalya for a few days, the Turkish Riviera for a few more, Cappadocia as the highlight, and a return via Antalya to wrap up the trip. And it was all planned by AI!
So, if you're ready, fasten your seatbelts—cabin crew, doors to automatic and cross check—boarding for Turkey now!
It often happens that we're asked what to visit in Belgium.
And the answers usually point to Bruges, Ghent, Antwerp, and Brussels—and rightly so, as these cities are well worth visiting ;).
However, Belgium, though small, isn’t just limited to these four cities.
I live in one of them (Brussels), enjoy spending time in the other three, but I’d like to highlight some lesser-known spots that could add to the trip for those who want to see a bit more or something different.
Between trips, I like exploring one or two corners of the country where I live.
Hence the idea for a travel journal of walks.
Most of the places I’ll talk about can be visited as a day trip from Brussels, whether by public transport or car.
In chronological order of the topics covered:
- The Gileppe Dam (Liège province) - message 2, page 1
- The Domaine de La Hulpe (Walloon Brabant) - message 3, page 1
- Mechelen (Antwerp province) - message 4, page 1
- The coast - message 5, page 1
- The Westhoek, from De Panne - message 6, page 1
- The Zwin, from Knokke - message 7, page 1
- Lier (between Mechelen and Antwerp) - message 8, page 1
- Mons (Hainaut) - message 9, page 1
- The Florenville region - message 12, page 1
- The East Cantons - message 13, page 1
- Dinant - message 18, page 1
- The Japanese garden in Hasselt - message 24, page 2
- Leuven - message 29, page 2
- Louvain-la-Neuve - message 32, page 2
- Ostend - message 42 (page 3) and message 166 (page 9)
- The floralies of Groot-Bijgaarden - message 43, page 3
- Halle Forest - message 44, page 3
- Pralines - message 54, page 3
- Charleroi - message 68, page 4
- Namur - message 92, page 5
- Le Bois du Cazier (Marcinelle) - message 95, page 5
- Couques and gosettes - message 96, page 5
- Liège - message 99, page 5
- Tournai - message 115, page 6
- Oudenaarde - message 121, page 7
- Meise Botanical Garden - message 124, page 7
- Tongeren - message 125, page 7
- Beersel Castle (Flemish Brabant) - message 126, page 7
- Brussels in lockdown (messages 150 and 154, page 8)
- Notre-Dame à la Rose Hospital in Lessines (messages 161 and 162, page 9)
- Westende (message 167, page 9)
I’ll keep updating this list as the journal progresses...



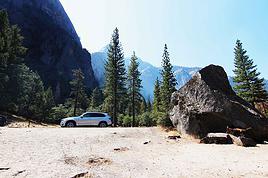
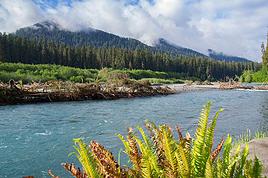
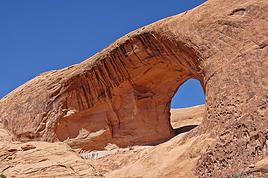
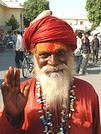
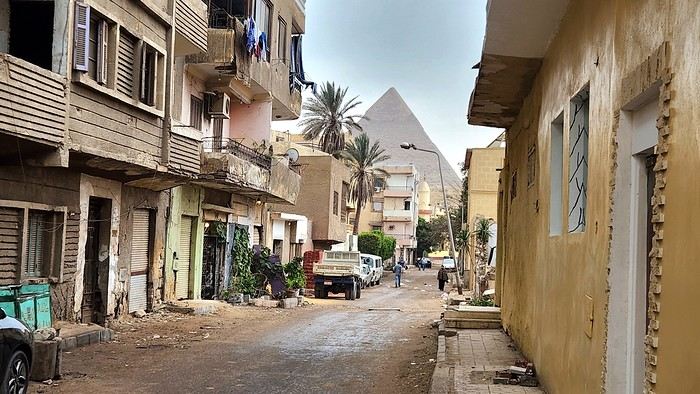
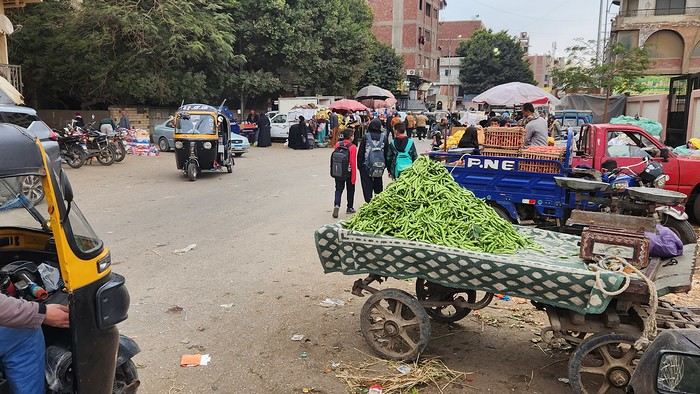
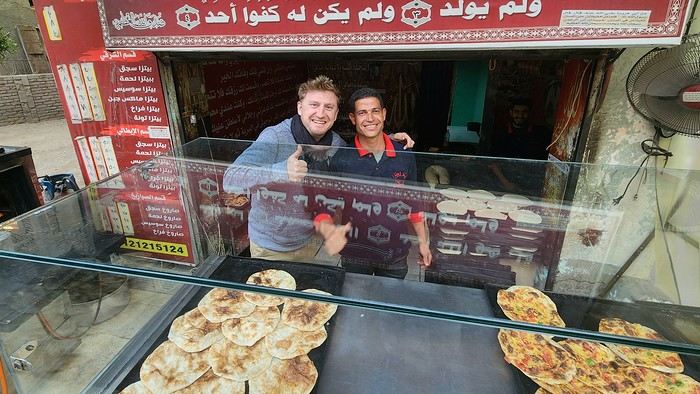
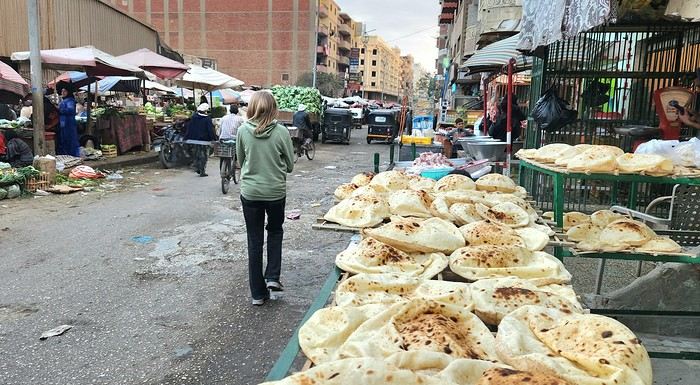
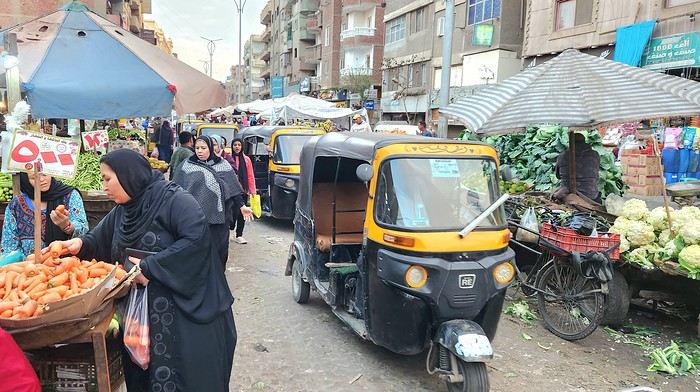
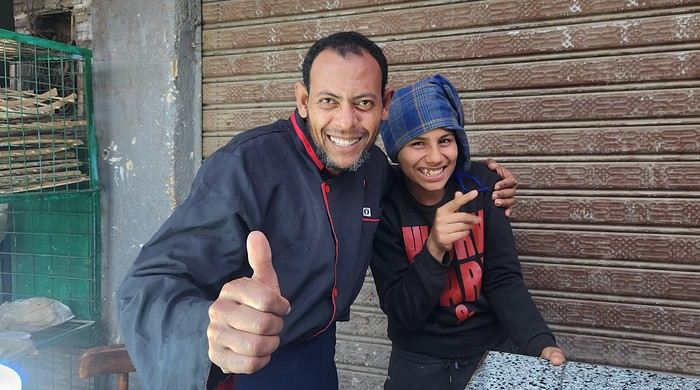
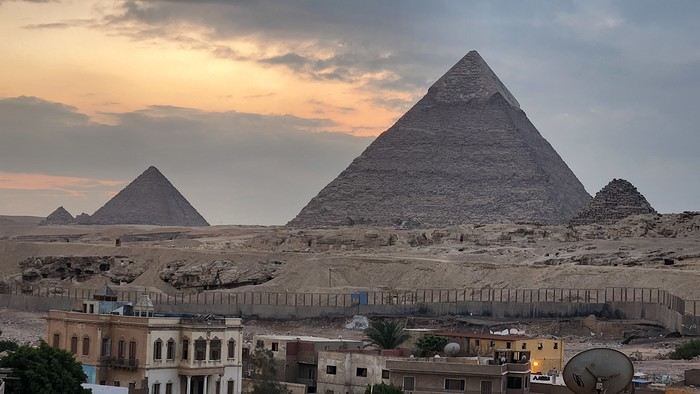
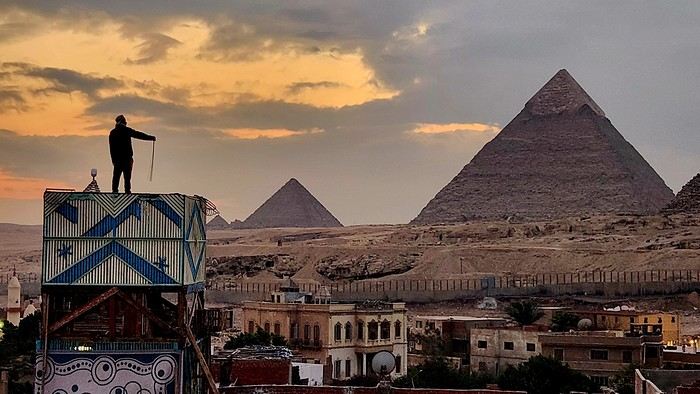
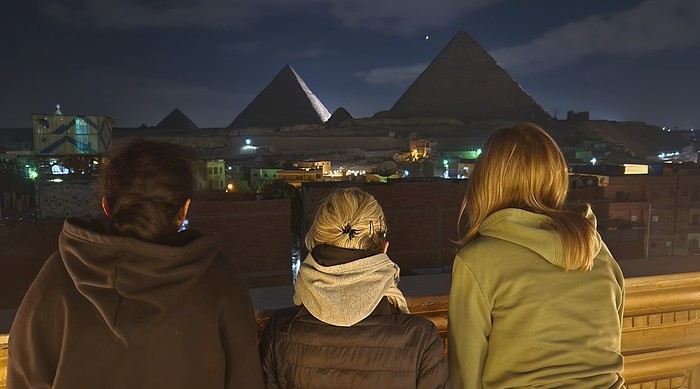


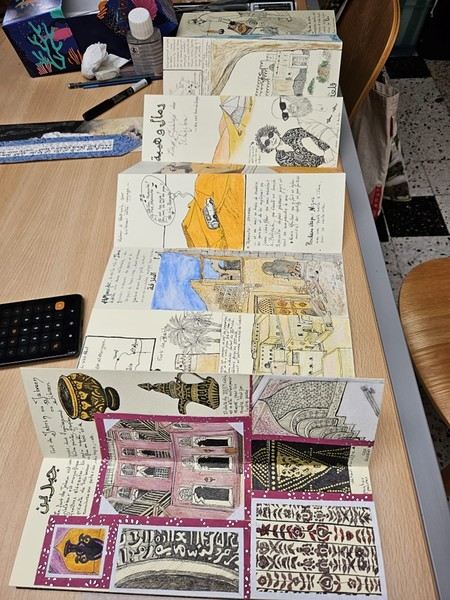
 On the right, the "welcome marker"—those dates offered everywhere as a sign of hospitality. On the left, a tribute to those stunning doors worn by time, admired all over the old quarters, including the abandoned ones.
 Hospitality will often lead you to accept a small coffee, an "Omani coffee," very light, subtly flavored with cardamom, maybe a touch of saffron, and occasionally rosewater.
Here, I’ve depicted a man in the common everyday attire of Omanis: the dishdasha, mostly white (during the week and daytime; colors are more common in the evening or on Fridays and Saturdays). While you’ll see some men dressed in Western clothes, they’re very few. The white dishdasha is truly the shared attire of all men. The dishdasha, which has no hood, is distinguished by a small pom-pom attached to the collar, the furakha, which is soaked in perfume. And believe me, Omanis go overboard with it! "It smells like the pom-pom" is an expression that’s now part of our shared language, my husband and I.
Another must of men’s attire is the kuma, a small round head covering, usually white with brightly colored patterns. The keffiyeh is also worn (but without the cord called an agal in Arab countries), and it’s mostly worn by those with roots in the desert, from what I understood.
And what about the women, you might ask? Some are veiled, some in full black (but not a burka—more like a chador + abaya), due to the influence of Saudi Arabia and the United Arab Emirates, whereas the traditional outfit used to be a layering of very colorful dresses. Most of the women we saw wore neutral clothing, a plain veil over their hair, but with their faces uncovered. We also saw many saris and colorful veils—don’t forget that 40% of the population consists of Indian, Nepalese, and Bangladeshi immigrants, who work a lot in tourism, hospitality, restaurants, services, and construction.
Just to clarify, as a tourist, there’s no pressure to wear a veil, and never any disapproving looks. Of course, you’ll save the mini shorts, plunging necklines, bare shoulders, and midriffs for the hotel terrace—but I’d say that’s the same for men and women, and with the sun being strong, it’s better for your skin too.
Here’s the introduction! In the next post, I’ll tell you about my itinerary, and we can dive in!
Hospitality will often lead you to accept a small coffee, an "Omani coffee," very light, subtly flavored with cardamom, maybe a touch of saffron, and occasionally rosewater.
Here, I’ve depicted a man in the common everyday attire of Omanis: the dishdasha, mostly white (during the week and daytime; colors are more common in the evening or on Fridays and Saturdays). While you’ll see some men dressed in Western clothes, they’re very few. The white dishdasha is truly the shared attire of all men. The dishdasha, which has no hood, is distinguished by a small pom-pom attached to the collar, the furakha, which is soaked in perfume. And believe me, Omanis go overboard with it! "It smells like the pom-pom" is an expression that’s now part of our shared language, my husband and I.
Another must of men’s attire is the kuma, a small round head covering, usually white with brightly colored patterns. The keffiyeh is also worn (but without the cord called an agal in Arab countries), and it’s mostly worn by those with roots in the desert, from what I understood.
And what about the women, you might ask? Some are veiled, some in full black (but not a burka—more like a chador + abaya), due to the influence of Saudi Arabia and the United Arab Emirates, whereas the traditional outfit used to be a layering of very colorful dresses. Most of the women we saw wore neutral clothing, a plain veil over their hair, but with their faces uncovered. We also saw many saris and colorful veils—don’t forget that 40% of the population consists of Indian, Nepalese, and Bangladeshi immigrants, who work a lot in tourism, hospitality, restaurants, services, and construction.
Just to clarify, as a tourist, there’s no pressure to wear a veil, and never any disapproving looks. Of course, you’ll save the mini shorts, plunging necklines, bare shoulders, and midriffs for the hotel terrace—but I’d say that’s the same for men and women, and with the sun being strong, it’s better for your skin too.
Here’s the introduction! In the next post, I’ll tell you about my itinerary, and we can dive in!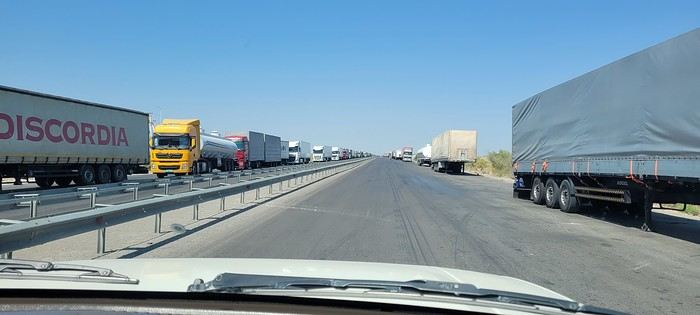
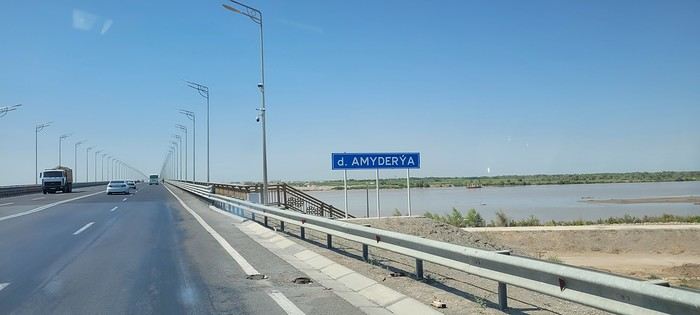
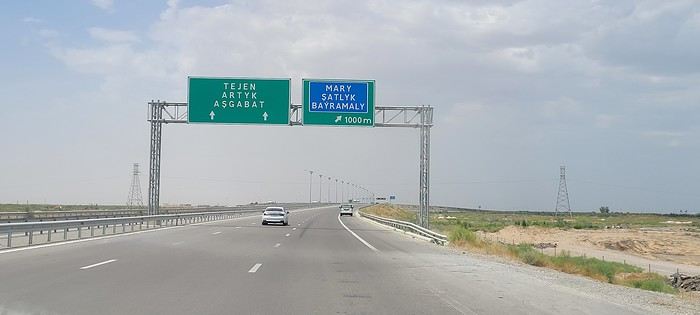
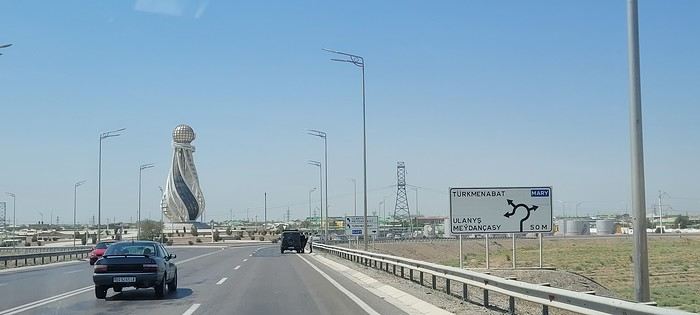
 Roundabouts are particularly interesting because they feature emblems of Turkmen culture, like the dog, a carpet, the Ahal Teke horse, or Muslim symbols, even though the presence of Islamic artifacts is quite limited.


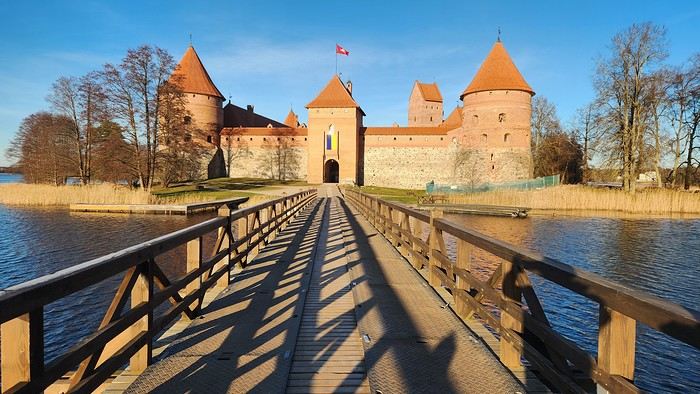
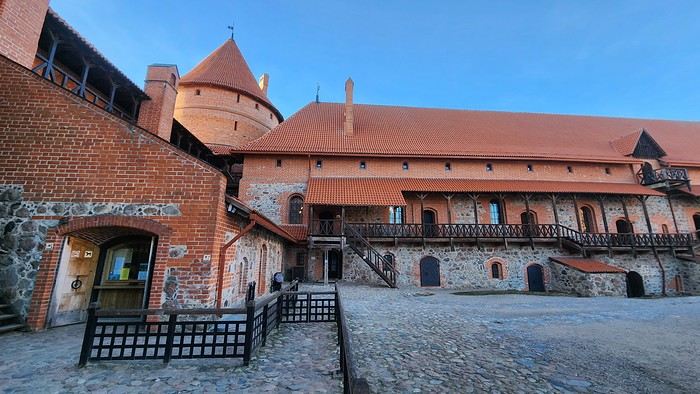
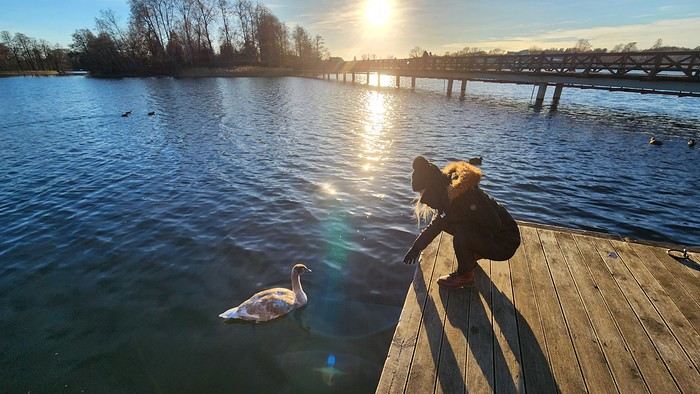

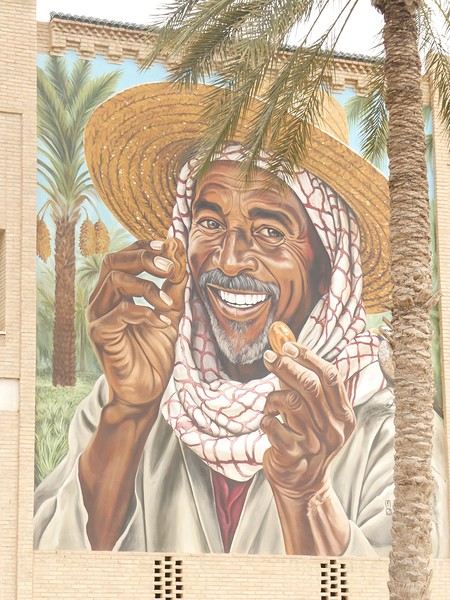

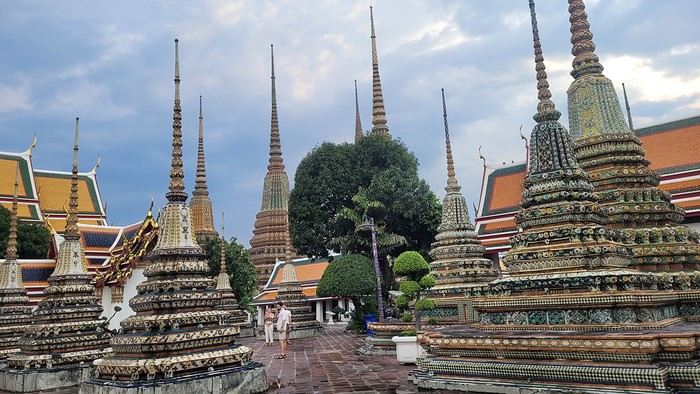
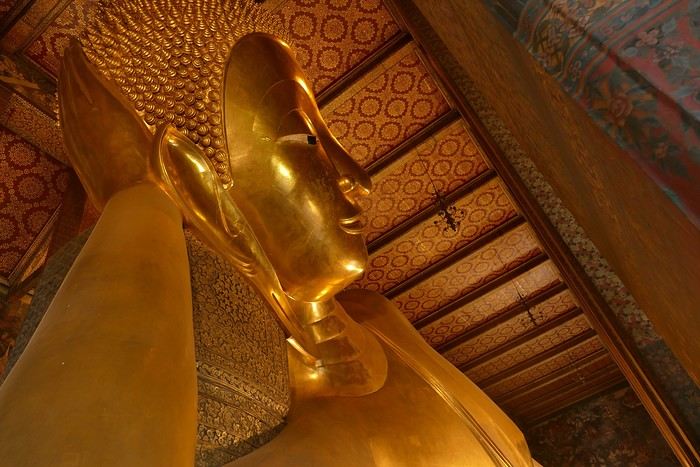
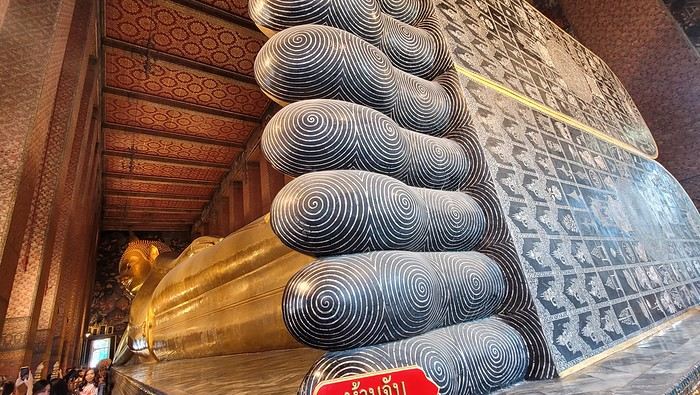
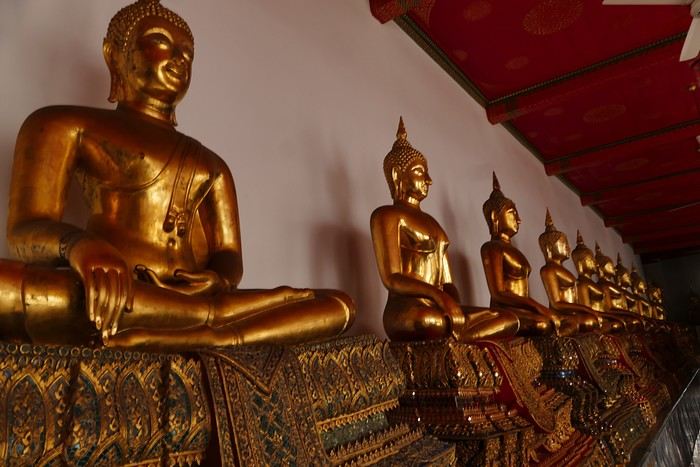
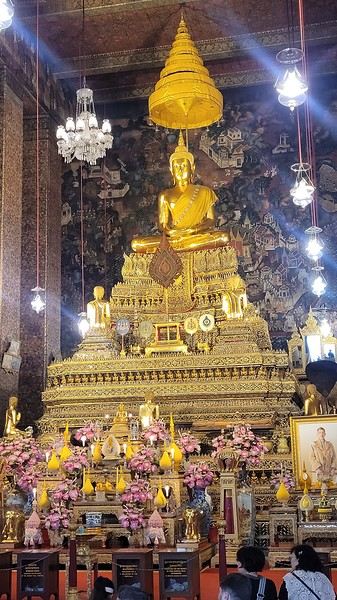
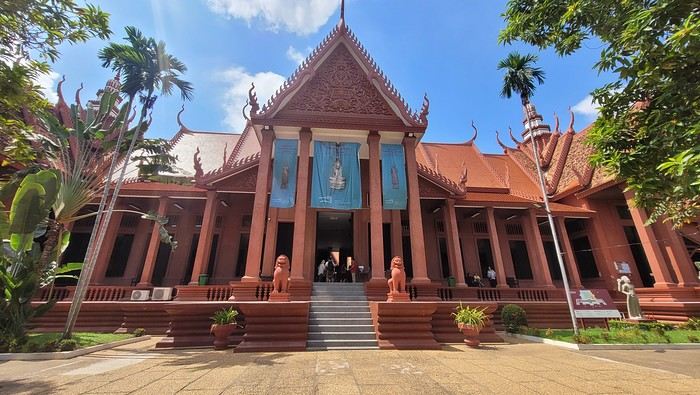
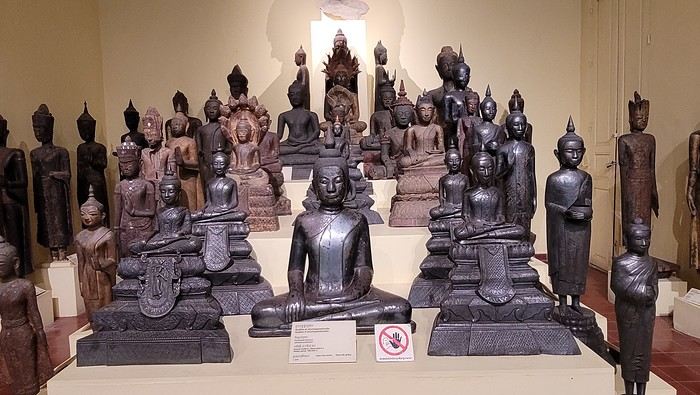
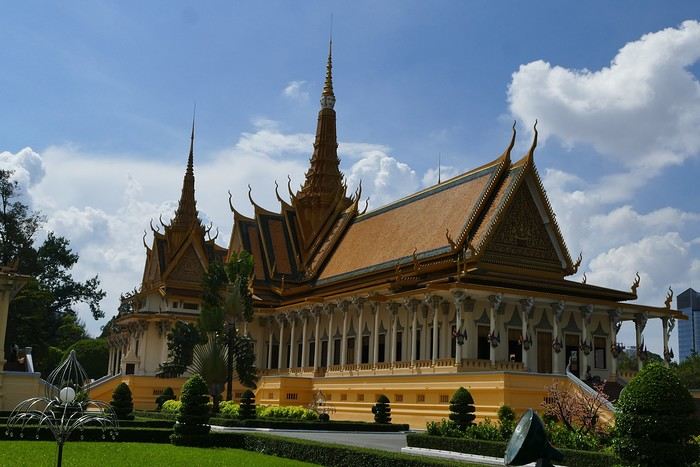
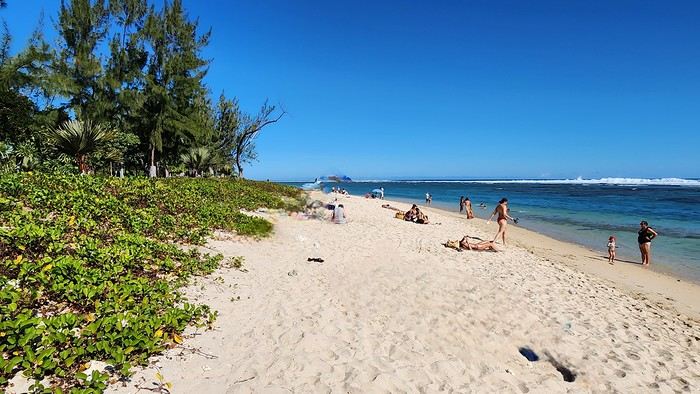
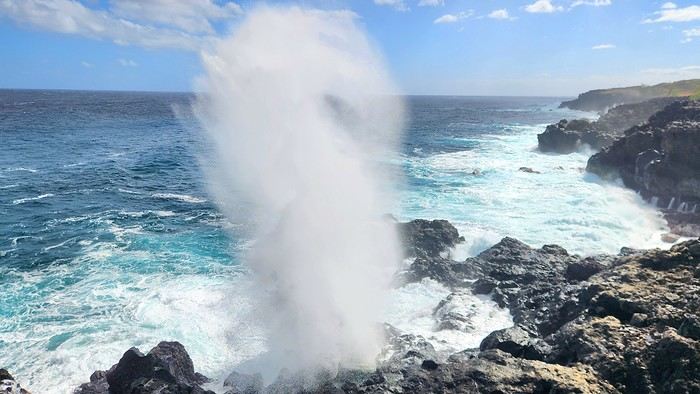
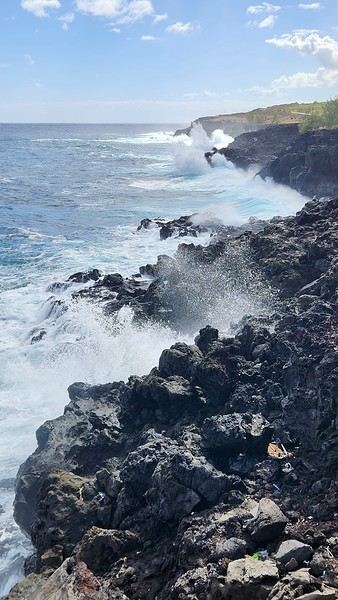
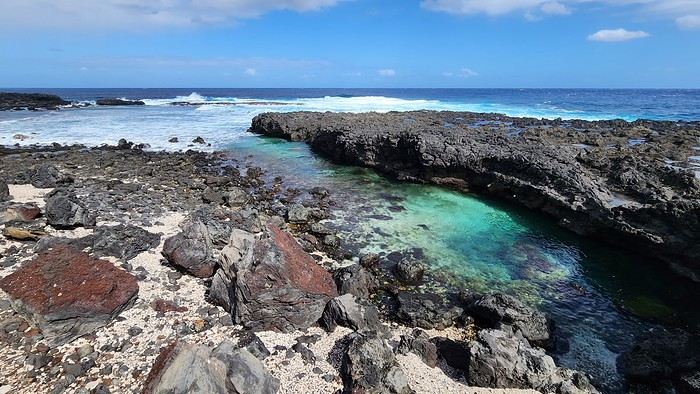
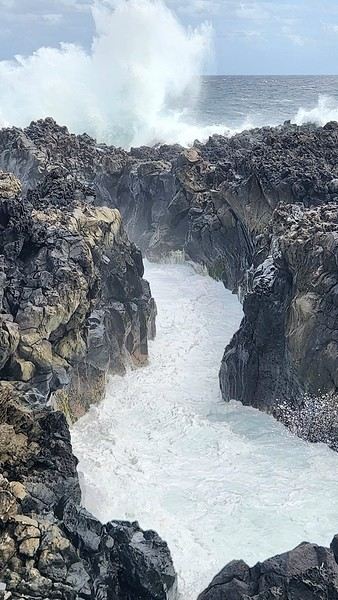

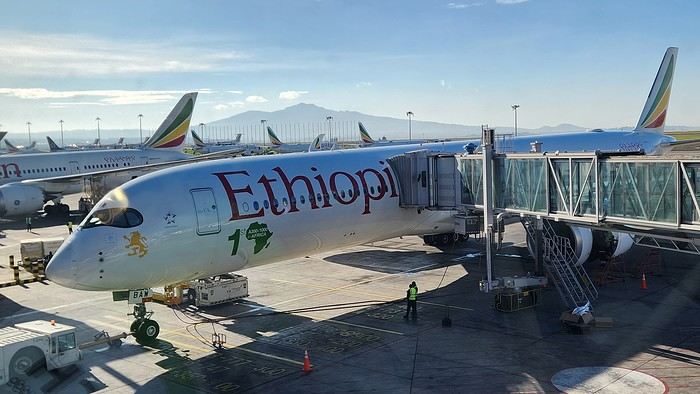
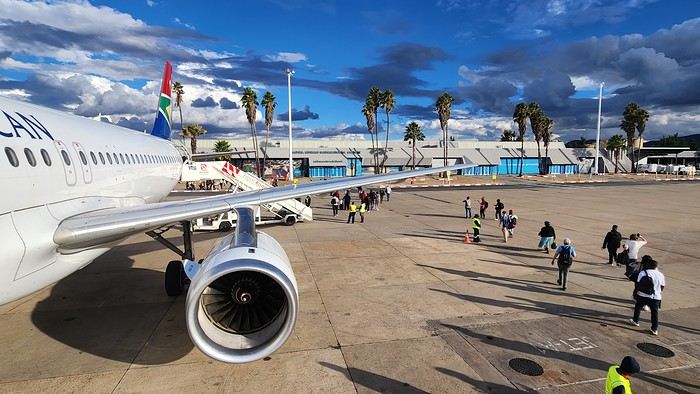
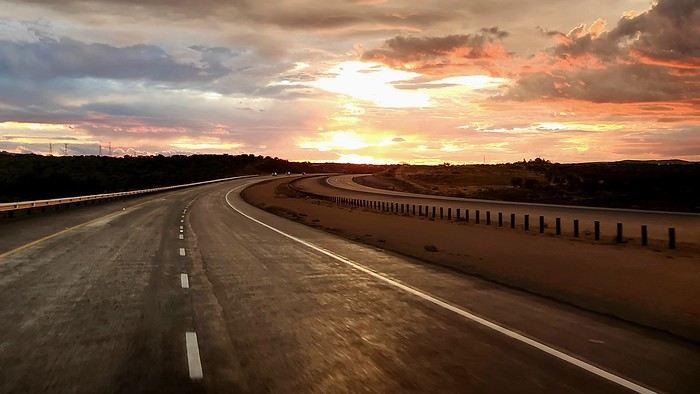
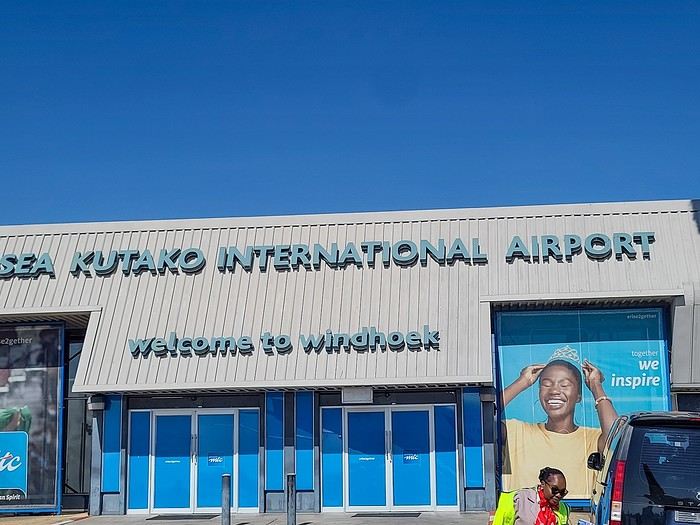
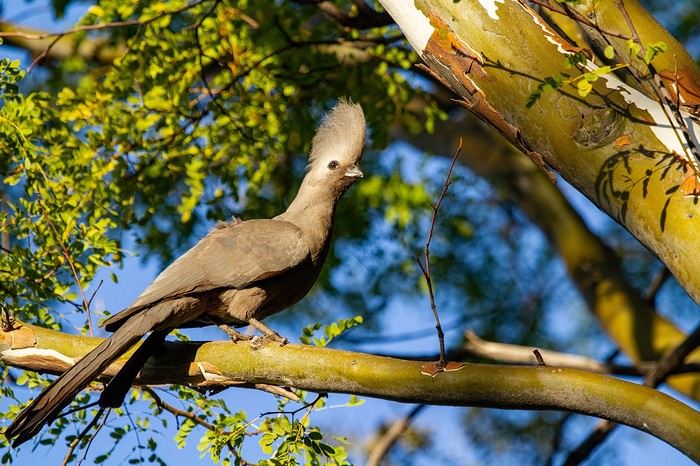
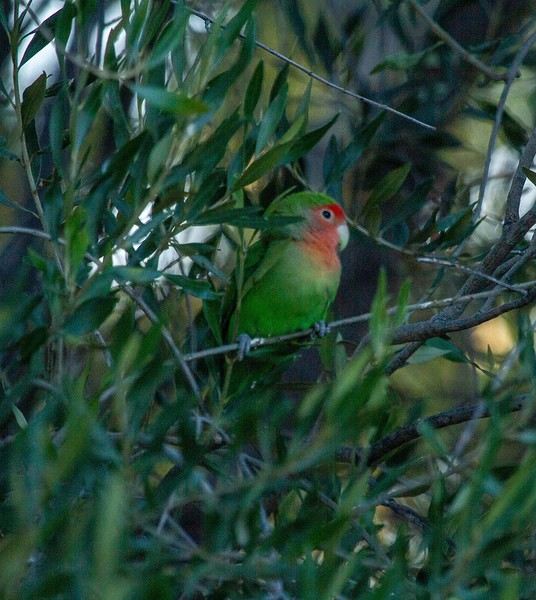
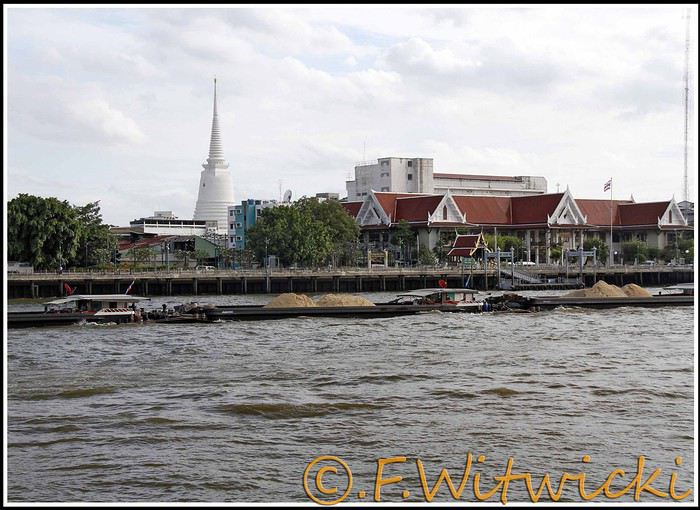
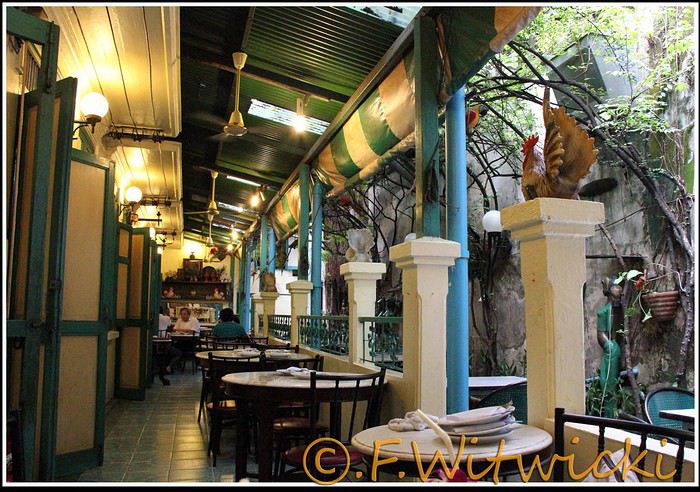

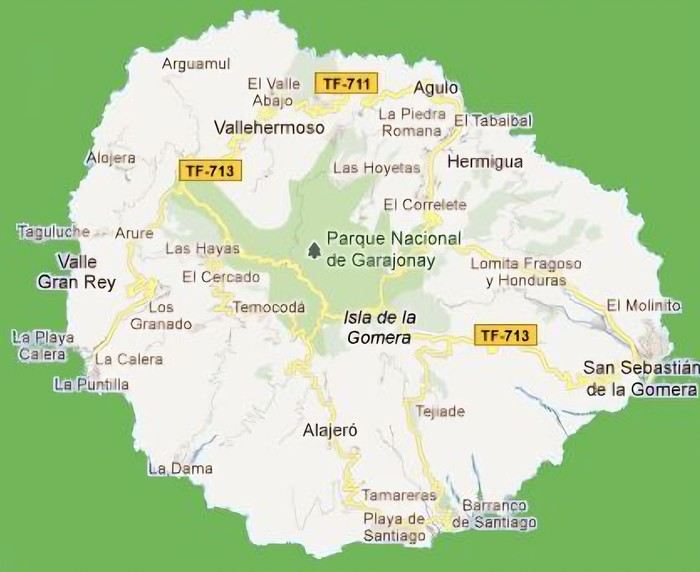 The large solidified magma massifs that shape the heart of the island have created a large depression more protected from the sun at its center, allowing the growth of a vast laurel forest, today grouped within the Garajonay National Park, La Gomera’s green lung, which has earned it the status of a World Biosphere Reserve. Its completely European appearance contrasts sharply with the rocky and tropical landscapes of the rest of the island. Thus, the climate varies greatly from one point to another on the island: in summer, you can quickly go from a dry and sunny valley at 35°C to a humid forest area at altitude at 18°C.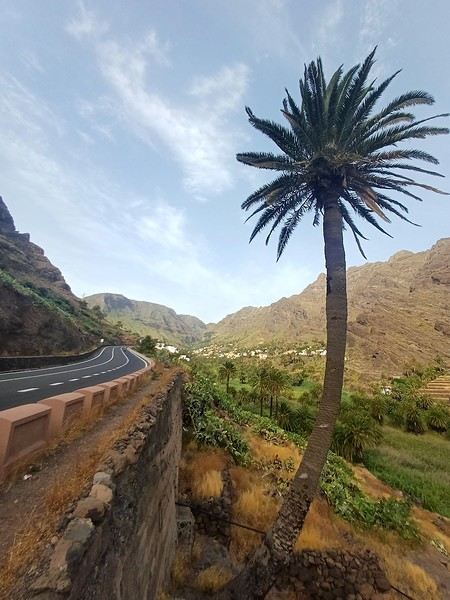
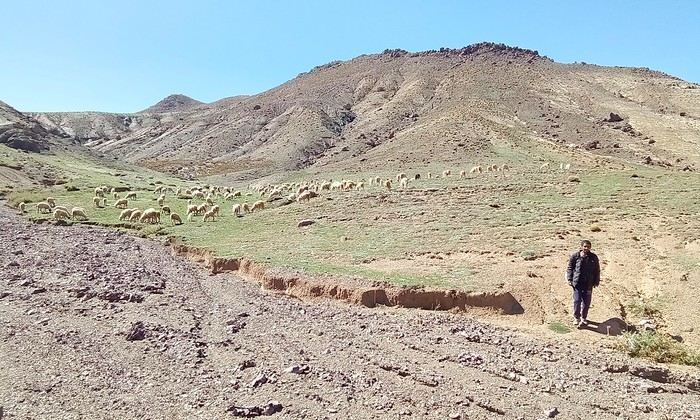
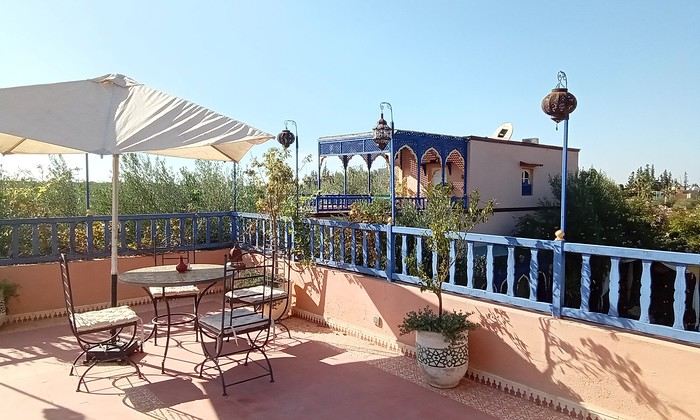
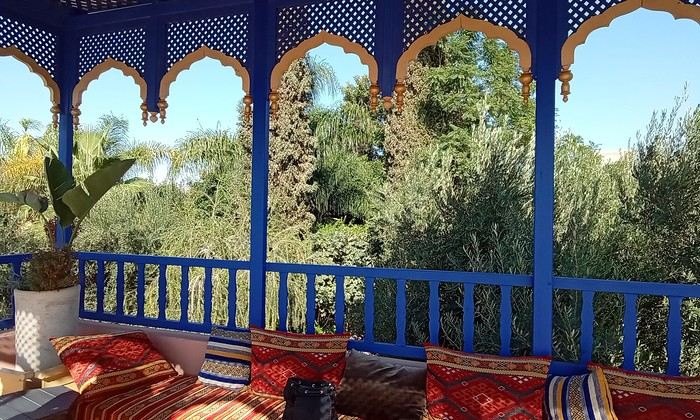 Last October, we landed in Marrakech to spend a few days with family exploring Morocco’s roads.
Transport: a rented Dacia.
Accommodations: small guesthouses.
Last October, we landed in Marrakech to spend a few days with family exploring Morocco’s roads.
Transport: a rented Dacia.
Accommodations: small guesthouses.
 Come along, I'm taking you to this country where it's so nice to wander and slow down...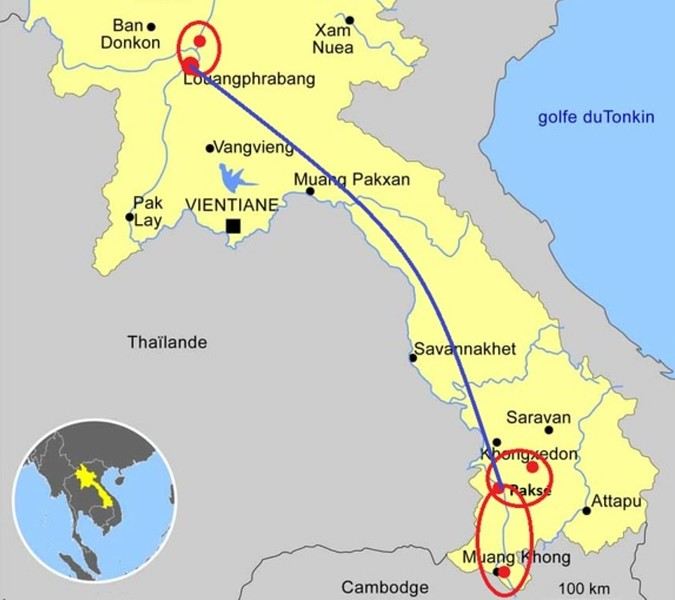
 I’m inviting you on a stroll through my drawings—a completely subjective, far from exhaustive, and totally personal take, since it’s based on my own sketches. I put this travel journal together after returning in late 2024, mostly using felt-tip pens and pencils, with a few collages thrown in. I worked from our personal photos.
 And in Kyoto, Nishiki Market:

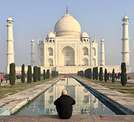
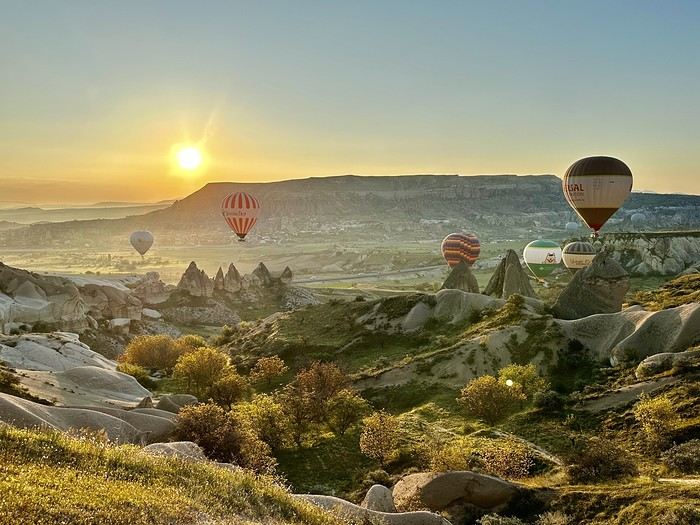 A little sneak peek?