Merci pour tous tes conseils Jean-Philippe (sur ce post ou dans d'autres discussions). Vos réponses à Thierry et toi me font cogiter sérieusement en ce moment ! 😉
Je ne pensais pas qu'une tente 2 places était tellement limite et qu'il valait mieux prendre une 3 places... C'est bien de se l'entendre dire avant !
Bon, on a encore le temps de réfléchir et puis quand arrivent les beaux jours, les tentes sont exposées en magasin donc on se rend mieux compte ! 😉
Nous poursuivons notre chemin en longeant la pente et en descendant progressivement dans la vallée située en contrebas tout en restant sur le côté Est. Il faut avouer qu'il y a ici moins de formations intéressantes.
Nous progressons sur du slickrock coloré avec quelques passages de sable.
Il nous faut aussi zigzager pour contourner certaines crevasses.
Nous voyons d'en bas quelques hoodoos situés le long de la rim mais nous n'avons pas le courage de remonter.
Nous remontons donc la vallée et finissons par arriver au 2e endroit que nous souhaitions voir aujourd'hui : un canyon profond qui nous sépare de la zone 3.
L'accès semble peu évident et semble demander beaucoup d'efforts pour poursuivre dans le canyon ou rejoindre la zone 3.
Et puis il est déjà 10h30 et nous souhaitons être vers midi à White Domes. Bref, nous zappons l'exploration de cette zone, à regret.
Oui, l'Andalousie, c'est pas mal du tout ! Faudra vraiment que j'y aille un jour...
ah ! je suis contente de voir la suite.
C'est toujours féérique ! 🙂
Mais c'est vrai que le relief devient plus tourmenté en allant vers cette 3ème zone. Tu es passé un poil plus au large que nous pour te rapprocher du canyon et là tu dois être proche de Windlass et The Notch. Je suis contente de voir les photos de cette zone !
J'adore les photos ! C'est à cause de toi que nous n'arrêtons pas de reparler de cette zone. Je crois que tu as relativement convaincu Francesco avec l'idée du backpacking pour le refaire sur 2 jours. Je suis plus réticente. J'ai encore le souvenir des épaules sciées par le poids et l'idée de porter encore plus... Mais ces zones au coucher et lever de soleil : c'est vrai que c'est extraordinaire !
Merci pour le partage !
Pour voir mes carnets Ouest USA, cliquez sur mon pseudo puis cliquez celui désiré dans la rubrique "carnets" : Vous avez le choix avec 2009, 2011, 2012, 2013, 2014, 2015 et 2016 : ça en fait de la lecture ! Et maintenant : la Chine !
Nous devons maintenant remonter sur le plateau principal pour rejoindre The Windlass et ce n'est pas évident car il n'y a pas de chemin et la végétation est dense !
Nous finissons par trouver un petit wash avec une végétation peu dense qui monte jusqu'à un nouvel ensemble coloré de slickrock et Sandstone.
En remontant cette zone, nous tombons sur des sortes de Moqui Marbles en Sandstone grosses comme des balles de tennis.
Elles sont assez impressionnantes.
Nous arrivons enfin au bord du plateau avec une vue plongeante sur la vallée de Hildale.
Puis en longeant le bord en direction de l'Ouest, nous arrivons rapidement à The Windlass.
Ce treuil servait à descendre dans la vallée située 500 mètres en contrebas le bois coupé sur le plateau. Les câbles sont presque intactes.
C'est le côté "historique" de la randonnée mais il faut dire que l'installation est assez photogénique.
J'avoue avoir du mal à comprendre quelle force actionnait ce treuil (des chevaux ou un moteur ?)
En tous cas, l'à-pic est impressionnant ! Le vent toujours aussi présent nous empêche de nous approcher plus près du vide.
Il est maintenant 11h30 et nous préférons aussi renoncer à explorer la zone 4 située au Nord Ouest de Windlass car l'eau commence à manquer et nous sommes déjà en retard par rapport à l'horaire que nous avions prévu.
Nous repartons donc plein Est par le chemin classique
Nous aussi avions beaucoup de vent. Nous nous tenions mutuellement pour faire les photos en sécurité puis nous avons trouvé l'emplacement relativement protégé avec la vue à 180 °.
j'aime bien la mention du "chemin classique". 😏 Comme j'aimerais en parcourir souvent d'aussi classiques ! 🙂
Pour voir mes carnets Ouest USA, cliquez sur mon pseudo puis cliquez celui désiré dans la rubrique "carnets" : Vous avez le choix avec 2009, 2011, 2012, 2013, 2014, 2015 et 2016 : ça en fait de la lecture ! Et maintenant : la Chine !
Je croyais que ce n'était pas pour vous le backpacking ! Si on fait trop d'adeptes, le NPS va finir par mettre en place un système de permis overnight la-haut 😛
Mais c'est vrai que vu la superficie du site, il n'y a pas d'autre solution pour essayer d'explorer toutes les merveilles la haut.
Je crois que le pire endroit pour le vent a été The Notch, presque impossible de faire une photo. Le site fait comme un entonnoir géant dans lequel le vent s'engouffre. Décoiffant !
Pour le chemin classique, nous étions contents de retrouver un chemin de sable large et balisé après avoir passé quelques heures à zigzaguer.🙂
Le chemin est maintenant facile à suivre et nous arrivons rapidement à The Notch. Il y a quelques flaques d'eau mais aussi un vent dantesque !
Impossible de rester debout alors faire des photos dans ces conditions...
Nous ne nous attardons donc pas et continuons à poursuivre sur le chemin qui alterne sable et slickrock.
Nous passons devant quelques hoodoos assez sympa
Puis nous arrivons à une zone composée de petits hoodoos au chapeau noir.
Nous sommes pressés de retourner à White Domes et nous suivons le chemin de sable qui correspond à nos points GPS. Nous zappons la zone Black Rocks (peut être à tort) et après un peu plus d'une heure nous apercevons de nouveau les White Domes.
Nous souhaitions être présents aux White Domes aux trois moments de la journée (lever de soleil, coucher de soleil et milieu de journée).
Quelle finesse de la roche dans ces vagues qui n'ont presque rien à envier à leur grande sœur près de Page.
Le site n'a maintenant plus d'ombre marquée
Les couleurs orangés sont bien plus vives à ce moment de la journée par rapport au coucher et au lever de soleil et quelques détails dans la roche ressortent bien plus comme ces frises orangées qui traversent les dômes
Le contraste est finalement très fort. C'est très différent par rapport à la lumière douce de ce matin.
Voici à peu près le même endroit pris aux 3 moment de la journée (perso j'ai une nette préférence pour le lever de soleil 🙂
Belle moisson de photos ! 🙂
ça fait plaisirs de voir que vous avez pris le temps d'explorer, de revenir sur les même lieux, ...
Et les nuages donnent un beau relief au ciel bleu, même si sur place on s'en passerait je suis sûr ! 😇
+ 1 pour la préférence au lever de soleil sur les WD... 😎
(ça me rappelle le même débat pour Zabriskie Point ! 😉)
Merci encore pour le partage...
Bonjour Olivier,
Ta façon de voyager m'est totalement étrangère, tes lieux visités me sont totalement inconnus, même ton vocabulaire m'échappe parfois... Bref, ce post ne devrait pas me concerner et pourtant je te suis avec plaisir car tes photos sont à tomber par terre..!!!
As-tu songé à les vendre, ne serait-ce que pour financer le voyage suivant ?
Merci pour le partage.
A+
Eric
Merci pour le compliment. J'ai vu que tu avais réalisé ton premier voyage dans l'Ouest. Peut être que pour les prochains tu essaieras
As-tu songé à les vendre, ne serait-ce que pour financer le voyage suivant ?
C'est une question qu'on finit toujours par se poser quand on cumule les voyages là-bas. Et si on vendait des photos ? Et si on faisait des livres ? Et puis, on se rend très vite compte que finalement on fait souvent les mêmes photos que tout le monde 😏
Il y a 20 ans, peut être que certains des sites que l'on visite maintenant étaient totalement inconnus sauf par les initiés, dont certains étaient photographes. Avec Internet, il devient pratiquement impossible de garder secret le lieu d'une photo et la valeur photographique diminue donc très fortement.
Il suffit de voir les galeries de certains photographes professionnels de l'Ouest Américain qui ferment ou se réduisent d'année en année. Je crois que cela devient de plus en plus difficile pour eux.
De même, le tourisme de masse dans les parcs nationaux pousse de plus en plus de voyageurs a se tourner vers le "hors des sentiers battus" et le nombre de livres (surtout en anglais) pour découvrir des lieux encore un peu préservés mais qui nécessitent un peu d'efforts se multiplient aussi. Mais avec la concurrence des sites internet spécialisés, l'offre gratuite d'informations diminue fortement l'intérêt de publier.
Au delà de ces considérations, je ne suis qu'un simple randonneur qui a tendance a appuyer lourdement sur le déclencheur de mon appareil. Le reste c'est la nature qui a fait le job ! 😎
Nous profitons encore un peu du lieu en piqueniquant et en nous reposant un peu. Puis à 13h30, nous checkons l'eau disponible : il nous reste 2.5l pour 2, ce qui devrait suffire pour faire les 10km restants jusqu'au véhicule.
Nous consultons les points GPS à suivre car la descente pour rejoindre le Wash en contrebas n'est pas si évidente que cela à suivre.
Il y a quelques cairns mais elles ne sont pas très nombreuses. L'utilisation du GPS semble donc indispensable ici.
La pente est assez raide et on imagine que la montée doit être épuisante.
Au bout d'une demi-heure, nous rejoignons le Wash principal où se situent quelques bassins remplis d'eau.
Il semble qu'il y ait plusieurs possibilités pour rejoindre, depuis le Wash, Top Rock , qui est le point de départ de la descente finale dans Water Canyon. Une grosse cairn indique le début d'une des montées et nous décidons de la suivre. Il n'y a pas vraiment de chemin et nous montons un peu tout droit en apercevant de temps en temps quelques cairns.
Au bout d'une demi-heure nous arrivons enfin à Top Rock et commençons la descente qui est maintenant évidente.
Nous apercevons au loin la Zone 1 que nous voulions explorer la veille mais un orage nous en avait dissuadé.
La descente est raide avec quelques passages exposés. Nous sommes contents d'être passés par Squirrel Canyon hier pour faire la montée car c'est ici beaucoup plus raide et moins évident avec des gros sac de rando.
Au bout de 40 minutes et après 2 hésitations sur le chemin à suivre, nous atteignons le bas de Water Canyon.
Nous cherchons la marque que Pong avait faîte sur la paroi mais elle semble avoir disparu.
Quelques photos aux Narrows de Water Canyon que nous connaissons déjà
et nous finissons la descente jusqu'au petit lac de retenue en passant devant Water Canyon Arch. Malheureusement nous n'avons pas eu hier le courage d'aller faire la fameuse photo de traversée de l'Arche avec les 400 mètres de vide en dessous !
La dernière demi-heure depuis le Lac, presque asséché, jusqu'au véhicule est un peu longue. Nous rencontrons pour la 1e fois depuis la veille quelques locaux sur la piste. Il nous a fallu 3 heures pour redescendre des White Domes en marchant tranquillement.
Il est 16h40, nous sommes dans le timing que nous nous étions fixés et nous partons en direction de Panguitch.
Nous cherchons la marque que Pong avait faîte sur la paroi mais elle semble avoir disparu.
C'est sûr que la craie ça ne reste pas très longtemps... 😇
J'espère vivement que l'initiation faite par la FFRP en Amérique du Nord prendra et fera école ! 🙂
http://www.sia-iat.com/images/Upload/Revue_de_presse/oxygene.pdf
(p2)
Finalement vous avez fait une boucle complète si je comprends bien ! 😮
Nous sommes passés 2 fois à The Notch et la première : effectivement nous n'avons pas pu nous approcher à cause du vent. La seconde, ça allait mieux.
Encore sublimes les photos de white dome : notamment la troisième au dessus du tryptique.
Toutes les lumières sont belles mais c'est vrai que celle douce du lever de soleil avec les ombres me plaît énormément !
La descente est assez longue surtout quand on en a plein les jambes. Il y a toujours un petit stress vers top rock jusqu'à ce que l'on retrouve le sentier. Puis la dernière grosse 1/2 h avec les cailloux de partout quand on a plus de jambes, c'est pénible.
Je ne savais pas qu'on peut faire une photo en traversant l'arche. Par où peut-on y monter? Cela semble inaccesible.
Bon en tout cas : mille merci pour ce partage et ces photos de rêve ! Je ne me lasse pas de regarder tout ça !
Pour voir mes carnets Ouest USA, cliquez sur mon pseudo puis cliquez celui désiré dans la rubrique "carnets" : Vous avez le choix avec 2009, 2011, 2012, 2013, 2014, 2015 et 2016 : ça en fait de la lecture ! Et maintenant : la Chine !
Oui, tu peux traverser l'arche. Il faut passer comme nous par Squirrel canyon et essayer de rester le plus possible sur le côté Ouest lors de l'approche de l'arche.
Ils ont fait l'ascension de The Behive (cela peut donner de nouvelles idées pour la prochaine fois) et la traversée de l'arche qui est finalement assez large une fois dessus.
Tu vois, il y a pleins de raisons de remonter la haut 😛
J'espère vivement que l'initiation faite par la FFRP en Amérique du Nord prendra et fera école ! 🙂
www.sia-iat.com/...e_presse/oxygene.pdf
(p2)
Tu sais, j'espère ne pas croiser trop de monde à chaque fois que je pars en GR donc je préfère que cela reste pas trop accessible 😛 Mais je peux comprendre que cela puisse rassurer certaines personnes.
Finalement vous avez fait une boucle complète si je comprends bien ! 😮
Yes, une vraie et jolie boucle de 30 km. Je vais mettre la carte bientôt.
Quelques informations sur le backpacking des Canaan Mountains
Distance parcourue : environ 30 km
Dénivelé : environ 1400m
Difficulté moyenne mais bâtons de marche très appréciés !
Voici le parcours effectué (le GPS a un peu perdu la boussole dans Water Canyon) :
1e jour en rouge
2e jour en bleu
Nous avons donc finalement du abandonner l'exploration de plusieurs endroits (Water Canyon Arch, Zones 1, 3 et 4, black rocks) soit par manque de temps soit par manque d'eau.
Il serait préférable de partir 3 jours pour explorer les différents lieux. Le plateau vu du ciel paraît assez plat mais les sites intéressants sont souvent assez escarpés ou juchés en haut d'une colline.
La problématique de l'eau se pose donc ensuite. Il y a plusieurs sources indiquées sur les cartes (par ex ici : http://www.zionnational-park.com/map-squirrel-canyon.htm) mais elles sont sûrement taries à partir de l'été. La seule qui semble permanente se situe tout à l'Ouest du plateau et donc en dehors du parcours. Il est peut être donc préférable de monter la haut avec 2 versions préétablies (une sans trouver d'eau sur 2 jours et une autre sur 3 jours si vous trouvez de l'eau à filtrer).
La montée par Squirrel Canyon me semble plus appropriée que par Water Canyon car la pente est régulière, assez facile à suivre et beaucoup plus facile avec de gros sac de rando.
Si un jour je remonte sur le plateau j'ai déjà une idée assez précise du parcours qui sera très différent de celui-ci. Il y a énormément de zones à explorer !
Merci pour les infos !
C'est très instructif, et ça donne très envie d'y retourner...😎
Il me semble que Zehrer (http://www.ushikes.com/l_index.htm) y avait été en faisant un circuit "ouvert" en se faisant déposer au début du circuit (après avoir laisser sa voiture à l'autre extrémité) : ça demande pas mal de préparatifs en amont...
Et de mémoire il l'avait fait en 3 jours effectivement...
L'avantage de ces sites très riches (comme the Wave, ou Yant Flat...) c'est qu'il reste toujours à explorer et à découvrir de nouvelles choses : 20 sites autour de St George par ex ! 😮 😇
http://www.ushikes.com/htm_hot_spot_saint_george.htm
Je n'ai pas réussi à trouver le circuit "ouvert" dont tu parles sur US Hikes. J'ai vu les montées par Water et Squirrel Canyon, ainsi que la loop mais c'est tout.
Il existe aussi la possibilité de monter par Eagle crags (avec un peu d'escalade à la fin) et passer donc par les Lower Mountains pour rejoindre le plateau.
En termes de rando, la région de Zion est sûrement ce qui se fait de mieux dans l'Ouest Américain !
Sinon, effectivement je découvre les infos données par tes liens.
Même si l'arche semble large, ce doit être tout de même impressionnant.
La montée à Behive m'a l'air intéressante aussi.
Sinon je n'ai pas trouvé non plus l'info de la rando en "circuit ouvert" de Pong.
C'est intéressant de trouver de nouvelles idées pour les voyages à venir... 😉
Pour voir mes carnets Ouest USA, cliquez sur mon pseudo puis cliquez celui désiré dans la rubrique "carnets" : Vous avez le choix avec 2009, 2011, 2012, 2013, 2014, 2015 et 2016 : ça en fait de la lecture ! Et maintenant : la Chine !
Aujourd'hui est une journée de "repos" avant notre prochain backpacking. Nous avons donc décidé de remettre au programme de cette année la randonnée de Fairyland loop à Bryce Canyon.
Nous avions en effet du l'annuler l'année dernière à cause de la tempête de neige qui sévissait au mois d'Avril.
Le trailhead est situé à l'extérieur du parc mais la randonnée rentre à l'intérieur du parc. Nous ne savons donc pas si nous devons quand même payer les droits d'entrée.
Nous allons donc discuter avec le ranger à la guérite de l'entrée qui est super sympa. Il nous conseille de ne pas payer les 30$ et mime de fermer les yeux :)
Direction le parking où il y a 3 voitures ce qui est plutôt agréable dans un parc très fréquenté.
Le temps est aussi très agréable aujourd'hui, ca sent la très bonne balade !
On fait le tour dans le sens des aiguilles d'une montre ce qui nous semble être la meilleure option.
Voici le parcours :
8h30, c'est parti !
La première partie en descente offre de jolies points de vue sur les cirques de Fairyland jusqu'à rejoindre la canyon de Fairyland
Il est toujours aussi agréable de respirer l'odeur des pins à Bryce
Les couleurs ocre des hoodoos tranchent avec le vert des arbres et le bleu du ciel
Il y a peu de monde pour l'instant sur le chemin même si nous nous faisons dépasser par de plus en plus de randonneurs. Il faut dire que nous prenons tout notre temps
Le passage sur l'arrête au Sud de Boat Mesa est spectaculaire !
Puis nous entamons la descente vers Campbell Canyon
Jusqu'à rejoindre la bifurcation qui conduit à Tower Bridge
Cela fait 2h40 que nous sommes partis et nous en profitons pour piqueniquer au pied de Tower Bridge.
Après cette bonne pause, nous entamons la remontée en passant par l'endroit que j'ai préféré : Chineese Wall
Puis le chemin remonte en ligne droite jusqu'à Rim Trail
Une fois sur la rim, nous profitons du chemin plutôt plat qui longe les pink Cliffs
et qui offre de très jolis points de vue
Après un peu plus de 5h30, nous sommes de retour à la voiture.
Nous avons beaucoup apprécié cette balade qui n'est pas trop dure et qui reste "un peu" en dehors des balades classiques de Bryce Canyon où la foule est vite envahissante.
Et puis nous avons surtout apprécié de nous balader avec des petits sacs de rando bien légers ! 😏
Nous faisons route maintenant vers Escalante avec l'objectif d'arriver avant 16h30 pour récupérer au visitor center le permis pour l'overnight du backpacking de demain (Boulder Mail Trail (BMT) en entier ou BMT via Death Hollow)
Nous récupérons le permis sans problème et nous nous rendons compte qu'il n'est pas vraiment nécessaire de réserver le permis à l'avance. Peut être qu'il n'y a pas tant de backpackers dans le coin.
Il est encore assez tôt et nous décidons de faire la piste de Hell's backbone. Celle-ci présente un double intérêt pour nous : elle permet d'aller voir le fameux passage entre Sand Creek et Death Hollow mais aussi de repérer le trailhead de Boulder Mail Trail qui se situe à la fin de la piste vers la jonction avec la route 12.
Cette piste très roulante offre quelques passages agréables comme le long de Pine Creek au début mais la partie dans les Boulder Mountains est assez monotone. C'est en effet, une piste au milieu de la forêt et des conifères sans toutefois offrir de points de vue.
Ce n'est qu'en arrivant vers le Bridge que nous commençons à apercevoir Death Hollow. Nous sommes d'ailleurs assez circonspects sur le fait qu'il y ait un chemin qui descende ici dans Death Hollow (pour ceux qui veulent descendre Death Hollow dans son intégralité). Il faut dire que les falaises de 200 mètres sont très abruptes.
Nous arrivons enfin Hell's Backbone Bridge
Le pont enjambe d'une centaine de mètres une arrête qui sépare ...
Sand Creek...
de Death Hollow
Il y a un petit promontoire pour faire une jolie photo à côté du vide de Death Hollow 😮
De l'autre côté c'est une explosion de couleurs qui donne envie de descendre pour explorer
Nous restons un peu mais le froid à près de 3000 mètres d'altitude est vivifiant et nous repartons donc sur la piste qui descend maintenant vers les ranch de Salt Gulch puis rejoint la route 12.
Nous repérons la petite piste qui mène à l'"aéroport" de Boulder avant de quitter Hell's Backbone Road.
De retour à Escalante nous faisons quelques courses et nous profitons de la soirée pour trancher définitivement sur le parcours des 2 jours à venir. Cela sera BMT via Death Hollow !
Boulder Mail Trail ! Je me souviens avoir vu ce nom pour la première fois sur une photo du restaurant Cowboys Blues d’Escalante. Il était écrit que ce trail était le dernier chemin à pied utilisé par la poste américaine pour relier Boulder à Escalante avant que les routes Hells Backbone puis la route 12 ne soient construites.
Lorsque l’on parcourt ce trail, il faut donc s’imaginer les mules portant le courrier et les vivres à travers ces paysages de slickrock blanc et de canyons profonds.
Rien que cela avait le don d’aiguiser ma curiosité ! Ensuite, pour être passés quelques fois dans la région d’Escalante et surtout avoir pu admirer les canyons depuis Hogs Back sur la route 12, l’idée de le parcourir nous est venue naturellement.
Nous l’avions prévu en 2014 mais le temps froid à Escalante nous avait fait changer d’avis.
2015 sera donc la bonne année !
Boulder Mail Trail mais quelle variante ?
Il existe en effet plusieurs façons de faire Boulder Mail Trail en totalité ou en partie :
La version « classique » c’est-à-dire de faire BMT dans sa totalité en partant de l’ "aéroport" de Boulder et rejoindre Escalante.
La deuxième version consiste à partir de l’aéroport de Boulder jusqu’au milieu du BMT, descendre le canyon de Death Hollow puis rejoindre Escalante par Escalante River
La troisième version consiste à partir de l’aéroport de Boulder jusqu’au milieu du BMT, descendre le canyon de Death Hollow et une fois arrivé à Escalante River ressortir du canyon par un short cut dans du slickrock pentu jusqu’au parking situé au Sud.
La quatrième version part de l’Aeroport de Boulder jusqu’au milieu du BMT, descend Death Hollow puis part à l’Est dans Escalante River jusqu’au parking situé au Nord de la Kiva Koffee House.
Et puis il y a un tas d’autres possibilités ! Passer par Sand Canyon, partir du haut de Death Hollow…Après avoir échangé avec Blandine (alias Mme Pizza) sur ce forum qui venait de faire BMT dans sa totalité, nous avons décidé de faire la quatrième version décrite ci-dessus.
En effet, nous avons longtemps hésité entre une traversée totale du BMT et le retour par Death Hollow/Escalante River.
Cependant, on s’est décidé en se disant que la version par Death Hollow serait moins monotone et par le fait que les Narrows de Death Hollow sont parmi les plus beaux de l’Utah d’après certains spécialistes de l’Ouest Américain.
On se laissait quand même la possibilité de modifier notre choix jusqu’à la veille en fonction de la météo. Il est recommandé de ne pas la faire avec un risque d’orage ou lorsque la température est trop froide car une grosse partie de la marche se passe dans l’eau de la rivière.
Et pourtant….
Pourtant, Death Hollow est connu pour avoir une densité de Poison Ivy conséquente ! Le poison Ivy (ou plus connu sous le nom de sumac vénémeux) est une plante principalement présente en Amérique du Nord et qui produit une résine toxique, l’urushiol, qui peut être très irritante et créer une allergie mais tout le monde n’est pas concerné ! Et oui, nous ne sommes pas tous égaux devant le poison Ivy !
En tous cas, si vous êtes sensibles à cette plante, il faut porter un pantalon long et éventuellement un tee shirt à manches longues afin d’éviter tout contact.
Et puis surtout, il faut savoir le reconnaitre…on vous conseille ce site qui est très bien fait : fr.wikihow.com/...c-v%C3%A9n%C3%A9neux
Voici une photo du sumac dans Death Hollow
On peut trouver cette plante dans beaucoup d’endroits mais on a remarqué qu’elle aimait bien être au bas des falaises de canyon !
Et pourtant, la traversée de Death Hollow est exigeante car la végétation y est dense et la marche est donc parfois compliquée.
Enfin pourtant, Death Hollow a un risque très élevé de crue subite. Il suffit de faire un petit tour sur Hells Backbone road jusqu’au début du canyon de Death Hollow pour comprendre qu’il forme un entonnoir géant pouvant récolter une quantité faramineuse d’eau descendant des Boulder Mountains.
Combien de temps ?
Il est conseillé de faire ce backpack en 3 jours pour profiter un maximum de Death Hollow Canyon. Dans l’idéal, faîtes la première nuit au bas de la descente dans Death Hollow (ou légèrement plus loin) puis la deuxième nuit vers la fin de Death Hollow (ou à la jonction avec Escalante River).
Cela vous permettra d’explorer Mamie Creek (petroglyphes) et de profiter des piscines naturelles de Death Hollow. Et puis si vous avez l’âme d’un pêcheur vous pourrez taquiner un peu le poisson !
Pour notre part, nous avions un timing assez serré pour nos vacances et nous nous sommes donnés 2 jours pour le réaliser. Ça reste tout à fait acceptable même si nous n’avons pas pu profiter de la baignade. Dommage.
Par contre, cela nous a permis de dormir au plus bel emplacement. On va vous montrer où il est 🙂
Un peu de logistique
Et oui ce n’est pas une boucle. Cela veut dire qu’il faut organiser un retour à la voiture. Il y a donc 2 options :
Faire appel à une société qui fera le shuttle. Il en existe au moins 3 à Escalante mais il faut compter environ 100$ par personne !
Faire du Stop même si ce n’est pas une pratique très courante là-bas.C’était le gros point d’interrogation car il y a une dizaine de miles à faire entre le début et la fin de la randonnée et cela peut prendre plusieurs heures à pied ! Là encore, on va se laisser plusieurs possibilités et on va mettre une stratégie en place.
Tout d’abord, on prendra avec nous les coordonnées téléphoniques de toutes les sociétés pouvant fare du shuttle (certaines peuvent être contactées à la dernière minute).
Ensuite, nous avons vérifié la veille que nous avions du réseau sur le parking de la fin de la randonnée (bah oui cela serait ballot de ne pas pouvoir appeler les sociétés…)
Enfin, nous prévoyons de déposer dans un premier temps la voiture à l’arrivée de la randonnée et de tenter le stop pendant 1 heure. En cas d’échec, nous irions nous garer au parking du départ et nous ferions du stop à la fin.
Bonjour Olivier,
Bien réfléchie toute la partie logistique, bravo ! Je n'aurais pas pensé à mettre la voiture à l'arrivée et à essayer le stop dès le départ.
Les sociétés de shuttle se font plaisir avec leurs tarifs !!!
J'attends le récit maintenant 😉
Nous sommes impatients de partir ce matin mais en ouvrant les rideaux on se rend compte que le temps n’est pas de la partie. Il pleut et le ciel est orageux !
Nous n’avons pas envie de marcher sous la pluie alors nous préférons attendre que la dépression passe, ce qui semble être le cas lorsque nous observons la carte satellite des précipitations.
Vers 12h, nous décidons de partir car la situation s’est améliorée. Direction le petit parking situé au Nord de la KoffeeHouse.
Nous garons la voiture au moment où un pickup commence à partir. Nous nous précipitons vers lui et là bingo ! L’homme accepte de nous amener au début de la randonnée, c’est-à-dire au petit aéroport de Boulder.
L’homme s’appelle Leny et est bucheron à Escalante. Il devait couper du bois de chauffe dans les Boulder Mountains mais les pluies l’empêchent de travailler aujourd’hui à cause de la boue glissante. Il est donc en journée off et se reposait un peu dans son pickup.
Nous discutons avec lui durant le trajet au sujet d’Escalante puisque sa famille est installée dans le village depuis longtemps. D’ailleurs, on s’est peut-être déjà rencontrés puisqu’il faisait les pizzas du Outfitter il y a encore 7 ans.
Leny nous conduit carrément au tout début du trail, pas simplement à l’intersection avec la route 12. On le remercie vivement de son aide et nous nous préparons à commencer la marche.
La température n’étant pas si importante, nous partons avec seulement 3L d’eau pour deux. De toute façon, nous pourrons recharger dans Sand Creek ou Death Hollow si besoin.
Nous signons le registre. Un groupe de 6 personnes est apparemment parti quelques heures plus tôt.
Le début de la randonnée est assez monotone et le chemin assez facile à suivre passe au milieu d’une forêt de petits arbustes.
Au bout d’une demi-heure, nous commençons à apercevoir les premières parties de slickrock blanc.
Les nuages et le soleil alternent et la marche est pour l’instant très facile.
Nous arrivons enfin à Sand Creek au bout d’une heure. On n’imaginait pas que ce canyon était si large !
Du slickrock à volonté !
Nous entamons la descente peu pentue et régulière de Sand Creek.
Il y a des cairns sur le slickrock et nous arrivons rapidement au bord du ruisseau qu’il faut traverser au milieu d’une végétation dense. Le débit de l’eau est assez important, sûrement dû aux orages d’il y a quelques heures.
Il faut longer le ruisseau légèrement en surplomb sur environ 500 mètres avant de le quitter pour entamer la remontée de Sand Creek
Au début de la remontée, se trouve un drainage avec quelques gros rochers volcaniques, le tableau est assez photogénique.
Au milieu de la montée, nous profitons du panorama pour piqueniquer. Après cette pause de 30 minutes, nous terminons la montée (170 mètres de dénivelé au total) et continuons sur un chemin qui est maintenant plutôt plat.
Nous suivons le fil métallique du téléphone qui est bien conservé et se balade d’un arbre à un autre.
La marche redevient à nouveau moins intéressante jusqu’à ce qu’on commence à apercevoir le Canyon de Death Hollow et ses falaises vertigineuses
Bonjour Olivier.
Encore une belle rando et des photos superbes.
Comme chaque fois, tes récits me donnent envie d'aller sur vos traces.
Merci de ces partages d'autant plus intéressants qu'ils portent souvent sur des zones très rarement visitées.
Merci !
Jean-Michel.
Salut Olivier,
Je tombe vraiment très par hasard sur ton retour de trip et me voilà vite happée par vos si belles aventures!
Faut dire aussi que les régions de Zion et d'Escalante m'ont toujours séduites alors j'ai pris beaucoup de plaisir à randonner avec vous par procuration, j'adore errer sur ce genre de sites puis ces grands espaces avec leurs variations en roches et couleurs sont très attirants
Tes photos sont extraordinairement belles et les trails White Domes et Boulder Mail me donneraient bien envie de les explorer😊
Merci pour ce petit moment de plaisir
J'attends la suite..
Laurence
Bien réfléchie toute la partie logistique, bravo ! Je n'aurais pas pensé à mettre la voiture à l'arrivée et à essayer le stop dès le départ.
Cela nous donnait une double chance d'être pris en stop. Et puis comme tu l'as peut être lu après, nous avons vraiment eu du bol !
Les sociétés de shuttle se font plaisir avec leurs tarifs !!!
C'est clair que cela donne envie de créer une société de Shuttle. Certains prix sont quand même hallucinants (250$ pour aller au départ de Coyote Gulch par exemple).
Il faudrait organiser une sous-section Shuttle sur VF 😛
Nous nous approchons progressivement du bord du canyon.
Plus on se rapproche et plus on se demande comment on va pouvoir descendre.
Ca y est, nous pouvons voir le fond du canyon qui est très vert ! Nous apercevons le groupe de randonneurs qui nous devance et qui est en train de finir la descente.
Finalement une corniche part sur la droite. Elle semble avoir été légèrement creusée pour faciliter le passage des mules à l'époque.
Ce passage n'est pas dangereux même s'il est un peu exposé.
Il permet de rejoindre un drainage dans lequel il assez facile de descendre.
Après une dernière traversée au-dessus d'une alcôve et au bout de 25min nous sommes en bas après avoir descendu les 200m de dénivelé.
Voici le parcours de la descente :
Nous sommes surpris par la densité de la végétation et nous ne savons d'ailleurs dès fois plus où est le chemin.
Nous décidons donc de mettre les chaussures d'eau ainsi que les pantalons. Ca va, l'eau est plutôt bonne et c'est même agréable de marcher dedans.
Nous finissons par rejoindre le groupe de randonneurs avec qui nous discutons un peu. Ils sont de l'Utah et un peu surpris que nous fassions le trip en 2 jours (eux vont le faire en 3 jours).
Cela fait maintenant 4 heures que nous sommes partis et le temps alterne entre soleil et nuages menaçants. Le problème c'est qu'une fois en bas, on ne voit plus le temps qui peut arriver.
Notre objectif est d'avancer le plus loin possible sans dépasser les Narrows. Il est en effet possible de bivouaquer où l'on veut dans le canyon mais il faut privilégier les camps déjà existants pour ne pas abîmer le site.
Nous continuons la descente de Death Hollow en alternant 50% du temps dans l'eau et 50% sur des chemins de sable au milieu d'une végétation très dense.
On nous avait prévenu qu’il y aurait du poison ivy présent dans le canyon mais c’est carrément l’invasion. Il est par moment impossible de contourner les champs de Poison Ivy, seule possibilité : lever les bras le plus haut possible !
Nous faisons aussi la connaissance avec des serpents d’eau qui nagent dans le ruisseau avec juste leur tête qui dépasse. Ils ne sont pas très farouches et nous regardent passer. Ils ne sont pas dangereux d’après une des randonneuses qui en a dans son jardin.
On commence à surveiller l'heure car la nuit tombe vers 19h et on veut se laisser du temps pour profiter un peu de la soirée.
Et puis nous avons la crainte d'arriver trop rapidement à la partie des Narrows et de devoir faire demi-tour pour trouver un camp adéquate à l'abris d'un flash flood éventuel.
Le seul problème c'est que nous ne savons pas précisément où se trouve les narrows ! On essaie donc de garder à distance l'autre groupe qui marche maintenant derrière nous. On se dit qu'ils vont camper avant les Narrows.
Nous passons par moment à travers des zones très dégagées
mais la majorité du chemin se passe dans le canyon dont les parois sont espacées de moins de 40m.
Nous cherchons un emplacement pour bivouaquer mais plus on avance et moins nous en trouvons. Il y a quelques emplacements sans trop de végétation mais ils sont trop près du ruisseau et nous n'avons pas envie de nous réveiller au milieu d'un flash flood !
Bref, nous continuons à avancer.
Nous sommes maintenant pratiquement arrivés à l'intersection avec Mamie Creek et la bingo ! En haut d'une petite butte, le camp parfait ! Bien dégagé, une vue à couper le souffle, quelques troncs qui servent de banc. Bref, on peut rien demander de plus
Il est 18h et nous nous installons. Le groupe qui nous suivait arrive et nous leur proposons de s'installer avec nous car il y a plusieurs places. Cependant, ils ne veulent pas nous déranger et vont s'installer un peu plus loin sur une zone sablonneuse mais proche du ruisseau...
Nous passerons une superbe soirée à profiter des derniers rayons du soleil sur les falaises. Et une excellente nuit !
Merci pour ton commentaire.
L'objectif de ce voyage était en effet de partir dans des endroits qui ne sont que rarement évoqués sur VF. Par contre, je t'avoue dès maintenant que la suite du voyage va subir pas mal de changements à cause de la météo... 🙁 Mais il va y avoir encore quelques endroits très très sympathiques qui vont je l'espère te donner l'envie de les découvrir !
Je tombe vraiment très par hasard sur ton retour de trip et me voilà vite happée par vos si belles aventures!
Bah tu tombes bien alors 😛 Merci pour ton commentaire.
Faut dire aussi que les régions de Zion et d'Escalante m'ont toujours séduites...
Région très différentes mais qui ont chacune une multitude d'endroits exceptionnels.
Je me suis rendu compte après ce 7e voyage qu'au final, je faisais pratiquement toujours les mêmes étapes : Saint George, Escalante, Kanab/Page, Hanksville, Moab... et pourtant chaque année je vais sur des sites différents qui ont chacun leur particularités ! Preuve que l'exploration de ces régions est presque sans limite !
La nuit fut excellente (pas de vent, température agréable). Nous ne levons d'ailleurs pas si tôt que cela, vers 7 heures.
Nous savons cependant que la journée qui nous attend va être longue puisque nous devons parcourir environ 18 km dont une partie dans les Narrows qui n'est pas si évidente.
Nous profitons maintenant du lever du soleil qui illumine la face Ouest du Canyon. Prendre son petit déjeuner devant ce spectacle est un moment privilégié et nous prenons notre temps ce matin.
Nous sommes finalement prêts à 8h et nous remettons nos chaussures froides et mouillées. Cependant, au bout de quelques minutes dans le ruisseau l'eau nous semble de nouveau agréable.
La lumière est très douce et illumine pour l'instant les sommets des falaises environnantes.
Nous trouvons le chemin plutôt facile à suivre. Nous commençons à nous habituer à enchainer les passages dans l'eau et sur les berges, et puis il y aura beaucoup moins de Poison Ivy dans cette deuxième partie.
Au bout d'1 heure, nous arrivons à un petit enchainement de mini cascades photogéniques
Ca y est les couleurs commencent vraiment à se réchauffer
Le Canyon étant plus étroit, la marche se passe presque exclusivement dans le ruisseau
Nous continuons encore 1 heure de plus et arrivons enfin à la partie la plus intéressante : les Narrows
Il nous faut être plus vigilant car il y a des pools profondes par moment.
Il y a par moment une petite ressemblance avec The Subway
Plus on se rapproche et plus on se demande comment on va pouvoir descendre.
on s'est posé exactement la même question en approchant du bord de la falaise en juin 2014 lorsqu'on est descendu dans Death Hollow (mais A/R à partir de l'airport strip: http://www.ouestusa.fr/utah/bouldermail/bouldermail.php) et c'est encore plus flagrant avec la carte que tu as mis. on avait eu également cette impression en faisant Marphy loop dans island in the sky avec un sentiment encore plus marqué...
Envie de découvrir l'ouest autrement, de sortir des sentiers battus: c'est maintenant sur www.ouestusa.fr où vous attendent itinéraires, cartes topo, photos, moteur de recherche et de nombreux renseignements
Il faut faire attention à ne pas glisser en passant les petites cascades
Peu après, nous arrivons à un passage délicat. L'eau a l'air ici vraiment profonde. Je laisse mon sac qui n'est pas étanche à Virginie et je tente le passage par la gauche. En faisant bien attention, cela semble possible mais avec les gros sacs, il ne faut même pas essayer. Je reviens donc en arrière. Heureusement, nous savions qu'il fallait emporter une corde pour ce passage.
L'astuce consiste donc à grimper sur la gauche pour y faire descendre les sacs avec la corde.
Virginie part donc pour récupérer les sacs en bas, sauf que... sauf qu'au bout de quelques pas elle perd l'équilibre et finit dans l'eau ! Je la vois nager pour rejoindre le bord donc l'eau était vraiment profonde 😛
On descend les sacs et à mon tour je repasse par le bas sans encombre.
Ici c'est un petit d'air de Water Canyon
Les couleurs chaudes des falaises se reflétent dans l'eau au milieu de ce défilé 😮
Nous continuons en faisant toujours attention à ne pas refaire un plongeon.
Comme nous prenons énormément de temps, nous pensons voir le groupe de randonneurs nous rejoindre mais il semble qu'ils prennent aussi leur temps ce matin
Puis progressivement le canyon s'élargit
Comment ne pas s'enthousiasmer de marcher dans un tel décor ?
Comment ne pas s'enthousiasmer de marcher dans un tel décor ?
+1 ! 😉
Merci pour le partage, c'est magnifique ! 🙂
Je n'ai pas souvenir d'avoir vu souvent des retours sur cette rando...
Il faut dire qu'avec le poison Ivy, l'eau jusque là, et le passage avec les cordes, ça place la barre assez haut ! 😮
Bravo à vous pour nous montrer le chemin... 😇
On aperçoit en effet le passage vers la droite qu'au dernier moment. Heureusement, la descente est plus facile qu'elle ne paraît.
Il va falloir de toute façon que vous y retourniez pour faire la boucle en entier 😛
Au fait, n'oubliez pas les jeux de société pour vos futures longues nuits en Laponie ! 😏
A ++
Olivier
si Virginie n'avait pas dit à Lysiane qu'elle avait nagé au milieu des serpents d'eau😉 , je ne dit pas mais maintenant il faudrait une bonne force de persuasion d'autant plus
- qu'on est déjà descendu au pied de Death Hollow + A/R sand creek le long de l'escalante donc déjà fait une partie de la rando sauf narrows
- que je ne la ferais pas en été cause deer flies ( c'était infesté lorsqu'on avait fait A/R sand creek à partir du parking le long de l'US12 en 2008) et on pourra de moins en moins partir rarement en dehors des périodes estivales cause travail (cela risque d'être de pire en pire)
- Elle n'est pas ultra fan de narrows sauf quand c'est sculpté type Buckskin gulch et j'avoue que mois aussi même si c'est beau je préfère des narrows de red rock. on devient difficile avec l'age....
Pour la Laponie, c'est sur que les lunettes de soleil ne seront pas d'une grande aide.. on va quand même faire des activités: raquettes, ski de randonnée, motoneige, pêche façon trappeur et j'espère bien voir quelques aurores boréales et pouvoir les prendre en photo...
Envie de découvrir l'ouest autrement, de sortir des sentiers battus: c'est maintenant sur www.ouestusa.fr où vous attendent itinéraires, cartes topo, photos, moteur de recherche et de nombreux renseignements
Ce qui est ressort très admirablement de ce sujet est l'esprit "pionnier" qui colle vraiment à l'Ouest Américain...
Merci encore de nous le faire partager... 😉
Olivier
Je n'ai pas souvenir d'avoir vu souvent des retours sur cette rando...
Je crois aussi que les retours sont très limités. A ma connaissance, il n'y a que JJacques01 qui avait fait un retour très rapide sur cette rando mais pas de carnet.
C'est aussi pour cela que je fais un compte rendu détaillé de cette rando pour donner le maximum d'infos et de photos pour peut être susciter des vocations 🙂
Il faut dire qu'avec le poison Ivy, l'eau jusque là, et le passage avec les cordes, ça place la barre assez haut ! 😮
J'ai l'impression que la végétation était très dense en Septembre dernier et je ne crois pas avoir lu et vu qu'il y avait autant de poison ivy sur internet. On a été vraiment surpris. Les photos ne le montrent peut être pas mais la partie entre le début de Death Hollow et l'intersection avec Mamie Creek était "infestée" de poison ivy.
A l'intersection avec l'Escalante River, nous avons rencontré des employés nationaux en charge de l'entretien des forêts. Ils venaient couper des russian olive trees qui se développent beaucoup dans le coin. A un moment ils sont partis en direction de Death Hollow et se sont exclamés devant un paquet de Poison Ivy. On a un peu rigolé au fond de nous car ce n'était vraiment rien comparé à ce qu'on avait vu la veille où il y avait du poison ivy pratiquement partout !
Je suis toujours avec grand intérêt la progression de ton carnet et je suis émerveillée par les dernières photos!😊
Qu'il est beau ce défilé avec les reflets dans l'eau..
Donc si j'ai bien compris vous avez traversé la "partie profonde" de l'Escalante River à la nage, pas trop froide la plongée?
Je referai une lecture en continu sur ton site dés que tu auras avancé car c'est difficile de suivre sur VF🤪
Encore bravo pour vos belles aventures et ce beau partage
@bientôt de te lire,
Laurence
Fairyland loop : peu de monde et des vues variées : une randonnée très agréable qui permet de profiter pleinement de Bryce.
BMT : j'avais déjà vu et apprécié beaucoup le trajet "one day" de Mme Pizza et je l'avais déjà mis en wish list. Ton parcours m'en donne encore plus envie :
Les photos sont vraiment invitantes avec les nuages photogéniques sur fond de slickrock jaune ou blanc, ainsi que la marche au fond du canyon avec les parois colorées.
Serpents d'eau, Poison Ivy et passage délicat: i l faut donc quand même être prudent.
Sinon jolie chambre pour la nuit ! Le décor est superbe. Les photos dans le canyon avec la belle eau bleue donnent aussi envie.
Bref, une fois encore tu nous donnes de quoi penser et tes nombreuses indications peuvent être vraiment utiles : merci donc pour le partage...
Pour voir mes carnets Ouest USA, cliquez sur mon pseudo puis cliquez celui désiré dans la rubrique "carnets" : Vous avez le choix avec 2009, 2011, 2012, 2013, 2014, 2015 et 2016 : ça en fait de la lecture ! Et maintenant : la Chine !
Nous ne sommes pas encore arrivés à l'Escalante River. Nous sommes toujours Death Hollow. Je sais ce n'est pas toujours évident de suivre sur VF 😉
La partie profonde n'est longue que de 10 mètres. La nage peut être une solution mais j'ai réussi en me faufilant sur la gauche à éviter la nage. Virginie a glissé au milieu et s'est retrouvé donc dans l'eau. Je crois qu'elle a trouvé l'eau rafraichissante 😛
La partie basse de Death Hollow n'est pas technique. C'est le seul passage où on peut se retrouver à devoir nager.
Rien à voir avec la partie haute de Death Hollow qui s'apparente parait il à une rando aquatique avec quelques franchissements de rochers et traversées de grosses piscines à la nage.
Je n'ai pas le souvenir d'avoir vu le retour de Mme Pizza sur sa traversée du BMT...
J'avais échangé avec elle avant de partir en Septembre et je m'attendais d'ailleurs à avoir son compte rendu à mon retour 🙂
Bon je vais me remettre à écrire la suite après une pause d'1 mois !
Nous marchons maintenant exclusivement dans le lit de la rivière, l'eau ne dépassant pas 15 cm de profondeur.
Les falaises autour de nous sont vraiment impressionnantes. Elle se parent de couleurs chaudes lorsqu'elles ne sont pas éclairées.
Il est difficile de ne pas photographier mais je sens que Virginie veut avancer un peu plus vite. Il faut dire que nous avons rendez-vous avec nos amis ce soir à Hanksville et que la rando est encore longue !
Progressivement le canyon s'élargit
Et la végétation se fait de nouveau plus présente.
Après 3 de marche nous arrivons à une immense alcôve. Avant de partir, nous avions vu des photos de cette alcôve avec une chute d'eau en son centre. Un drainage se trouve en effet juste au dessus. Malheureusement pour nous il n'y a point d'eau et donc pas de chute !
Quelques truites nagent dans la rivière. Je crois qu'il est autorisé de les pêcher.
Encore quelques efforts et nous arrivons à l'intersection avec Escalante River et surprise Death Hollow est bien plus large que l'Escalante River.
Sur cette photo l'Escalante River se trouve à gauche et Death Hollow à droite :
Cela nous emble l'endroit idéal pour piqueniquer. A côté de nous 4 gardes forestiers sont en train de se reposer. Nous discutons un peu avec eux. Ils travaillent depuis quelques jours pour éliminer les Russian Olive trees qui envahissent le canyon de l'Escalante River. Ces arbres excessivement invasifs sont une vraie plaie. C'est un travail fastidieux pour essayer de contenir leur propagation.
Pendant tout le reste de la journée nous allons rencontré des dizaines de tas de cet arbre faits par les forestiers. Les brûlent ils après ?
Après cette bonne pause déjeuner, je pars à la recherche des pétroglyphes qui sont censés se situer près de la confluence sur la paroi Nord Est. Je me fraye un chemin dans la végétation dense jusqu'à la paroi, la longe plusieurs fois en observant attentivement mais RIEN ! Absolument Rien !
Si quelqu'un sait où se trouve ces pétroglyphes sur la paroi de cette photo, je suis preneur !
Nous partons maintenant en direction de l'Est c'est-à-dire en suivant le sens de l'eau.
La marche est moins intéressante que dans Death Hollow mais il y a quand même au bout de 1h20 cette falaise rose orangée impressionnante !
Et puis nous regardons les grenouilles se laisser glisser dans le courant. Certaines semblent ne pas vouloir nous lâcher.
Regarder le mimétisme de celle-ci avec la feuille
Peu avant l'intersection avec la fin de Sand Creek, le canyon s'élargit de plusieurs centaines de mètres et le paysages devient totalement différent.
700 mètres après Sand Creek, nous arrivons à une des curiosités de cette partie : Escalante Natural Arch
Cette arche massive est vraiment collée à la falaise et il est difficile de trouver un angle intéressant.
Remarquez la petite ruine indienne se trouvant sur sa gauche.
Il n'est pas possible d'y accéder sans échelle et on se dit qu'ils devaient être bien protégés la haut.
On aperçoit quand même de loin de jolies frises sur les murs
Encore un peu plus loin se trouve un panel, cette fois accessible.
avec un serpent
des danseurs vénérant le soleil ?
et des guerriers
Nous pensions trouver un peu de monde dans cette partie du parcours mais il n'y a absolument personne.
Encore quelques centaines de mètres et nous nous trouvons devant Escalante Natural Bridge qui est lui très photogénique. Il est possible d'accéder assez facilement à sa base et des deux côtés.
La fin de la randonnée est tranquille et nous arrivons rapidement au petit parking où nous avons garé la voiture la veille.
Bilan de ce petit trek sur 2 jours :
Nous avons apprécié la variété des paysages traversés qui est très différente entre le slickrock du BMT, les falaises et les narrows de Death Hollow et enfin les arches d'Escalante River.
On s'est dit qu'on avait bien fait de ne pas faire l'ensemble du BMT qui aurait peut être été plus monotone.
Si on devait le refaire et avec un peu plus de temps, on aurait mis une 3e journée. Cela nous aurait permis de profiter un peu plus de Death Hollow (pourquoi pas la partie supérieure), explorer Sand Creek et peut être pêcher !
Il est désormais 16h30 et nous faisons route jusqu'à Hanksville. Nous arrivons 5 minutes avant Thierry et Lysiane (Wavemaster sur VF) qui viennent eux de Salt Lake City après avoir fait 2 premières semaines en Oregon (voyageforum.com/...regon-utah-d7219644/)
Nous avons en effet prévu de passer une journée ensemble pour aller voir une nouveau pont naturel, encore peu connu : Hurst Bridge.
C'est sympa de se retrouver si loin de la France dans ce coin paumé des States. On rigole un peu en voyant leur 4*4 orienté ville dont la garde au sol n'est pas plus haute que celle des berlines à côté. Enfin, bon avec notre SUV 2 roues motrices, on la ramène pas non plus des masses.
Thierry me dit que cela devrait aller pour la piste de demain...on verra. En attendant, un bon repas au resto du camping pour ce soir !
Le pont se trouve dans la faille de San Rafael, au nord d'Hanksville. Thierry cherchait de nouvelles arches à découvrir et j'avais celle-ci en "réserve" depuis quelques temps alors je lui avais soumis cette idée qu'il a donc intégré à leur programme. De notre côté, nous avions prévu initialement autre chose mais en comparant nos programmes, nous avions une date en commun. L'occasion était donc belle de se faire une nouvelle découverte ensemble.
Un peu d'histoire...récente !
Ce pont naturel a été découvert dans les années 50 par Jim Hurst lors d'un vol en avion. Quelques temps plus tard son fils et un ami sont allés le voir depuis le sol.
Depuis, Hurst Bridge reste encore peu connu. Il faut dire aussi que le pont est assez bien caché et que sans GPS il est très difficile de le trouver.
C'est parti !
8h du mat, on décolle direction la route 24 au Nord. J'adore longer la faille de San Rafael car je me dis toujours qu'il doit y avoir une multitude d'endroits à explorer dans ce coin !
Puis nous empruntons la piste qui part vers l'Ouest. Pas de problème au début, nos 2 véhicules passent sans problème.
Les choses se corsent au premier Wash. Notre 2 roues motrices est incapable de passer une zone sablonneuse. Nous préférons donc laisser notre véhicule ici et nous montons dans la "berline" 4*4 de Thierry. On sent bien qu'il en faudrait pas beaucoup plus pour devoir se résoudre à continuer à pied !
D'ailleurs au petit wash suivant, une légère montée de 50 centimètres risquerait d'y laisser le parechoc ! Et puis en voulant faire marche arrière nous finissons par ensabler le véhicule ! Bigre, en plus le véhicule ne semble plus vouloir bouger. On dégonfle les pneus, met des cailloux sous les pneus, désensable, pousse à 3 mais rien ! Et la Thierry, nous explique que cela marcherait sûrement mieux s'il enlevait enfin le frein à main 🤪 Grosse rigolade
Tiens, en effet ça marche beaucoup mieux et le véhicule sort du traquenard.
Bon, il va falloir faire 5 km de plus à pied...et en plein cagnard ! Il fait 34 degrés et pas une zone d'ombre !
Nous atteignons rapidement le canyon d'Earnie, point de départ réglementaire de la rando.
30 minutes dans ce canyon et nous arrivons rapidement à Earnie Canyon Bridge
Le Bridge n'est pas très impressionnant mais vu que c'est sur le trajet. Par contre, se cache à l'intérieur une nuée de moustiques agressifs !
La suite de la balade consiste à monter sur le plateau supérieur et à suivre le cap grâce au GPS.
Le Bridge se trouve caché au fond d'un petit canyon. Autant dire que sans GPS, on aurait eu très peu de chance de le trouver.
Entrée du petit canyon :
Puis ca y est nous voila devant ! Il ne fait que 7 mètres de haut mais sa forme entre un "hole" et un "bridge" lui confère un certain charme.
Nous le photographions sous plusieurs angles
Et puis après un piquenique et une photo souvenir, nous repartons en prenant le même chemin au retour.
Au total, la balade fait 15 km. (10 km si on arrive au trailhead avec son véhicule).
Si les paysages traversés ne sont pas d'un grand intérêt, les amateurs de pont et arches apprécieront le caractère isolé et l'aspect photogénique du bridge.
Attention, il n'y a pratiquement aucune cairn sur le chemin. Un GPS est obligatoire.
Retour à Hanksville assez tôt pour une fin de journée tranquille.
En réalité l'après-midi ne fut pas si tranquille, nous avons beaucoup réfléchi à ce qu'on allait faire les 3 prochains jours.
Nous avons en effet prévu de faire un trek sur 3 jours pour aller voir une nouvelle pépite qui attire de plus en plus de monde : Happy Canyon.
Ce Canyon est semble t il équivalent à Antelope Canyon sans la horde de touristes. Bref, le genre de sites qui nous a tout de suite donné envie.
Il existe 3 trails qui mènent à Happy Canyon :
- Un très long et facile (via Poison Springs)
- Un long et très dangereux (via Burr Point Trail)
- Un court et technique avec rappel en fil d'araignée (Miner's trail)
Nous avons donc choisi initialement le très long et facile qui consiste à emprunter la piste de Poison Springs. Ayant un gros doute sur la capacité de notre véhicule j'avais prévu 3 jours pour faire ce trek (2 jours pour faire l'aller-retour sur la Poison Springs à pied + 1 jour pour descendre jusqu'à la dirty Devil River, la traverser, visiter Happy Canyon et revenir).
Bref, tout cela semblait pas mal sauf que...
Sauf que je me suis trompé dans les kilomètres à faire à pied : l'aller retour sur la poison springs n'était pas de 32 km mais 42 km...
Sauf que la température est bien plus importante que ce que j'avais prévu (plus proche des 35 degrés que des 25 degrés que j'anticipais) et il n'y a pas d'eau avant le milieu de la 2e journée ce qui nous obligerait à partir avec beaucoup d'eau...
Sauf que en y réfléchissant on s'est demandé si 2 jours à pied sur une piste assez monotone rendait le rapport effort/intérêt encore valable...
Notre deuxième possibilité pour espérer nous rendre à Happy Canyon est de faire la Poison Springs avec un véhicule. Thierry et Lysiane sont partants pour nous accompagner dans ce cas là !
Hors de question bien sûr de faire cela avec notre véhicule qui n'a pas du tout de capacité de franchissement. Mais à la vue des prouesses de celui de nos amis, leur véhicule ne semble pas non plus être à la mesure d'arriver au bout. Et le hic c'est que Poison Springs est sujet au flash flood donc impossible de laisser le véhicule hormis au début ou à la fin de Poison Springs.
Nous nous renseignons auprès de la gérante de l'hôtel pour essayer de trouver un outfitter qui pourrait nous amener là-bas. Mais il ne semble que personne ne puisse nous accompagner.
Troisième possibilité : essayer d'emprunter un des deux autres trails.
On reprend notre livre de Michael R.Kelsey et étudions ce qu'il va être possible de faire.
Nous excluons rapidement le Miner's trail car nous n'avons pas le matériel nécessaire pour faire la partie de rappel.
Il reste donc le Burr Point Trail mais en regardant des photos sur le net de certains passages vertigineux nous préférons renoncer.
A regret nous préférons donc annuler la visite de Happy Canyon mais cela nous semble plus prudent.
Merci pour cette suite, c'est toujours aussi intéressant à lire.
Vu que nous ne sommes pas prêts à faire des trails sur 2 ou 3 jours pour l'instant, cela nous permet de voir ces endroits par procuration...
Nous réfléchissons en ce moment à notre future location de voiture : au départ, nous pensions louer un Grand Cherokee comme l'an passé, mais les prix trouvés sur les divers comparateurs sont complètement "barrés" en ce moment... Nous avons finalement trouvé un prix un peu moins prohibitif sur le site d'Avis Espagne : 767 € pour un Chevrolet Traverse ou 900 € pour un Tahoe pour 16 jours. Mais mon mari avait l'impression que le Traverse est plus orienté ville... alors en lisant cette phrase
On rigole un peu en voyant leur 4*4 orienté ville dont la garde au sol n'est pas plus haute que celle des berlines à côté.
je suis allée voir sur le carnet de Thierry ! 😉 Mon intuition était la bonne ! C'est bien un Traverse qu'ils avaient et mon mari a donc raison de penser que le Traverse ne sera pas un bon choix pour nous...
Bon, ben donc merci aussi pour ce genre d'infos, même si c'est par un biais détourné !😉
les véhicules indiqués sur les sites des loueurs sont indicatifs et si tu veux connaitre l'offre locale il faut essayer d'appeler le guichet du loueur à l'aéroport. Cela dit je confirme; le Chevrolet traverse, c'est de la merde !!!! c'est le pire véhicule que j'ai eu en 18 voyages. la garde au sol ne serait pas très mauvaise s'il n'y avait pas ce pare choc si bas (j'avais dans l'idée de démonter la partie basse mais je n'avais pas les tournevis nécessaire et le garage de hanksville était fermé) et l'angle d'attaque est quasi nul.... bref un véhicule à fuir sauf pour l'habitabilité
Envie de découvrir l'ouest autrement, de sortir des sentiers battus: c'est maintenant sur www.ouestusa.fr où vous attendent itinéraires, cartes topo, photos, moteur de recherche et de nombreux renseignements
Alors je mets en pratique une idée que j'ai eu voici deux ans... j'invite tous ceux qui le veulent à construire ensemble un bel objet participatif, un carnet…
Je me lance pour l'écriture d'un carnet de voyage sur les USA. Un énième carnet, me direz vous... Après 2 voyages aux USA et un immense coup de foudre l'année…
Kiki veut un nouveau carnet avec des photos, hein, qui?? Allez, c’est parti... Cette année 2016, ce sera un voyage de contrastes, entre Utah et Colorado: Rouge…
Amis passionnés de l'Ouest! Pour notre 3e voyage dans le Southwest (2e pour nos enfants âgés de 13, 11 et 7 ans) cet été, du 13 juillet au 4 août 2018, nous…
Le 30 mai 2016 nous avions prévu avec Lysiane de partir en backpacking à reflection canyon malgré 30° annoncés. Nous étions partis à environ 12H du parking…
I’d been wanting to discover Sulawesi for years. But then life happened—COVID, the cost of flight tickets, you name it. Long story short, years went by, but we finally set off as a family for a three-week trip in southern Sulawesi: Rammang Rammang, Rantepao, Sengkang, Bira, and Selayar.
I like to spend a good amount of time in the places I visit, giving myself the chance to really get to know the area and meet locals. So no island-hopping this time—just the south. But when I say "just," it’s not restrictive at all, given how rich this island is in landscapes, little encounters, and magical moments.
Wednesday 07/08 - Thursday 07/09:
We left Montpellier for what was supposed to be five flights, though we only took four to start, landing in Jakarta.
We picked up our luggage there to catch a flight to Makassar the next day. That’s the only way we could get an affordable ticket (702 €).
I won’t bore you with the flight details—there’s not much to say. We arrived at 7 PM and considered heading straight to Makassar that evening. But we opted for a recovery night before taking off again. Good thing we did, because my son’s suitcase was missing...
First contact with the locals was a bit stressful—a trip without your luggage isn’t exactly fun. But right away, a woman reassured us: the suitcase was just enjoying some extra time in Singapore. Maybe it was doing some last-minute shopping. Anyway, nothing serious—it was supposed to arrive at 9 AM the next day. That gave us some breathing room since our flight wasn’t until noon.
So off we went to our hotel (Days Hotel & Suites) near the airport. It was cheap (40 € for three rooms—my kids are older and need their space), but it wasn’t worth much more. The place had definitely seen better days. But no big deal—we were only there for the night, and... we got to watch France beat Morocco in the World Cup live at 3 AM. That’s what really mattered!
Friday 07/10: In search of the lost suitcase
First challenge of the morning: finding our missing suitcase. They sent us to the airport basement, to the staff entrance. We were greeted with smiles, and an airport employee led me through the underground corridors back to the baggage claim. Right on time at 9 AM, the suitcase arrived, just like they’d promised. We were finally complete!
Off we went to change terminals, grab a well-deserved meal, and board our fifth flight to Makassar.
Little side note: I struggled for a while trying to book domestic flights directly on the airlines’ websites with no luck. Without meaning to advertise (though I guess I am a little), I realized it’d be easier to use sites like tiket.com or Traveloka. That turned out to be a great choice—I even ended up booking hotels through them later in the trip.
12:40 PM: We were on our way to Makassar. First good news: we were the only tourists. Well, the only European tourists on the flight, anyway.
No, you’re not dreaming—the bag is full of... potato chip packets.
To each their own souvenirs, I guess...
When we arrived in Makassar, a driver was waiting to take us straight to Rammang Rammang: 250,000 IDR (12 €) to our guesthouse (Rammang Rammang House). Forget about meeting people on the bus—we were headed straight to the first stop of our trip, and it was already stunning.
My kids’ guesthouse:
Ours:
View of the little lake:
But not everything is straightforward around here.
I wanted to get a local SIM card for internet and calls. I found them expensive at Jakarta’s airport (20 € for 20 GB), so I decided to wait. Well, no luck in Rammang Rammang either. You can’t just buy one from the local shop—you need a Telkomsat store (they have the best coverage). So we’d have to wait for Rantepao to get Wi-Fi... When I say "local shop," I mean the little shack around the corner. No big deal—we’d find one easily in Rantepao for 5 € and 25 GB. So there we were, offline, just the four of us enjoying the amazing view.
Saturday 07/11: Rammang Rammang
We woke up early to the sound of wedding music blasting through the village (everyone’s invited!). Off we went to explore the area.
A little walking, a little boat ride (shared with a French tourist and a Polish one—yes, there *are* tourists here, just not many; 750,000 IDR for up to 8 people) through a lovely canal, and we discovered the karst site. It was peaceful and beautiful.
The river:
The karst site:
It was winter, a winter with beautiful weather,
A season that only exists in the southwest of America,
I remember very well what I told you that morning
A month ago... A century ago, an eternity ago...
We’ll go... wherever you want, whenever you want...
Well, yeah, back from our adventure in our enchanting American West just a month ago, we’re already taking a bite out of one of its lesser-known competitors. "Flo, if you had to pick just one reason to justify your love for the U.S., what would it be?" The greasy, dripping burgers? No, I don’t think I’m going out on a limb by saying it’d be the wide-open spaces... And that’s exactly what our new quest is taking us to—a land on the other side of the globe where the horizon also seems endless, where silence tastes like salty wind and sand, where freedom is measured in kilometers of desert tracks, where the GPS is mostly there to confirm you’re lost in the middle of nowhere... Add to that magic formula the fact that you’ll see more zebras, giraffes, wildebeest, and elephants than people per square kilometer, and you can imagine us setting foot in Southern Africa for the first time, more precisely at the small airport in Windhoek, capital of... of...? Brush up on your geography, damn it! We’re landing in Namibia!!!
To be honest, Namibian landscapes have been flirting with me for ages. So how did I resist this island of temptation for so long? First, the budget. Let’s just say that for the same amount of effort (and kidneys), the bank lets you choose two other adventures almost anywhere else on the planet. Then there were my girls. Yeah, back then, they were too little to dose up on Malarone, the only malaria remedy at the time... Long story short, ten years later, all the planets have aligned. First, I won the Euromillions! Well, almost... Let’s just say my girls are now old enough... not to take Malarone, but to stop following me on all my adventures! Jackpot! "Flo, how about a little two-person caprice, just the two of us, tackling the Namibian tracks?"
As we landed on the runway, first wow effect: The horizon is immense. It’s flat as can be, incredibly flat... So much flat space! Did I mention it was flat?... Looking into the distance, it feels like your gaze could circle the Earth without hitting a single obstacle—until you end up staring at your own backside. "Oh, what a nice view!" Well, it’s the first time I’ve seen my butt from this angle! Touching moment... Sorry, I’m rambling—must be the exhaustion from the three-flight marathon we just powered through via Ethiopia and South Africa... And yet, no time to philosophize about my anatomy. As usual, we want to rack up our first kilometers to be front and center at dawn tomorrow. After wrapping up the tedious Namibian immigration formalities and meeting the 4x4 that’ll be our companion day and night for the next fifteen days, we’re off! We’re not exactly fresh, but we’re ready to tackle the next five hundred kilometers in night mode, cruise control set due south! Just outside Windhoek, the local wildlife—a jackal—welcomes us with a smile: "Welcome to Namibia!" That’s what it said! Honest... Okay, first endless straight road, first flaming sunset, first corrugated dirt track, first Milky Way with zero light pollution... You get it—it’s definitely the day of firsts... First night camping, too, in the big trunk of our Toyota Fortuner parked by the side of the track... The real adventure, the kind that smells under the arms, can finally begin...
I could have titled my travel journal like Carmen: "Some trips are born twice." Indeed, we had considered this destination back in February 2020. However, an honest tour operator advised us against traveling at that time due to the climate. So, we gave up and opted for Guatemala instead (see "On the Mayan Lands" on this site).
So, why this title? When I was in primary school, over 65 years ago, the illustrations in my history books (Machu Picchu) and geography books (Lake Titicaca) made me dream, and those images stayed in my mind. It took until 2026 to finally make this dream come true!
We prepared our trip with Tout Pérou, a French-speaking "agency." Everything was handled via email and WhatsApp exchanges with our contact: Laurent, who was both competent, friendly, and full of good advice.
For 200 €, Tout Pérou provided us with drivers and guides whenever we wanted, helped us buy our domestic flights (cheaper when purchased in Peru), booked shuttles between airports and hotels, and got us a discount on the train ride to Aguas Calientes, as well as on the buses between Chivay and Puno and between Puno and Cusco. In short, Laurent took care of all the logistics and the Machu Picchu tickets. It was up to us to book our hotels. Tout Pérou provided a list, but we weren’t obliged to follow it. Another advantage of the package: we didn’t have to pay in advance; we paid the service providers directly day by day.
We didn’t meet Laurent in person because he was on vacation in Europe. Before his departure, he gave us a briefing, provided a summary table with the entire program, the service providers, their phone numbers, their fees, the schedules, and gave us plenty of advice (money, exchange, safety, etc.). After returning at the end of our stay, he kept checking in on us.
Lastly, we had also gathered information from Arnaud Lagadec, who runs a hotel in Cusco and offers tours of the region. He gave us a lot of useful information. Another contact: Thomas Montaigne, very friendly, who runs an agency in Arequipa (Agence Pérou Exclusif).
Day 1 – Paris to Lima
Foreword
I’ll share our trip without any pretension—I don’t have the talent of some contributors on this forum—and I’ll illustrate it with a few photos (taken with an ordinary smartphone). My comments are personal and only reflect my own views. So, please be kind! Feel free to comment on my story as you like, but let’s avoid pointless debates.
Even though we live in the south of the Paris region, true to our habits when the flight is in the morning, we chose to spend the night before our departure in a hotel near CDG and parked our car in a parking lot in Garches. This way, we avoid the stress that often comes with traveling around Paris (accidents, roadworks, traffic jams, etc.).
Check-in and border control went smoothly on that Sunday morning. Our Air France flight was uneventful. In Lima, border control took a particularly long time, and for the first time, we didn’t get an entry visa stamped in our passports.
As planned, a driver took us to the Miraflores district, where our hotel was located. We were surprised by the numerous signs about possible tsunamis, having forgotten that Peru is prone to such events and regularly experiences earthquakes. We’d see the consequences of these during our journey.
Exhausted from the early wake-up, the 13-hour flight, and the 7-hour time difference, we had dinner at the hotel before a restful night.
Note that this day was Peru’s presidential election day. As a result, we weren’t served beer—the sale of alcohol was banned that Sunday.
With my girlfriend Christelle, we’ve chosen South Africa for our first trip to Southern Africa, focusing on safaris—after a long debate with a Cape Town/Kruger combo.
But that would’ve meant cutting out St Lucia, which would’ve been harder to fit into another trip.
And St Lucia—thanks to Michel and all those travel journals—we really wanted to go there.
So our 11-night itinerary ended up like this, mostly shaped by school holidays:
- 3 nights in St Lucia
- 1 night in Hluhluwe
- 1 night at Mkhaya Game Reserve (Eswatini)
- 1 night at Hlane Royal National Park (Eswatini)
- 3 nights in Kruger (Berg en Dal / Satara / Tamboti)
- 1 night at Shindzela Tented Camp in the Timbavati private reserve
- 1 final night in Kruger at Lower Sabie
All of this in the off-season and rainy season, just a month after catastrophic floods that killed over 150 people and seriously damaged Kruger’s infrastructure.
I’ll jump straight to St Lucia and skip the loooong journey to get there (with a layover in Frankfurt, landing in Johannesburg, a domestic flight to Durban, and the rest by rental SUV—First Car Rental, perfect, no complaints).
To motivate readers—especially some familiar faces here—I’ll drop in a first photo.
When we started looking for a summer destination a few months ago, our first criterion was to avoid extreme heat and heatwaves. We had already been to Norway two years ago and are considering going back in the future for other occasions. So, we had some fun asking ChatGPT which destinations enjoyed a mild climate during the summer without going too far. Among the list provided by the AI were the Canary Islands... The idea of a place we wouldn’t have thought of first, both not too far away and exotic enough, appealed to us: “Hmm, why not?”
This destination had never really attracted me, though Magali was a bit more interested. Five years earlier, COVID had caused a short break in my professional activity, and I had planned a trip because the flight price was attractive, and I was looking for a destination different from what usually appeals to me, more than out of deep interest. From a distance and with a social judgment I acknowledge (it’s not great, but it’s not completely wrong), I had the image of a destination for party-goers enjoying the sun without the slightest interest in local culture, with concrete coastlines and denatured landscapes—everything I detest the most. Still, I had done some quick research on the different islands and spotted Lanzarote for its beautiful volcanic landscapes, hiking trails, beaches, and the impression of a good balance between activity and fewer crowds than Tenerife or Gran Canaria. Then I dropped the idea of going, without ever reconsidering traveling to the Canaries...
Until now! Because we started researching the different islands of the archipelago to see which ones might appeal to us the most. It was La Gomera, the third smallest island of the archipelago, more praised for its hiking trails and preserved nature than for its beaches, away from mass tourism (fifty times fewer tourists than Tenerife) but still a bit more developed than its wild neighbor El Hierro, that caught our attention. Contrary to what might be suggested later, I’m not at all addicted to AI, but I use it from time to time to synthesize quick research or simply for experimentation. Since ChatGPT had started anticipating my tastes lately as if it had become my buddy (often successfully, sometimes off the mark), I asked which Canary Island would suit me best for a trip with my family. The tool answered first with... La Gomera. So, I tested it and teased it a bit to see if this suggestion was well-founded, as the method sometimes makes it contradict itself. But no luck: “You’d appreciate the wild nature of El Hierro, but with family, you’ll find little activity for the kids. You won’t like the touristy vibe of the big islands like Tenerife, Gran Canaria, Lanzarote, and Fuerteventura. You could consider La Palma, but it’s really La Gomera that will suit you best, based on your interests and the criteria given.” So, we dug deeper into our research and were convinced without a shadow of a doubt that this island was the one waiting for us.
Without knowing it, we had Canarians in our circle who revealed their origins when they heard about our travel plans. One from Tenerife insisted we’d be better off choosing Tenerife (obviously...) because it also has preserved spots and that La Gomera, “you can explore it in two or three days, you’ll get bored quickly...” The other, a colleague from Gran Canaria who had never visited La Gomera, still recommended it without hesitation because it turned out her parents had just gone there on vacation: they loved it and had encountered few tourists. She also tended to think this destination was usually the subject of short stays, but according to what her parents told her, taking your time there was also a great idea. However, in our research, the idea that La Gomera is an island you can explore in three or four days max kept coming up. So, we considered combining its visit with La Palma or El Hierro, the other two that caught our eye. But hopping between islands by ferry represents a significant budget for non-Canarians, even more so for a family of four. Then, scrutinizing Google Maps, it seemed obvious that two weeks were too short to discover two islands as they deserve, and that there seemed to be plenty to see in La Gomera, given its very unique culture. After all, we read that some people spend several months a year there, others never even leave... Finally, these landscapes and this atmosphere, which seemed to us a mix of Europe, North Africa, and Latin America, tempted us. So, it would be two weeks in La Gomera, deal!
La Gomera is therefore the second... well, the third smallest island of the Canaries since La Graciosa was recently recognized as a fully inhabited island. It has the shape of a rough circle about 20 to 25 kilometers in diameter and has just over 20,000 inhabitants, half of them in its capital, San Sebastián de la Gomera, the only real town. Like its Canarian sisters, La Gomera is a volcanic formation that rose about 10 million years ago. The island is very mountainous and rugged, covered with red and black rocky landscapes. Geological activity has shaped, between the sprawling massifs that end in steep cliffs in the ocean, six coastal valleys with tropical vegetation that have favored human settlement. They divide the island like slices of a cake; from the north clockwise: the agricultural Vallehermoso, the rustic Agulo, the green, humid, and fertile Hermigua, the sunny capital San Sebastián de la Gomera, the southern and isolated Alajeró-Santiago, and the seaside Valle Gran Rey. They constitute the six municipalities (more like cantons to our French understanding) of the territory.
The large solidified magma massifs that shape the heart of the island have created a large depression more protected from the sun at its center, allowing the growth of a vast laurel forest, today grouped within the Garajonay National Park, La Gomera’s green lung, which has earned it the status of a World Biosphere Reserve. Its completely European appearance contrasts sharply with the rocky and tropical landscapes of the rest of the island. Thus, the climate varies greatly from one point to another on the island: in summer, you can quickly go from a dry and sunny valley at 35°C to a humid forest area at altitude at 18°C.
La Gomera was populated late. As with the rest of the Canaries, human presence is thought to have begun about 2,000 years ago. Groups of animist Berbers, probably fleeing persecution, gradually populated the archipelago, especially the western islands and La Gomera, becoming its small aboriginal population: the Guanches (or later Gomeros). The animist and pastoral civilization of the Guanches thrived until the Spanish takeover in the 15th century, which, after a short period of harmony and mixing with the indigenous people, suddenly ended in bloodshed... La Gomera later became the “Columbus Island” after Christopher Columbus’s stopover, increasing the blending of populations. In the 20th century, many Gomeros emigrated to Cuba and other Latin American countries in search of a better life, bringing back a mix of cultures and traits quite palpable in today’s Gomeran culture. It is, however, in La Gomera that the vestiges of Guanche culture seem to have left the most traces, in the language, gastronomy, social practices... Moreover, most Gomeros, especially in remote villages, have a particular identifiable type and proudly claim their ancestral roots, even making La Gomera a bit exotic in the eyes of other Canarians.
Perhaps that’s why it has never really wanted to develop its tourist infrastructure too much. If we set aside the tourists who visit for the day by bus or boat from Tenerife on a marked itinerary (and whom we ultimately rarely encounter), La Gomera has remained a hidden gem, a destination focused on nature discovery that attracts hikers, nature-loving divers, and scientists for its fauna and flora, and to a lesser extent, beachgoers who don’t seek overly developed coastlines. Tourist activity is therefore limited. Roughly speaking, you’ll find a majority of Spaniards, including a substantial number of residents from other Canary Islands, many Germans who have a particular fondness for La Gomera and spend long stays there or own second homes, to the point that the German cultural footprint is clearly noticeable in some places (it’s said to be Angela Merkel’s favorite holiday spot), and still quite a few French. The presence of other nationalities seemed negligible to us. Most travelers come mainly for hiking, but it’s also a prime spot for whale watching. Additionally, the seaside resorts of La Gomera—San Sebastián, Santiago, and especially Valle Gran Rey—are well-known destinations for hippies, especially German ones, ranging from chic boho hippies to old-school hippies who’ve been there for decades, quite similar to those you’d meet in India in Goa, Rishikesh, or Paharganj. Thus, practices like naturism, vegetarianism, and local organic production are quite well established in some areas.
Some practical info:
- The round-trip flight from Paris to Tenerife cost us 365 € per person (outbound with Transavia, return with EasyJet), including checked luggage and three seats reserved side by side.
- We chose two bases to explore the island: one week in Valle Gran Rey, reputed to be the most pleasant of the three seaside resorts, and one week in Hermigua, more mountainous and close to the natural park. We booked two houses with balconies and views: the first at 120 € per night, the second at 99 €.
- The round-trip ferry between Tenerife and La Gomera cost us 270 € with the company Baleària Canarias, including discounts for children aged 4 and 12, but I don’t have the exact details. It was a bit cheaper than with the other company, Fred Olsen.
- Finally, we rented a car through the agency Cicar for 360 € for 16 days, which comes to 22.50 € per day.
- Apart from that, we didn’t plan anything and decided the day before or even the morning of what we wanted to do. We didn’t invest in any paper guide on the Canaries, as information on La Gomera was scarce, but we used the very comprehensive site La Gomera Travel, a travel guide published by the Canary Islands Tourism Council, a real goldmine of almost exhaustive information on the island.
Alright, off we go for 16 days of adventure discovering La Gomera!
Come along, I'm taking you to this country where it's so nice to wander and slow down...
This trip was in 2023, but when I wanted to write my travel journal, VF was still closed to contributions...
So, now that I've just finished my Japan travel journal here, I figured it was high time to honor this destination we came back from so enchanted.
Disclaimer 1: This is a written travel journal. There’ll be text! Too much, for some!
Disclaimer 2: This is an illustrated travel journal. There’ll be photos! Too many, for some!
I have to say, every time I try to discipline myself, to keep it shorter, to include fewer photos... I end up adding more. It feels like my dear Aunt Nicole, who exhausted us with her slide-show evenings in the 70s/80s, decided to take her revenge. The upside for you, readers, is that you can slip away anytime without offending Aunt Nicole. I won’t even notice!
Anyway, since I love maps, here’s one to give you an idea of where I’m taking you. As you can see, we only saw a tiny part of Laos (the areas circled in red); we only had 3 weeks for ourselves (my husband’s newly retired, I still work), and we prefer taking our time over rushing around like crazy.
In broad strokes, it was very classic:
First, we “settled in” at Luang Prabang (8 days), because we wanted and needed to.
From there, we took three days to venture a little further north—not far in kilometers, but as we know, distances aren’t just about km!
Then we flew south to Paksé, letting ourselves drift down to the 4,000 Islands while stopping by the pre-Angkorian archaeological sites.
We wrapped up with the Bolaven Plateau.
A few practical notes: We arrived via Bangkok, then took a Bangkok-Luang Prabang flight, having picked up our luggage in Bangkok to check it in for Luang Prabang. No issues—the Bangkok airport, which many of you know, is very well organized.
We got our visas on arrival in Luang Prabang. Quick, but to be fair, we were on a “small” plane, and the big flights had arrived earlier, so we weren’t too crowded in line!
At the end of our trip, we didn’t fly out of Paksé but from the nearby airport in Thailand, Ubon Ratchathani (a 2.5-hour drive from Paksé), then Bangkok and Paris.
You’ll notice we skipped Vientiane to stay longer in Luang Prabang. That said, there’s now a high-speed train between Vientiane and Luang Prabang—good to know—and soon the (Chinese) train will go all the way to Bangkok and even Kuala Lumpur!
With that intro out of the way, let’s dive into the heart of the matter.
To be continued: Slowing down the pace... in Luang Prabang
Hi everyone, I’m Patrick, 67 years old, a seasoned traveler (already 22 trips outside Europe).
In autumn 2025, I took my first 3-week trip to Japan, with stops in Tokyo, Kamakura, Matsumoto, Kamikochi, Takayama, Kanazawa, Kyoto, Nara, Osaka, Koyasan, Tokyo again, and Nikko.
I wanted to go back in May 2026 and explore some lesser-known places to complement my first trip.
Last year, there were four of us traveling together to discover Japan (a fairly classic itinerary). This time, I’ll be traveling solo for part of the trip and with a couple of French friends for the rest.
The weather was gorgeous in May, averaging around 25°C, with two very hot days in Kyoto and only two rainy days.
As usual, I organized everything myself, gathering plenty of information from various sites, including this one.
Transportation:
An ICOCA card is essential.
I got a 5-day Kansai-Hiroshima pass because I took the shinkansen between Hiroshima and Osaka three times, and it paid for itself quickly.
Accommodations:
Mostly through Booking. No issues at all. Average cost was 46 € per night.
Meals:
For breakfast, I alternated between buying food at a konbini to eat in my room or on the train and grabbing something at local cafés.
For lunch and dinner, I tried to vary my meals as much as possible—lots of sashimi, sushi, and ramen.
Okonomiyaki in Osaka and Hiroshima.
Oysters in every form (raw, grilled, fried) in Onomichi and Hiroshima.
A variety of seafood (shrimp, shellfish) in Hiroshima and Matsumoto.
Fish whose names often escaped me, but notably mackerel and eel (unagi).
Tempura and gyoza.
Chicken skewers (yakitori) and one teppanyaki meal.
One omakase meal (9 different dishes).
In the end, not much meat aside from a few yakitori skewers. No splurges on super expensive wagyu or Kobe beef.
Average dinner cost: 4,800 yen, drinks included.
The Itinerary:
Day 1: Departure from Brussels
Day 2: Arrival in Osaka
Day 3: To Himeji, then Kurashiki
Day 4: To Fukuyama, then Tomo no Ura, then Onomichi
Day 5: Cycling the Shimanami Kaido
Day 6: To Takahara, then Hiroshima
Day 7: To Kyoto to attend the Aoi Matsuri parade
Day 8: To Miyajima
Day 9: Hiroshima, then Kyoto
Day 10: Southern Kyoto
Day 11: Northern Kyoto
Day 12: Final day in Kyoto, then to Nagatsugawa
Day 13: Start of the Nakasendo Trail (Magome to Tsumago)
Day 14: Second day of the trail (Kiso Fukushima)
Day 15: Third day of the trail (Narai), then Matsumoto
Day 16: To Mt. Fuji (Kawaguchiko)
Day 17: To Tokyo
Day 18: Excursion to Enoshima and Kamakura
Day 19: Flight home, with a 10-hour layover in Hong Kong
Day 20: Arrival in Brussels
I hesitated about writing this travel journal...
This summer, we only did the classics (the 3 northern parks and Zanzibar) and let a local agency take care of everything from start to finish.
No craziness, no risks, no sleeping under the stars, no self-drive, no venturing off the beaten path, no incidents, and not even any delays in the pre-planned itinerary...
But don’t think we were disappointed!
The whole family (there were 6 of us) came back with smiles and memories of great moments spent together.
So, if you're looking for a "classic" way to discover Tanzania, this is the place to be.
Our 2-week itinerary:
- Arusha (1 night upon arrival)
- Tarangire (1 night)
- Ngorongoro (2 nights in Karatu then Irmisigiyo)
- Serengeti (3 nights in Robanda, Togoro Plains, and Seronera)
- Zanzibar Stone Town (1 night)
- Zanzibar Matemwe (3 nights)
- Zanzibar Jambiani (3 nights)
Preamble:
Africa was calling to me, so a year ago, with our usual travel companions, we decided to return to the continent we love so much.
Where to go?
Uganda quickly caught our attention—wildlife we’re used to seeing, plus gorillas and the shoebill we missed in Zambia.
We got in touch with Paul, who’s been mentioned several times on the forum back in September, booked our flight tickets, secured the gorilla permits, and by early October, the most important things were done.
We still had plenty of time to hold our "prep meetings" for the final itinerary.
Three days before departure, I sprained my ankle (my weak spot, as you’ll recall from our Colombia trip).
I wasn’t in great spirits, but after a year of waiting, nothing was going to stop me.
We’d see how it goes!
Off we went for our new adventures
After as many weeks as I have fingers on my right hand, we're hitting the road again, fully recovered from our pharaonic adventure. Back in France to drop off our daughters (sorry, girls!), this time it's just the two of us, ready to be welcomed by a new destination. They say it offers one of the richest cultural heritages in the world for those willing to put in the effort. It's the land of the ancient Silk Road, where we'll follow a journey steeped in history and discoveries straight out of *One Thousand and One Nights*. A former Soviet bloc region independent only since 1991, we'll be walking in the footsteps of Genghis Khan, Tamerlane, Alexander the Great, Marco Polo...
Another fun fact about this country: it's strictly forbidden to import porn on your phone. True story. The same goes for painkillers! Unless it's about sodomy—though the two don’t seem connected, that’s just how it is. Don’t ask me why! Anyway, I’m getting off track. Here’s the big question: Where do you think we’ve just landed?... To give you a hint, the locals are known for being incredibly welcoming. No sooner said than done—our first taxi driver, proud to transport French travelers, refused to let us pay for the ride. Great vibes for these two weeks ahead. So, any guesses?
Uzbekistan!!!
Okay, Palermo—we know it. We go there to marvel at the architectural wonders born from the Arab-Norman-Byzantine-Gothic mix. And rightly so. We also go to treat our taste buds to all kinds of delights, both savory and sweet. Again, rightly so. We go to succumb to the charms of Palermo’s women, their sun-kissed skin glowing with golden highlights. Still, rightly so. And all while fantasizing about a mafia we’ll never actually see. Anyway.
But you’ll also find street art everywhere, even in the historic center. Sometimes, you just need to step a few meters away from the main tourist highways like Cassaro, Via Maqueda, or the main arteries of the Ballarò, Capo, or Vucciria markets to stumble upon some amazing murals. Duck into one or two slightly grimy alleys, weaving past trash and crumbling walls, and you’ll find real gems.
For example, just 50 meters south of the main artery of the Mercato del Capo, there’s a great spot with dozens of murals in a tiny neighborhood of run-down mini-houses. You’ll find plenty more south of the Mercato di Ballarò, in the Albergheria (the grittier side, not the one near Cassaro). There’s some in Ballarò itself too, but it’s hard to spot when the market’s in full swing with stalls everywhere. La Kalsa isn’t left out either, nor is Vucciria—just step away from the restaurant-packed streets.
Here are a few examples that really caught my eye.
(In the heart of Albergheria, on a street every visitor walks down—lovely message from an unidentified artist)
We landed in Victoria Falls, Zimbabwe, and headed straight to Kasane in Botswana to pick up our car.
Our vehicle is a 4x4 because in Zambia, it's practically impossible to use anything else, especially in the national parks. I’ve already had the pleasure of visiting South Luangwa National Park—it’s one of the reasons for this trip, the main one being to travel in Africa with one of my sons.
First stop: Livingstone on the banks of the Zambezi River. Along the way, we discovered a lovely restaurant at Socrates with a super-friendly owner (we’ll actually stop there again on our way back). We spent our first night in the rooftop tent after a stunning sunset, accompanied by the grunting of hippos in the river.
The next day, we set off early, heading to Kafue NP. In fact, we’ll always leave early—waking up between 5:00 and 5:30 AM and hitting the road an hour later. Kafue is a lesser-known park, mostly forested, and the animals are skittish because they’re not used to human presence. We crossed the park from south to north and came across various antelopes. Near Lake Itezhi-Tezhi, there are plains where wildlife is easier to spot.
After Kafue, we headed to South Luangwa. This journey requires stops in Mumbwa and Petauke. Two pleasant stops where we found lodges (a nice change from the rooftop tent) at affordable prices and met welcoming people.
For me, South Luangwa is Zambia’s most beautiful park—the river is stunning, the landscapes are gorgeous, and there’s a wide variety of wildlife, including, of course, big cats. A tip for those, like us, who aren’t with a guide: if you’re staying near the park for several days, don’t hesitate to do a "game drive" to scout out where the animals are so you can return the next day with your own vehicle. Of course, in the dry season, you’ll want to focus on waterholes to see the animals—and you’ll need a bit of luck too. The elephant population is growing, and we were lucky enough to see around sixty elephants crossing the Luangwa at dawn, spread across several groups. South Luangwa is the westernmost point of our trip, and we’re now heading east to Lower Zambezi.
Lower Zambezi is Zambia’s side of Mana Pools on the Zimbabwe side. We took a boat ride on the Zambezi to see elephants, hippos, crocodiles, and a multitude of birds living along the water and on the river’s islands. The sunset there is also magnificent.
To explore the park, we followed the waterways parallel to the Zambezi, mostly on the western side (see our route). Lower Zambezi is the last park we visit, and the final leg of our trip will be Victoria Falls.
Victoria Falls—or Mosi-Oa-Tunya ("The Smoke That Thunders")—are truly impressive, even during the dry season. We saw the falls from both countries: in Zambia for the overall view and the bridge that serves as the border, and in Zimbabwe to get as close as possible to the most spectacular parts of the falls.
This marks the end of our trip, which, despite a blown tire on the road, went off without any major issues. Zambia is a beautiful country that immerses you in wild, still-preserved nature.
From Southern Shikoku, between land and sea, to the blue waters of Miyakojima and finally Tokyo’s megacity
Hi everyone,
I have to admit, I really hesitated before deciding to write this travel journal... Writing one takes a lot of time and energy, and since this is my 4th trip, I wondered if it would actually interest anyone other than myself (both for the discovery and the writing). But after a few "Are you going to write a journal?" requests and especially the renewed pleasure from reading other travelers’ travel journals about Japan or elsewhere on this forum or elsewhere, I’ve decided to share this 4th installment in the Land of the Rising Sun here.
The itinerary:
27 full days, from late May to late June 2025, right in the middle of the rainy season, including:
-->13 days in Shikoku, from Kochi (Kochi Prefecture) to Matsuyama (Ehime Prefecture)
-->7 days in Miyakojima (Okinawa Prefecture)
-->7 days in Tokyo
The trip was decided on fairly last-minute this year, as usual.
I regularly check flight prices to track fluctuations for this destination, even without concrete plans. Finding a slightly cheaper direct flight (900 €) than what I’d seen in previous months (around 1,200–1,400 € on average) for a Paris-Tokyo route with Japanese airline ANA was too tempting to resist the urge to return to this enchanting country. After long hesitations between exploring the San’in region (Matsue, Tottori, Yamaguchi) and southern Shikoku, the decision was made—I took the plunge! The tickets are booked: Paris to Kochi with a layover in Tokyo, all with ANA, the airline I’d been dreaming of... for 1,120 € per person. Okay, it’s not cheap, but it’s still better than in 2023.
We leave in 2 weeks!! Now it’s just a matter of getting everything ready!
Intense work ahead in these 2 weeks to:
finalize a more precise itinerary and reach an agreement—yep, because even though we both love Japan, our preferences differ slightly, and we have to choose between exploring new places or taking time to revisit beloved spots...
decide how much time to spend in each selected area without rushing while still exploring
research places that might interest us and watch videos about Japan
book accommodations: yes, it’s possible to do this on the spot as we go, but last year, we noticed that last-minute options were pretty expensive, so we’re booking ahead—even if it means keeping a few options open while we decide or see if better deals pop up later
reserve rental cars
order yen
check the weather regularly and wonder if choosing the *tsuyu* (rainy season) was really a good idea—and whether we’ll be stuck in non-stop rain???
What a tough job, right? Traveling to Japan for a month—such a hard life!
Despite this being my 4th trip, the excitement is just as intense as the first time.
The only small downside is that when we booked the flight tickets, there were only a few seats left, so we’re only sitting together on the international return flight. Plus, on the outbound flight, we’ve got the middle seats.
Another lingering question: what French-language films will be available? According to the internet, the selection seems limited.
Oh well, these are just minor details—it’s almost time to fly!
PS: I’ll be posting slowly and irregularly... so for those interested, be patient or maybe set an alert...
Before Our Departure
Preparing for this trip started 9 months before our departure in June. For those planning a similar itinerary, it’s important to book accommodations well in advance, especially in the Okavango and Savuti campsites—otherwise, you might not find any availability.
Introduction
After visiting Zambia three years ago and Namibia and western Botswana a year and a half ago, this year we chose Zimbabwe (Hwange NP) and the northern half of Botswana.
Our flight from Paris was to Victoria Falls with Ethiopian Airlines, with a layover in Addis Ababa. We rented a 4x4 from Bushlore in Kasane, complete with two rooftop tents since there are four of us on this adventure. Bushlore picked us up from our guesthouse to collect our 4x4 and, most importantly, gave us a rundown of the vehicle and its equipment. Pay close attention to what they tell you—it could be crucial if something goes wrong, as it did for us during the trip.
Our Itinerary
We arrived on June 12th at noon. At Victoria Falls Airport, we got our double-entry visa right away—I’d already pre-booked it online on the site https://www.evisa.gov.zw/.
Since our vehicle was in Botswana, we had to cross the border from Victoria Falls into Botswana for the first time.
The next morning, Bushlore picked us up from our guesthouse to collect our 4x4. After completing the formalities, we headed toward Zimbabwe and the town of Victoria Falls.
We woke up early the next morning to be at Victoria Falls at sunrise. The scenery was stunning, but since it was the start of the dry season, the Zambezi was still high, so the falls had a strong flow. This made it hard to fully appreciate their beauty.
In the early afternoon, we left for Hwange NP, where we stayed for 4 days. Two days at Gwango campsite near Dete, followed by two days at Robins Camp. We expected to see more animals at Robins, but that wasn’t the case. In Hwange, we didn’t spot any predators, but we did see plenty of mammals (buffalo, elephants, giraffes, zebras, and antelopes).
After a few days in Zimbabwe, we crossed back into Botswana at Pandamatenga. We stopped at Nata Lodge for a good night’s rest—driving on the dirt roads is exhausting.
We left Nata and headed toward Nxai Pan. The road was sandy but manageable. We made a small detour to admire some beautiful baobabs at "Baines Baobabs." Then we continued to our campsite, Nxai Pan South Camp. Keep in mind that many campsites in Botswana aren’t fenced (except for the shower/toilet areas), so animals can roam freely within the camp. Take precautions, especially after dark.
After our stop in Nxai Pan, we headed to Maun. We decided to break our journey in Maun before heading to Moremi and the Okavango Delta for three reasons: first, we needed to stock up on supplies and fuel for the next 5 days; second, our fridge had broken (luckily, Bushlore has a branch in Maun); and third, the drive from Nxai to our camp in Xakanaxa in the delta would’ve taken too long. I always avoid driving after dark.
We arrived at our Xakanaxa camp on June 21st in the early afternoon. Not wanting to waste time, we booked a boat ride on the Okavango Delta, leaving at 4:00 PM for a 2-hour sunset cruise. For those interested, to the right of the Xakanaxa X1 site, there’s a sign for boat rides. The organizer is very professional and offers prices that are nothing like those of the lodges.
It was a beautiful ride through the delta with a stunning sunset. Being on a boat is much more relaxing than driving on the dirt roads. That didn’t stop us from doing self-drive safaris the next morning and late afternoon, though.
Then came the time to leave the delta and head toward Savuti, a much drier region. And that’s when the toughest part of our trip began. First, we decided to go up via Khwai. The rainy season was over, but the area was still marshy. We had to cross a few small water patches, testing the depth to make sure we could get through. Luckily, a sign on the road pointed us toward a drier route. We reached Khwai without any issues, but then we made a major mistake. Instead of taking the main track toward Mababe Gate to reach Savuti Camp, we took a straight path north and then a right turn to get to our camp. Bad call—we got stuck in the sand, with one rear wheel buried halfway and a front wheel off the ground. We were genuinely scared we wouldn’t get out, especially since we were on a deserted track, 20 kilometers from our destination, with night falling in two hours. This is where paying attention to the vehicle instructions really paid off—we had to use the jack to get out of the mess. The result: we arrived at Savuti campsite just before dark (Distance: 146.3 km, Duration: 9 hours, 56 minutes, and 3 seconds, Average speed: 14.7 km/h, tracked with Osmand). At reception, the staff couldn’t understand how we’d gotten there—we hadn’t passed through any of Savuti’s reserve entry gates.
The next morning, no one felt like driving, so we did a game drive with a guide. I don’t know if it was some kind of reward, but the outing was amazing. We saw three lions and, best of all, a pack of African wild dogs that we had time to admire and photograph. The next day, we did a short self-drive and found one of the lions from the day before drinking at a waterhole. That was the end of our Savuti adventure.
Now we’re heading to Kasane. We returned our vehicle and settled in for our last two nights there. The next morning, since we no longer had a car, we decided to do one last early-morning game drive in Chobe NP. It turned out great—we followed two brother lions and saw plenty of other mammals. The only downside of Chobe is the number of tourists, which was a change from the other parks we’d visited. That said, we’re tourists too, so...
In the evening, we took one last boat ride on the Chobe River to end on a high note with a beautiful sunset.
After a good night’s sleep and plenty of wonderful memories, landscapes, animals, and emotions, it was time to leave. We left early in the morning with the same taxi company as before to cross the border into Zimbabwe one last time and head to the airport, where we took off to return to France.
We all have two lives. And the second one kicks off the day you realize you only have one, with the determination to spend the time you have left on what truly adds sparkle to your life, Kevin! I like to elegantly introduce a trip with a philosophical quote. First, it gives you the illusion that I’m some kind of deep thinker, and second, it lets me fill up the first few lines of my blank page when I don’t know how to tell you I’m diving back into what really lights up my life: another adventure beyond the horizon! And nearly every other year, like a toxic relationship, my horizon tends to take shape in Uncle Sam’s backyard. And this, despite his cousin Donald calling the shots. Speaking of which, it was partly that impulsive guy who pushed us to be just as impulsive and snag our four flight tickets at a ridiculously low price—a direct result of foreign tourism taking a hit from BetaMax’s repeated antics... Four tickets? Who are the other lucky ones? In this case, our lucky ones are actually lucky ladies: My Flo, always up for exploring the world with me on foot, camelback, or scooter, is obviously in on the fun. The other two seats went to our daughters, Sasha and Luna, both thrilled to be part of this new American adventure...
But what’s the American West like in February?... A gamble. Let’s call it Russian roulette since we’re not landing during peak weather season. That’s why we encouraged our transportation and accommodation to get cozy and produce a little camper van, so we can stay ultra-flexible in the face of any weather tantrums. We’ll be roaming in Kara the van with the motto "Follow the sun!" Bad weather? We bolt. Snow? We speed up. Sunny? We act like it was the plan all along and soak it up.
"Okay, but why keep coming back to the same corner of the globe? After ten American adventures, you must be tired of seeing the same things, right?" But I’m not crazy, you know!... The American West is like making love to your gorgeous wife over and over, always enjoying it just as much. And contrary to what you might think, the American West isn’t just the Grand Canyon, Monument Valley, Las Vegas, and Bryce Canyon. Proof is, after ten trips to the U.S., my retinas are still untouched by three-quarters of the places I scribbled on a napkin for this adventure... Oh, and add to that my wife, who I’ve easily converted to my religion, and boom... relapse is even easier! Because yes, we’ve landed in Los Angeles after a sunny flight over Greenland, still under Danish flag for now. And we’re already heading east through the XXL traffic of L.A.’s eight-lane highways, eager to dive into our first discoveries. But first, night is taking over the sky, and second, we’ve been officially awake for 24 hours, so I suggest wrapping up this intro. I’ll tell you more tomorrow morning. Sound good?
This travel journal aims to help future travelers (well, I hope so!), since there’s so little information available about this remote archipelago. Big thanks to Lolodesiles and Ayis for answering my questions while I planned this trip!
Context
This is our fourth trip to Indonesia as a couple—after Java-Bali in 2011, Flores-Komodo in 2013, and Sulawesi in 2016—each time for three weeks. It’s also our tenth trip to Southeast Asia overall.
We’re traveling like we have in previous years: with a rough itinerary that often changes based on who we meet, tips from other travelers, how tired we are, or what we’re feeling in the moment. In the Moluccas, it’ll change constantly, mostly depending on transportation.
Our only accommodation booking: the first few nights in Ambon when we arrive.
Planned route (to be refined on the spot): Ambon - Banda Islands - Lease Islands - Ternate - Tidore - Halmahera (between Sofifi and Tobelo) - Morotai and the neighboring unnamed archipelago.
Flights: Lyon-Paris-Singapore on Air France (428 € round-trip), with good meals, champagne, and wine (we like our little comforts when going on vacation 😏). Then Singapore-Jakarta-Ambon on Air Asia and Garuda.
Return flight: Ternate-Jakarta-Singapore on Lion Air, with a 3-day stopover in Singapore before heading home.
Episode 1: Ambon to Banda
Our guesthouse, booked two days before departure, is 45 minutes from Ambon Airport, near Natsepa Beach (northeast of Leihitu). It’s a pretty average beach—quiet on weekdays but packed on Sundays (we saw the difference). It’s lined with warungs.
This rainy day helps us readjust to the atmosphere of this country we love so much.
Our “Solim Guesthouse” is a lovely house with a living/dining room and garden, costing 15 € per night for two, including a hearty breakfast.
Dinner is at Gaba Gaba, a great restaurant just a short walk away, right by the water, recommended by our host. Fun fact: it’s in the Lonely Planet, and it might be the only LP-listed spot in the Moluccas that actually matches the description (the others either don’t exist or have nothing to do with what’s advertised 😠).
For the next two days, the super-friendly owner lends us his scooter. We set off to explore the coastal villages in northern Leihitu (the western part of Ambon Island, which has a weird shape).
Laundry and trucks washed in the same stream.
Liang Beach, described as the island’s most beautiful, is almost gone (climate change or something else?), but the colors are magical.
We continue 25 km toward a snorkeling spot our host recommended, taking a gorgeous, deserted little road through tiny villages in clove plantations (oh, those unforgettable scents!), stunning coves, and dense forest.
We’re greeted dozens of times with “Hello Mister”—a daily routine in the Moluccas. Every time we stop, we pose for photos to be saved on locals’ smartphones. They don’t see tourists often.
We ask for directions to the snorkeling spot (not easy—we only know basic Indonesian like *Selamat pagi*, *siang*, *sore*, and other polite phrases). Not many people know where it is (especially since we never know which village we’re in), but we eventually reach a small village that seems to be the right place. 🙂
We ask a local to take us there by boat (it’s not reachable by land).
The spot is at most 100 meters long, but the coral is in good condition (apparently not dynamited by fishermen, unlike in other parts of this beautiful country where fishing methods are destructive and nature pays the price 😠). The fish are plentiful and diverse. It’s a great start before heading to Banda. We’re happy to have the place to ourselves… though we don’t yet realize we won’t see a single tourist for the rest of the trip!
After two days of rest, we head to Tulehu Port in the morning, aiming for the Banda Islands. We know the journey is often tricky: the Pelni ferry runs twice a month but doesn’t match our dates, the 10-seat Suzi Air plane is always full (you can’t book—you have to show up on Mondays and Fridays), and it’s often canceled due to weather. So we opt for the Tuesday speedboat (which also gets canceled if there are waves or wind), with the next one on Saturday.
We’re used to Indonesian ports—crowded, rusty boats, no English speakers—but we still feel lost. When I ask about the speedboat to Bandaneira, people gesture wildly, someone takes me to the “harbor office,” then tells me there’s no boat, others try to sell me tickets, and some just say, “No boat.”
Luckily, an English-speaking local approaches us and confirms the speedboat is broken. The next one will be Saturday *if* it’s fixed—otherwise, even later. 🤪 😠
We’re crushed. We came here for the Banda Islands… 🙁
We decide waiting five days for a maybe-boat isn’t an option, so we decide to head straight to North Moluccas, which was planned for later. We’re so disappointed we don’t even want to stay in the area. The Lease Islands don’t appeal to us despite what we’ve read, and Seram would deserve its own trip with its remote mountain tribes.
Huge disappointment—we’d been dreaming of Banda for months, with its incredible drop-offs like Bunaken, its islands covered in nutmeg trees, etc. I’d read that Banda is in the world’s top 5, alongside Bunaken (amazing—we went in 2016), Komodo (incredible—we went in 2013), Sipadan, and another spot I’ve forgotten.
We take a taxi back to Ambon (45 minutes) to a travel agency to buy plane tickets to Ternate. There’s a daily ATR72 flight at noon—perfect timing.
Ambon is the capital of South Moluccas (or Central, depending on who you ask!) with 300,000 people. The city doesn’t seem unpleasant, but we don’t stop.
On the plane, there are only about ten passengers for 72 seats. The flight attendants are stunning, as always with Wings Air—clearly, they’re hired for their looks. 😊
Stopover in Bacan—a runway in the middle of coconut trees serving a tiny town—then we fly over countless volcanoes, the last one towering over Ternate.
Bonjour,
De retour sur le forum - et première rédaction d'un espèce de carnet de retour de notre 4ème voyage en Indo.
Contexte : une trentaine de jours, en scooter et en duo, sur Florès (et une petite incursion dans l'archipel de Solor, plus précisément à Lembata (chut, faut pas trop en parler !!!), qui donne envie d'en faire beaucoup plus là bas malgré les infrastructures sporadiques), en partie dans des destinations déjà bien connues du forum (la classique Ruteng / Bajawa / Riung / Moni voir baie de Maumere) ... et qui ne parlera pas du PN de Komodo ou de Wae Rebo, puisque nous n'y sommes pas allés 🏴☠️.
Texte en anglais (issu d'une autre plateforme). Sans nul doute, des traducteurs intelligents ou pas marcheront à merveille en cas d'anglophobie 🤪.
Disponible à toute fin utile pour des détails ou infos.
Equippement : Yam' Nmax 155 ; 2x saccoches cavalières (25L) + sac de selle (30L) + saccoche tunnel (15L pour le matos photo) ; casques et vêtements d'enduro amenés depuis la France.
Itinéraire : boucle depuis Labuan bajo jusqu'à Pulau Lembata ; juillet-août 2026
Road conditions graded from A (excellent) to D (very bad, at least for a Scooter… a CRF/KLX or even honda ADV would do better on that)
D1 : Labuan Bajo – Reok via Ranggoe, Rego & Tagol (130km ; 5hrs). Section LBajo – Rego (90 km ; B) is quite good tarmac, despite a lot of elevation with many small valleys and passes. Rego – Tagol (10km ; D) is a stone road (not gravel), some ascents & very poor condition ; necessary to lower tyre pressure. Tagol – Reok port (22km, quality depends considerably from D to B). Reok port – Towncenter : B. Night @Iffah Homestay (100k for fan room, mandi attached, no breakfast), simple but clean. Notes : path to danau Sano Limbung was closed ; access to Tiwu Pai & Wae Kuli (waterfalls) not permitted in july 2026.
D2 : Reok – Riung via Pota (105km ; 3h-3h30). The road is very narrow in some part, thanks to the uncut bushes (lowering visibility hence extra caution as animals/people can suddenly appear in a turn…) but generally good condition except many eroded sections and some unpaved ones. Grade C/B. 2 nights @Mentos (285k for AC room)
D3 : Boat tour in Riung (booked directly with a captain, 800k for two for private boat incl. lunch and NP fees) + sunset from Watu Mitong Riung (should not be missed).
D4 : Riung – Muku Saki via Mbay (around 100km ; 3h30). Quality varies from A in the vicinity of Mbay to eroded sections (C) in secluded places. Night @Sao Paolo Homestay (250k for fan room with mandi, maybe overpriced but nice house and great food). Note : if you happen to pass by Mbay on Saturday, the market is well worth a stop (cheapest Ikat on the trip : you’ll be asked normal prices providing you’re OK in Bahasa…)
D5 : Muku Saki – Tanjung Kajuwulu (near Ndete) (90km, 3h). Many patholes, eroded (C). Night at Déjà Vu Homestay (220k for a matress on the floor & outside mandi/toilets ; I woud define this as a tourist trap – the quote we had for food was double priced too…)
D6 : Tanjung Kajuwulu – Waiterang (east of Maumere, 55km , 1h30). Pathholes till maumere, then All good (TransFlores), C/A. Night at Sunset Cottage (new concrete room, very serene place ; 270k for AC with bathroom ; much prefered Sunset over Lena House (more customers, more built up).
D7 : Waiterang – Larantuka via Boru and Eputobi (TransFlores ; grade A ; 115km / 2h40). Particularly liked the drink stalls (marked as Rest Area Eputobi) and the out of order aquatic park just before Larantuka (obyej wisata waiplatin). Night @ Dewy Onong Homestay, which is not advertising itself as Larantuka Beach Homestay as some contributor signals here and on goole maps review. Best breakfast of the trip (Cumi Cumi !!!) ; 275k for AC room with bathroom.
D8 : Local Boat (Kapal Kayu) from the main port to Lembata (Lewoleba). Departure 8am ; price 60k/head + 50k for the bike. Stop enroute on Adonara (where we did not stop due to fights between communities). Night @Elmany Homestay (275k for AC room with bathroom, fan room with shared bathroom also available). Whole afternoon at Pantai Hadakewa, fantastic place (good snorkeling, great views of Ile Api aka Gn Lewotolo). Road condition : A (did not expect the TransLembata to be that good…).
D9 : Loop around Ile Api (50km, 2hrs), anticlockwise. Stops enroute at Situs Tulang Paus (whale squeletton), pantai Jotona, pantai Wena (we expected to snorkel from there, but wind was very strong that day), situs Watu Nale, Selat Sonia. The western coast is far less interesting. Road conditions : bad (C) on the eastern side (up to Riangbeda), good (B/A) afterwards. Night @Elmany Homestay.
D10 : Lewoleba – Lamalera via the western and south coast (70km, 2h30). Good road (B) for roughly the first 55km (up to Tapobali), then eroded track for the last 15km (in some parts steep and dangerous) up to Lamalera (D/C). Notes : 1/ Kuma resort denied us the entry for some drink ; 2/Pantai Waijarang « complex » is abandonned but closed with fences ; you can still sneak in ; 3/ some reports advise to skip Bukit Cinta (foreigner entry fee) for Bukit Doa Watomiten (stations of the cross) ; well Bukit Cinta has also been abandonned (well spent money…sic) but remains opened with structures falling (quickly) appart. Night @Lamalera Inn (200k per head including meals ; very basic fan room + attached mandi). Planned 2 nights, spent only one, as it’s the only tenant I had difficulties with (only interested in money, initially stated crazy prices, starts loud music at 6am … and drinking moke at 8am…)
D11 : Trip to Wulandoni for the Barter Market (Saturday only). Bad road (C) along the coast. Had to report at the Kantor upon arrival, which quite surprisingly asked 100k per person (foreigner) to go inside the (outside) market. Other « local » tourists (a group from Jakarta) were not asked to pay. Well, since a market is a public space and not a zoo, we refused payment and enjoyed the activity from the kopi stall next to it. Returned then to Lamalera for the catches of the day, then to Lewoleba via the mountain road (45km, 2 hours). First 10km to Puor is in very bad condition and uphill (D/C). The remaining is on a newly constructed road (A). Note : Air Panas Sabutobo is abandonned and falling apart (again…) but there are still some water pipes along the river that you can enjoy (depending how lucky you are, just with the forest sounds as companion). Night @Elmany Homestay
D12 : Chill day alond the northern coast (Batu Payung, Pantai Hadakewa with lot of snorkeling, drove till Wailolong and backtracked to Pantai Lewolein for more snorkeling (nice canyons there !) and another fantastic sunset over Ile Api (see GMaps pictures)). Night @Elmany Homestay
D13 : Monday weekly market at Pada, southwest of Lewoleba. Renowned but honnestly dont plan any itinerary specifically for it, just an ordinary Kampung weekly market. Returned to Larantuka and Flores with the 12pm local boat (the same boat that leaves from Larantuka at 8am). Same prices as the first leg. Night @ Dewy Onong Homestay
D14 : Larantuka – Waiterang along the northern coast (100km, 3h) via Pantai Kawaliwu, Tewuk Lewokluok (trail is easy to find, very nice snorkelling in a lagoon), Pantai Lato (to my opinion the most beautiful beach on Flores and you’ll be the only visitor, as opposed to Pantai Koka) and Pantai Hia, until rejoining the TransFlores near Nebe. Grade C on the costal eroded road / track. 3 nights @Lena Guesthouse (booked ahead as it fills up quickly, but we prefered its neighbour Sunset Beach Guesthouse)
D15 : Snorkeling trip organised by Lena Guesthouse (200k per head excluding NP fees and lunch)). The drop-off near Pulau Babi is a very nice spot.
D16 : scooter day trip around the Egon Range (too lazy to hike it…), through nice Sikka villages (route : Watublapi, Umauta, Bola, pantai Doreng, Nakatoli, foot of Gn Egon, Air panas Blidit). The track from Natakoli to the foot of Gn Egon is very steep, damaged and wet (with moss) ; I would recommend not to attempt that in case of bad weather.
D17 : Waiterang – Moni (130km, 3h30, transflores grade A/B) via Pantai Koka (refused to pay the mafia entry fee…) and Jopu (some rumah Adat Lio). Stopped at Museum Bikon Blewut, south of Maumere. Very nice artefacts (especially wooden statues from Papuan, great ikat collection) although very disorganized and sadly non-visited (hence masterpieces fall into oblivion). 2 Nights @Liahz Lodge (150k for fan room, basic bathroom… but right next to Air Panas Liasembe (free, no closing time) !!!).
D18 : Sunrise from Kelimutu with a nice weather (stayed until 8.30am). I don’t know if the sunrise is really worth it (lot of people ascending and watching the sunrise – a lot but nothing compared to e.g. Gn Bromo), nearly everyone going down around 7am, then there is virtually nobody. Trip (20km one way, good road B) to Kampung Adat Nggela (Lio). Although the village is habited and mostly out of the beaten path, I have mixed fillings due to the fact that most ladies (some are pushy) try to sell you (bad) pieces of ikat.
D19 : Moni – Ende via Detusoko paddy fields, Kampung Adat Saga (Lio) and Puncak Ndona ; 75km 2h30. We really liked Saga (nice setting on the mountain, friendly villagers, no selling, mix between traditional and more modern houses in that lively village). Sunset from Bukit Raja, on the peninsula with a 360 view on Gn Iya, Gn Meja Kota Ende and the mountains behind. Note : at the end of the road (search for Gunung Meja Tourist Info Center), there is a (sand) track leading to the path. 1/ only intend the track if you have off road driving experience ; 2/ dont trust the walking time stated by Maps.me. Took us 45mins on a steady pace to reach the summit. Night @Hoja Homestay, 300k for a comfortable AC room with bathroom.
D20 : Ende – Bajawa, via Air Panas Mengeruda ; grade A, 120km, 3 hours. Note : don’t plan to short in Mengeruda (Soa), very easy to spend a half day there, especially if playing with local kids. Stay @Cinnamon GH, 250k for double with fan and hot shower (cheaper options with shared hot shower availlable).
D21 : First day in Bajawa : Watu Nari Wowo (Avatar Hill, sic…), Kampung Adat Ngada Tololela & Gurusina (very very friendly people, complementary views of Gn Inerie & Wolo Deru). Sunset from Puncak Manulalu (well… Heaven’s door Bar & Restaurant)
D22 : Second day in Bajawa : Kampung Adat Ngio (hardly visited, best view on Gn Inerie), Air Panas Malanage, Kampung Adat Bena (the most visited Ngada village (after Bela ?) in the area, we went there at the end of the afternoon to avoid tours, early morning would be fine too), and Gunung Wolobobo for a terrific sunset
D23 : returned to Gunung Wolobobo for sunrise with Gn Ebulobo in the distance (search for a track on the eastern slope, near the communication antenna). You can circuit the rim to the usual viewpoint (westside, sunset spot), the path is easy to find. Then took again the road to Aimere, visiting Kampung Adat Belaraghi enroute (the setting is maybe less rewarding than all the previous villages). 56km ; 1h30. The road to Belaraghi is fine, except the final part.
D24 : Aimere – Ruteng (105km, 3h30). Nice detour by the paddy fields of Wodo (southwest of Golo Loni) of Sunset from Golo Curu (nice encounters with locals). Night @Tange GH, 130k for room with outside (private) bathroom, no breakfast.
D25 : Surroundings of Ruteng (paddy fields north and east of ruteng ; Maps.me has funny tracks starting from Kenda), and the rather pleasant city itself (pasar, churches, lapangan). We finally skipped Liang Bua.
D26 : Ruteng - Labuan Bajo (130km, 3h30). No visits of the waterfalls close to the TransFlores (entry fee (with bule prices) + mandatory guide etc…). Sunset from Bukit Hercadi with very few locals (Bukit Sylvia & Bukit Amelia, just south, were packed). 2 nights @Wellamas Homestay, away from the harbour and its advantages/disadvantages. 230k for comfortable AC room with hot shower.
D27 : New road to Golo Mori Convention Center (another big money well spent…), with nice views on the strait separating Flores from Pulau Rinca. Some empty beaches (e.g. Pantai Pasir Pajang ; we were there on a weekday perhaps frequented by people from LBajo only). 30km (40 mins) one way, perhaps the fastest road of Flores…
D28 : Morning on the peninsula north of Labuan Bajo before taking a flight to Jakarta in the afternoon. On Google maps, the asphalt road only goes to Teras Langit ; it now (august 2026) continues to Puncak Basok and is still in progress towards the eastern part of the peninsula. On the way back, two other nice Bukit where you can enjoy nice views on the bay (and the resorts…) : Bukit Lontar & Bukit Beta. Note : we only found one public (and nice and quiet) beach in the area ; tagged as Sunset Point Beach on Gmaps. All the rest was closed by fences ; they are privately owned (although the Indonesian consitution grants the coastline as public space).
We're a family of five: one dad, one mom, and three kids aged 10, 15, and 18.
Before diving into each stop in more detail, here are a few general thoughts:
We wanted to sample a bit of everything Japan has to offer in terms of landscapes, accommodation, and transport. We were after walks, temples, restaurants, shopping, and some downtime—but no "all-inclusive experiences" or museums for this first visit.
Three medium-sized (60x42x25) canvas suitcases, plus a duffel bag and a few small backpacks. 23 kg in the hold on the way out, 60 kg on the way back. 36 kg of shopping, without even trying. I think this is the maximum suitcase size if you don’t want to stress on the Shinkansen: they fit easily in the overhead racks.
Round-trip with Cathay Pacific, layover in Hong Kong: no need to collect luggage in Hong Kong—we checked it in at departure and picked it up in Tokyo, and the same on the way back (checked in Osaka, picked up at our final destination). This let us explore Hong Kong without worrying about our bags. Food and entertainment were pretty good—meals included a little Häagen-Dazs on each flight, and the entertainment had way more Asian cinema than you’d find on a Western airline, which was a nice way to see how much weight Western culture carries in Asia.
The original plan was to fly directly from Ishigaki to Hong Kong, but due to Typhoon Dolphin, we had to cancel the Ishigaki leg. Cathay didn’t bat an eye about swapping the Ishigaki-HK flight for an Osaka-HK one, even though it was twice as long.
We were a bit too attached to the idea of ending the trip with some beach time and replaced Ishigaki with Shirahama. It was a mistake—we should’ve visited Hiroshima or spent a little more time in Tokyo instead.
Last February, I made a trip using "public transport" from France to southern Senegal via Spain, Morocco, Western Sahara, and Mauritania.
It’s a journey of about 5,000 km, where I took trains (as far as Marrakech), ferries (to cross Gibraltar and then to reach Casamance from Dakar), and mostly buses on the long desert straightaways. I hadn’t planned any stops in advance or booked any hotels, except for the very first train to Spain, which left plenty of room for the unexpected.
Why travel by land and sea? In recent years, flight-free travel has been gaining popularity. On social media, posts explaining how to cross Europe by train as quickly as possible go viral. Traveling without flying—and making sure people know about it—has become a great way to earn a badge of eco-responsibility: an essential totem for anyone wanting to prove both their dedication to the ecological cause and the wisdom of slow travel.
I haven’t flown in years, and this journey to West Africa could easily be filed under "responsible travel." But it wouldn’t be honest to say that: in reality, it wasn’t really my aversion to flying that motivated this long trek. I see overland travel primarily as a way to experience the world’s geography at a grounded, earthly pace—the pace of the locals. Besides, I’ll be flying back, which disqualifies any claim to being a model of sustainability.
So no eco-badge, and no adventurer’s badge either: you won’t find any heroic tales of camel rides in lost lands or mineral train wagons in this account (popular with influencers, the Mauritania iron ore train now attracts tourists from all over the world, turning "the experience" into something you "have to do at least once in your life"). This five-part story, written on the road, has no other ambition than to recount a journey through places and people, and to share the thoughts they inspire in me. As simply and, I hope, as humbly as possible.
I’m posting the episodes here, which you can also find on my blog (with more photos) at the following links:
Episode 1: Spain, from Avignon to Algeciras
Episode 2: Morocco, from Tangier to Tarfaya
Episode 3: Western Sahara, from Tarfaya to Guerguerat
Episode 4: Mauritania, from Guerguerat to Nouakchott
Episode 5: Senegal, from Rosso to Saloulou
To help those who might want to make the same trip, I’ve also put together a summary of the route with recommendations—you can read it at the end of the story and on the blog:
From France to Senegal Without Flying: Route and Itinerary Recommendations
Hello and welcome aboard this new travel journal!
We’re heading off to Ireland together—a country I’ve wanted to explore for a very long time.
The moment has finally arrived.
We’ll be traveling as a family—my wife, my husband, and our 7-year-old daughter.
Here’s our itinerary:
24/07: Flight from Marseille to Dublin, overnight in Dublin
25/07: Dublin, overnight in Dublin
26/07: Dublin, overnight in Dublin
27/07: Pick up rental car, drive to Dingle, overnight near Tralee on the peninsula
28/07: Visit the Ring of Kerry
29/07: Adare, Bunratty Castle, Galway, overnight in Outheragh, near Galway
30/07: Cliffs of Moher, overnight in Outheragh
31/07: Connemara, overnight in Outheragh
01/08: Drive to Sligo via Westport and Downpatrick Head, overnight in Sligo
02/08: Slieve League, Silver Strand Beach, Glencolmcille, overnight in Sligo
03/08: Drive to Derry via Glenveagh National Park, overnight in Derry
04/08: Giant’s Causeway, Dunluce Castle, Portrush, Derry, overnight in Derry
05/08: Drive to Belfast, visit Belfast, overnight in Lisburn (Belfast suburbs)
06/08: Game of Thrones filming locations: Dark Hedges, Carrick-a-Rede, Ballintoy, etc., overnight in Lisburn
07/08: Drive to the Wicklow Mountains, visit Wicklow Mountains National Park, overnight in Blessington
08/08: Drive back to Dublin and return to Marseille.
Cost breakdown:
Flights:
Outbound flights with KLM via Amsterdam for 3: 175 € + 40,000 Flying Blue miles (so essentially a free ticket)
Return flight with Aer Lingus for 3: 489 €
Rental car:
10 days booked with Enterprise via Carigami: 443 € including zero-excess insurance.
Accommodation:
Dublin: 3 nights at Maldron Hotel New Cross: 394 €
Tralee: 2 nights in a caravan (Ocean Trail Oasis): 292 €
Outheragh: 3 nights Airbnb, family room with private bathroom: 430 €
Sligo: 2 nights at Clayton Hotel: 456 €
Derry: 2 nights at Belfray Inn: 255 €
Lisburn: 2 nights at Temple Golf Club: 232 €
Blessington: 1 night at Baltyboys Lodges B&B: 158 €
That brings our total to 3,325 € for three.
On the ground, visits, fuel, and food cost around 2,500 €.
So this was quite an expensive trip.
A few price examples:
1 liter of unleaded fuel: 1.89 €
3-day pass in Dublin: 18 €
1 scoop of ice cream: 5 to 6.5 €
Castle visit: 15 € per person
A coffee: 3-4 €
A glass of wine at a restaurant: 8-10 €
A half-pint of Guinness: 7-12 €
Now, here’s the day-by-day account of our adventure in Ireland:
Our decision is our decision. And it’s firm and final. Next winter, our plane will spread its great wings toward the island of Ceylon! "Wait a minute... Ceylon... Ceylon... that name rings a bell, but I can’t quite place it on the globe Grandma gave me for Christmas! Ceylon... Oh right, I’ve got it: Ceylon is the name of my tea!" Exactly. But the name on your pretty tea box is also the one used until 1972 for this island nation, a speck on the Indian Ocean at the southern tip of the Indian subcontinent: Sri Lanka!
For this new adventure, I’m exceptionally leaving my Flo behind, cowardly replaced by a double dose of testosterone. To write the book of this journey with me, I’m bringing along my brother, who’s used to this kind of thing, and... a guest star: My model of resilience. My dad! All aboard! Or rather, all aboard our tuk-tuk! Yes, you read that right: A real tuk-tuk, a little colorful rolling box that putters along at two miles an hour. The idea? Well, Sri Lanka and its winding roads overlooking the vastness of lush nature are tailor-made for this kind of vehicle. And since it’s one of only two countries in the world that allow foreigners to rent and drive these mini speedsters, we’ll be crisscrossing the island in our two-square-meter rolling box. Plus, adopting this mode of transport is a surefire way to connect directly with the locals, who’ll surely be curious to see a foreigner driving their iconic vehicle. Not to mention the... let’s say... spicy anecdotes it might generate. I mean, heading into a subtropical zone with my jet-black dad and his unpredictable digestive flora while deliberately choosing the tuk-tuk as our *only* means of transport? That’s the winning combo for an unforgettable adventure! "More seriously, Dad, Sullivan, I’m already loving the idea of living this adventure together, the three of us—brothers and father..."
So, does the intro to this new adventure get your salivary glands going? Yes? Too bad. Because unfortunately, the program handed out by the lady at the entrance has been slightly... let’s say *crumpled*. Some might even say "scrunched up and nearly tossed in the trash." First, six days ago, as the countdown echoed in us like a call to adventure, Cyclone Ditwah grabbed Sri Lanka, played with it like a rag doll, and left it battered on the ground. The toll is devastating: over a thousand dead, thousands of homes wiped out by relentless rains, roads and railways swallowed by massive mudslides. A country wounded once again, after the civil war, the 2004 tsunami, and the post-Covid economic crisis.
But as if this weather disaster wasn’t enough to shake our unbreakable adventurer spirit, fate decided to mess with us further by cutting our trio down to two. The victim? My brother, violently turned away because of a simple date on his passport that didn’t match the border officials’ expectations. Return to sender!
So now it’s just the two of us allowed to board the Qatar Airways Airbus A380 for this trip. If he were here, Denis Brognart would say, "And in the end, only one remains!" Except I know you’ll be with us, following our adventures! Right?
This trip had been on my mind for about fifteen years.
But the discomfort of overnight stays, the difficulty of communication, and the prices of the few car rental options kept making me postpone the project.
And then, everything suddenly fell into place—I told myself, it’s time!
The preparations took longer than usual; the destination is still far from mainstream.
A bit of Kazakhstan?
Not in the end.
The south or not the south?
Yes, in the end.
Pre-book or go with the flow?
Only two stops were a leap into the unknown.
To help me find the ideal route, I made great use of this forum (thanks to everyone for patiently answering my questions!), pored over travel journals and blogs (Christian, Jeff), zoomed in on Google Maps and Yandex, and bought the guide published by OunTravela about this destination (the guide has been updated since).
---/---
You’ve got your passport, international driver’s license, bank cards, and euros?
Off we go to Lyon—just one night left before our early morning flight.
Tomorrow night, we’ll be sleeping in Bishkek!
(Steak for my partner’s mischievous nephews...)
You’ll find here a post with some practical information.
And here, the version of the travel journal without comments.
---/---
As a supplement, the route track.
Not necessarily ultra-accurate since Google has serious gaps for this destination...
Hello everyone, I’m happy to welcome you to this new travel journal.
We’re heading to Costa Rica together—a Central American destination that dreams are made of for many French travelers and attracts crowds from France.
It was the country’s wild nature and safety that convinced us to go, since we’re traveling with our 7-year-old little one.
We didn’t have much vacation time in February 2026 (only 12 days), so we optimized as much as possible.
Here’s the itinerary:
Wednesday, February 11: Flight from Marseille to San Jose via Paris and Atlanta
Thursday, February 12: Pick up the car, drive to Poas Volcano, visit La Paz Waterfall Gardens
Friday, February 13: Poas Volcano and drive to Manuel Antonio
Saturday, February 14: Manuel Antonio National Park
Sunday, February 15: Nauyaca Waterfall and Playa Linda
Monday, February 16: Drive to Monte Verde and Santa Elena Reserve
Tuesday, February 17: El Tigre Waterfall Reserve and Treetopia Park
Wednesday, February 18: Monte Verde Reserve with a guide and drive to La Fortuna
Thursday, February 19: Sloth guided tour, Observatory Lodge Park
Friday, February 20: Arenal Volcano National Park, Termalistas del Arenal hot springs, and night tour
Saturday, February 21: Return to San Jose, flight to Paris via Atlanta
Sunday, February 22: Arrival in Paris and flight to Marseille.
That gives us a solid 9 days in the country.
Budget breakdown:
Costa Rica is an expensive country, but no more so than France. However, almost all hikes and waterfalls are paid entry, which can really add up.
For meals, sodas (6–10 €) are cheaper than restaurants (10–20 € per dish).
Flights:
We chose Delta Airlines for the price: Marseille to San Jose was 740 € per person (modifiable, with checked baggage and seat selection included).
Other direct flights from Europe were priced between 1200 € and 1600 € with more restrictive conditions.
That’s 2220 € for the family.
Accommodations:
Alajuela, first night: 139 € (1 night) at Rodeo Estancia Boutique Hotel, with personalized airport pickup, transfer to the hotel, and a briefing from Vert Costa Rica agency the next day.
Poas: 66 € (1 night) at Cabañas Tierra Fértil (entire apartment).
Manuel Antonio: 394 € (3 nights) at La Palapa Ecolodge (hotel in the jungle).
Monte Verde: Chalet Aloha Monteverde Cloud Forest (2 bedrooms): 125 € (2 nights).
La Fortuna: Arenal Dream Garden (1 bedroom): 217 € (3 nights).
Total: 941 €.
Car rental:
I went through Vert Costa Rica agency (Vincent is a French expat who set up the agency in Costa Rica and makes great YouTube videos with useful tips).
I rented a 4x4 that was delivered to the hotel the day after arrival and returned at the airport before the flight. The total was 772 €, including full insurance (zero deductible), a child seat, and a phone with a Costa Rican SIM and WhatsApp. The rental company was Poas Rent a Car. The vehicle was well-maintained—no complaints.
Gas: 100 € for the whole trip (3 fill-ups).
Activities:
To get discounts, I bought the pass offered by Vincent, which paid for itself after just one activity. It cost me 30 € (promo since I rented the car through him).
Prices are for 3 people. I’ve added stars to rate them:
La Paz Waterfall Gardens ****: 112 €
Poas Volcano National Park *: 33 €
Manuel Antonio National Park ****: 35 €
Nauyaca Waterfall ***: 25 €
Santa Elena Reserve **: 45 €
El Tigre Waterfall Reserve ****: 141 € (with meal)
Treetopia (ziplining, suspension bridges) **: 250 €
Guided tour of Monte Verde Reserve ***: 113 €
Sloth guided tour (with breakfast) ***: 115 €
Arenal Observatory Lodge (with meal) ****: 102 €
Arenal Volcano National Park *: 34 €
Termalistas del Arenal ****: 20 €
Night tour ***: 116 €
Total: 1171 €.
Meals: 600 €
My favorite restaurants:
Poas: Food court Mercaditas in Fraijanes
Manuel Antonio (near La Palapa): La Langosta and also El Patio
Near Nauyaca Waterfall: Ricar2 el Avión
Between Manuel Antonio and Monte Verde: Soda D’Calle
Santa Elena: HG’s Food
Guadalupe (between Monte Verde and La Fortuna): Soda Río Piedras
Arenal Observatory Lodge restaurant
Arenal Oasis Ecolodge restaurant
Other expenses: 300 € (groceries for breakfast, drinks, ice cream, souvenirs, etc.)
Total overall: 6065 € (about 2020 € per person).
Now, here’s the day-by-day account of this beautiful trip.
In early March, full of carefree joy and happy to return to Morocco, we landed in Marrakech under the sun.
We spent just one night in Marrakech at the Hôtel Toulousain, as we did on our previous trip. And we booked our 3 nights for the end of our trip, the second half of March... Ouch! Ouch! Ouch! But we’re not there yet...
Our first goal is to reach Magdaz, a mountain village in the Tessaout Valley, sometimes called the lost valley.
We discovered the village of Magdaz on this forum, and we were charmed by the photos and comments from travelers who came before us.
The road is easy—it’s dry, and the tarmac takes us right to the village gates at over 2,000 meters above sea level.
We arrive in the afternoon and are left speechless by the beauty of the place. A jewel of Berber architecture! Perfectly restored granaries and kasbahs!
A young man from the village guides us on the visit and opens the doors to the terraces overlooking the village.
Several magnificent collective granaries have been beautifully restored. The warm colors of the stone capture the light wonderfully. It’s stunning!
We won’t find anything decent to stay overnight there, so we head back down a bit and settle in at the Assounfou guesthouse. Lovely welcome. The place is in excellent condition and very clean. It’s spacious, but we’re the only ones there.
First day full of promise!
This travel journal is therefore intended solely for my photos, to present a consistent style.
All the shots were taken with a simple Samsung Galaxy smartphone and with whatever was at hand.
All stays combined, I’ve spent the equivalent of a year at most in Thailand, and I’m no great expert.
However, after many trips, lots of reading on VoyageForum and other sites, and conversations with many locals as well as expats, my view of the country is becoming clearer, though it’s constantly evolving. You never stop discovering and learning.
I guess I wanted to deliver a puzzle, mainly for those who want to get an idea of the country here and for those who feel nostalgic about it.
I don’t know if this minimalist sharing will interest anyone, but it’ll do me good to put it together. After so many months without traveling and then these other long months with VF closed, there’s plenty of material available.
There’ll be a mix of places, periods, and subjects, but it might well be intentional.
I suspect many Thais have dogs because they make excellent guardians for the home. Nothing better to deter burglars or to signal the presence of a snake. You’ll often see Thais tapping the top of their dog’s head, but don’t be fooled: it’s a sign of affection from them. Judging by the dogs’ reactions, they’re used to it.
Thailand is one of the countries on the planet where rabies is still present, so keep that in mind. It’s not just bites that can be dangerous, so don’t let just any dog lick you. Especially on a wound, of course.
Even though dogs often fear humans—this dangerous and unpredictable predator—we still need to stay cautious.
Be careful when walking into alleys because the dog will defend its master’s big yard. Be careful at night, and be careful when they’re in packs.
It sometimes crosses our minds that Thailand isn’t all that made for walking around, and dogs are one of the reasons.
That said, it’s not uncommon to see them chasing bikes or scooters. Cars, though? Much rarer—they’re too big.
It seems Thais prefer to give their dogs freedom by not locking them behind gates. Though sometimes the gate is closed, the little side door is wide open. Oh, and sometimes there’s no gate in front of the property, or it’s been full of holes for years.
You’ll often see dogs sleeping on the roadside, sometimes right on the road. When you approach, they move aside nonchalantly—or not at all. It’s less funny when they suddenly appear from thick vegetation, reminding visitors not to drive too fast. As a result, you’ll notice that dogs with injuries or missing legs aren’t that rare.
Since they believe in reincarnation and respect for all forms of life, they don’t chase dog packs away too much, and they don’t sterilize them enough. When you see a small pack roaming freely in the countryside, you think twice about running into them at the edge of a field.
A darker side of this is that euthanasia isn’t often practiced. Twice, we saw dogs at death’s door in temples, enduring terrible suffering with no one to help. The image (and the smell) of one of them, agonizing and exuding the stench of death, still comes back to me sometimes.
Some of you may have seen the YouTube vlog of a French woman living in Phuket who was given a little pig by her Thai friends. The animal, well-fed, quickly became a happy and enormous beast with its own garden. Yet it didn’t take long for it to fall seriously ill and become incurable. In her video, the French woman described how difficult it was to find a vet willing to perform euthanasia.
You’ll often see bowls by the side of the road. Thais leave food and water there for stray cats and dogs. Overall, they have a big heart for animals.
If you ever pop into a shopping mall, you might see people pushing their small dogs in strollers. It’s not just for fun—these strollers are provided for customers to put their pets in, otherwise you can’t bring them inside. It looks a bit odd when you expect to see a baby.
Hi everyone,
We (two adults, 74 and 70 years old) had already shared a travel journal about our first trip to the Philippines in February/March 2019 on this forum (https://voyageforum.com/v.f?post=9377175;search_string=carnet%20philippines). We had visited Manila, the Banaue rice terraces, Sagada, the Visayas (Bohol, Siquijor, Dumaguette), and on our way back to Luzon, the Taal volcano before returning to France. Delighted by this trip, organized by the French-speaking agency Alizé, we decided to further explore this beautiful country, this time focusing on Coron and Palawan.
Before writing this journal, I should mention that these are personal comments and don’t reflect any differing opinions. Without any literary or photographic talent, I’ll stick to the facts and share a few details about the visits, hotels, and restaurants.
Preparations
We decided to return in mid-January 2025 and consulted three French-speaking tour operators to create a trip based on our wishes (places to visit, type of accommodation) and budget. Comparing three operators helped us weigh their advice and make our choices. Only our first operator respected the budget, a second came close, and the third proposed a slightly more upscale trip. In the end, we chose the agency from our first trip. Our discussions helped refine our itinerary, and when we reviewed it point by point, the document provided was perfect, full of great tips. The most debated point was a 3-day, 2-night cruise between Coron and Palawan. We were tempted but worried about being the only "older" travelers among younger people and feared two uncomfortable nights. Reassured by our tour operator, we finally opted for this "exploration." We’ll come back to that later.
Once the choice was made and dates set, we booked our international flights with Cathay Pacific for 750 € per person, which offers the best schedules (short layovers) at an acceptable price for flights arriving in Cebu. Our trip started on February 25 and returned to Paris on March 15.
International flights
The round-trip flights went smoothly. Cathay does the job well, without frills. The service quality seems to have slightly declined compared to our previous trips with them. Hong Kong Airport is huge but very practical.
Note that not all airlines serve Cebu.
Recommendation: Fill out your Philippine entry form within 72 hours before your flight. This can prevent issues with the airline (possible boarding refusal) and saves a lot of time upon arrival (see the Philippine embassy website).
Domestic flights
For our two domestic flights—Cebu to Coron and Puerto Princesa to Cebu—our tour operator chose Philippine Airlines and their propeller planes. No problems there.
Day 1:
We landed around 12 PM (local time) after 17 hours of travel. A driver was waiting for us at the airport exit and took us to our hotel, intentionally chosen near the airport (Mandaue, about 10 minutes away) to help us recover and get a good night’s sleep before our early morning domestic flight the next day. The Mayoo Hotel, reasonably priced, was perfect for this. Large, beautiful room in a new building—clean, comfortable, with a spa. We could relax by the pool on the 16th floor and enjoy the city view. The breakfast was exceptional, and the staff was smiling, attentive, and helpful. An ATM in the lobby allowed for withdrawals. However, the hotel is in a neighborhood with nothing to see or do. We dined at the Korean restaurant K-GOGI across from the hotel—a real attraction and a great discovery.
Day 2:
After a restful night, we were driven to the airport around 6:30 AM for an 8:10 AM flight from Cebu to Busuanga (Coron).
The flight was uneventful. Upon arrival, we paid 200 pesos per person for the Coron tourist fee before a 40-minute transfer to our hotel: Natura Resort, located outside the city in a secluded spot. The setting is stunning—a beautifully maintained tropical garden, a pleasant pool, and the option to book massages. The cottages are tropical-style with thatched roofs, simple and unpretentious.
The owner, who speaks French, told us that given the heat and our ages, climbing the 721 steps to the top of Mount Tapyas wasn’t necessary. She gave us a few rooftop recommendations to watch the sunset over Coron Bay. After a good swim in the pool and a meal at the resort’s pleasant restaurant, we hired a tricycle to go into town. We were told it costs 150 pesos one way, and depending on the return time, it could exceed 250 pesos. But our driver gave us his WhatsApp number and charged the same price regardless of the time. He just earned two days’ worth of customers.
He dropped us off at the port where bangkas (local boats) gather for day trips. It was the end of the day, so there was a rush. A few shops around the port sold waterproof bags for marine excursions at reasonable prices (compared to back home), after some bargaining. We wandered the town’s alleys looking for the Top Hotel, whose rooftop is famous. Indeed, it’s perfectly located to admire the sunset and enjoy a refreshing drink.
We dined nearby at a small Chinese restaurant, then just had to call our driver to head back.
The night wasn’t entirely restful—our hotel had a soundtrack of all the countryside animals, and it seemed they had no set bedtime! :
If you're looking for great tips and offbeat spots, if you love exploring uncharted parts of a country, if the exotic is your adrenaline, then move along!
Our 15 days in early May in this part of Turkey (a country I first discovered during a city trip to Istanbul in 2017) will only tread well-worn paths and revisit popular routes. Simply because I kept hoping until the very end that our flight to Jordan wouldn’t be canceled. Events in the Gulf proved me wrong, so we left with:
Zero preparation.
Not a single hotel booked (well, except the first one), no visits planned, just a flight ticket bought three weeks earlier. No guidebook, no app—just the desire to explore southern Turkey and Cappadocia, whose images and the chance to stretch our legs had caught my eye.
Oh, wait—I did bring along a new guide: Gemini! Yes, my friends, generative AI was my chief advisor throughout the trip for sites to visit, accommodations, routes, and even restaurants! An experiment I wanted to try to form my own opinion on using this new technology. And what better way to test it than a Turkish getaway?
The verdict? You’ll have to wait for the trip recap to find out!
The main idea of the trip is also relaxation.
So, the plan is Antalya for a few days, the Turkish Riviera for a few more, Cappadocia as the highlight, and a return via Antalya to wrap up the trip. And it was all planned by AI!
So, if you're ready, fasten your seatbelts—cabin crew, doors to automatic and cross check—boarding for Turkey now!
This travel journal summarizes a trip I took in March to Argentine and Chilean Patagonia. It starts in El Calafate and ends in Ushuaia. During my planning, I considered looking into the Australis cruise from Punta Arenas to Ushuaia, as well as the W trek in Torres del Paine National Park. In both cases, I was put off by the prices. Instead of the cruise, I found two interesting wildlife excursions from Punta Arenas: whale watching in the Strait of Magellan and observing king penguins in Tierra del Fuego. The journey to Ushuaia was by bus. For Torres del Paine, things were a bit confusing, so I reached out to two agencies. In the end, I went with a rental car option, overnight stays on-site, and day hikes. I shared my full itinerary with the agency and ended up being taken care of by a local Argentine agency and a Chilean one.
So, here we go...
Hi everyone,
Way back when, before the internet and all that, there were Larousse encyclopedias, and in the proper names section, I came across a photo of Samarkand. Just the name made me dream. I kept it in the back of my mind for later, and last winter, I revisited the idea. Within a few weeks, I managed to plan our 16-day getaway. Oh, I didn’t do it all by myself—I used a travel agency to handle the flights, accommodations, transportation, and local guide. It was a custom trip for three people, tailored to what we wanted to do, what we wanted to see, within the time we’d chosen, at our own pace.
The main goal of the trip was to visit the three iconic cities of architectural art in Uzbekistan (just for the sheer beauty of it) and, very secondarily, to take a break with a short hike.
We left in early May, flying from Toulouse to Istanbul, then to Tashkent:
- One day in Tashkent, 2 nights,
- By car (6 hours) to the Fergana region: Margilan (silk and pottery), 2 nights, with a guide,
- Back to Tashkent, then a flight to Khiva, 2 nights, 1 day with a guide, 1 day on our own,
- Train to Bukhara (6 hours, sleeper cars), 3 nights, 1 day with a guide, 1 day on our own,
- Train to Samarkand, 2 nights, 1 day with a guide,
- By car to Tersak, 1 night with a local family, short hike, same guide,
- By car to Shakhrisabz (Tamerlane’s hometown), then back to Samarkand,
- Samarkand, 2 more nights,
- Train back to Tashkent, final night, and return home.
What I took away from this Silk Road trip:
- A completely safe country in May—don’t go later because of the heat,
- The warm welcome and easy connection with Uzbeks, a multicultural people,
- A constant puzzle with currency exchange (how much is that in euros? ) 1 € = 14,000 sums,
- Logistics handled by a local agency—top-notch,
- Delicious meals at a very reasonable price,
- Total awe in Khiva and Samarkand (palaces, mausoleums, mosques, madrasas),
- The length of the trip, which let us wander and take our time.
A few photos, but not too many—I don’t want to spoil the joy of discovery!









 1e journée en violet
2e journée en rouge
1e journée en violet
2e journée en rouge











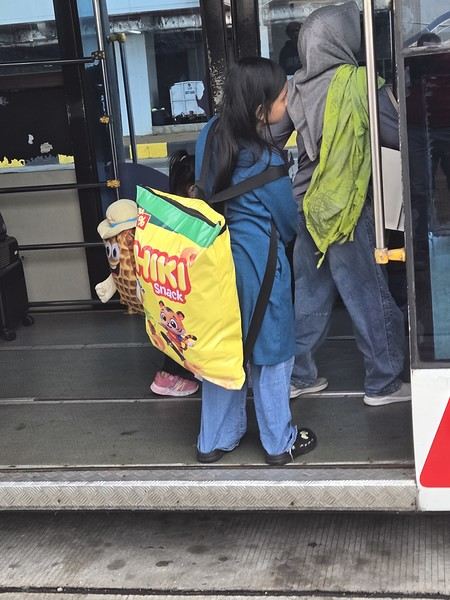
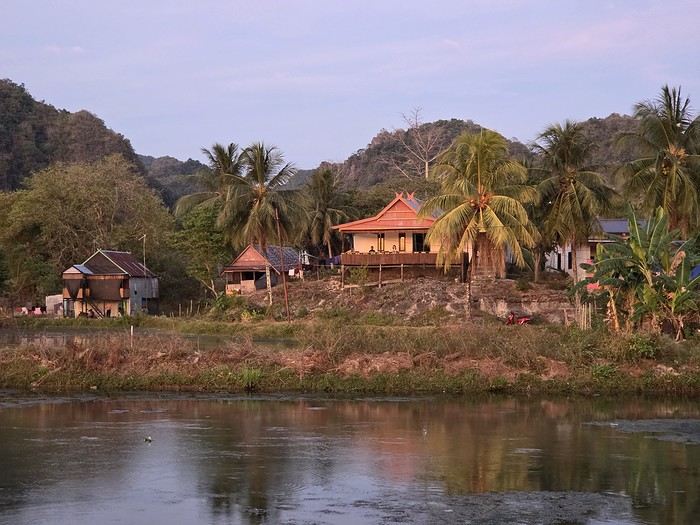
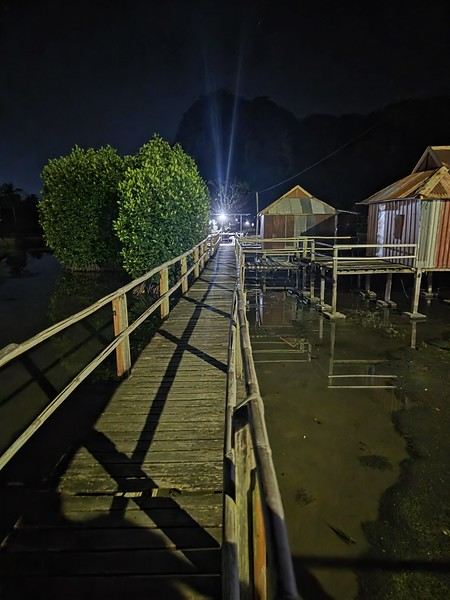
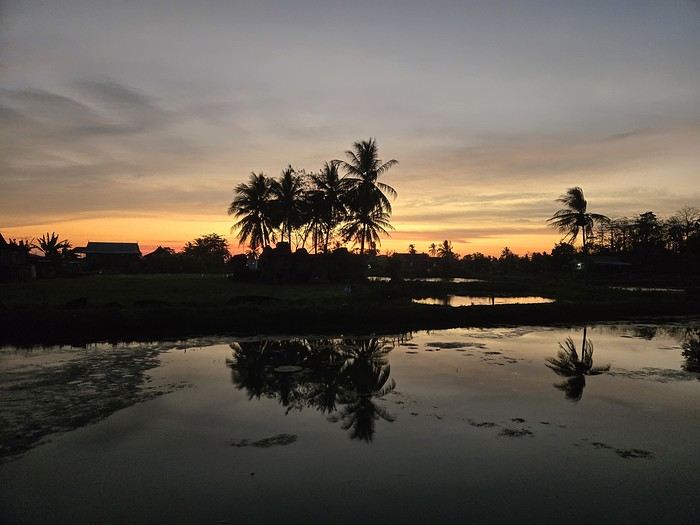
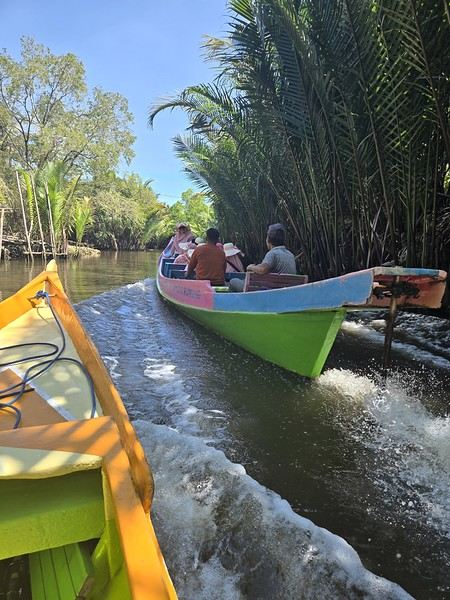 The karst site:
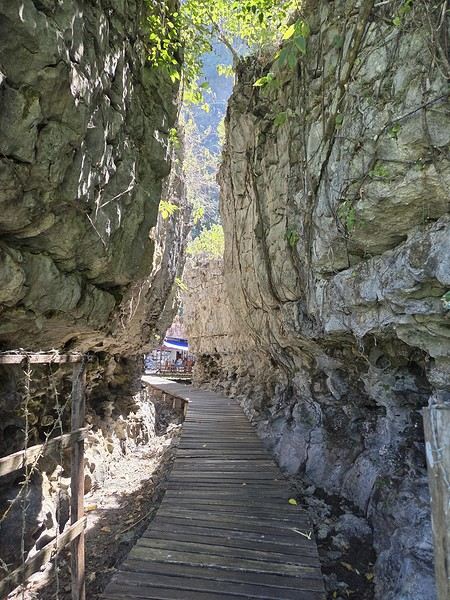
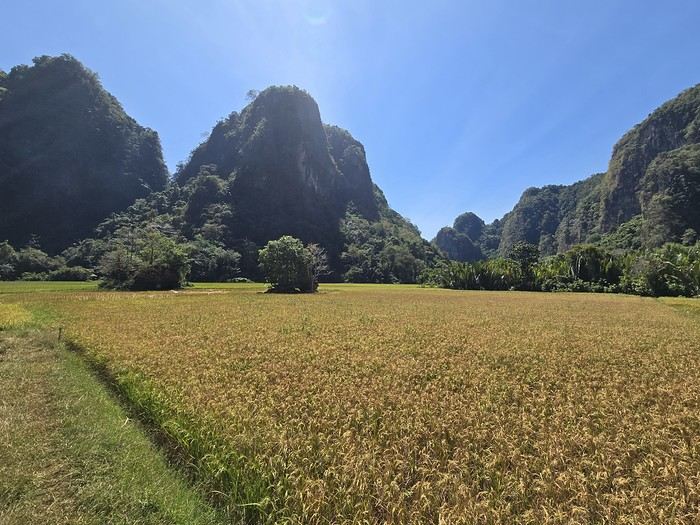
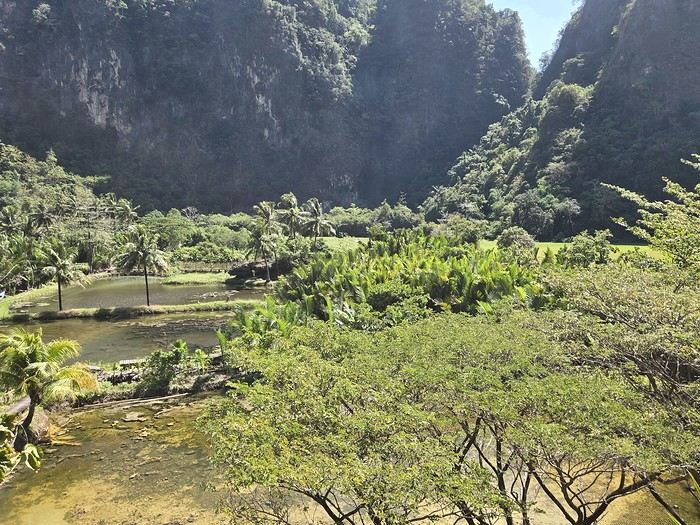
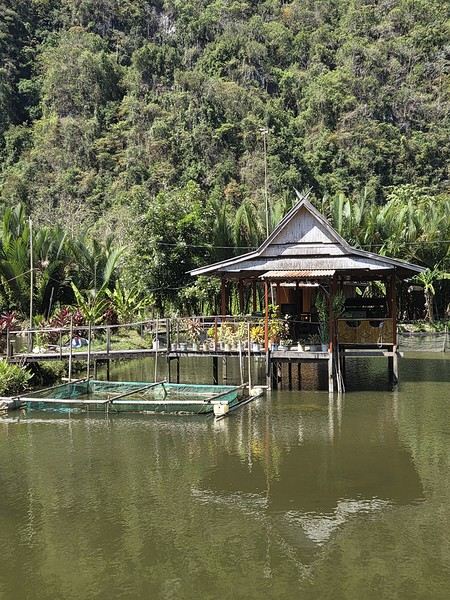
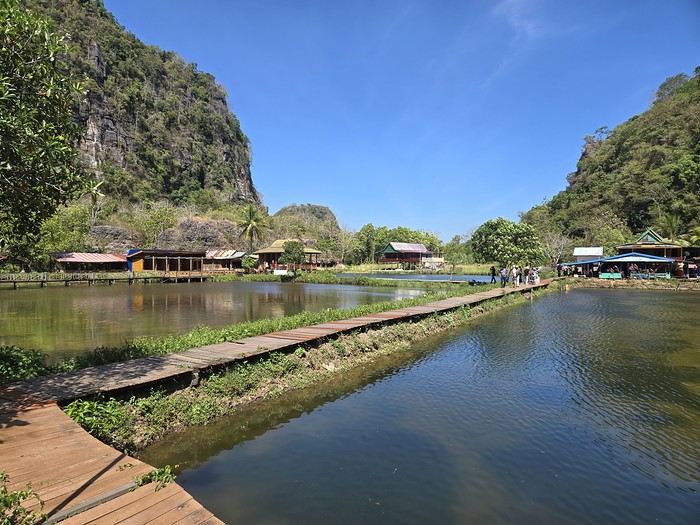

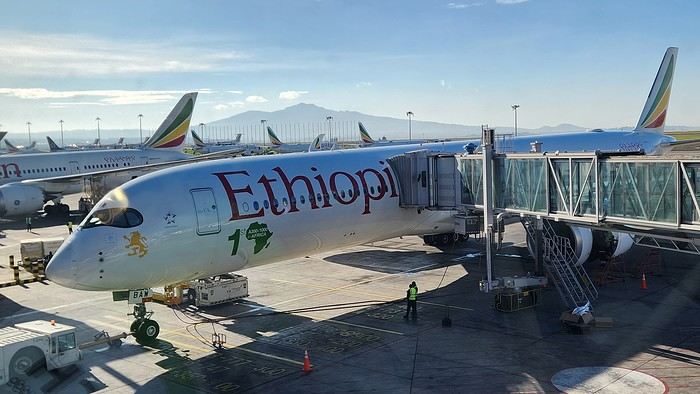
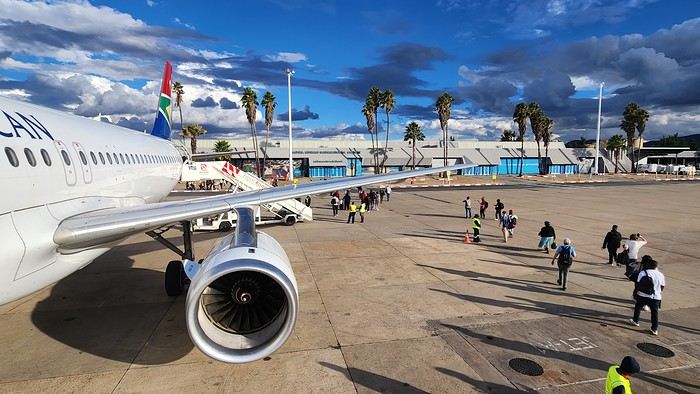
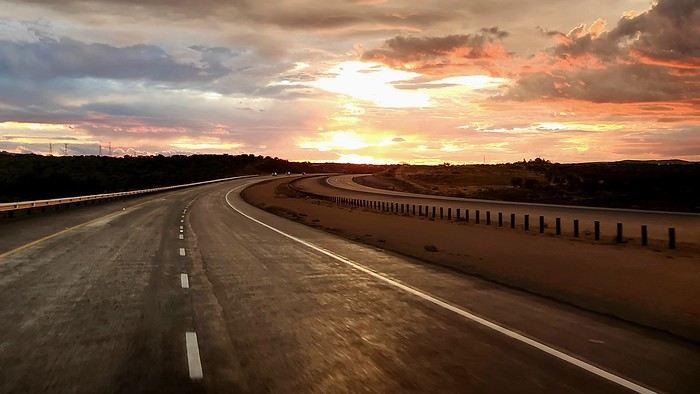
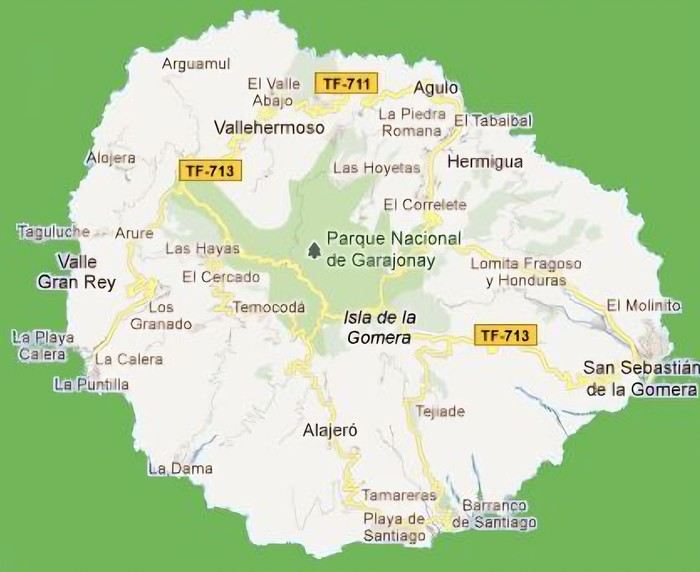 The large solidified magma massifs that shape the heart of the island have created a large depression more protected from the sun at its center, allowing the growth of a vast laurel forest, today grouped within the Garajonay National Park, La Gomera’s green lung, which has earned it the status of a World Biosphere Reserve. Its completely European appearance contrasts sharply with the rocky and tropical landscapes of the rest of the island. Thus, the climate varies greatly from one point to another on the island: in summer, you can quickly go from a dry and sunny valley at 35°C to a humid forest area at altitude at 18°C.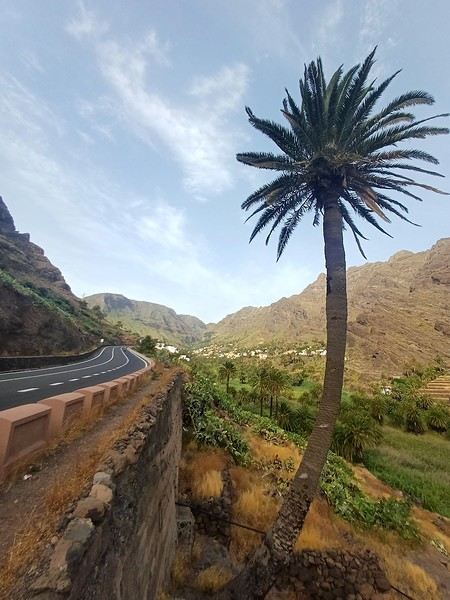
 Come along, I'm taking you to this country where it's so nice to wander and slow down...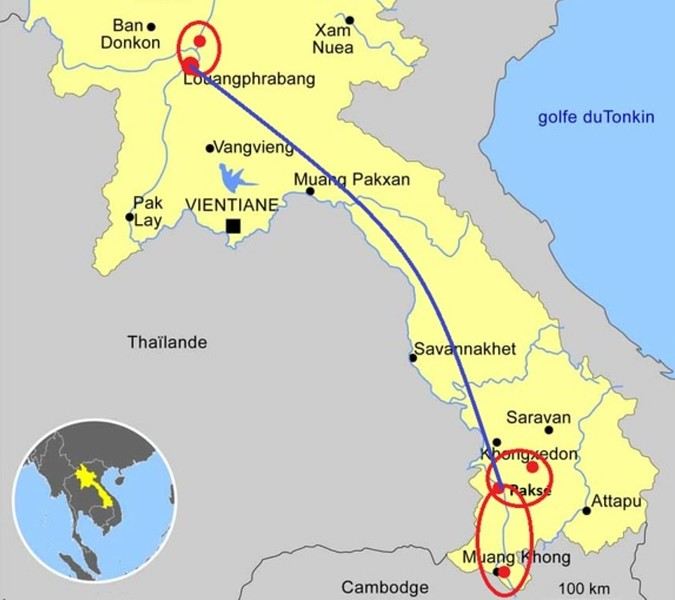


 (In the heart of Albergheria, on a street every visitor walks down—lovely message from an unidentified artist)
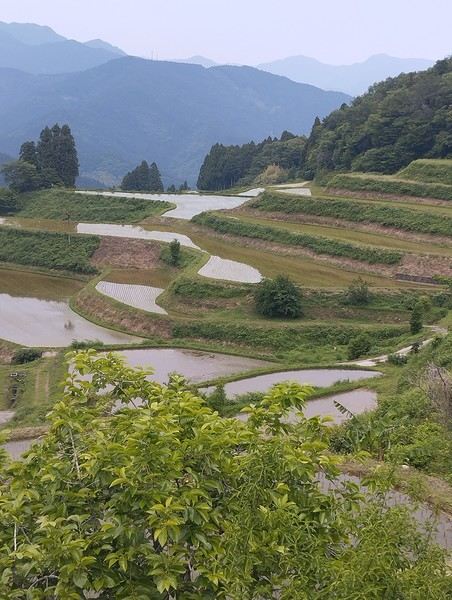
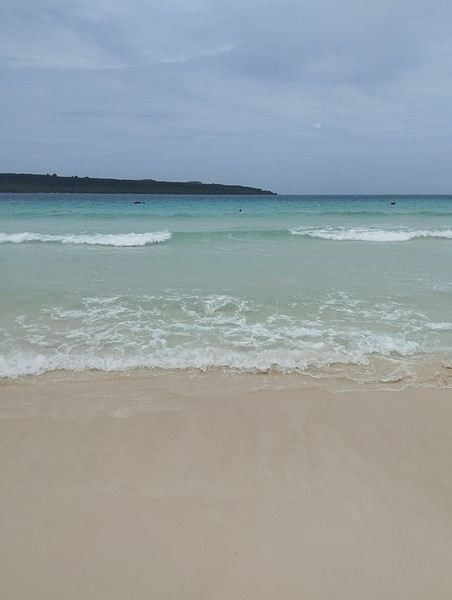
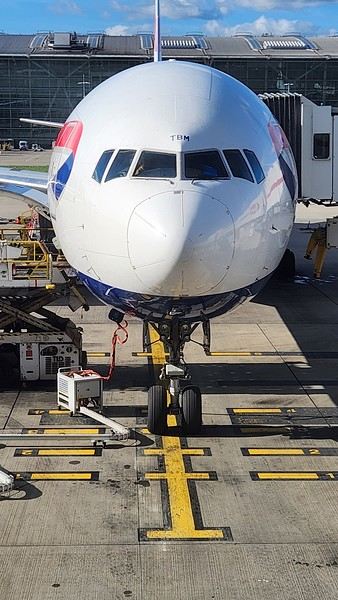


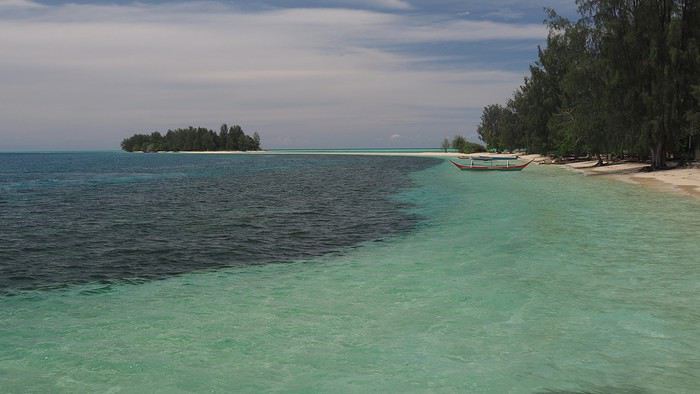
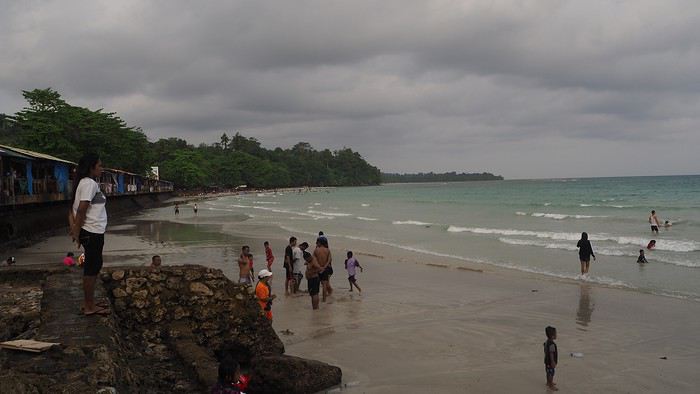
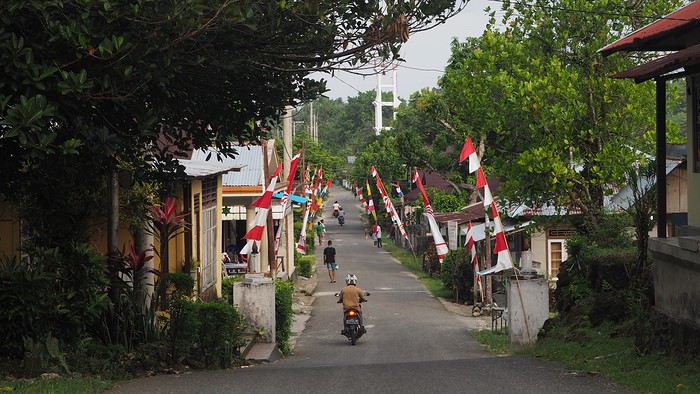
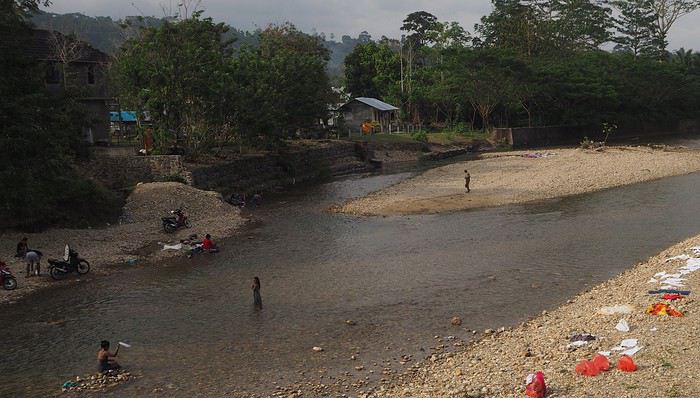 Laundry and trucks washed in the same stream.
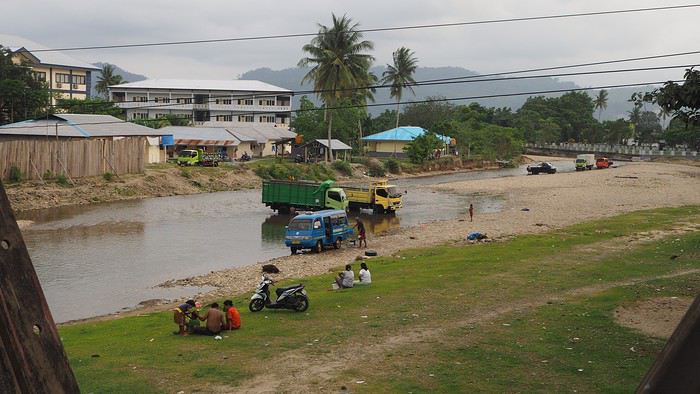
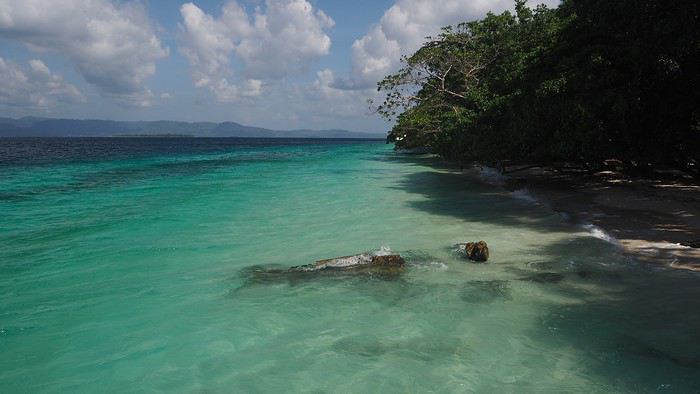
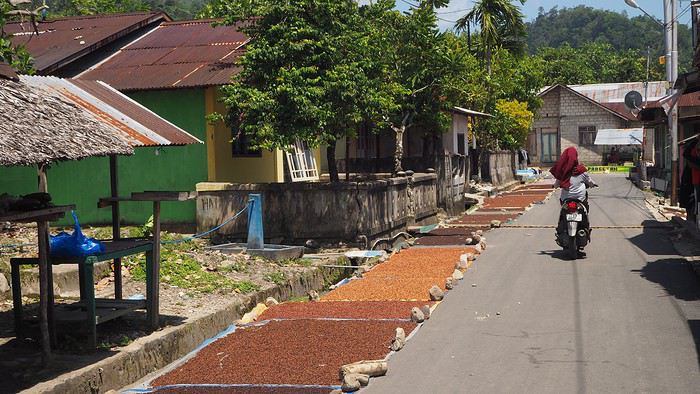
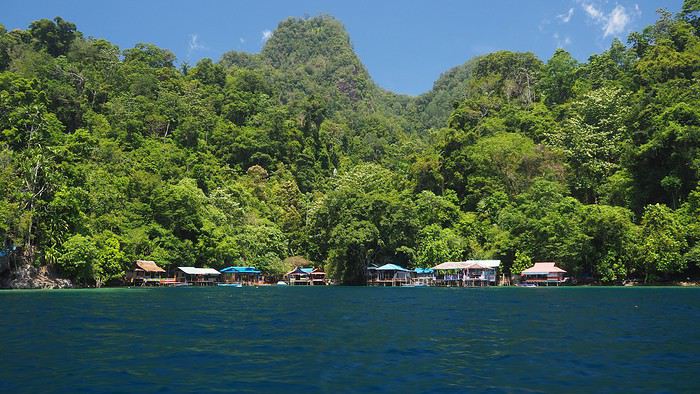 We’re greeted dozens of times with “Hello Mister”—a daily routine in the Moluccas. Every time we stop, we pose for photos to be saved on locals’ smartphones. They don’t see tourists often.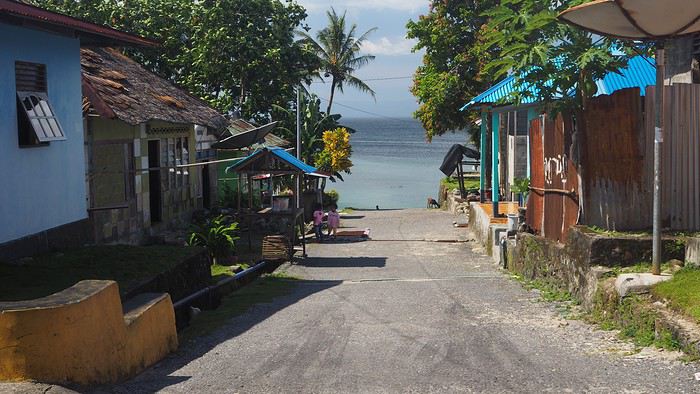
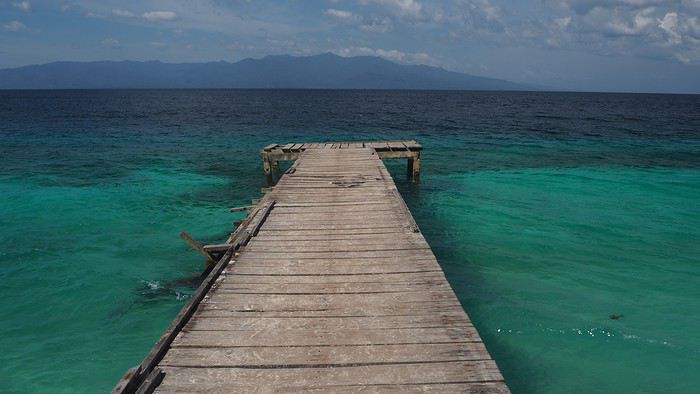
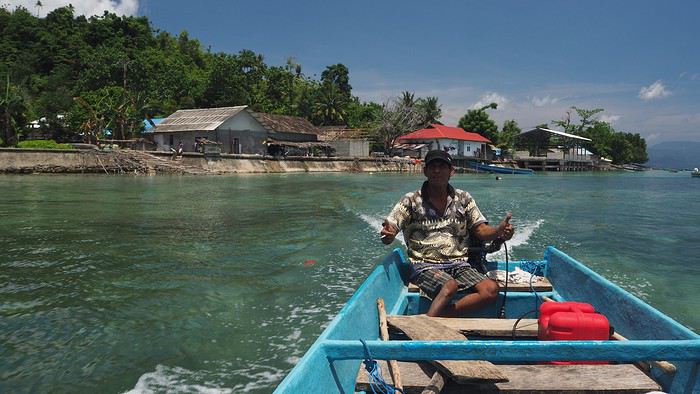
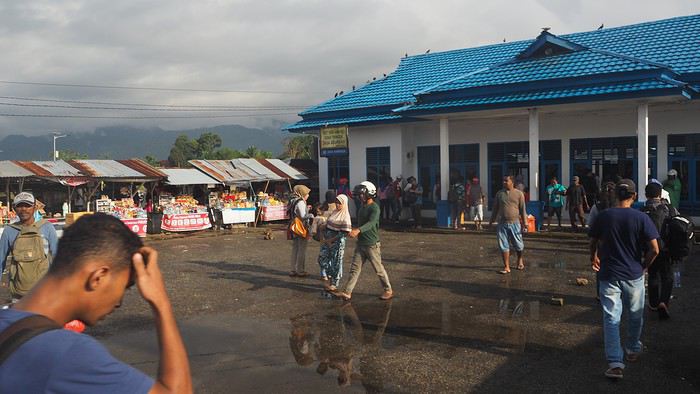




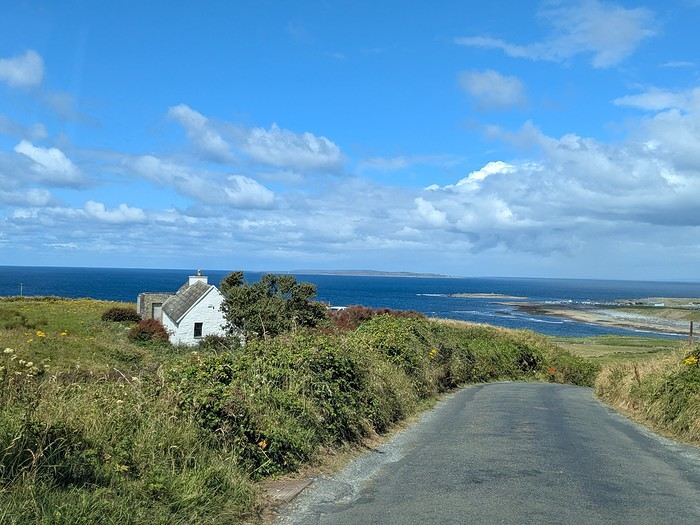
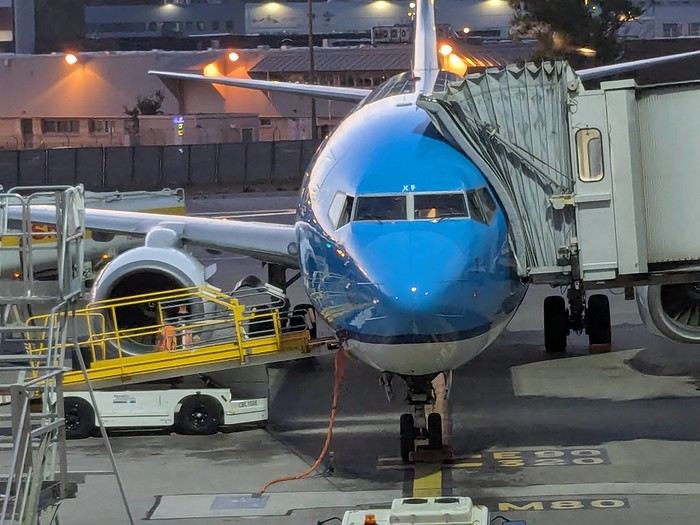
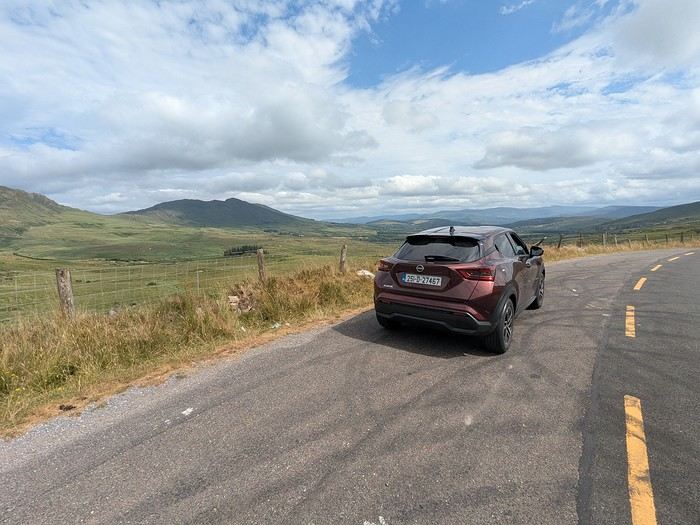
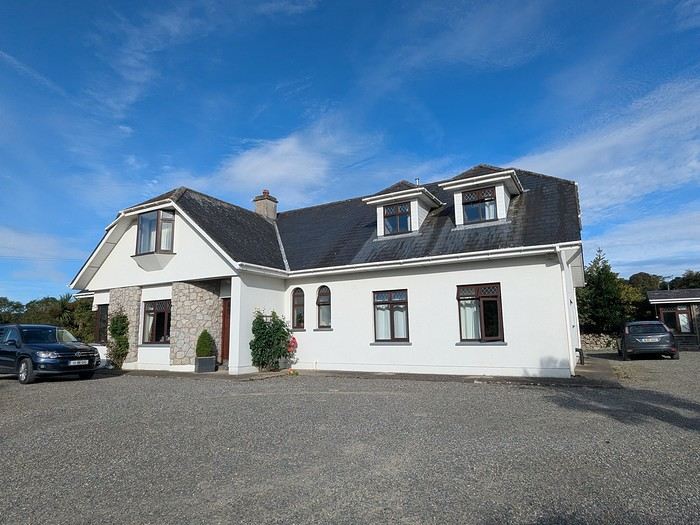

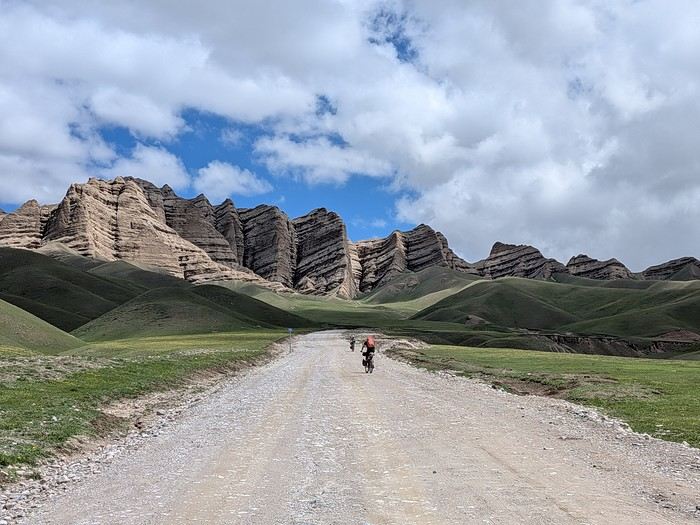
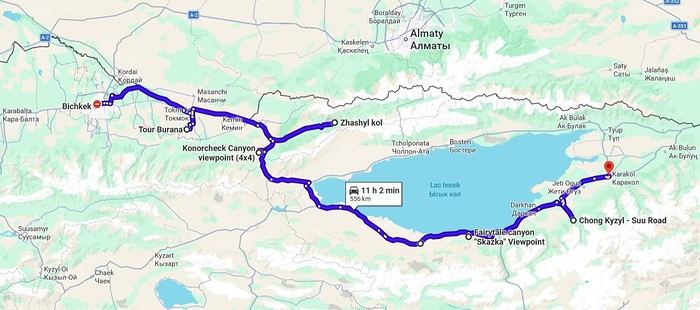
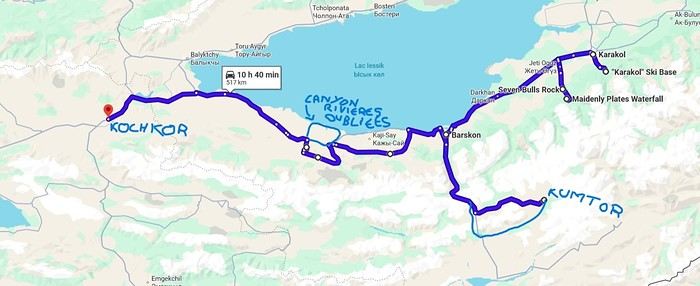
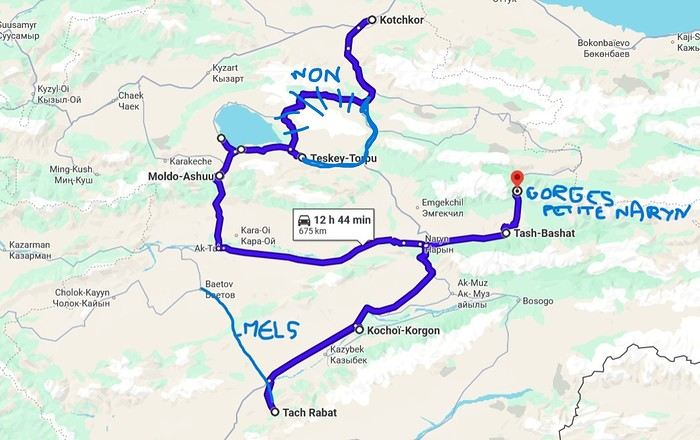
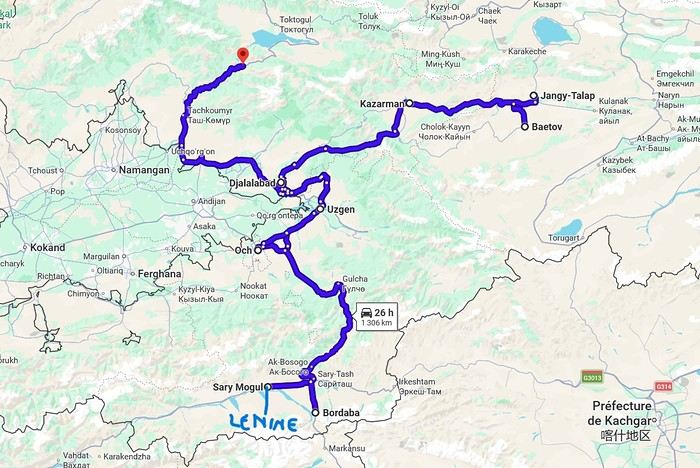
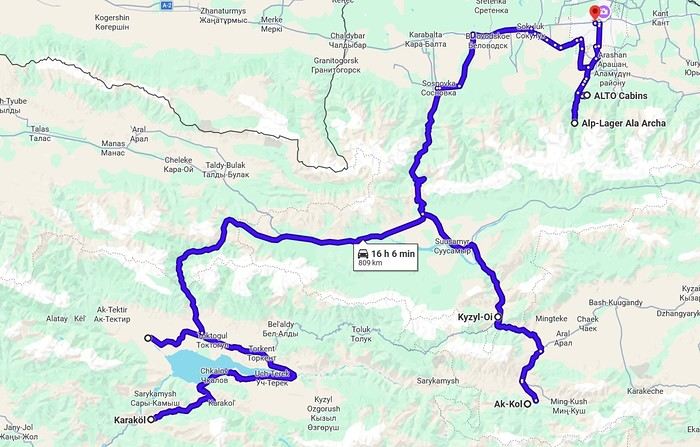

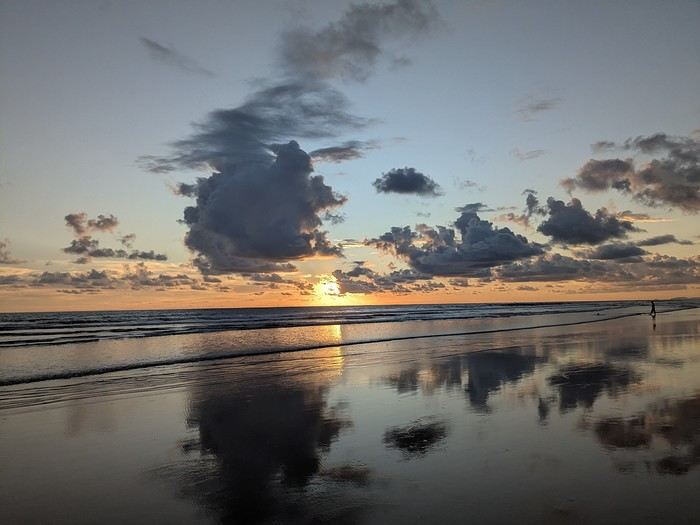
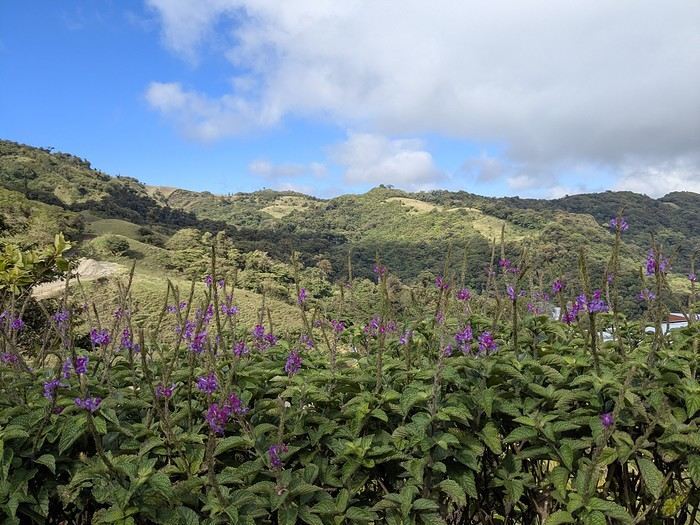
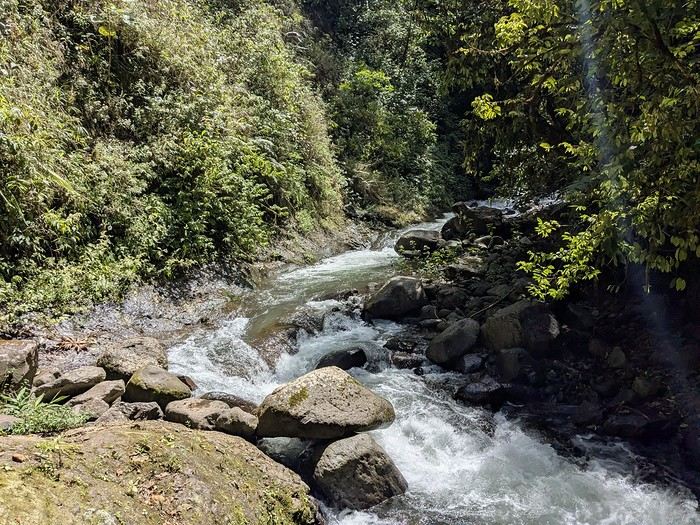
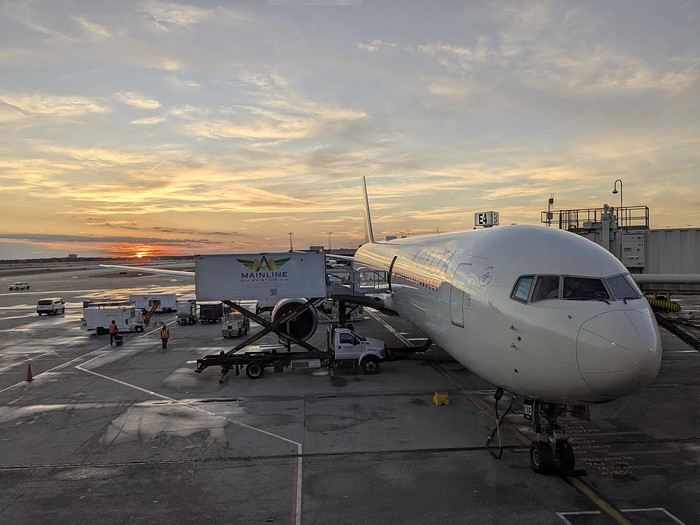
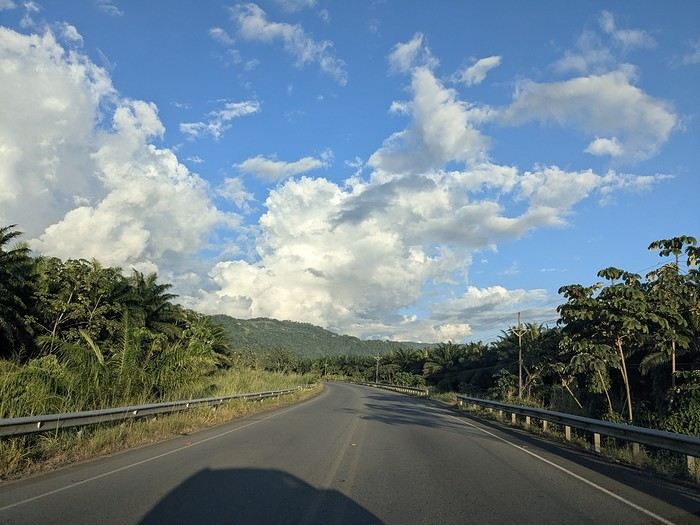
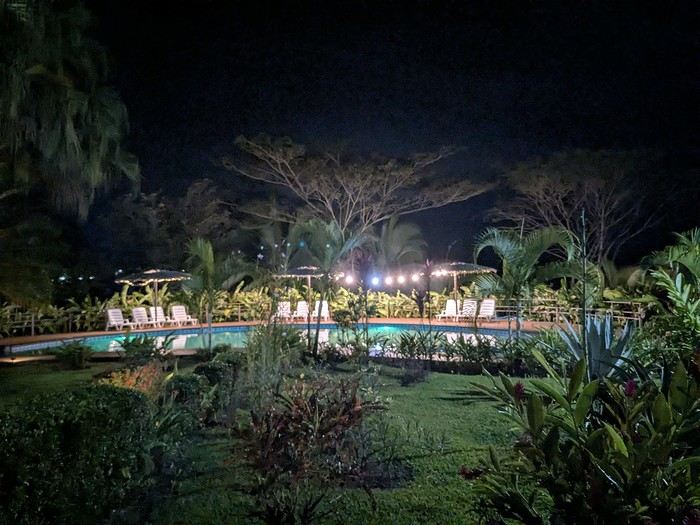
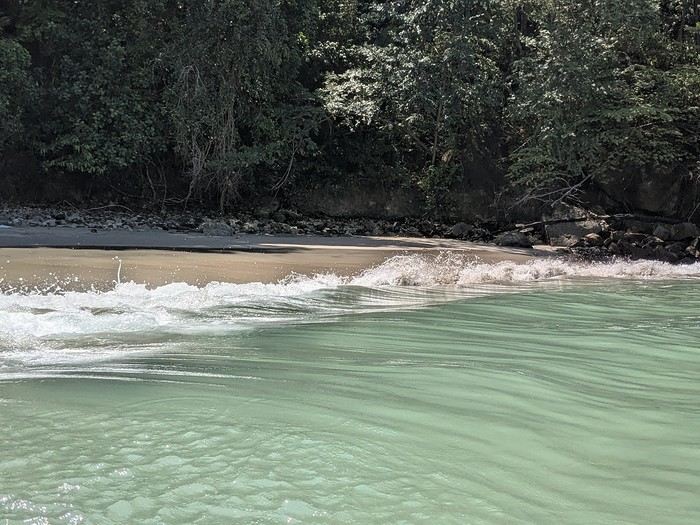
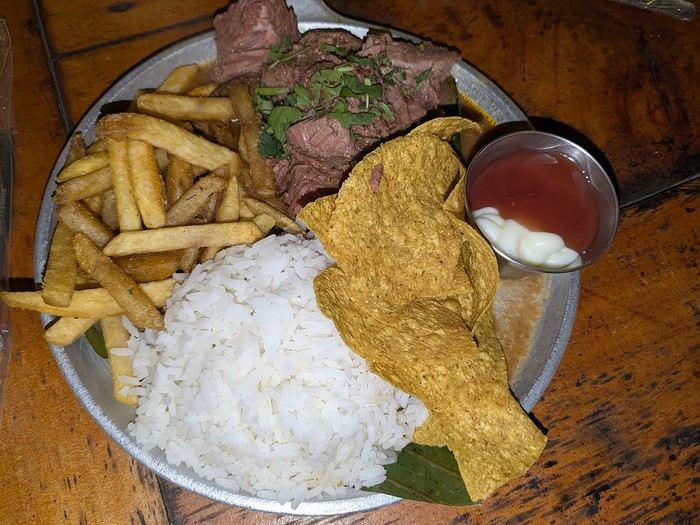
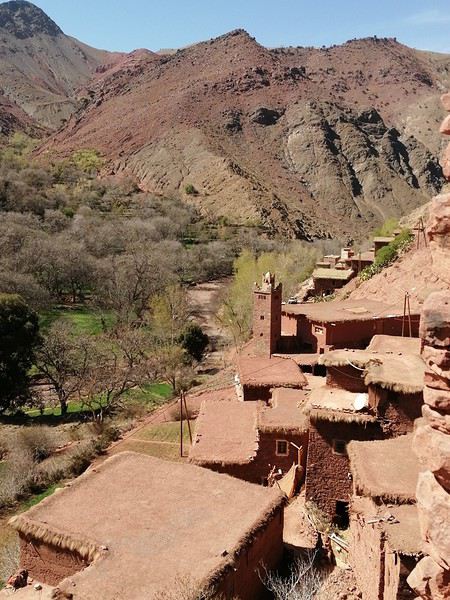
 Several magnificent collective granaries have been beautifully restored. The warm colors of the stone capture the light wonderfully. It’s stunning!

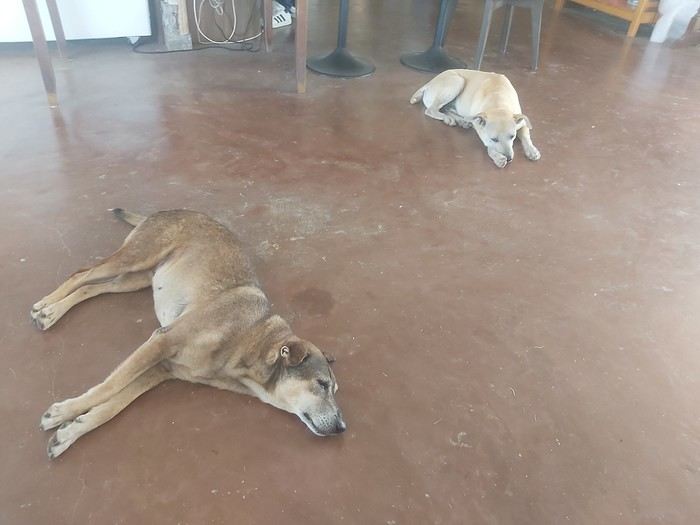
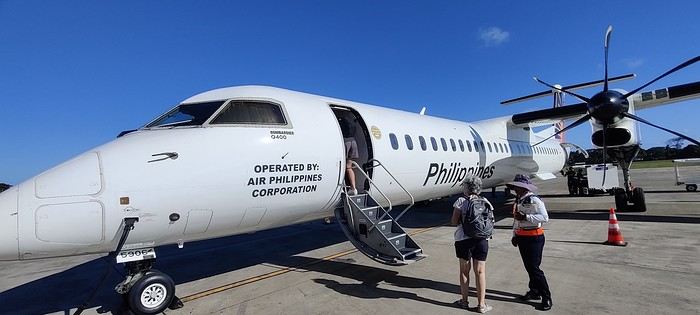
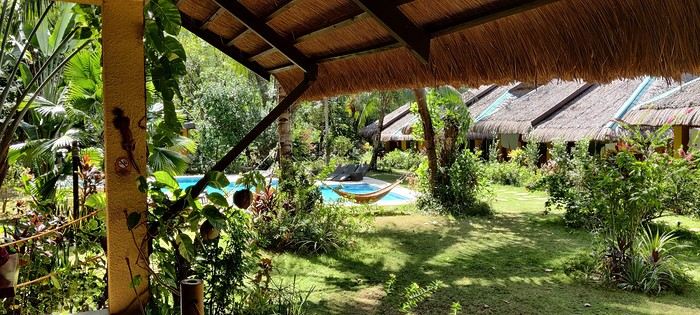
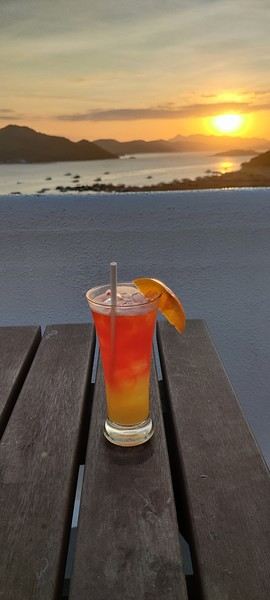
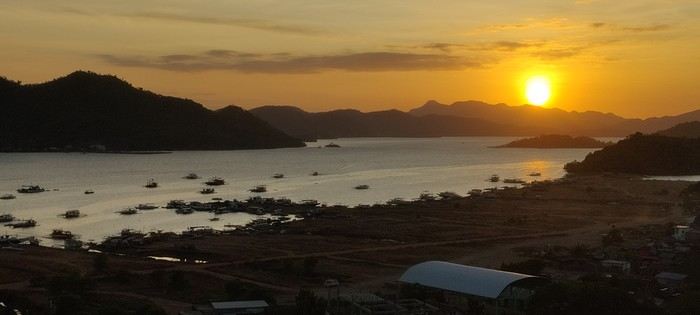
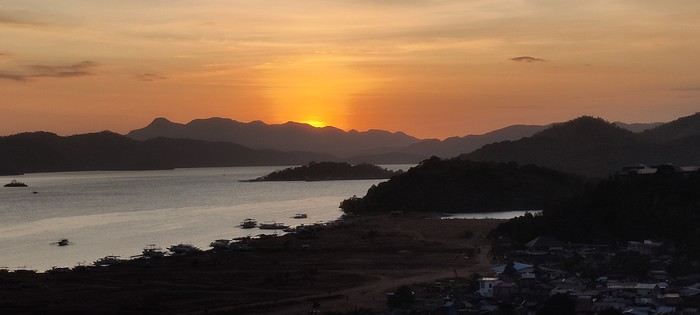

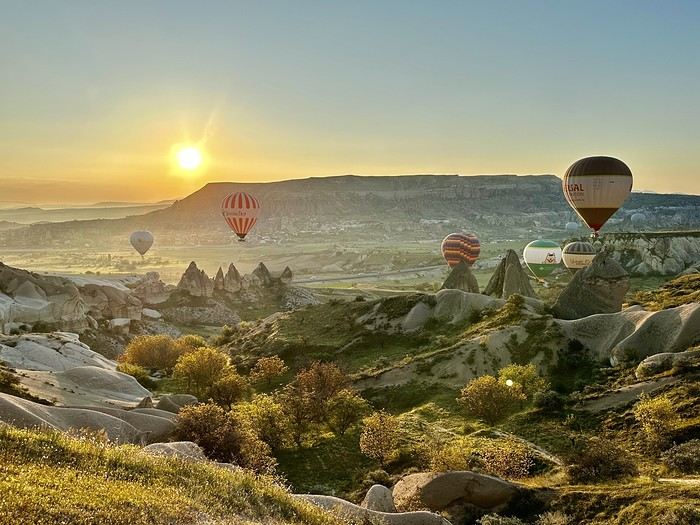 A little sneak peek?