Des vidéos sont insérées tout au long du résumé. Veuillez cliquer sur l'image pour démarrer la vidéo.
En septembre dernier, nous avons séjourné 15 jours sur l'île de Maui à Hawaii afin d'en découvrir les différents attraits touristiques
Comme la plupart de nos précédents voyages, plusieurs semaines ont été consacrées à la création de notre itinéraire afin de pouvoir être en mesure d'atteindre parfaitement nos objectifs.
Lors de notre séjour, nous avons utilisé l'application Maps.me, une application mobile qui fournit des cartes hors ligne. Cette application s'avère très précieuse lors de nos déplacements en voiture, en randonnée et même lors de nos circuits à pied dans les grandes villes.
J'avais préalablement téléchargé les coordonnées GPS de toutes les attractions prévues à notre itinéraire dans l'application Maps.me, ce qui a facilité grandement nos déplacements.
La réservation de l'hébergement ainsi que la location d'une voiture ont été effectuées sur internet avant notre départ.
Les attraits touristiques que nous avons visités sont énumérés ci-dessous. Un lien est rattaché à chaque attrait afin de vous permettre d'accéder plus rapidement aux informations le concernant.
Atterrissage sur l'île de Maui
Location d'un véhicule
Notre condo à Kihei
Kahekili Highway:
- En route vers la Waihe'e Ridge Trail
- Randonnée (la montée) sur la Waihe'e Ridge Trail
- Randonnée (la descente) sur la Waihe'e Ridge Trail
- En route vers Olivine Pools
- Olivine Pools & Bellstone
- Ohai Loop Trail and Overlook
- En route vers Nakalele Point & Blowhole
- Nakalele Point & Blowhole
- En route sur la Kahekili Highway
Haleakala National Park:
- Sliding Sands Trail (Keonehe'ehe'e)
- Pu'u'Ula'ula Summit (Red Hill)
- Kalahaku Overlook Trail
- Leleiwi Overlook Trail
Road to Hana:
- Introduction
- Spreckelsville Beach (Baby Beach)
- Baldwin Beach Park
- Ho'okipa Beach Park & Surf
- Ho'okipa Beach Park - A la rencontre des tortues
- Ho'okipa Beach Park - Wing Surfing
- Ho'okipa Beach Park - Snorkeling
- Ho'okipa Beach Park - Sauvetage en mer
- Twin Falls
- Eucalyptus arc-en-ciel
- Waikamoi Nature Trail
- Waikamoi Stream & Waterfalls
- Kaumahina State Wayside Park
- Keanae Arboretum
- Wailua Valley State Wayside Park
- Upper Waikani Falls (Three Bears Waterfalls)
- Pua'a Ka'a Falls
- Hanawi Falls
- Hana Lava Tube
- Wai'anapanapa State Park
- Saut de falaise - Wai'anapanapa State Park
- Les mangoustes - Wai'anapanapa State Park
- Hana Beach Park
- Fagan's Cross
- Koki Beach
- Hamoa Beach
- Wailua Falls
- Pipiwai Trail & Waimoku Falls
- Seven Sacred Pools (Ohe'o Gulch)
- Alelele Falls
En route sur la Piilani Highway
Kahului
- Kanaha Pond Wildlife Sanctuary
- Kanaha Beach Park
En route - Kahului & Wailuku
Wailuku
- En route - Iao Valley State Park
- Iao Valley State Park
- Kepaniwai Park & Heritage Gardens
L'intérieur des terres
- Waihou Spring Trail - Makawao
- En route sur Olinda Rd - Makawao
- Kula Botanical Garden
- Sun Yat-Sen Memorial Park - Kula
West Maui
- Front Street - Lahaina
- Lahaina Banyan Court Park - Lahaina
- Hale Pa'Ahao/Lahaina Prison - Lahaina
- Randonnée - Hanakao'o Beach Park vers Wahikuli Wayside Park - Ka'anapali
- Ka'anapali Beach Boardwalk
- Saut de falaise à Black Rock - Ka'anapali
- Black Rock Torch Lighting / Cliff Diving Ceremony - Ka'anapali
- Kahekili Beach Park - Ka'anapali
- Honokowai Beach Park - Honokowai
- Napili Bay - Napili
- Kapalua Coastal Trail (Aller) - Kapalua
- Kapalua Coastal Trail (Retour) - Kapalua
- Dragon's Teeth (Makaluapuna Point) - Kapalua
- Randonnée dans la forêt de la Baie d'Honolua - Kapalua
- Plongée en apnée dans la Baie d'Honolua - Jour 1 - Kapalua
- Plongée en apnée dans la Baie d'Honolua - Jour 2 - Kapalua
- Plongée en apnée dans la Baie d'Honolua - Jour 3 - Kapalua
- Baignade avec les tortues dans la Baie d'Honolua - Kapalua
- Road Trip - Honoapiilani Hwy - Lahaina
South Maui
- Kealia Pond National Wildlife Refuge - Ma'alaea
- Kealia Coastal Boardwalk - Ma'alaea
- Maui Ocean Center - Ma'alaea
- Kalepolepo Beach Park - Kihei
- Kamaole Beach Park I, II & III - Kihei
- Keawakapu Beach Park - Kihei
- Wailea Beach Path - Wailea
- Palauea Beach & Po'olenalena Beach & Malu'aka Beach - Makena
- Plongée en apnée - Makena Landing Beach - Makena
- Big Beach, Little Beach & Pu'u Ola'i - Makena
- Plongée en apnée - Ahihi Bay - Makena
- Plongée en apnée - Ahihi-Kina'u Natural Area Reserve - Makena
- Randonnée - La Perouse Bay - Makena
- Road Trip - Makena Alanui Rd - Wailea-Makena
L'île de Maui nous apparaît enfin en plein milieu de l'océan Pacifique. La vue est sensationnelle du haut des airs.
Nous survolons de denses forêts verdoyantes ainsi qu'une vallée parsemée de multiples quartiers ainsi que de terres agricoles.
Le vert des forêts disparaît graduellement pour laisser place à un sol brunâtre lorsque nous arrivons près de l'aéroport de Kahului. Cette région est beaucoup plus aride que celle que nous venons tout juste de traverser.
Juste avant d'atterrir à Kahului, nous apercevons le Kanaha Pond State Wildlife Sanctuary situé en bordure du littoral. Nous irons d'ailleurs le visiter lors de notre séjour à Maui.
Nous avions effectué la location d'un véhicule de type compact (Ford Focus ou similaire) sur le site internet d'Auto Europe avant notre départ pour Maui.
Lorsque nous sommes arrivés à l'aéroport, nous avons récupéré nos bagages et nous nous sommes dirigés vers le comptoir de location de la compagnie Thrifty situé à l'extérieur de l'aéroport.
Le comptoir est situé à moins de 10 minutes de marche du terminal. Il est possible de s'y rendre à pied et le chemin est très bien indiqué. C'es très facile.
Sinon, il y a un petit train qui fait régulièrement la navette entre le terminal et l'édifice ou sont situés les comptoirs de location.
Il y avait déjà quelques clients dans la file d'attente lorsque nous sommes arrivés au comptoir. Cependant, nous avons été servis très rapidement.
Les véhicules sont regroupés par catégorie dans un grand stationnement situé derrière les comptoirs de location.
En fait, aucun véhicule ne nous est attitré. Nous avons donc recherché un véhicule de type compact, mais il n'y en avait plus. Alors, on nous a proposé de rechercher un véhicule de type intermédiaire.
Nous avons donc opté pour la Chevrolet Cruz que nous avons nous-mêmes inspectée et avons complété le rapport d'état du véhicule.
C'était la première fois que cela se passait ainsi. Habituellement, un représentant de la compagnie nous accompagne et fait le tour avec nous.
Ici, vous retrouverez le rapport d'état ainsi qu'un crayon dans chaque véhicule. Il suffit donc de le compléter et de le remettre à un préposé à la sortie du stationnement.
Nous avons effectué la location d'un condo sur le site internet d'airbnb. Contrairement à l'île d'Ohau, les offres de location ne sont pas en aussi grand nombre, ce qui fait que les prix sont plus élevés à Maui.
Le condo que nous avons loué est situé à Kihei en bordure de l'océan (une rue à traverser) sur la côte sud de Maui.
Nous l'avons choisi entre autres pour sa localisation puisqu'il était facile de se déplacer facilement et rapidement vers les autres parties de l'île.
Le condo, situé au rez-de-chaussée, est climatisé et comporte une cuisine complète avec tous les accessoires, une salle de bain ainsi qu'une grande pièce qui sert de chambre à coucher et de salon.
Nous avons également une petite terrasse extérieure qui fait face aux terrains de tennis.
Les espaces de rangement sont nombreux et des chaises de plage, glacière ainsi que des masques de plongée sont mis gratuitement à notre disposition.
Nous avons un espace de stationnement. A chaque fois que nous utilisons le stationnement, il est primordial d'accrocher le permis au rétroviseur puisqu'un gardien fait la tournée des véhicules.
Nous l'avons oublié une seule fois et nous avons eu un avertissement que la prochaine fois, nous aurions une amende. Alors, c'est à prendre au sérieux.
Nous avons également accès à une aire sécurisée comprenant une piscine, un spa, des barbecues ainsi que de nombreuses chaises longues.
Tous les soirs, nous nous rendions sur la plage située en face du condo afin d'assister au coucher de soleil qui était tout à fait fabuleux.
La plage n'est pas très grande. Cependant, si l'on contourne le bâtiment situé à droite de la plage, nous arrivons sur une autre plage, très longue, sablonneuse et peu fréquentée.
Un long muret de pierres a été installé dans l'océan en face de la plage, créant ainsi un bassin propice à la baignade Les tortues viennent d'ailleurs s'y reposer en fin de journée.
On retrouve à proximité de nombreux restaurants ainsi que des supermarchés.
Je le recommande sans hésitation. L'endroit est très calme. De plus, la propriétaire du condo répond très rapidement à nos demandes d'informations.
De plus, les renseignements qu'elle nous transmet relativement à l'arrivée et au départ sont précis et très pertinents.
Nous sommes partis très tôt le matin de Kihei pour aller effectuer une randonnée sur la Waihe'e Ridge Trail.
Nous avons emprunté la Kahekili Highway pour nous y rendre. Cette route est surtout reconnue pour son étroitesse à certains endroits.
Cependant, la portion de cette route située entre Kihei et le ranch Mendes, malgré ses nombreuses courbes en lacets, se parcourt aisément puisque ses dimensions sont normales.
La végétation est luxuriante et verdoyante. Ce n'est pas étonnant puisque cette région reçoit une grande quantité de précipitations tout au long de l'année.
D'ailleurs, nous observons que les nuages s'accrochent continuellement au sommet des montagnes.
Il faut tourner à gauche dans une rue très étroite devant le ranch Mendes. Celle-ci, en excellent état, mène au stationnement situé à proximité du sentier.
Le site est ouvert de 7h00 à 19h00 et on retrouve des toilettes portables à proximité du sentier.
Nous avons débuté cette randonnée de 8 km aller-retour aux alentours de 7h30 le matin. Il était conseillé d'effectuer cette randonnée tôt le matin afin d'éviter les nuages qui viennent recouvrir la région au cours de la journée.
Il est recommandé de nettoyer ses chaussures avant de passer le portail, ceci afin d'éviter de contaminer la végétation existante.
Il faut d'abord monter une route bétonnée plutôt raide et franchir un autre portail pour enfin arriver au sentier balisé qui se faufile dans la forêt tropicale dense et très humide.
Le début du sentier est facile à parcourir car il est en gravier et la pente est plutôt douce.
Après avoir passé un virage très serré, nous arrivons à un belvédère offrant une superbe vue panoramique du secteur. On y aperçoit d'ailleurs les chutes de Makamaka'ole qui se déversent à deux niveaux au fin fond de la vallée.
A cet endroit, il y a un banc sur lequel nous pouvons nous reposer avant de poursuivre notre randonnée.
Le sentier continue ensuite de monter et mène à un autre belvédère d'où nous avons une magnifique vue du littoral ainsi que du majestueux canyon verdoyant au creux duquel coule une rivière comportant quelques cascades.
Le sentier devient par la suite un peu plus difficile à arpenter puisqu'il est souvent recouvert de boue, ce qui le rend plutôt glissant.
Il s'élève très rapidement en direction du sommet de la montagne qui porte le nom de Lanilili.
Heureusement, des marches ont été installées à plusieurs endroits sur le sentier afin de faciliter la montée.
Le taux d'humidité est très élevé, augmentant le degré de difficulté. Nous avons carrément la tête dans les nuages. Le brouillard est dense à certains endroits, diminuant ainsi la visibilité.
Peu importe, ces conditions ne nous empêcheront aucunement de nous rendre jusqu'au sommet.
Lorsque nous y sommes arrivés, nous nous sommes d'abord assis à une table de pique-nique pour nous reposer. Il y avait déjà quelques personnes sur la terrasse.
Durant la demi-heure que nous y avons passé, il y a eu un flot incessant de randonneurs qui venaient et repartaient peu de temps après.
Il faut dire qu'au sommet, le brouillard masquait le paysage environnant. Cependant, de petites percées de soleil nous ont permis d'apercevoir brièvement le littoral et une partie de la vallée.
Pour cela, il a fallu être très patients et surtout se dépêcher de prendre des photos le moment venu.
Voici donc la vidéo de notre randonnée vers le sommet.
Randonnée sur la Waihe'e Ridge Trail - La descente
Coordonnées GPS: 20.952938, -156.531650
Durée: 01h15
Évidemment, nous avons pris beaucoup moins de temps pour effectuer la descente. Cependant, il fallait tout de même être prudent car le sentier était glissant à certains endroits.
Lors d'une randonnée, je trouve qu'il est toujours plus agréable d'effectuer la descente plutôt que la montée puisque nous bénéficions de superbes vues plongeantes.
Et nous avons été choyés malgré tout par la température puisque lorsque nous sommes arrivés au niveau des belvédères, le ciel était plutôt dégagé, nous permettant d'apprécier davantage la beauté du paysage.
Après avoir quitté le sentier, nous nous sommes retrouvés sur la route bétonnée qui comporte une forte inclinaison. Attention aux genoux!
Ce fut une superbe randonnée dans un site très pittoresque constitué d'une végétation luxuriante.
Elle est accessible à tous. Il suffit d'y aller à son propre rythme, effectuer des pauses au besoin, porter de bonnes chaussures et avoir de l'eau en quantité suffisante pour vous hydrater.
Tel que mentionné précédemment, la Kehekili Highway (Route 340) est réputée pour son étroitesse. C'est pourquoi il est déconseillé de prendre cette route.
C'est vrai qu'elle comporte des sections étroites à une voie (et pourtant elle n'est pas à sens unique) et des virages en épingle très serrés puisqu'elle se faufile à travers de hautes falaises escarpées.
Assez serrés d'ailleurs que nous avons pris l'initiative de klaxonner avant d'entreprendre ces virages afin d'indiquer notre présence aux véhicules qui pourraient venir en sens inverse.
Heureusement, cette route n'est pas très fréquentée et les automobilistes rencontrés étaient tous très prudents.
Nous nous sommes arrêtés à quelques endroits en bordure de la route pour admirer le paysage. Entre autres, quelques belvédères (Positions GPS: 20.998479, -156.548040 et 20.998445, -156.551654) nous permettent de bénéficier de magnifiques vues sur Kahakuloa, un petit village de pêcheurs blotti au creux d'une vallée luxuriante, ainsi que sur le littoral.
Nous apercevons d'ailleurs une formation rocheuse portant le nom de Kahakuloa Head (Pu'u Ko'e). Il semblerait que c'est de cet endroit que Kahekili, roi du 18e siècle, aimait sauter dans l'océan.
A ce dernier belvédère (20.998445, -156.551654), il y avait un food truck (Braddah Chic's) et nous en avons profité pour faire une pause et savourer leurs délicieuses crevettes.
En fait, Olivine Pools, ce sont des piscines naturelles qui se sont formées dans la lave en bordure de l'océan.
Il y a plusieurs espaces de stationnement en bordure de la route. Il suffit de suivre le sentier qui part du stationnement et qui mène en direction du littoral.
Lorsque nous sommes arrivés au bout de la falaise, nous en avons d'abord profité pour admirer le littoral comportant quelques piscines naturelles.
Et puis, nous nous sommes questionnés à savoir par où nous devions descendre pour nous rendre jusqu'à ses piscines.
Le chemin le plus approprié nous a semblé être le petit sentier qui se faufile à travers un sous-bois, et ce, à droite de la falaise.
Il faut être extrêmement prudent car la descente est plutôt abrupte et le sol est glissant à certains endroits.
Par la suite, le terrain est très accidenté. Cependant, il suffit de se frayer un chemin entre les roches volcaniques dont certaines sont très escarpées. La prudence est de mise car ces roches peuvent s'avérer très coupantes.
Je vous recommande de porter des chaussures de randonnée pour vous rendre en bordure du littoral.
La température de l'eau de ces piscines naturelles est vraiment agréable. Par ailleurs, nous pouvons apercevoir de nombreux poissons tropicaux nager dans ces eaux cristallines. Les bassins sont étonnamment très profonds!
Plusieurs visiteurs s'aventurent au-delà des piscines et déambulent sur les roches volcaniques humides sur lesquelles les vagues viennent se fracasser.
C'est un secteur très dangereux car une grosse vague peut arriver à tout instant et vous propulser sur les roches volcaniques qui pourraient vous blesser très sérieusement et vous pourriez même être projetés dans l'océan et vous noyer.
Nous avons malheureusement été témoins d'un tel événement sur l'île d'Oahu.
Après avoir profité d'une petite pause à cet endroit, nous sommes retournés au stationnement situé en bordure de la route.
Tout près, il y a un gros rocher portant des marques d'impact circulaires. En fait, il s'agit d'une "Bellstone". Les anciens hawaïens frappaient ce rocher pour obtenir une résonance métallique qui servait à transmettre des messages.
Il faut savoir exactement comment le frapper pour produire un tel son. Mon conjoint en a fait l'essai, mais n'a pas obtenu le résultat escompté.
Ohai Loop Trail and Overlook sont en fait deux sentiers qui offrent de superbes vues sur le littoral ainsi que sur Nakalele Point.
Overlook est un court chemin pavé qui mène à un promontoire tandis que Ohai Loop Trail est un sentier en boucle de 2 km qui est très bien entretenu et qui traverse une végétation plutôt dense.
Il est possible de faire la boucle dans les deux sens. Cependant, il était suggéré de faire la randonnée dans le sens antihoraire. C'est pourquoi nous avons débuté notre randonnée dans l'embranchement situé à la droite du sentier.
Le sentier débute donc à l'intérieur des terres et plusieurs panneaux ont été installés à proximité du sentier pour donner de l'information sur les différentes formations de cette région.
Le sentier est très agréable à parcourir et nous mène en bordure de l'océan où nous pouvons apercevoir au loin, en direction Est, le Kahakuloa Head (Pu'u Koa'e), une imposante colline en forme de pyramide.
Lorsque nous sommes arrivés, il y avait plusieurs personnes sur ce sentier. Cependant, lorsque nous avons débuté notre randonnée, nous nous sommes retrouvés seuls à explorer cette région, nous plongeant ainsi dans un sentiment de sérénité.
Le sentier longe ensuite le littoral, nous permettant ainsi de découvrir des falaises escarpées. Plusieurs types de plantes bordent le sentier et enjolivent le secteur.
Il y a un banc le long du sentier qui nous permet de nous reposer et profiter du magnifique paysage environnant.
C'est un excellent endroit pour observer les baleines durant la saison de migration de ces cétacés qui débute en décembre et se termine en mai.
Nous en avons donc profité pour faire une petite pause et avons poursuivi notre randonnée sur le sentier qui se dirige ensuite vers l'intérieur des terres pour ainsi terminer la boucle.
Malgré la présence du vent, il faisait très chaud à cet endroit. Alors, apportez de l'eau en quantité suffisante et portez un chapeau car le soleil tape très fort.
Nous venons tout juste de quitter la Ohai Loop Trail située sur la Kahekili Highway (route 340) et nous nous dirigeons maintenant vers Nakalele Point où se trouve un souffleur.
Cette portion de route est très sinueuse. Cependant, elle est beaucoup plus large que celle que nous avions parcouru précédemment pour nous rendre à Olivine Pools. D'ailleurs, elle possède même des marquages au sol pour délimiter les voies de circulation.
La végétation est très abondante dans ce secteur. C'est agréable et apaisant de se balader au coeur d'une nature verdoyante et vallonnée.
Le Nakalele Blowhole est une attraction spectaculaire située également sur la Kihelele Highway (Route 340), à une quinzaine de kilomètres du village de Kapalua.
En fait, il s'agit d'un geyser maritime appelé communément un souffleur, c'est-à-dire un trou creusé dans le sol par lequel l'eau de la mer s'infiltre et jaillit périodiquement dans les airs.
Le phénomène se produit lorsque la mer se retire et que l'air comprimé contenu dans l'orifice repousse l'eau avec une force inouïe.
On peut le regarder du haut de la falaise ou bien s'en approcher en descendant prudemment la falaise parsemée de nombreuses roches volcaniques.
Lors de notre passage, nous avons eu l'opportunité de voir jaillir l'eau à plusieurs reprises. Ce n'est pas toujours le cas!
Cependant, il suffit d'être patient et peut-être aurez-vous l'opportunité d'assister à ce spectacle divertissant.
Des arcs-en-ciel se formaient régulièrement lorsque l'eau jaillissait du trou. Nous en étions d'ailleurs tous émerveillés!
Le vent souffle très fort à cet endroit. Alors, vérifiez la direction du vent afin d'éviter d'être atteint par la bruine produite lors du jaillissement.
De plus, si vous portez un chapeau, assurez-vous de bien le tenir car il pourrait s'envoler! C'est d'ailleurs arrivé à mon conjoint qui a eu heureusement le réflexe de le récupérer très rapidement.
Regardez les curieuses formations à proximité du souffleur. Vous pourrez admirer le travail artistique que peut parfois créer l'érosion. Un trou en forme de coeur peut être observé dans une de celles-ci.
Je sais qu'il peut être tentant de s'approcher très près du souffleur pour prendre la photos de ses rêves. Cependant, évitez de le faire car vous risquez de mettre votre vie en danger.
Une immense vague peut survenir à tout moment et vous projeter au sol et même dans l'évent (le souffleur). Ce triste événement est survenu plus d'une fois.
Nous venons tout juste de quitter Nakalele Point et son souffleur et nous retournons à Kihei.
Nous roulons sur la Kahekili Highway en direction sud et nous découvrons que les vues sur les multiples collines et vallées verdoyantes sont vraiment plus spectaculaires dans cette direction.
Cette vidéo se déroule entre les bornes Mile 41 et Mile 11 . La route contourne les multiples falaises et descend à maintes reprises dans le creux de superbes vallées. Les paysages sont magnifiques.
En route vers le Parc National Haleakala, nous nous sommes arrêtés à un belvédère (Coordonnées GPS: 20.754335, -156.270813) offrant une superbe vue panoramique sur la région avoisinante.
La prudence est de mise sur cette route car celle-ci est sinueuse et on y croise plusieurs cyclistes qui partent du sommet et dont certains descendent à vive allure.
Des frais d'entrée de 25 $ US par véhicule sont exigés pour accéder au parc. Le permis délivré est valide pour une période de 3 jours consécutifs, incluant la date de l'achat.
Si vous désirez assister au lever du soleil, il est fortement suggéré d'en faire la demande sur le site internet de ce parc car l'accès est restreint avant 7h am.
Nous nous sommes dirigés tout d'abord vers le Centre des Visiteurs derrière lequel se trouve un belvédère offrant une vue époustouflante sur l'intérieur du cratère.
En fait, ce cratère est l'un des plus grands du monde. Il possède une circonférence de 34 km ainsi qu'une profondeur de 900 m.
On y observe entre autres plusieurs cônes volcaniques ainsi que des coulées de lave. Le paysage, que je qualifierais de lunaire, est très coloré (tons de rouge, brun, gris et jaune et vert) et se modifie d'ailleurs au gré de la luminosité.
Un sentier (Sliding Sands Trail, également appelé Keonehe'ehe'e) débute à côté du Centre des Visiteurs. Il longe un court instant la route principale et bifurque ensuite vers l'intérieur du cratère.
Certains l'empruntent pour se rendre au bout d'un autre sentier (Halemau'u Trail) situé au Mile 14,7, ce qui représente une randonnée de 18 km aller seulement. Ils doivent alors prévoir un moyen de transport pour le retour.
Il faut consacrer pratiquement une journée de marche pour effectuer cette randonnée.
En ce qui nous concerne, nous n'avons parcouru qu'une distance d'environ 2 km dont la descente est relativement facile.
Cependant, j'ai trouvé la montée particulièrement plus difficile car mon souffle était très court, étant donné l'altitude à laquelle nous nous trouvions.
J'ai donc dû effectuer plusieurs petits arrêts pour être en mesure de retourner au Centre des Visiteurs.
A une altitude de 3000 m, l'air se fait plus rare et je me suis aperçue que cela m'affectait tandis qu'Alain, mon conjoint, na ressenti aucun symptôme.
Je vous le redit encore une fois, le paysage est réellement sensationnel et cette courte balade vaut la peine d'être effectuée car elle nous permet de voir l'intérieur du cratère sous différents angles et de nous approcher des cônes volcaniques.
J'aurais bien aimé effectuer la traversée entière du cratère, mais les symptômes que j'ai ressenti m'ont fait comprendre que je devais être prudente et respecter mes limites.
Il est important d'apporter une bonne quantité d'eau car l'on se déshydrate plus rapidement à cette altitude. Au retour, je devais boire fréquemment car j'avais constamment la bouche sèche.
N'oubliez surtout par la crème solaire et des vêtements chauds car la température est beaucoup plus froide au sommet. Le soleil était présent et j'ai constaté que j'avais attrapé un méchant coup de soleil lors de cette randonnée.
Vérifiez également les conditions météorologiques car les conditions peuvent se détériorer très rapidement dans cette région.
Lors de notre retour vers le sommet, les nuages s'accumulaient tout doucement à l'intérieur du cratère. C'est d'ailleurs pour cette raison qu'il est suggéré de s'y rendre tôt le matin.
La route se poursuit au-delà du Centre des Visiteurs du Parc National Haleakala. En fait, elle mène au Sommet Pu'u'Ula'ula (Colline Rouge) qui culmine à 3055 m.
A cet endroit, il y a un poste d'observation qui permet d'obtenir une superbe vue panoramique du vaste cratère aux multiples couleurs.
Par temps clair, il est possible d'apercevoir au loin, vers l'est, les sommets du Mauna Kea et du Mauna Loa situés sur l'île de Big Island.
On peut y apercevoir également une plante très rare que l'on appelle sabre d'argent. Elle était en pleine floraison lors de notre passage.
La base de cette plante est composée de feuilles rigides d'une couleur métallique et lors de sa floraison, qui survient entre juin et octobre, une immense tige de fleurs émerge à plus de 2 m de sa base.
La Kalahaku Overlook Trail est un autre belvédère du Parc National de Haleakala qui offre une vue sensationnelle sur l'intérieur du cratère ainsi que sur les multiples cônes volcaniques dont les couleurs vibrantes nous captivent et nous font totalement tomber sous le charme.
Ce site n'est accessible que lorsque l'on redescend du sommet car lorsque l'on monte vers le sommet, le virage à gauche est interdit car il y a une courbe à proximité qui est jugée comme dangereuse.
La plate-forme d'observation est facilement accessible car elle se trouve à proximité du stationnement.
Il nous a fallu être très patients pour bénéficier d'une excellente vue de ce splendide panorama car les nuages jouaient du coude dans ce secteur.
Nous en avons donc profité pour faire une petite pause et avaler notre repas du midi.
Ainsi, nous avons eu l'agréable surprise de voir les nuages se dissiper afin de nous permettre d'admirer ce spectaculaire paysage qui nous semble totalement surréaliste.
La Leleiwi Overlook Trail est également un sentier situé dans le Parc National de Haleakala. Il part de l'aire de stationnement située au Mile 17,4.
Il suffit de traverser la route et suivre le sentier, d'une longueur d'environ 400 m, qui mène à une plate-forme d'observation.
Lorsque nous sommes arrivés à cette plate-forme, les nuages recouvraient le secteur. Cependant, comme les nuages se déplaçaient très rapidement, nous avons tout de même eu l'opportunité d'obtenir une vue partielle sur l'intérieur du cratère.
Il semblerait que l'on peut observer un phénomène plutôt unique à cet endroit que l'on appelle le spectre de Brocken. En fait, cela se produit en après-midi lorsque le soleil frappe une silhouette humaine à un angle précis.
L'ombre de la silhouette, entourée dès lors d'un halo au couleurs de l'arc-en-ciel, est ainsi projetée sur les nuages situés en contrebas.
Nous aurions bien aimé vivre cette expérience, mais les conditions climatiques n'étaient certainement pas propices à ce genre de phénomène lors de notre passage.
La Route d'Hana est une route panoramique très fréquentée située dans une forêt pluviale. D'une longueur de 109 km (Highways 36 et 360), elle est étroite, sinueuse et comporte 620 virages et 59 ponts à une seule voie.
Pour ceux qui ont le mal du transport, cette route peut devenir leur pire cauchemar. Pour les amants de la nature, c'est le paradis sur terre.
En fait, on y dénombre de multiples cascades, des plages de sable blanc, rouge et même noir, des grottes, des tubes de lave, les célèbres arbres eucalyptus et j'en passe...
Comme nous avons passé 15 jours sur l'île de Maui, nous avons eu l'opportunité de découvrir la majorité des attraits situés le long de cette magnifique route et je me permets de vous les faire découvrir un à un par le biais de commentaires et vidéos.
Il est préférable de partir très tôt le matin afin d'éviter les courts embouteillages qui peuvent se produire.
Apportez un parapluie ou un habit de pluie car il y a fréquemment de courtes ondées et, si vous faites des randonnées, apportez de l'eau et portez des chaussures appropriées car les sentiers sont accidentés et parfois boueux.
Avant d'entreprendre la route de Hana, il est préférable de s'informer des conditions routières. Assurez vous également d'avoir suffisamment d'essence car il n'y a aucune station-service entre les villes de Paia et Hana.
Si vous ne possédez pas de voiture, plusieurs compagnies offrent des excursions d'une journée vous permettant de découvrir quelques-uns des attraits. Ces derniers sont d'ailleurs facilement accessibles.
La plage de Spreckelsville, également appelée "Baby Beach", est une très belle plage située sur la côte nord de Maui.
Elle est délimitée à son extrémité Ouest par un escarpement rocheux de couleur rouge tandis qu'à son extrémité Est, débute la plage de Baldwin.
Un récif surélevé crée un lagon calme et parfait, entre autres, pour les jeunes enfants.
On retrouve une zone boisée derrière cette plage, ce qui permet de se détendre à l'ombre.
Le vent souffle parfois assez fort dans cette région. Si cela vous déplaît, il est possible de vous diriger vers l'autre extrémité de la plage de Baldwin qui se trouve à l'abri du vent.
On y retrouve quelques espaces de stationnement. Si c'est complet, il est possible de se stationner à la plage de Baldwin qui comprend de nombreux espaces de stationnement.
La plage de Baldwin est une plage très populaire située sur la côte nord. Ici, les sauveteurs sont présents et on y retrouve de nombreux espaces de stationnement, toilettes, douches, tables de pique-nique et même un pavillon couvert.
Il s'agit d'une longue et magnifique plage. Cependant, l'océan peut parfois être plus agité dans ce secteur.
Si c'est le cas, dirigez vous vers l'une ou l'autre des deux extrémités de cette plage (Spreckelsville Beach ou Baldwin Cove) où les eaux sont beaucoup plus calmes.
De plus, les arbres situés derrière cette plage créent une zone ombragée, vous permettant ainsi de vous reposer à l'abri des chauds rayons du soleil.
Ho'okipa Beach Park est une belle longue plage de sable blanc. La zone de baignade est plutôt restreinte. Cependant, vous risquez de rencontrer plusieurs tortues dans l'eau car elles se rendent par dizaines sur la plage pour se reposer.
Il y a également un récif en bordure de la plage sur lequel les vagues viennent se fracasser, créant ainsi de petits bassins d'eau dans lesquels les enfants peuvent se baigner en toute sécurité.
C'est également un endroit reconnu mondialement pour la pratique de la planche à voile. D'ailleurs, lors de notre passage, les vents étaient favorables et plusieurs s'amusaient à braver les vagues de l'océan.
Le surf est également à l'honneur et il est agréable de voir évoluer petits et grands.
A cet effet, il y a un belvédère au haut de la falaise qui offre une superbe vue panoramique sur ce site.
Plusieurs espaces de stationnement sont d'ailleurs disponibles à cet endroit. Si vous poursuivez ensuite votre route vers la ville d'Hana, c'est à que vous devez garer votre voiture.
On retrouve généralement à cet endroit un camion de restauration qui offre une cuisine locale.
Il y a également plusieurs espaces de stationnement au bas de la falaise, derrière la plage. Cependant, la route est à sens unique et la sortie vers la route principale ne permet pas un virage à gauche (en direction de Hana)
Derrière la plage, il y a deux pavillons sous lesquels il est possible de s'abriter et qui permettent également de voir évoluer les surfeurs.
On y retrouve des toilettes, douches et tables de pique-nique.
Nous regardions évoluer les véliplanchistes bravant les vagues de l'océan lorsque nous avons aperçu un jeune homme qui pratiquait le Wing Surfing, un nouveau sport nautique.
En fait, ce sport est un mélange de Kitesurf, SUP et Windsurf. Il n'y a aucun mât et la voile, qui ressemble à un cerf-volant, possède des poignées pour mieux la manoeuvrer.
La planche s'élève au-dessus de l'eau, limitant la friction à son maximum.
Ce jeune homme semblait être un expert en la matière! Il manoeuvrait parfaitement sa voile et possédait une étonnante stabilité sur sa planche.
Ho'okipa Beach n'est peut-être pas le meilleur endroit à Maui pour faire de la plongée en apnée, mais même si les eaux étaient un peu agitées, celles-ci étaient d'une clarté incroyable, nous permettant ainsi de découvrir une très grande variété de poissons.
De plus, les tortues viennent se reposer sur la plage en après-midi. Alors, il est fort possible que vous les aperceviez dans l'eau tout près de vous.
Lors de notre passage à la plage Ho'okipa, nous avons été témoins d'une opération de sauvetage qui est survenue en mer.
Je ne connais pas les raisons exactes de ce sauvetage. Est-ce que c'était une pratique?
Pour faire une histoire courte, un homme a d'abord été récupéré dans l'océan par une moto marine et, par la suite, l'hélicoptère a survolé l'océan à très basse altitude pour lui venir en aide.
Il a tenté d'attraper la nacelle de sauvetage qui pouvait lui permettre de remonter à bord de l'hélicoptère, mais peine perdue, il n'y est pas arrivé.
Alors, un membre de l'escouade a sauté à l'eau pour l'aider et ils ont réussi à se hisser dans la nacelle pour être ensuite transportés sur terre.
Coordonnées GPS: 20.912292, -156.242863
Distance: Environ 3 km aller/retour - Durée: 02h00
Twins Falls est la première série de chutes que nous verrons sur la route d'Hana.
On y retrouve plusieurs espaces de stationnement ainsi qu'un stand offrant des collations.
L'entrée est gratuite. Cependant, les dons sont appréciés et permettent ainsi de payer les frais d'entretien de ces magnifiques lieux.
Les chutes jumelles sont facilement accessibles par un sentier bifurquant vers la gauche, tout de suite après les toilettes sèches (environ 5 minutes de marche).
Les déplacements sont cependant plutôt hasardeux tout près des chutes car de nombreuses racines jonchent le sol.
Le débit des chutes était très différent. L'eau s'écoulait vivement dans l'une tandis qu'un mince filet d'eau faisait acte de présence dans la seconde.
La grande majorité des visiteurs se rendent voir ces deux chutes, prennent quelques photos et repartent sans savoir que plus loin sur ce site, il y en a d'autres qui valent vraiment le détour.
Comme nous avions tout notre temps, nous nous sommes dirigés vers les prochaines chutes.
Celles-ci sont également facilement accessibles. A partir des chutes jumelles, il suffit de rebrousser chemin et ainsi retourner en direction des toilettes sèches.
Cependant, à l'intersection menant à ces toilettes, on ne se dirige pas vers celles-ci. On poursuit notre chemin en ligne droite sur le sentier.
Après 5 minutes de marche, nous arrivons au bout du sentier qui est délimité par une clôture. A gauche de ce sentier, il y a un petit sentier qui pénètre dans le bois et qui mène rapidement à deux autres chutes.
Ici, en fait, la rivière se déverse sur deux paliers, formant ainsi deux belles cascades
Vous pouvez vous arrêter ici. Cependant, je vous incite fortement à poursuivre votre randonnée vers une autre chute qui se situe dans un milieu enchanteur.
Pour cela, il vous faudra ouvrir la clôture qui se trouve sur le sentier et la refermer derrière vous. Je vous invite à lire les avertissements qui apparaissent sur une affiche apposée sur la clôture car il est important de comprendre qu'il y a certains risques associés à la poursuite de cette randonnée.
L'une de ces particularités est la crue soudaine des eaux provoquées par de fortes pluies.
L'accès à la prochaine chute se fait par une route d'accès en gravier qui longe la rivière Ho'olawa.
Nous nous enfonçons tout doucement dans la forêt tropicale. De multiples fleurs et plantes enjolivent le parcours.
Après environ 1 km de marche, la route se divise en deux. Il faut alors se diriger vers la gauche et traverser à gué la rivière.
Celle-ci est assez large, mais peu profonde. Elle se traverse aisément. Tel que mentionné précédemment, le débit peut être différent dépendamment des saisons.
Le sentier nous amène vers un ancien barrage en maçonnerie sur lequel nous devons marcher afin de longer un fossé d'irrigation.
De l'autre côté de ce barrage, un choix s'impose: marcher dans l'eau de la rivière ou sur un muret à droite de la rivière.
Comme il n'y avait pratiquement pas d'eau dans la rivière, nous avons donc décidé de prendre cette direction. Il faut dire que nous portions des chaussures amphibies.
La chute est située dans un oasis de verdure derrière laquelle se trouve une grotte d'aspect préhistorique, d'où son nom "L'homme des cavernes" (Caveman).
Elle se déverse dans un joli bassin aux eaux turquoises, ce qui en fait l'endroit idéal pour se rafraîchir.
Un point important à prendre en compte: évitez de vous rendre directement sous une chute car vous pourriez recevoir des débris qui pourraient sérieusement vous blesser.
Ce secteur est également potentiellement dangereux en ce qui a trait aux crues soudaines. Même s'il fait beau à cet endroit, il peut y avoir de fortes pluies plusieurs kilomètres en amont et ainsi provoquer en peu de temps une importante crue des eaux.
En bordure de la route d'Hana, à proximité du Mile 7, il est possible d'apercevoir des arbres qui ont l'air d'avoir été peints. En fait, il s'agit d'eucalyptus arc-en-ciel.
Ceux-ci possèdent des stries multicolores vraiment spectaculaires. Elles se forment lorsque l'arbre perd des plaques d'écorce externe, laissant ainsi apparaître l'écorce interne d'une couleur vert vif.
Lorsque l'écorce interne mûrit, celle-ci prend des tons de bleu, violet, orange et marron.
C'est un arbre qui, en moyenne, pousse de 2 mètres annuellement et qui peut atteindre une hauteur de 60 mètres et un diamètre de 2 mètres.
Lorsque l'on se dirige vers Hana, il y a quelques espaces de stationnement qui sont disponibles à droite en bordure de la route.
Les arbres sont situés à gauche de cette route. Alors, la prudence est de mise pour traverser la rue car il y a une courbe assez prononcée à proximité de cet emplacement.
On peut également apercevoir plusieurs de ces arbres au Keʻanae Arboretum que je vous présenterai d'ailleurs ultérieurement.
Waikamoi Nature Trail est un sentier de randonnée en boucle de 1,3 km ou de 2,5 km au total si l'on décide de parcourir également l'extension qui mène à une aire de pique-nique tout au haut de la colline.
Les espaces de stationnement sont plutôt restreints, environ 5 au total, et il n'y a aucun service.
Une aire de pique-nique se trouve au début du sentier. Au départ, des marches ont été créées afin de faciliter la montée. Par la suite, le sentier est parsemé de nombreuses racines que l'on doit enjamber avec précaution.
Un panneau nous suggère d'ailleurs de marcher en silence car les arbres sont au travail.
La végétation est luxuriante et on y retrouve une grande variété d'arbres dont l'eucalyptus, le bambou, le pandanus ainsi que plusieurs espèces de fleurs et de plantes.
Nous avons décidé de poursuivre notre randonnée jusqu'à l'aire de pique-nique située au sommet de la colline. Les racines s'entremêlent et couvrent entièrement le sentier.
Nous arrivons finalement à l'aire de pique-nique qui est ceinturée par une jolie forêt de bambous.
Nous explorons un court moment le secteur et sommes fascinés par le lichen recouvrant certains arbres, créant ainsi un paysage riche en couleur.
Nous rebroussons ensuite chemin pour finaliser la boucle qui nous ramènera vers notre point de départ.
Certains arbres ont une dimension phénoménale. Alain, mon conjoint, marche devant moi et il me paraît si petit lorsqu'il passe à proximité de ceux-ci.
Il n'y a pas vraiment de point de vue sur ce sentier. Cependant, la nature exubérante vaut largement le détour.
Nous adorons marcher dans la forêt et cet endroit permet de nous ressourcer et ressentir une paix intérieure.
La première chute est facilement accessible par un sentier situé à droite du pont qui surplombe la rivière. On y arrive en quelques minutes de marche.
Sur la route d'Hana, on ne la voit que partiellement car des branches obstruent la vue.
La végétation qui l'entoure est luxuriante et on y retrouve également un bassin d'eau turquoise propice à la baignade.
Certains s'amusent à sauter ou plonger à partir du haut de cette chute.
La seconde chute est accessible par un sentier rocailleux ponctué de nombreuses racines situé à droite de la rivière ou en marchant directement dans le lit de la rivière lorsque celle-ci est presque asséchée.
Nous avons préféré marcher sur le sentier pour nous y rendre. Il faut dire que le lit de cette rivière est rempli de gros rochers, ce qui ne facilite pas les déplacements.
De plus, le niveau d'eau est plus élevé à certains endroits de la rivière, créant ainsi des petites piscines naturelles également propices à la baignade.
Cela nous a pris une quinzaine de minutes pour nous rendre à la seconde chute.
Cette chute, qui est beaucoup plus haute, s'écoule dans un écrin de verdure et se déverse dans un joli bassin d'eau turquoise.
L'entrée dans l'eau est plutôt hasardeuse car les rochers présents sous l'eau sont parfois glissants.
Lors de notre passage l'endroit était désertique, nous permettant de bénéficier sereinement de ce site enchanteur.
Lorsque nous avons entamé notre retour, en jetant un petit coup d'oeil au-delà de la rivière, nous avons été surpris de constater la densité de la végétation dans ce secteur.
Nous avons repris le même sentier pour retourner au stationnement situé sur la Route d'Hana.
La prudence est de mise sur ce sentier car on y retrouve plusieurs embûches: roches, racines, branches et importantes dénivellations.
Mais si vous êtes le moindrement aventurier, je vous recommande fortement cette belle randonnée dans la nature.
Cette halte routière offre un point de vue sur le littoral de la côte nord-est de Maui. On y retrouve des toilettes ainsi que des tables de pique-nique.
Derrière l'édifice où sont situées les toilettes, il y a un petit sentier dans la forêt dans lequel nous avons fait une courte randonnée.
Ce sentier n'est pas vraiment entretenu, mais il nous a permis de découvrir une forêt tropicale exubérante dans laquelle on retrouve de magnifiques arbres ainsi qu'une multitude de plantes, fleurs, fougères, etc.
Je vous invite à visiter ce parc si vous êtes amateurs d'arbres et de plantes exotiques car on y retrouve pas moins de 150 spécimens. Plusieurs sont d'ailleurs identifiés. De plus, l'entrée est gratuite.
Il est possible de se stationner à proximité de la clôture qui indique l'entrée de ce parc, mais évitez de stationner votre véhicule devant celle-ci.
Sinon, il y a plusieurs espaces de stationnement de l'autre côté de la rue, non loin de l'entrée principale.
Le sentier, d'une longueur de 1,6 km aller-retour, est pavé et il se situe dans une magnifique forêt tropicale constituée entre autres d'arbres hawaïens, palmiers, eucalyptus arc-en-ciel, bananiers, papayers, arbres à pain, bambous, etc.
Au-delà de ce sentier pavé, il y a un portail. Cependant, il n'y a pas grand chose à voir dans ce secteur. Il semblerait que l'on y fait la culture du taro. Les herbes sont hautes et le sentier est très boueux. Nous avons donc décidé de rebrousser chemin.
Il y a une rivière qui longe le parc et on y retrouve de petites piscines naturelles où il est possible de se baigner.
En fait, cet emplacement passe souvent inaperçu aux yeux des visiteurs. Il y a bel et bien une affiche qui indique le nom du parc et trois espaces de stationnement dont un pour handicapés, mais rien ne laisse présager qu'il y a un belvédère qui offre un excellent point de vue sur la péninsule de Ke'anae, la vallée verdoyante de Wailua, une chute lointaine et sur la réserve tropicale de Ko'olau.
En fait, le belvédère ne se trouve pas au niveau du stationnement. Un escalier, à droite de celui-ci, nous mène à un niveau supérieur pour ainsi obtenir de superbes vues sur le littoral, d'un côté, et sur la réserve tropicale de Ko'olau, du côté opposé.
Nous avons garé notre voiture dans un stationnement situé à environ 240 m des chutes et avons descendu à pied la route menant au belvédère qui offre une vue panoramique sur celles-ci..
En fait, nous sommes restés moins de 15 minutes pour observer ces chutes pour la simple raison qu'il pleuvait abondamment lors de notre passage.
Nous pensions nous rendre au pied des chutes. C'est possible de le faire en passant à droite ou à gauche du pont. Cependant, comme le début de la descente est plutôt rocambolesque et que les rochers étaient mouillés et pouvaient être glissants, nous avons décidé d'être prudents et de ne pas nous y rendre.
On les surnomme Three Bears Falls car elles sont séparées, mais parallèles et de longueurs différentes. Elles tombent d'une hauteur de 21 m dans un joli bassin d'eau turquoise.
Ce site est constitué d'une halte-repos avec salles de bain, tables de pique-nique ainsi que plusieurs espaces de stationnement en bordure de la Route d'Hana.
Un sentier pavé nous amène jusqu'à une belle chute qui se déverse dans un bassin d'eau turquoise. Elle est entourée d'une végétation verdoyante.
Il faut dire qu'il pleut souvent dans cette région et nous avons eu droit à une courte mais forte ondée durant que nous y étions.
Heureusement, des pavillons étaient disponibles pour nous mettre à l'abri de la pluie.
Fait intéressant: Il y a deux chutes à cet endroit. En effet, l'eau dans le bassin s'écoule tout doucement dans la rivière qui se déverse ensuite dans un autre bassin qui est également propice à la baignade.
Les chutes de Hanawi sont situées en bordure de la route d'Hana. Plusieurs font un court arrêt sur le pont surplombant la rivière pour prendre une photo du site et repartent aussitôt.
Si vous désirez faire un arrêt à cet endroit, vous devrez stationner votre voiture sur l'accotement près du petit bâtiment situé à proximité du pont. Prenez note que cet espace est plutôt restreint.
En fait, les chutes que nous voyons à cet endroit sont connues sous le nom de Upper Hanawi Falls, les chutes supérieures.
Dans ce secteur, l'eau de la rivière se déverse en une série de cascades dont la plus importante a une hauteur de 9 mètres.
Au pied de cette cascade se trouve une piscine naturelle. Cependant, il est risqué de s'y baigner car la chute de roches ou des inondations soudaines peuvent survenir en tout temps.
La rivière poursuit son cours jusqu'à l'océan. Sur son parcours, on retrouve les cascades inférieures (Lower Hanawi Falls) d'une hauteur de 61 m.
Il y a bel et bien un sentier qui mène à ces chutes inférieures. Cependant, la randonnée n'est pas permise sur ce sentier car il traverse un terrain appartenant à une société d'irrigation.
Le coût d'entrée pour visiter ce site est de 12,50 $ US par personne. Une lampe de poche est remise à chaque visiteur car c'est le noir total à l'intérieur du tube de lave. La visite s'effectue individuellement, c'est-à-dire sans aucun guide.
Un escalier très étroit mène à l'intérieur de ce tube de lave qui est à la fois le plus grand et le plus accessible de Maui. Cependant, la visite n'est autorisée que sur un demi kilomètre.
La température de la grotte est d'ailleurs très confortable car elle se maintient toute l'année entre 18°C et 22°C durant toute l'année.
Ce tube de lave a été formé il y a plus de 960 ans lorsque de la lave en fusion s'est écoulée d'un volcan en éruption. La couche extérieure s'est refroidie et durcie pour ainsi former un immense tunnel souterrain.
Des panneaux ont été installés à plusieurs endroits afin de nous informer sur les différentes formations existant dans ce tube de lave.
Parfois, nous avons l'impression que l'intérieur du tube est tapissé d'une importante couche de chocolat.
Nous avons adoré notre visite. J'avoue sincèrement que je n'aime pas particulièrement me retrouver sous terre. Cependant, ce n'est pas notre première visite dans une grotte et j'apprends de plus en plus à me détendre et à profiter de chaque instant.
Il n'aurait pas fallu cependant que la lampe de poche s'éteigne car le mode panique aurait pris le dessus!
On retrouve également sur le site un labyrinthe, une aire de pique-nique ainsi que des toilettes publiques.
Ce site est ouvert tous les jours de 10h30 à 16h00.
Le parc d'État de Wai’anapanapa est l'un des plus beaux sites que nous ayons visité sur la Route d'Hana.
Les paysages sont non seulement variés, mais réellement spectaculaires.
Un sentier pavé a été érigé en bordure du littoral. Il offre de superbes vues panoramiques sur le littoral où l'on peut apercevoir entre autres un îlot, une arche naturelle ainsi que la plage de Pa'iola, une magnifique plage de sable volcanique entourée d'un écrin de verdure époustouflant
La couleur de l'océan est d'un bleu profond. Les vagues blanches contrastent joliment avec le sable noir de la plage.
L'océan est cependant très agité à cet endroit. Ce n'est pas l'endroit idéal pour une baignade sécuritaire.
A droite de cette plage, il y a une toute petite ouverture dans la falaise qui mène à une grotte marine.
A l'entrée, le plafond de cette grotte est très bas. Cependant, une fois rendu à l'intérieur, il est possible de se tenir debout.
En fait, il s'agit d'un long tunnel dont l'autre extrémité s'ouvre sur l'océan. Les vagues viennent d'ailleurs se fracasser sur les parois intérieures de la grotte.
Un sentier se trouve à gauche de la plage. Nous avons fait une courte randonnée sur celui-ci. Il offre une vue sensationnelle sur la plage de Pa'iola ainsi que sur la superbe végétation qui l'entoure. Le panorama est époustouflant.
Les vagues viennent se fracasser fortement sur les rochers et forment parfois un immense mur d'eau qui s'élève vers le ciel.
La végétation est tout à fait éblouissante dans cette région.
Par la suite, nous nous sommes dirigés vers une piscine naturelle située dans une grotte. Un court sentier dans la forêt mène à celle-ci.
L'eau est cristalline et propice à la baignade. Fait intéressant: des passages dans l'eau permettent d'aller explorer, à l'aide d'une lampe frontale, d'autres grottes situées derrière les murs de la présente grotte.
Le souffleur a été le dernier élément que nous avons visité dans ce parc. Nous avons dû être très patients pour voir l'eau jaillir dans les airs. Cependant, nous avons pu être témoins (une seule fois) de ce spectaculaire phénomène.
De retour au stationnement, de jolies petites bêtes étaient présentes dans la forêt. Ce sont des mangoustes. Je vous donnerai bientôt plus d'informations sur celles-ci.
A titre informatif, ce parc possède également des espaces pour le camping.
Le saut de falaise (Cliff Jumping) est très populaire auprès des jeunes gens. Nous en avons été témoins lors de nos nombreux voyages et Maui n'y échappe certainement pas.
Cependant, c'est au Parc d'État de Wai'anapanapa que nous avons assisté à la plus audacieuse expérience de saut de falaise effectué par trois jeunes hommes car l'océan est extrêmement agité à cet endroit.
Ils ont d'abord descendu la falaise pour atteindre un rocher situé en bordure de l'océan et puis ils ont plongé chacun leur tour dans les eaux tumultueuses pour atteindre un îlot situé un peu plus loin dans l'océan.
A ma grande surprise, ils ont escaladé facilement la paroi d'un immense rocher pour se rendre rapidement au sommet de l'îlot.
Une fois rendus au sommet, ils ont escaladé tous les trois un pan de rocher très étroit situé à une des extrémités de l'îlot, en fait le point le plus haut de cet îlot, ont pris une petite pause et ont par la suite sauté à tour de rôle dans l'océan.
Ils ont ensuite nagé pour retourner sur la terre ferme. Cependant, un de ceux-ci a certainement trouvé le retour plus difficile car il s'est retourné à plusieurs reprises sur le dos pour tenter de reprendre son souffle.
Comme vous pourrez le constater dans cette vidéo, c'est une activité très dangereuse car vous vous exposez aux dangers d'une noyade ou d'une chute qui pourrait vous blesser gravement et même vous tuer.
Heureusement, cette expérience s'est bien terminée pour ces trois jeunes hommes.
Nous avons aperçu à maintes reprises des mangoustes, non seulement sur l'île de Maui, mais également sur l'île d'Oahu.
Elles avaient l'habitude de disparaître rapidement lorsque nous nous en approchions.
Cependant, celles que nous avons aperçues dans ce parc, tout près du stationnement, devaient certainement être habituées à la présence humaine car elles se promenaient allègrement sur le terrain, faisant fi de notre présence.
J'en ai donc profité pour les observer. Je les trouve tellement mignonnes avec leurs beaux yeux marrons, leurs petites oreilles rondes et leurs corps allongés.
Elles ont été introduites à Hawaii au milieu du 19e siècle afin de diminuer l'énorme quantité de rats qui détruisaient les cultures.
Cependant, il semblerait que ce ne fut pas un énorme succès car les mangoustes sont diurnes et les rats sont nocturnes. Difficile de se rencontrer, étant donné les circonstances!
Malheureusement, cela a eu une incidence sur la disparition de certaines espèces d'oiseaux car les mangoustes se nourrissent entre autres de leurs oeufs.
La ville d'Hana possède une belle plage de sable noir et la baignade est sécuritaire à cet endroit car la baie est protégée par un récif corallien. Cependant, cette plage n'offre aucune surveillance.
On y retrouve des toilettes, douches, de nombreuses tables de pique-nique ainsi que plusieurs espaces de stationnement.
Le quai offre une excellente vue panoramique de cette plage ainsi que du paysage montagneux et verdoyant situé en arrière-plan. Le paysage est réellement magnifique.
Lorsque l'on se déplace dans les alentours de la ville d'Hana, on remarque une croix érigée au sommet d'une petite colline située devant l'Hôtel Travaasa Hana.
Cette croix, qui porte le nom de la Croix de Fagan (Fagan's Cross), aurait été érigée en 1960 en mémoire de M. Paul Fagan.
Cet homme a été une personnalité importante dans la communauté d'Hana puisque c'est lui qui a établi l'élevage de bétail dans cette région. Il a également ouvert un hôtel à Hana en 1946, permettant ainsi à cette toute petite ville de devenir une destination touristique très prisée.
A l'époque, cet hôtel portait le nom de Kauiki Inn. Aujourd'hui, il porte le nom de Travaasa Hana.
Il y a un grand stationnement situé devant cet hôtel. Il y a quelques espaces de stationnement disponibles pour les visiteurs.
Nous nous sommes donc garé à cet endroit et sommes partis en randonnée par le petit chemin pavé qui débute dans le champ derrière le stationnement.
En une quinzaine de minutes, nous étions rendus au sommet, face à cette belle et gigantesque croix en pierre de lave.
Il faut dire que nous avons pris un petit raccourci aux deux-tiers du trajet. Nous n'étions pas certains si ce chemin menait à la croix où s'il continuait à l'intérieur des terres. (Maintenant, je peux vous confirmer qu'il mène bien à la croix.)
Depuis le sommet de cette colline, nous bénéficions d'une superbe vue panoramique sur le littoral, sur la ville d'Hana ainsi que sur les verts pâturages avoisinants.
A titre informatif, cette randonnée est approximativement d'une longueur de 2,4 km aller-retour et le dénivelé est de 152 mètres.
La plage de Hamoa est une belle plage de sable blanc accessible entre autres par quelques marches et un chemin pavé qui descend vers la plage.
Il faut stationner notre voiture en bordure de la route qui surplombe cette plage. Alors, il peut parfois être difficile d'en trouver un car les espaces de stationnement sont très limités.
On y retrouve des salles de bain ainsi que des douches publiques et il y a suffisamment d'ombre pour s'abriter des chauds rayons du soleil.
C'est un endroit très populaire pour la pratique du surf. Lors de notre passage, les vagues étaient propices à la pratique de ce sport.
Debout, couché ou assis sur leur planche, les jeunes s'en donnaient à coeur joie dans les vagues qui les propulsaient vivement en direction du rivage.
Wailua Falls est une superbe cascade d'une hauteur de 80 pieds située dans un environnement très pittoresque. Elle se déverse dans un profond bassin dans lequel il est possible de se baigner.
De plus, elle est facilement accessible puisqu'elle se situe en bordure de la Route d'Hana. D'ailleurs, il y un petit belvédère qui offre une vue panoramique sur celle-ci.
A droite du pont qui enjambe le cours d'eau, il y a un petit sentier qui conduit au pied de la cascade. La prudence est de mise car il y a beaucoup de rochers et ceux-ci peuvent être parfois glissants.
Le sentier Pipiway, d'une longueur de 6,4 km aller-retour, est situé dans le district de Kipahulu du Parc National de Haleakalā.
Il y a un droit d'accès à payer: 25 $ US par voiture. Cependant, il est valide pour tous les attraits du Parc National de Haleakalā, et ce, pour une période de 72 heures.
Le sentier débute au Centre des Visiteurs de Kipahulu et il nous conduit d'abord à la Route d'Hana que l'on doit traverser car le sentier continue de l'autre côté de cette route.
Lorsque nous sommes partis, il pleuvait abondamment et le sentier est devenu rapidement très boueux.
Au début du sentier, on traverse un secteur qui comporte de nombreuses racines au sol et, par la suite, nous marchons à travers les hautes herbes.
S'ensuit une série de marches taillées dans la pierre que nous devons monter pour atteindre les Chutes de Makahiku situées à 800 mètres de notre point de départ.
D'une hauteur de 56 mètres, les Chutes de Makahiku sont situées dans un décor enchanteur. La végétation est luxuriante et forme un magnifique mur de végétation verdoyante.
Après une petite pause, nous reprenons ensuite le sentier qui nous mène vers les Chutes Waimoku. Il nous reste un peu moins de 3 kilomètres à parcourir.
Nous passons devant un banian, un très grand arbre possédant de nombreux embranchements ainsi que des racines aériennes. Il est réellement sensationnel.
Nous poursuivons note randonnée dans la forêt et traversons deux petits ponts piétonniers qui surplombent un cours d'eau. Ils offrent une jolie vue sur deux belles cascades.
Nous pénétrons dans une magnifique forêt de bambous. Au début, le sentier est plutôt rocailleux. Par la suite, une passerelle de bois a été érigée, facilitant ainsi nos déplacements.
Noua longeons ensuite le ruisseau Pipiwai dont les eaux sont passablement agitées et apercevons enfin les Chutes de Waimoku,
D'une hauteur de 122 mètres, elles s'écoulent le long d'une abrupte paroi recouverte d'une abondante végétation.
On entrevoit également de nombreuses petites cascades qui ont été formées par les récentes pluies.
La partie la plus difficile a été de traverser le ruisseau à deux reprises car les eaux étaient tumultueuses. Nous n'étions pas les seuls à l'avoir fait. Mais après coup, je considère que nous avons pris un énorme risque lorsque je regarde le niveau de l'eau et l'intensité du courant.
Nous nous sommes rendus jusqu'au pied des chutes de Waimoku qui se déversent avec une puissance étonnante dans un joli bassin.
Même si une distance sécuritaire nous séparait de ces chutes, nous avons été complètement mouillés par les embruns.
Le sentier qui mène à ces piscines naturelles est appelé Kuloa Point Trail. Il s'agit d'un sentier en boucle de 1 kilomètre situé dans le district de Kipahalu du Parc National de Haleakalā.
Il y a un droit d'accès à payer: 25 $ US par voiture. Cependant, il est valide pour tous les attraits du Parc National de Haleakalā, et ce, pour une période de 72 heures.
Ce sentier offre de magnifiques points de vue sur un cours d'eau comportant une série de cascades au pied desquelles se trouve un bassin formant une piscine naturelle. Il se déverse ensuite dans l'océan.
La végétation présente sur ce site est d'une beauté sans pareil. On y voit plusieurs espèces d'arbres dont un immense banian avec ses racines aériennes ainsi que plusieurs plantes.
Lorsque les conditions le permettent, il est possible de se baigner dans l'une de ces piscines naturelles.
Cependant, lors de notre passage, la baignade y était interdite puisqu'il y avait un risque de crues soudaines dans ce secteur. La pluie, intermittente mais abondante, a causé le gonflement du cours d'eau.
Les chutes d'Alelele sont les dernières chutes que l'on peut voir sur la Route d'Hana.
La route est très étroite et cahoteuse dans ce secteur, mais c'est de courte durée.
Nous longeons une abrupte falaise qui nous rend un tantinet nerveux puisque le risque de chute de pierres nous semble assez évident. Mais bon, tout s'est bien passé.
Il est possible de garer sa voiture sur un stationnement situé de l'autre côté du pont Alelele (côté océan).
Le sentier débute à droite du pont Alelele. Celui-ci longe tout d'abord le ruisseau que nous devons ensuite traverser à gué pour nous rendre sur l'autre rive.
Lors de notre passage, il y avait peu d'eau et l'on voyait parfaitement l'endroit où nous devions traverser. En fait, une rangée de pierres formait un passage dans le ruisseau.
Cela nous a pris moins de 10 minutes pour atteindre la cascade. D'une hauteur de 20 mètres, elle se déverse dans un bassin formant une jolie piscine naturelle.
Elle est peu fréquentée, nous permettant ainsi de profiter pleinement de ce joli site enchanteur.
Les chutes d'Alelele sont les dernières chutes que l'on peut voir sur la Route d'Hana.
La route est très étroite et cahoteuse dans ce secteur, mais c'est de courte durée.
Nous longeons une abrupte falaise qui nous rend un tantinet nerveux puisque le risque de chute de pierres nous semble assez évident. Mais bon, tout s'est bien passé.
Il est possible de garer sa voiture sur un stationnement situé de l'autre côté du pont Alelele (côté océan).
Le sentier débute à droite du pont Alelele. Celui-ci longe tout d'abord le ruisseau que nous devons ensuite traverser à gué pour nous rendre sur l'autre rive.
Lors de notre passage, il y avait peu d'eau et l'on voyait parfaitement l'endroit où nous devions traverser. En fait, une rangée de pierres formait un passage dans le ruisseau.
Cela nous a pris moins de 10 minutes pour atteindre la cascade. D'une hauteur de 20 mètres, elle se déverse dans un bassin formant une jolie piscine naturelle.
Elle est peu fréquentée, nous permettant ainsi de profiter pleinement de ce joli site enchanteur.
INTRODUCTION Des vidéos sont insérées dans le texte. Veuillez cliquer sur l'image pour démarrer la vidéo. Nous avons séjourné à Waianae sur l'île d'Oahu à…
Que faire de mieux par un dimanche d’automne où il ne fait pas bon mettre le nez dehors (pluie, vent, grêle sont de la partie)? Et pourquoi ne pas commencer un…
En lisant tous les carnets de voyages depuis que je suis rentrée, je constate qu'il y en a beaucoup sur l'Ouest, un peu moins sur la Floride mais Hawaii semble…
Allez je me lance dans ce carnet Hawaïen! J’espère que vous serez nombreux à me suivre car la destination ne manque pas de charme. Je préviens par avance que…
J'ai passé un mois à Hawaii à parcourir 4 îles, oahu, Maui, Big Island et Kauai, je vous propose le récit de mes aventures dans ce bel état américain ainsi que…
Bonjour tout le monde, nous voici rentrés d'un RT USA organisé par nos soins du 31/07/2026 au 26/08/2026.
La destination : Le Sud-Ouest USA avec le Texas, l'Arizona et le Nouveau-Mexique. 7000 kilomètres effectués à la louche.
L'Auto : Une Chevrolet Equinoxe pour deux en passant par BSP Auto et Avis. Et dedans 2 valises, un sac de voyage, deux valises cabines, la glacière de chez Walmart, le matos photos et les bouteilles d'eau (pack de 40).
Le trajet : Dallas DFW, Fort Worth, Houston, Austin, San Antonio, Alpine, El Paso, Tucson, Sedona, Albuquerque, Amarillo et Dallas pour finir avec départ sur DFW.
Les voyageurs : Deux séniors bien avancés dans l'âge (73 et 75) mais toujours en activité (pas épuisante physiquement) (pour rester vivants et financer les voyages), autonomes physiquement à 100%, intellectuellement beaucoup moins, passionnés des USA, pays où tout est possible, plus marcheurs que randonneurs, plutôt hôtels à partir de 3 étoiles que motels de bord de route, plutôt restos Italiens que nourriture US, adeptes des arrêts fréquents pour les photos, plutôt musées que rien, Plutôt sieste que marches forcées. Pas trop râleurs, juste ce qu'il faut pour rester français au pays du grand Satan qu'ils disent.
Pas trés doués pour les langues, Anglais des rues (mais bien pratique), Espagnol nul pour moi hormis : " Hola ! Una Cerveza por Favor ! " Cela fait court. Madame comprend tout mais refuse de parler.
Le coût du RT : Environ 12 000 euros avec les vols AF, Auto, Essence, cadeaux, visites et tutti quanti. Bien maitrisé puisque 13500 euros prévus au départ.
Le bilan positif : Un régal avec les longues routes à perte de vue. Des Musées à découvrir. Le constat de la présence Hispanique et de son Histoire importante dans ce secteur de l'Amérique. Des locaux adorables. Des touristes plus ou moins sympas. Un accent Texan abominable et difficile à comprendre. Des stations Gas qui sont de véritables magasins avec nourriture préparée et autre alcools vendus en Arizona et Nouveau-Mexique et des employés au top ! Toujours prêts à rigoler !
Le bilan négatif : La chaleur tout au long du séjour...43° sur Dallas en fin de séjour. Impossible de sortir dans les rues. Beaucoup de "Homeless" dans les rues de l'Hyper Centre de Dallas. Les breakfasts Hôtel toujours les mêmes. On s'y fait.
Donc, positif certes mais le concept commence à fatiguer. Il se pourrait que le modèle RT autonome soit repensé pour le prochain. SI celui qui est en haut nous prête vie.
Pour la suite, attendons les premières photos triées et passées à la moulinette.
I could have titled my travel journal like Carmen: "Some trips are born twice." Indeed, we had considered this destination back in February 2020. However, an honest tour operator advised us against traveling at that time due to the climate. So, we gave up and opted for Guatemala instead (see "On the Mayan Lands" on this site).
So, why this title? When I was in primary school, over 65 years ago, the illustrations in my history books (Machu Picchu) and geography books (Lake Titicaca) made me dream, and those images stayed in my mind. It took until 2026 to finally make this dream come true!
We prepared our trip with Tout Pérou, a French-speaking "agency." Everything was handled via email and WhatsApp exchanges with our contact: Laurent, who was both competent, friendly, and full of good advice.
For 200 €, Tout Pérou provided us with drivers and guides whenever we wanted, helped us buy our domestic flights (cheaper when purchased in Peru), booked shuttles between airports and hotels, and got us a discount on the train ride to Aguas Calientes, as well as on the buses between Chivay and Puno and between Puno and Cusco. In short, Laurent took care of all the logistics and the Machu Picchu tickets. It was up to us to book our hotels. Tout Pérou provided a list, but we weren’t obliged to follow it. Another advantage of the package: we didn’t have to pay in advance; we paid the service providers directly day by day.
We didn’t meet Laurent in person because he was on vacation in Europe. Before his departure, he gave us a briefing, provided a summary table with the entire program, the service providers, their phone numbers, their fees, the schedules, and gave us plenty of advice (money, exchange, safety, etc.). After returning at the end of our stay, he kept checking in on us.
Lastly, we had also gathered information from Arnaud Lagadec, who runs a hotel in Cusco and offers tours of the region. He gave us a lot of useful information. Another contact: Thomas Montaigne, very friendly, who runs an agency in Arequipa (Agence Pérou Exclusif).
Day 1 – Paris to Lima
Foreword
I’ll share our trip without any pretension—I don’t have the talent of some contributors on this forum—and I’ll illustrate it with a few photos (taken with an ordinary smartphone). My comments are personal and only reflect my own views. So, please be kind! Feel free to comment on my story as you like, but let’s avoid pointless debates.
Even though we live in the south of the Paris region, true to our habits when the flight is in the morning, we chose to spend the night before our departure in a hotel near CDG and parked our car in a parking lot in Garches. This way, we avoid the stress that often comes with traveling around Paris (accidents, roadworks, traffic jams, etc.).
Check-in and border control went smoothly on that Sunday morning. Our Air France flight was uneventful. In Lima, border control took a particularly long time, and for the first time, we didn’t get an entry visa stamped in our passports.
As planned, a driver took us to the Miraflores district, where our hotel was located. We were surprised by the numerous signs about possible tsunamis, having forgotten that Peru is prone to such events and regularly experiences earthquakes. We’d see the consequences of these during our journey.
Exhausted from the early wake-up, the 13-hour flight, and the 7-hour time difference, we had dinner at the hotel before a restful night.
Note that this day was Peru’s presidential election day. As a result, we weren’t served beer—the sale of alcohol was banned that Sunday.
Hi everyone, I’m Patrick, 67 years old, a seasoned traveler (already 22 trips outside Europe).
In autumn 2025, I took my first 3-week trip to Japan, with stops in Tokyo, Kamakura, Matsumoto, Kamikochi, Takayama, Kanazawa, Kyoto, Nara, Osaka, Koyasan, Tokyo again, and Nikko.
I wanted to go back in May 2026 and explore some lesser-known places to complement my first trip.
Last year, there were four of us traveling together to discover Japan (a fairly classic itinerary). This time, I’ll be traveling solo for part of the trip and with a couple of French friends for the rest.
The weather was gorgeous in May, averaging around 25°C, with two very hot days in Kyoto and only two rainy days.
As usual, I organized everything myself, gathering plenty of information from various sites, including this one.
Transportation:
An ICOCA card is essential.
I got a 5-day Kansai-Hiroshima pass because I took the shinkansen between Hiroshima and Osaka three times, and it paid for itself quickly.
Accommodations:
Mostly through Booking. No issues at all. Average cost was 46 € per night.
Meals:
For breakfast, I alternated between buying food at a konbini to eat in my room or on the train and grabbing something at local cafés.
For lunch and dinner, I tried to vary my meals as much as possible—lots of sashimi, sushi, and ramen.
Okonomiyaki in Osaka and Hiroshima.
Oysters in every form (raw, grilled, fried) in Onomichi and Hiroshima.
A variety of seafood (shrimp, shellfish) in Hiroshima and Matsumoto.
Fish whose names often escaped me, but notably mackerel and eel (unagi).
Tempura and gyoza.
Chicken skewers (yakitori) and one teppanyaki meal.
One omakase meal (9 different dishes).
In the end, not much meat aside from a few yakitori skewers. No splurges on super expensive wagyu or Kobe beef.
Average dinner cost: 4,800 yen, drinks included.
The Itinerary:
Day 1: Departure from Brussels
Day 2: Arrival in Osaka
Day 3: To Himeji, then Kurashiki
Day 4: To Fukuyama, then Tomo no Ura, then Onomichi
Day 5: Cycling the Shimanami Kaido
Day 6: To Takahara, then Hiroshima
Day 7: To Kyoto to attend the Aoi Matsuri parade
Day 8: To Miyajima
Day 9: Hiroshima, then Kyoto
Day 10: Southern Kyoto
Day 11: Northern Kyoto
Day 12: Final day in Kyoto, then to Nagatsugawa
Day 13: Start of the Nakasendo Trail (Magome to Tsumago)
Day 14: Second day of the trail (Kiso Fukushima)
Day 15: Third day of the trail (Narai), then Matsumoto
Day 16: To Mt. Fuji (Kawaguchiko)
Day 17: To Tokyo
Day 18: Excursion to Enoshima and Kamakura
Day 19: Flight home, with a 10-hour layover in Hong Kong
Day 20: Arrival in Brussels
When we started looking for a summer destination a few months ago, our first criterion was to avoid extreme heat and heatwaves. We had already been to Norway two years ago and are considering going back in the future for other occasions. So, we had some fun asking ChatGPT which destinations enjoyed a mild climate during the summer without going too far. Among the list provided by the AI were the Canary Islands... The idea of a place we wouldn’t have thought of first, both not too far away and exotic enough, appealed to us: “Hmm, why not?”
This destination had never really attracted me, though Magali was a bit more interested. Five years earlier, COVID had caused a short break in my professional activity, and I had planned a trip because the flight price was attractive, and I was looking for a destination different from what usually appeals to me, more than out of deep interest. From a distance and with a social judgment I acknowledge (it’s not great, but it’s not completely wrong), I had the image of a destination for party-goers enjoying the sun without the slightest interest in local culture, with concrete coastlines and denatured landscapes—everything I detest the most. Still, I had done some quick research on the different islands and spotted Lanzarote for its beautiful volcanic landscapes, hiking trails, beaches, and the impression of a good balance between activity and fewer crowds than Tenerife or Gran Canaria. Then I dropped the idea of going, without ever reconsidering traveling to the Canaries...
Until now! Because we started researching the different islands of the archipelago to see which ones might appeal to us the most. It was La Gomera, the third smallest island of the archipelago, more praised for its hiking trails and preserved nature than for its beaches, away from mass tourism (fifty times fewer tourists than Tenerife) but still a bit more developed than its wild neighbor El Hierro, that caught our attention. Contrary to what might be suggested later, I’m not at all addicted to AI, but I use it from time to time to synthesize quick research or simply for experimentation. Since ChatGPT had started anticipating my tastes lately as if it had become my buddy (often successfully, sometimes off the mark), I asked which Canary Island would suit me best for a trip with my family. The tool answered first with... La Gomera. So, I tested it and teased it a bit to see if this suggestion was well-founded, as the method sometimes makes it contradict itself. But no luck: “You’d appreciate the wild nature of El Hierro, but with family, you’ll find little activity for the kids. You won’t like the touristy vibe of the big islands like Tenerife, Gran Canaria, Lanzarote, and Fuerteventura. You could consider La Palma, but it’s really La Gomera that will suit you best, based on your interests and the criteria given.” So, we dug deeper into our research and were convinced without a shadow of a doubt that this island was the one waiting for us.
Without knowing it, we had Canarians in our circle who revealed their origins when they heard about our travel plans. One from Tenerife insisted we’d be better off choosing Tenerife (obviously...) because it also has preserved spots and that La Gomera, “you can explore it in two or three days, you’ll get bored quickly...” The other, a colleague from Gran Canaria who had never visited La Gomera, still recommended it without hesitation because it turned out her parents had just gone there on vacation: they loved it and had encountered few tourists. She also tended to think this destination was usually the subject of short stays, but according to what her parents told her, taking your time there was also a great idea. However, in our research, the idea that La Gomera is an island you can explore in three or four days max kept coming up. So, we considered combining its visit with La Palma or El Hierro, the other two that caught our eye. But hopping between islands by ferry represents a significant budget for non-Canarians, even more so for a family of four. Then, scrutinizing Google Maps, it seemed obvious that two weeks were too short to discover two islands as they deserve, and that there seemed to be plenty to see in La Gomera, given its very unique culture. After all, we read that some people spend several months a year there, others never even leave... Finally, these landscapes and this atmosphere, which seemed to us a mix of Europe, North Africa, and Latin America, tempted us. So, it would be two weeks in La Gomera, deal!
La Gomera is therefore the second... well, the third smallest island of the Canaries since La Graciosa was recently recognized as a fully inhabited island. It has the shape of a rough circle about 20 to 25 kilometers in diameter and has just over 20,000 inhabitants, half of them in its capital, San Sebastián de la Gomera, the only real town. Like its Canarian sisters, La Gomera is a volcanic formation that rose about 10 million years ago. The island is very mountainous and rugged, covered with red and black rocky landscapes. Geological activity has shaped, between the sprawling massifs that end in steep cliffs in the ocean, six coastal valleys with tropical vegetation that have favored human settlement. They divide the island like slices of a cake; from the north clockwise: the agricultural Vallehermoso, the rustic Agulo, the green, humid, and fertile Hermigua, the sunny capital San Sebastián de la Gomera, the southern and isolated Alajeró-Santiago, and the seaside Valle Gran Rey. They constitute the six municipalities (more like cantons to our French understanding) of the territory.
The large solidified magma massifs that shape the heart of the island have created a large depression more protected from the sun at its center, allowing the growth of a vast laurel forest, today grouped within the Garajonay National Park, La Gomera’s green lung, which has earned it the status of a World Biosphere Reserve. Its completely European appearance contrasts sharply with the rocky and tropical landscapes of the rest of the island. Thus, the climate varies greatly from one point to another on the island: in summer, you can quickly go from a dry and sunny valley at 35°C to a humid forest area at altitude at 18°C.
La Gomera was populated late. As with the rest of the Canaries, human presence is thought to have begun about 2,000 years ago. Groups of animist Berbers, probably fleeing persecution, gradually populated the archipelago, especially the western islands and La Gomera, becoming its small aboriginal population: the Guanches (or later Gomeros). The animist and pastoral civilization of the Guanches thrived until the Spanish takeover in the 15th century, which, after a short period of harmony and mixing with the indigenous people, suddenly ended in bloodshed... La Gomera later became the “Columbus Island” after Christopher Columbus’s stopover, increasing the blending of populations. In the 20th century, many Gomeros emigrated to Cuba and other Latin American countries in search of a better life, bringing back a mix of cultures and traits quite palpable in today’s Gomeran culture. It is, however, in La Gomera that the vestiges of Guanche culture seem to have left the most traces, in the language, gastronomy, social practices... Moreover, most Gomeros, especially in remote villages, have a particular identifiable type and proudly claim their ancestral roots, even making La Gomera a bit exotic in the eyes of other Canarians.
Perhaps that’s why it has never really wanted to develop its tourist infrastructure too much. If we set aside the tourists who visit for the day by bus or boat from Tenerife on a marked itinerary (and whom we ultimately rarely encounter), La Gomera has remained a hidden gem, a destination focused on nature discovery that attracts hikers, nature-loving divers, and scientists for its fauna and flora, and to a lesser extent, beachgoers who don’t seek overly developed coastlines. Tourist activity is therefore limited. Roughly speaking, you’ll find a majority of Spaniards, including a substantial number of residents from other Canary Islands, many Germans who have a particular fondness for La Gomera and spend long stays there or own second homes, to the point that the German cultural footprint is clearly noticeable in some places (it’s said to be Angela Merkel’s favorite holiday spot), and still quite a few French. The presence of other nationalities seemed negligible to us. Most travelers come mainly for hiking, but it’s also a prime spot for whale watching. Additionally, the seaside resorts of La Gomera—San Sebastián, Santiago, and especially Valle Gran Rey—are well-known destinations for hippies, especially German ones, ranging from chic boho hippies to old-school hippies who’ve been there for decades, quite similar to those you’d meet in India in Goa, Rishikesh, or Paharganj. Thus, practices like naturism, vegetarianism, and local organic production are quite well established in some areas.
Some practical info:
- The round-trip flight from Paris to Tenerife cost us 365 € per person (outbound with Transavia, return with EasyJet), including checked luggage and three seats reserved side by side.
- We chose two bases to explore the island: one week in Valle Gran Rey, reputed to be the most pleasant of the three seaside resorts, and one week in Hermigua, more mountainous and close to the natural park. We booked two houses with balconies and views: the first at 120 € per night, the second at 99 €.
- The round-trip ferry between Tenerife and La Gomera cost us 270 € with the company Baleària Canarias, including discounts for children aged 4 and 12, but I don’t have the exact details. It was a bit cheaper than with the other company, Fred Olsen.
- Finally, we rented a car through the agency Cicar for 360 € for 16 days, which comes to 22.50 € per day.
- Apart from that, we didn’t plan anything and decided the day before or even the morning of what we wanted to do. We didn’t invest in any paper guide on the Canaries, as information on La Gomera was scarce, but we used the very comprehensive site La Gomera Travel, a travel guide published by the Canary Islands Tourism Council, a real goldmine of almost exhaustive information on the island.
Alright, off we go for 16 days of adventure discovering La Gomera!
With my girlfriend Christelle, we’ve chosen South Africa for our first trip to Southern Africa, focusing on safaris—after a long debate with a Cape Town/Kruger combo.
But that would’ve meant cutting out St Lucia, which would’ve been harder to fit into another trip.
And St Lucia—thanks to Michel and all those travel journals—we really wanted to go there.
So our 11-night itinerary ended up like this, mostly shaped by school holidays:
- 3 nights in St Lucia
- 1 night in Hluhluwe
- 1 night at Mkhaya Game Reserve (Eswatini)
- 1 night at Hlane Royal National Park (Eswatini)
- 3 nights in Kruger (Berg en Dal / Satara / Tamboti)
- 1 night at Shindzela Tented Camp in the Timbavati private reserve
- 1 final night in Kruger at Lower Sabie
All of this in the off-season and rainy season, just a month after catastrophic floods that killed over 150 people and seriously damaged Kruger’s infrastructure.
I’ll jump straight to St Lucia and skip the loooong journey to get there (with a layover in Frankfurt, landing in Johannesburg, a domestic flight to Durban, and the rest by rental SUV—First Car Rental, perfect, no complaints).
To motivate readers—especially some familiar faces here—I’ll drop in a first photo.
This trip had been on my mind for about fifteen years.
But the discomfort of overnight stays, the difficulty of communication, and the prices of the few car rental options kept making me postpone the project.
And then, everything suddenly fell into place—I told myself, it’s time!
The preparations took longer than usual; the destination is still far from mainstream.
A bit of Kazakhstan?
Not in the end.
The south or not the south?
Yes, in the end.
Pre-book or go with the flow?
Only two stops were a leap into the unknown.
To help me find the ideal route, I made great use of this forum (thanks to everyone for patiently answering my questions!), pored over travel journals and blogs (Christian, Jeff), zoomed in on Google Maps and Yandex, and bought the guide published by OunTravela about this destination (the guide has been updated since).
---/---
You’ve got your passport, international driver’s license, bank cards, and euros?
Off we go to Lyon—just one night left before our early morning flight.
Tomorrow night, we’ll be sleeping in Bishkek!
(Steak for my partner’s mischievous nephews...)
You’ll find here a post with some practical information.
And here, the version of the travel journal without comments.
---/---
As a supplement, the route track.
Not necessarily ultra-accurate since Google has serious gaps for this destination...
It was winter, a winter with beautiful weather,
A season that only exists in the southwest of America,
I remember very well what I told you that morning
A month ago... A century ago, an eternity ago...
We’ll go... wherever you want, whenever you want...
Well, yeah, back from our adventure in our enchanting American West just a month ago, we’re already taking a bite out of one of its lesser-known competitors. "Flo, if you had to pick just one reason to justify your love for the U.S., what would it be?" The greasy, dripping burgers? No, I don’t think I’m going out on a limb by saying it’d be the wide-open spaces... And that’s exactly what our new quest is taking us to—a land on the other side of the globe where the horizon also seems endless, where silence tastes like salty wind and sand, where freedom is measured in kilometers of desert tracks, where the GPS is mostly there to confirm you’re lost in the middle of nowhere... Add to that magic formula the fact that you’ll see more zebras, giraffes, wildebeest, and elephants than people per square kilometer, and you can imagine us setting foot in Southern Africa for the first time, more precisely at the small airport in Windhoek, capital of... of...? Brush up on your geography, damn it! We’re landing in Namibia!!!
To be honest, Namibian landscapes have been flirting with me for ages. So how did I resist this island of temptation for so long? First, the budget. Let’s just say that for the same amount of effort (and kidneys), the bank lets you choose two other adventures almost anywhere else on the planet. Then there were my girls. Yeah, back then, they were too little to dose up on Malarone, the only malaria remedy at the time... Long story short, ten years later, all the planets have aligned. First, I won the Euromillions! Well, almost... Let’s just say my girls are now old enough... not to take Malarone, but to stop following me on all my adventures! Jackpot! "Flo, how about a little two-person caprice, just the two of us, tackling the Namibian tracks?"
As we landed on the runway, first wow effect: The horizon is immense. It’s flat as can be, incredibly flat... So much flat space! Did I mention it was flat?... Looking into the distance, it feels like your gaze could circle the Earth without hitting a single obstacle—until you end up staring at your own backside. "Oh, what a nice view!" Well, it’s the first time I’ve seen my butt from this angle! Touching moment... Sorry, I’m rambling—must be the exhaustion from the three-flight marathon we just powered through via Ethiopia and South Africa... And yet, no time to philosophize about my anatomy. As usual, we want to rack up our first kilometers to be front and center at dawn tomorrow. After wrapping up the tedious Namibian immigration formalities and meeting the 4x4 that’ll be our companion day and night for the next fifteen days, we’re off! We’re not exactly fresh, but we’re ready to tackle the next five hundred kilometers in night mode, cruise control set due south! Just outside Windhoek, the local wildlife—a jackal—welcomes us with a smile: "Welcome to Namibia!" That’s what it said! Honest... Okay, first endless straight road, first flaming sunset, first corrugated dirt track, first Milky Way with zero light pollution... You get it—it’s definitely the day of firsts... First night camping, too, in the big trunk of our Toyota Fortuner parked by the side of the track... The real adventure, the kind that smells under the arms, can finally begin...
After as many weeks as I have fingers on my right hand, we're hitting the road again, fully recovered from our pharaonic adventure. Back in France to drop off our daughters (sorry, girls!), this time it's just the two of us, ready to be welcomed by a new destination. They say it offers one of the richest cultural heritages in the world for those willing to put in the effort. It's the land of the ancient Silk Road, where we'll follow a journey steeped in history and discoveries straight out of *One Thousand and One Nights*. A former Soviet bloc region independent only since 1991, we'll be walking in the footsteps of Genghis Khan, Tamerlane, Alexander the Great, Marco Polo...
Another fun fact about this country: it's strictly forbidden to import porn on your phone. True story. The same goes for painkillers! Unless it's about sodomy—though the two don’t seem connected, that’s just how it is. Don’t ask me why! Anyway, I’m getting off track. Here’s the big question: Where do you think we’ve just landed?... To give you a hint, the locals are known for being incredibly welcoming. No sooner said than done—our first taxi driver, proud to transport French travelers, refused to let us pay for the ride. Great vibes for these two weeks ahead. So, any guesses?
Uzbekistan!!!
January 2026
Here we go again for new adventures and the pleasure of sharing them with you here! First of all, I’d like to thank everyone who helped me with the preparations, even with some last-minute improvisations just days before departure. Thanks to Montagnard74, Jojoone1, Songsam, Attila, Dennis2, NadegerFERM, and the authors whose travel journals about Laos inspired me (Montagnard74, Muriel18, Mavietongs...).
In this story, written by Richard and illustrated by me, we’ll tell you about the journey of four friends: Catherine, Richard, Nathalie, and Bruno. A reinvented but overall successful trip, filled with discoveries and surprises, the scents of spices and frangipani flowers, (too) spicy food, sunsets, and... one big mess.
Preamble:
Africa was calling to me, so a year ago, with our usual travel companions, we decided to return to the continent we love so much.
Where to go?
Uganda quickly caught our attention—wildlife we’re used to seeing, plus gorillas and the shoebill we missed in Zambia.
We got in touch with Paul, who’s been mentioned several times on the forum back in September, booked our flight tickets, secured the gorilla permits, and by early October, the most important things were done.
We still had plenty of time to hold our "prep meetings" for the final itinerary.
Three days before departure, I sprained my ankle (my weak spot, as you’ll recall from our Colombia trip).
I wasn’t in great spirits, but after a year of waiting, nothing was going to stop me.
We’d see how it goes!
Off we went for our new adventures
Come along, I'm taking you to this country where it's so nice to wander and slow down...
This trip was in 2023, but when I wanted to write my travel journal, VF was still closed to contributions...
So, now that I've just finished my Japan travel journal here, I figured it was high time to honor this destination we came back from so enchanted.
Disclaimer 1: This is a written travel journal. There’ll be text! Too much, for some!
Disclaimer 2: This is an illustrated travel journal. There’ll be photos! Too many, for some!
I have to say, every time I try to discipline myself, to keep it shorter, to include fewer photos... I end up adding more. It feels like my dear Aunt Nicole, who exhausted us with her slide-show evenings in the 70s/80s, decided to take her revenge. The upside for you, readers, is that you can slip away anytime without offending Aunt Nicole. I won’t even notice!
Anyway, since I love maps, here’s one to give you an idea of where I’m taking you. As you can see, we only saw a tiny part of Laos (the areas circled in red); we only had 3 weeks for ourselves (my husband’s newly retired, I still work), and we prefer taking our time over rushing around like crazy.
In broad strokes, it was very classic:
First, we “settled in” at Luang Prabang (8 days), because we wanted and needed to.
From there, we took three days to venture a little further north—not far in kilometers, but as we know, distances aren’t just about km!
Then we flew south to Paksé, letting ourselves drift down to the 4,000 Islands while stopping by the pre-Angkorian archaeological sites.
We wrapped up with the Bolaven Plateau.
A few practical notes: We arrived via Bangkok, then took a Bangkok-Luang Prabang flight, having picked up our luggage in Bangkok to check it in for Luang Prabang. No issues—the Bangkok airport, which many of you know, is very well organized.
We got our visas on arrival in Luang Prabang. Quick, but to be fair, we were on a “small” plane, and the big flights had arrived earlier, so we weren’t too crowded in line!
At the end of our trip, we didn’t fly out of Paksé but from the nearby airport in Thailand, Ubon Ratchathani (a 2.5-hour drive from Paksé), then Bangkok and Paris.
You’ll notice we skipped Vientiane to stay longer in Luang Prabang. That said, there’s now a high-speed train between Vientiane and Luang Prabang—good to know—and soon the (Chinese) train will go all the way to Bangkok and even Kuala Lumpur!
With that intro out of the way, let’s dive into the heart of the matter.
To be continued: Slowing down the pace... in Luang Prabang
I’d been wanting to discover Sulawesi for years. But then life happened—COVID, the cost of flight tickets, you name it. Long story short, years went by, but we finally set off as a family for a three-week trip in southern Sulawesi: Rammang Rammang, Rantepao, Sengkang, Bira, and Selayar.
I like to spend a good amount of time in the places I visit, giving myself the chance to really get to know the area and meet locals. So no island-hopping this time—just the south. But when I say "just," it’s not restrictive at all, given how rich this island is in landscapes, little encounters, and magical moments.
Wednesday 07/08 - Thursday 07/09:
We left Montpellier for what was supposed to be five flights, though we only took four to start, landing in Jakarta.
We picked up our luggage there to catch a flight to Makassar the next day. That’s the only way we could get an affordable ticket (702 €).
I won’t bore you with the flight details—there’s not much to say. We arrived at 7 PM and considered heading straight to Makassar that evening. But we opted for a recovery night before taking off again. Good thing we did, because my son’s suitcase was missing...
First contact with the locals was a bit stressful—a trip without your luggage isn’t exactly fun. But right away, a woman reassured us: the suitcase was just enjoying some extra time in Singapore. Maybe it was doing some last-minute shopping. Anyway, nothing serious—it was supposed to arrive at 9 AM the next day. That gave us some breathing room since our flight wasn’t until noon.
So off we went to our hotel (Days Hotel & Suites) near the airport. It was cheap (40 € for three rooms—my kids are older and need their space), but it wasn’t worth much more. The place had definitely seen better days. But no big deal—we were only there for the night, and... we got to watch France beat Morocco in the World Cup live at 3 AM. That’s what really mattered!
Friday 07/10: In search of the lost suitcase
First challenge of the morning: finding our missing suitcase. They sent us to the airport basement, to the staff entrance. We were greeted with smiles, and an airport employee led me through the underground corridors back to the baggage claim. Right on time at 9 AM, the suitcase arrived, just like they’d promised. We were finally complete!
Off we went to change terminals, grab a well-deserved meal, and board our fifth flight to Makassar.
Little side note: I struggled for a while trying to book domestic flights directly on the airlines’ websites with no luck. Without meaning to advertise (though I guess I am a little), I realized it’d be easier to use sites like tiket.com or Traveloka. That turned out to be a great choice—I even ended up booking hotels through them later in the trip.
12:40 PM: We were on our way to Makassar. First good news: we were the only tourists. Well, the only European tourists on the flight, anyway.
No, you’re not dreaming—the bag is full of... potato chip packets.
To each their own souvenirs, I guess...
When we arrived in Makassar, a driver was waiting to take us straight to Rammang Rammang: 250,000 IDR (12 €) to our guesthouse (Rammang Rammang House). Forget about meeting people on the bus—we were headed straight to the first stop of our trip, and it was already stunning.
My kids’ guesthouse:
Ours:
View of the little lake:
But not everything is straightforward around here.
I wanted to get a local SIM card for internet and calls. I found them expensive at Jakarta’s airport (20 € for 20 GB), so I decided to wait. Well, no luck in Rammang Rammang either. You can’t just buy one from the local shop—you need a Telkomsat store (they have the best coverage). So we’d have to wait for Rantepao to get Wi-Fi... When I say "local shop," I mean the little shack around the corner. No big deal—we’d find one easily in Rantepao for 5 € and 25 GB. So there we were, offline, just the four of us enjoying the amazing view.
Saturday 07/11: Rammang Rammang
We woke up early to the sound of wedding music blasting through the village (everyone’s invited!). Off we went to explore the area.
A little walking, a little boat ride (shared with a French tourist and a Polish one—yes, there *are* tourists here, just not many; 750,000 IDR for up to 8 people) through a lovely canal, and we discovered the karst site. It was peaceful and beautiful.
The river:
The karst site:
I hesitated about writing this travel journal...
This summer, we only did the classics (the 3 northern parks and Zanzibar) and let a local agency take care of everything from start to finish.
No craziness, no risks, no sleeping under the stars, no self-drive, no venturing off the beaten path, no incidents, and not even any delays in the pre-planned itinerary...
But don’t think we were disappointed!
The whole family (there were 6 of us) came back with smiles and memories of great moments spent together.
So, if you're looking for a "classic" way to discover Tanzania, this is the place to be.
Our 2-week itinerary:
- Arusha (1 night upon arrival)
- Tarangire (1 night)
- Ngorongoro (2 nights in Karatu then Irmisigiyo)
- Serengeti (3 nights in Robanda, Togoro Plains, and Seronera)
- Zanzibar Stone Town (1 night)
- Zanzibar Matemwe (3 nights)
- Zanzibar Jambiani (3 nights)
Okay, Palermo—we know it. We go there to marvel at the architectural wonders born from the Arab-Norman-Byzantine-Gothic mix. And rightly so. We also go to treat our taste buds to all kinds of delights, both savory and sweet. Again, rightly so. We go to succumb to the charms of Palermo’s women, their sun-kissed skin glowing with golden highlights. Still, rightly so. And all while fantasizing about a mafia we’ll never actually see. Anyway.
But you’ll also find street art everywhere, even in the historic center. Sometimes, you just need to step a few meters away from the main tourist highways like Cassaro, Via Maqueda, or the main arteries of the Ballarò, Capo, or Vucciria markets to stumble upon some amazing murals. Duck into one or two slightly grimy alleys, weaving past trash and crumbling walls, and you’ll find real gems.
For example, just 50 meters south of the main artery of the Mercato del Capo, there’s a great spot with dozens of murals in a tiny neighborhood of run-down mini-houses. You’ll find plenty more south of the Mercato di Ballarò, in the Albergheria (the grittier side, not the one near Cassaro). There’s some in Ballarò itself too, but it’s hard to spot when the market’s in full swing with stalls everywhere. La Kalsa isn’t left out either, nor is Vucciria—just step away from the restaurant-packed streets.
Here are a few examples that really caught my eye.
(In the heart of Albergheria, on a street every visitor walks down—lovely message from an unidentified artist)
We landed in Victoria Falls, Zimbabwe, and headed straight to Kasane in Botswana to pick up our car.
Our vehicle is a 4x4 because in Zambia, it's practically impossible to use anything else, especially in the national parks. I’ve already had the pleasure of visiting South Luangwa National Park—it’s one of the reasons for this trip, the main one being to travel in Africa with one of my sons.
First stop: Livingstone on the banks of the Zambezi River. Along the way, we discovered a lovely restaurant at Socrates with a super-friendly owner (we’ll actually stop there again on our way back). We spent our first night in the rooftop tent after a stunning sunset, accompanied by the grunting of hippos in the river.
The next day, we set off early, heading to Kafue NP. In fact, we’ll always leave early—waking up between 5:00 and 5:30 AM and hitting the road an hour later. Kafue is a lesser-known park, mostly forested, and the animals are skittish because they’re not used to human presence. We crossed the park from south to north and came across various antelopes. Near Lake Itezhi-Tezhi, there are plains where wildlife is easier to spot.
After Kafue, we headed to South Luangwa. This journey requires stops in Mumbwa and Petauke. Two pleasant stops where we found lodges (a nice change from the rooftop tent) at affordable prices and met welcoming people.
For me, South Luangwa is Zambia’s most beautiful park—the river is stunning, the landscapes are gorgeous, and there’s a wide variety of wildlife, including, of course, big cats. A tip for those, like us, who aren’t with a guide: if you’re staying near the park for several days, don’t hesitate to do a "game drive" to scout out where the animals are so you can return the next day with your own vehicle. Of course, in the dry season, you’ll want to focus on waterholes to see the animals—and you’ll need a bit of luck too. The elephant population is growing, and we were lucky enough to see around sixty elephants crossing the Luangwa at dawn, spread across several groups. South Luangwa is the westernmost point of our trip, and we’re now heading east to Lower Zambezi.
Lower Zambezi is Zambia’s side of Mana Pools on the Zimbabwe side. We took a boat ride on the Zambezi to see elephants, hippos, crocodiles, and a multitude of birds living along the water and on the river’s islands. The sunset there is also magnificent.
To explore the park, we followed the waterways parallel to the Zambezi, mostly on the western side (see our route). Lower Zambezi is the last park we visit, and the final leg of our trip will be Victoria Falls.
Victoria Falls—or Mosi-Oa-Tunya ("The Smoke That Thunders")—are truly impressive, even during the dry season. We saw the falls from both countries: in Zambia for the overall view and the bridge that serves as the border, and in Zimbabwe to get as close as possible to the most spectacular parts of the falls.
This marks the end of our trip, which, despite a blown tire on the road, went off without any major issues. Zambia is a beautiful country that immerses you in wild, still-preserved nature.
From Southern Shikoku, between land and sea, to the blue waters of Miyakojima and finally Tokyo’s megacity
Hi everyone,
I have to admit, I really hesitated before deciding to write this travel journal... Writing one takes a lot of time and energy, and since this is my 4th trip, I wondered if it would actually interest anyone other than myself (both for the discovery and the writing). But after a few "Are you going to write a journal?" requests and especially the renewed pleasure from reading other travelers’ travel journals about Japan or elsewhere on this forum or elsewhere, I’ve decided to share this 4th installment in the Land of the Rising Sun here.
The itinerary:
27 full days, from late May to late June 2025, right in the middle of the rainy season, including:
-->13 days in Shikoku, from Kochi (Kochi Prefecture) to Matsuyama (Ehime Prefecture)
-->7 days in Miyakojima (Okinawa Prefecture)
-->7 days in Tokyo
The trip was decided on fairly last-minute this year, as usual.
I regularly check flight prices to track fluctuations for this destination, even without concrete plans. Finding a slightly cheaper direct flight (900 €) than what I’d seen in previous months (around 1,200–1,400 € on average) for a Paris-Tokyo route with Japanese airline ANA was too tempting to resist the urge to return to this enchanting country. After long hesitations between exploring the San’in region (Matsue, Tottori, Yamaguchi) and southern Shikoku, the decision was made—I took the plunge! The tickets are booked: Paris to Kochi with a layover in Tokyo, all with ANA, the airline I’d been dreaming of... for 1,120 € per person. Okay, it’s not cheap, but it’s still better than in 2023.
We leave in 2 weeks!! Now it’s just a matter of getting everything ready!
Intense work ahead in these 2 weeks to:
finalize a more precise itinerary and reach an agreement—yep, because even though we both love Japan, our preferences differ slightly, and we have to choose between exploring new places or taking time to revisit beloved spots...
decide how much time to spend in each selected area without rushing while still exploring
research places that might interest us and watch videos about Japan
book accommodations: yes, it’s possible to do this on the spot as we go, but last year, we noticed that last-minute options were pretty expensive, so we’re booking ahead—even if it means keeping a few options open while we decide or see if better deals pop up later
reserve rental cars
order yen
check the weather regularly and wonder if choosing the *tsuyu* (rainy season) was really a good idea—and whether we’ll be stuck in non-stop rain???
What a tough job, right? Traveling to Japan for a month—such a hard life!
Despite this being my 4th trip, the excitement is just as intense as the first time.
The only small downside is that when we booked the flight tickets, there were only a few seats left, so we’re only sitting together on the international return flight. Plus, on the outbound flight, we’ve got the middle seats.
Another lingering question: what French-language films will be available? According to the internet, the selection seems limited.
Oh well, these are just minor details—it’s almost time to fly!
PS: I’ll be posting slowly and irregularly... so for those interested, be patient or maybe set an alert...
Before Our Departure
Preparing for this trip started 9 months before our departure in June. For those planning a similar itinerary, it’s important to book accommodations well in advance, especially in the Okavango and Savuti campsites—otherwise, you might not find any availability.
Introduction
After visiting Zambia three years ago and Namibia and western Botswana a year and a half ago, this year we chose Zimbabwe (Hwange NP) and the northern half of Botswana.
Our flight from Paris was to Victoria Falls with Ethiopian Airlines, with a layover in Addis Ababa. We rented a 4x4 from Bushlore in Kasane, complete with two rooftop tents since there are four of us on this adventure. Bushlore picked us up from our guesthouse to collect our 4x4 and, most importantly, gave us a rundown of the vehicle and its equipment. Pay close attention to what they tell you—it could be crucial if something goes wrong, as it did for us during the trip.
Our Itinerary
We arrived on June 12th at noon. At Victoria Falls Airport, we got our double-entry visa right away—I’d already pre-booked it online on the site https://www.evisa.gov.zw/.
Since our vehicle was in Botswana, we had to cross the border from Victoria Falls into Botswana for the first time.
The next morning, Bushlore picked us up from our guesthouse to collect our 4x4. After completing the formalities, we headed toward Zimbabwe and the town of Victoria Falls.
We woke up early the next morning to be at Victoria Falls at sunrise. The scenery was stunning, but since it was the start of the dry season, the Zambezi was still high, so the falls had a strong flow. This made it hard to fully appreciate their beauty.
In the early afternoon, we left for Hwange NP, where we stayed for 4 days. Two days at Gwango campsite near Dete, followed by two days at Robins Camp. We expected to see more animals at Robins, but that wasn’t the case. In Hwange, we didn’t spot any predators, but we did see plenty of mammals (buffalo, elephants, giraffes, zebras, and antelopes).
After a few days in Zimbabwe, we crossed back into Botswana at Pandamatenga. We stopped at Nata Lodge for a good night’s rest—driving on the dirt roads is exhausting.
We left Nata and headed toward Nxai Pan. The road was sandy but manageable. We made a small detour to admire some beautiful baobabs at "Baines Baobabs." Then we continued to our campsite, Nxai Pan South Camp. Keep in mind that many campsites in Botswana aren’t fenced (except for the shower/toilet areas), so animals can roam freely within the camp. Take precautions, especially after dark.
After our stop in Nxai Pan, we headed to Maun. We decided to break our journey in Maun before heading to Moremi and the Okavango Delta for three reasons: first, we needed to stock up on supplies and fuel for the next 5 days; second, our fridge had broken (luckily, Bushlore has a branch in Maun); and third, the drive from Nxai to our camp in Xakanaxa in the delta would’ve taken too long. I always avoid driving after dark.
We arrived at our Xakanaxa camp on June 21st in the early afternoon. Not wanting to waste time, we booked a boat ride on the Okavango Delta, leaving at 4:00 PM for a 2-hour sunset cruise. For those interested, to the right of the Xakanaxa X1 site, there’s a sign for boat rides. The organizer is very professional and offers prices that are nothing like those of the lodges.
It was a beautiful ride through the delta with a stunning sunset. Being on a boat is much more relaxing than driving on the dirt roads. That didn’t stop us from doing self-drive safaris the next morning and late afternoon, though.
Then came the time to leave the delta and head toward Savuti, a much drier region. And that’s when the toughest part of our trip began. First, we decided to go up via Khwai. The rainy season was over, but the area was still marshy. We had to cross a few small water patches, testing the depth to make sure we could get through. Luckily, a sign on the road pointed us toward a drier route. We reached Khwai without any issues, but then we made a major mistake. Instead of taking the main track toward Mababe Gate to reach Savuti Camp, we took a straight path north and then a right turn to get to our camp. Bad call—we got stuck in the sand, with one rear wheel buried halfway and a front wheel off the ground. We were genuinely scared we wouldn’t get out, especially since we were on a deserted track, 20 kilometers from our destination, with night falling in two hours. This is where paying attention to the vehicle instructions really paid off—we had to use the jack to get out of the mess. The result: we arrived at Savuti campsite just before dark (Distance: 146.3 km, Duration: 9 hours, 56 minutes, and 3 seconds, Average speed: 14.7 km/h, tracked with Osmand). At reception, the staff couldn’t understand how we’d gotten there—we hadn’t passed through any of Savuti’s reserve entry gates.
The next morning, no one felt like driving, so we did a game drive with a guide. I don’t know if it was some kind of reward, but the outing was amazing. We saw three lions and, best of all, a pack of African wild dogs that we had time to admire and photograph. The next day, we did a short self-drive and found one of the lions from the day before drinking at a waterhole. That was the end of our Savuti adventure.
Now we’re heading to Kasane. We returned our vehicle and settled in for our last two nights there. The next morning, since we no longer had a car, we decided to do one last early-morning game drive in Chobe NP. It turned out great—we followed two brother lions and saw plenty of other mammals. The only downside of Chobe is the number of tourists, which was a change from the other parks we’d visited. That said, we’re tourists too, so...
In the evening, we took one last boat ride on the Chobe River to end on a high note with a beautiful sunset.
After a good night’s sleep and plenty of wonderful memories, landscapes, animals, and emotions, it was time to leave. We left early in the morning with the same taxi company as before to cross the border into Zimbabwe one last time and head to the airport, where we took off to return to France.
We all have two lives. And the second one kicks off the day you realize you only have one, with the determination to spend the time you have left on what truly adds sparkle to your life, Kevin! I like to elegantly introduce a trip with a philosophical quote. First, it gives you the illusion that I’m some kind of deep thinker, and second, it lets me fill up the first few lines of my blank page when I don’t know how to tell you I’m diving back into what really lights up my life: another adventure beyond the horizon! And nearly every other year, like a toxic relationship, my horizon tends to take shape in Uncle Sam’s backyard. And this, despite his cousin Donald calling the shots. Speaking of which, it was partly that impulsive guy who pushed us to be just as impulsive and snag our four flight tickets at a ridiculously low price—a direct result of foreign tourism taking a hit from BetaMax’s repeated antics... Four tickets? Who are the other lucky ones? In this case, our lucky ones are actually lucky ladies: My Flo, always up for exploring the world with me on foot, camelback, or scooter, is obviously in on the fun. The other two seats went to our daughters, Sasha and Luna, both thrilled to be part of this new American adventure...
But what’s the American West like in February?... A gamble. Let’s call it Russian roulette since we’re not landing during peak weather season. That’s why we encouraged our transportation and accommodation to get cozy and produce a little camper van, so we can stay ultra-flexible in the face of any weather tantrums. We’ll be roaming in Kara the van with the motto "Follow the sun!" Bad weather? We bolt. Snow? We speed up. Sunny? We act like it was the plan all along and soak it up.
"Okay, but why keep coming back to the same corner of the globe? After ten American adventures, you must be tired of seeing the same things, right?" But I’m not crazy, you know!... The American West is like making love to your gorgeous wife over and over, always enjoying it just as much. And contrary to what you might think, the American West isn’t just the Grand Canyon, Monument Valley, Las Vegas, and Bryce Canyon. Proof is, after ten trips to the U.S., my retinas are still untouched by three-quarters of the places I scribbled on a napkin for this adventure... Oh, and add to that my wife, who I’ve easily converted to my religion, and boom... relapse is even easier! Because yes, we’ve landed in Los Angeles after a sunny flight over Greenland, still under Danish flag for now. And we’re already heading east through the XXL traffic of L.A.’s eight-lane highways, eager to dive into our first discoveries. But first, night is taking over the sky, and second, we’ve been officially awake for 24 hours, so I suggest wrapping up this intro. I’ll tell you more tomorrow morning. Sound good?
This travel journal aims to help future travelers (well, I hope so!), since there’s so little information available about this remote archipelago. Big thanks to Lolodesiles and Ayis for answering my questions while I planned this trip!
Context
This is our fourth trip to Indonesia as a couple—after Java-Bali in 2011, Flores-Komodo in 2013, and Sulawesi in 2016—each time for three weeks. It’s also our tenth trip to Southeast Asia overall.
We’re traveling like we have in previous years: with a rough itinerary that often changes based on who we meet, tips from other travelers, how tired we are, or what we’re feeling in the moment. In the Moluccas, it’ll change constantly, mostly depending on transportation.
Our only accommodation booking: the first few nights in Ambon when we arrive.
Planned route (to be refined on the spot): Ambon - Banda Islands - Lease Islands - Ternate - Tidore - Halmahera (between Sofifi and Tobelo) - Morotai and the neighboring unnamed archipelago.
Flights: Lyon-Paris-Singapore on Air France (428 € round-trip), with good meals, champagne, and wine (we like our little comforts when going on vacation 😏). Then Singapore-Jakarta-Ambon on Air Asia and Garuda.
Return flight: Ternate-Jakarta-Singapore on Lion Air, with a 3-day stopover in Singapore before heading home.
Episode 1: Ambon to Banda
Our guesthouse, booked two days before departure, is 45 minutes from Ambon Airport, near Natsepa Beach (northeast of Leihitu). It’s a pretty average beach—quiet on weekdays but packed on Sundays (we saw the difference). It’s lined with warungs.
This rainy day helps us readjust to the atmosphere of this country we love so much.
Our “Solim Guesthouse” is a lovely house with a living/dining room and garden, costing 15 € per night for two, including a hearty breakfast.
Dinner is at Gaba Gaba, a great restaurant just a short walk away, right by the water, recommended by our host. Fun fact: it’s in the Lonely Planet, and it might be the only LP-listed spot in the Moluccas that actually matches the description (the others either don’t exist or have nothing to do with what’s advertised 😠).
For the next two days, the super-friendly owner lends us his scooter. We set off to explore the coastal villages in northern Leihitu (the western part of Ambon Island, which has a weird shape).
Laundry and trucks washed in the same stream.
Liang Beach, described as the island’s most beautiful, is almost gone (climate change or something else?), but the colors are magical.
We continue 25 km toward a snorkeling spot our host recommended, taking a gorgeous, deserted little road through tiny villages in clove plantations (oh, those unforgettable scents!), stunning coves, and dense forest.
We’re greeted dozens of times with “Hello Mister”—a daily routine in the Moluccas. Every time we stop, we pose for photos to be saved on locals’ smartphones. They don’t see tourists often.
We ask for directions to the snorkeling spot (not easy—we only know basic Indonesian like *Selamat pagi*, *siang*, *sore*, and other polite phrases). Not many people know where it is (especially since we never know which village we’re in), but we eventually reach a small village that seems to be the right place. 🙂
We ask a local to take us there by boat (it’s not reachable by land).
The spot is at most 100 meters long, but the coral is in good condition (apparently not dynamited by fishermen, unlike in other parts of this beautiful country where fishing methods are destructive and nature pays the price 😠). The fish are plentiful and diverse. It’s a great start before heading to Banda. We’re happy to have the place to ourselves… though we don’t yet realize we won’t see a single tourist for the rest of the trip!
After two days of rest, we head to Tulehu Port in the morning, aiming for the Banda Islands. We know the journey is often tricky: the Pelni ferry runs twice a month but doesn’t match our dates, the 10-seat Suzi Air plane is always full (you can’t book—you have to show up on Mondays and Fridays), and it’s often canceled due to weather. So we opt for the Tuesday speedboat (which also gets canceled if there are waves or wind), with the next one on Saturday.
We’re used to Indonesian ports—crowded, rusty boats, no English speakers—but we still feel lost. When I ask about the speedboat to Bandaneira, people gesture wildly, someone takes me to the “harbor office,” then tells me there’s no boat, others try to sell me tickets, and some just say, “No boat.”
Luckily, an English-speaking local approaches us and confirms the speedboat is broken. The next one will be Saturday *if* it’s fixed—otherwise, even later. 🤪 😠
We’re crushed. We came here for the Banda Islands… 🙁
We decide waiting five days for a maybe-boat isn’t an option, so we decide to head straight to North Moluccas, which was planned for later. We’re so disappointed we don’t even want to stay in the area. The Lease Islands don’t appeal to us despite what we’ve read, and Seram would deserve its own trip with its remote mountain tribes.
Huge disappointment—we’d been dreaming of Banda for months, with its incredible drop-offs like Bunaken, its islands covered in nutmeg trees, etc. I’d read that Banda is in the world’s top 5, alongside Bunaken (amazing—we went in 2016), Komodo (incredible—we went in 2013), Sipadan, and another spot I’ve forgotten.
We take a taxi back to Ambon (45 minutes) to a travel agency to buy plane tickets to Ternate. There’s a daily ATR72 flight at noon—perfect timing.
Ambon is the capital of South Moluccas (or Central, depending on who you ask!) with 300,000 people. The city doesn’t seem unpleasant, but we don’t stop.
On the plane, there are only about ten passengers for 72 seats. The flight attendants are stunning, as always with Wings Air—clearly, they’re hired for their looks. 😊
Stopover in Bacan—a runway in the middle of coconut trees serving a tiny town—then we fly over countless volcanoes, the last one towering over Ternate.
Bonjour,
De retour sur le forum - et première rédaction d'un espèce de carnet de retour de notre 4ème voyage en Indo.
Contexte : une trentaine de jours, en scooter et en duo, sur Florès (et une petite incursion dans l'archipel de Solor, plus précisément à Lembata (chut, faut pas trop en parler !!!), qui donne envie d'en faire beaucoup plus là bas malgré les infrastructures sporadiques), en partie dans des destinations déjà bien connues du forum (la classique Ruteng / Bajawa / Riung / Moni voir baie de Maumere) ... et qui ne parlera pas du PN de Komodo ou de Wae Rebo, puisque nous n'y sommes pas allés 🏴☠️.
Texte en anglais (issu d'une autre plateforme). Sans nul doute, des traducteurs intelligents ou pas marcheront à merveille en cas d'anglophobie 🤪.
Disponible à toute fin utile pour des détails ou infos.
Equippement : Yam' Nmax 155 ; 2x saccoches cavalières (25L) + sac de selle (30L) + saccoche tunnel (15L pour le matos photo) ; casques et vêtements d'enduro amenés depuis la France.
Itinéraire : boucle depuis Labuan bajo jusqu'à Pulau Lembata ; juillet-août 2026
Road conditions graded from A (excellent) to D (very bad, at least for a Scooter… a CRF/KLX or even honda ADV would do better on that)
D1 : Labuan Bajo – Reok via Ranggoe, Rego & Tagol (130km ; 5hrs). Section LBajo – Rego (90 km ; B) is quite good tarmac, despite a lot of elevation with many small valleys and passes. Rego – Tagol (10km ; D) is a stone road (not gravel), some ascents & very poor condition ; necessary to lower tyre pressure. Tagol – Reok port (22km, quality depends considerably from D to B). Reok port – Towncenter : B. Night @Iffah Homestay (100k for fan room, mandi attached, no breakfast), simple but clean. Notes : path to danau Sano Limbung was closed ; access to Tiwu Pai & Wae Kuli (waterfalls) not permitted in july 2026.
D2 : Reok – Riung via Pota (105km ; 3h-3h30). The road is very narrow in some part, thanks to the uncut bushes (lowering visibility hence extra caution as animals/people can suddenly appear in a turn…) but generally good condition except many eroded sections and some unpaved ones. Grade C/B. 2 nights @Mentos (285k for AC room)
D3 : Boat tour in Riung (booked directly with a captain, 800k for two for private boat incl. lunch and NP fees) + sunset from Watu Mitong Riung (should not be missed).
D4 : Riung – Muku Saki via Mbay (around 100km ; 3h30). Quality varies from A in the vicinity of Mbay to eroded sections (C) in secluded places. Night @Sao Paolo Homestay (250k for fan room with mandi, maybe overpriced but nice house and great food). Note : if you happen to pass by Mbay on Saturday, the market is well worth a stop (cheapest Ikat on the trip : you’ll be asked normal prices providing you’re OK in Bahasa…)
D5 : Muku Saki – Tanjung Kajuwulu (near Ndete) (90km, 3h). Many patholes, eroded (C). Night at Déjà Vu Homestay (220k for a matress on the floor & outside mandi/toilets ; I woud define this as a tourist trap – the quote we had for food was double priced too…)
D6 : Tanjung Kajuwulu – Waiterang (east of Maumere, 55km , 1h30). Pathholes till maumere, then All good (TransFlores), C/A. Night at Sunset Cottage (new concrete room, very serene place ; 270k for AC with bathroom ; much prefered Sunset over Lena House (more customers, more built up).
D7 : Waiterang – Larantuka via Boru and Eputobi (TransFlores ; grade A ; 115km / 2h40). Particularly liked the drink stalls (marked as Rest Area Eputobi) and the out of order aquatic park just before Larantuka (obyej wisata waiplatin). Night @ Dewy Onong Homestay, which is not advertising itself as Larantuka Beach Homestay as some contributor signals here and on goole maps review. Best breakfast of the trip (Cumi Cumi !!!) ; 275k for AC room with bathroom.
D8 : Local Boat (Kapal Kayu) from the main port to Lembata (Lewoleba). Departure 8am ; price 60k/head + 50k for the bike. Stop enroute on Adonara (where we did not stop due to fights between communities). Night @Elmany Homestay (275k for AC room with bathroom, fan room with shared bathroom also available). Whole afternoon at Pantai Hadakewa, fantastic place (good snorkeling, great views of Ile Api aka Gn Lewotolo). Road condition : A (did not expect the TransLembata to be that good…).
D9 : Loop around Ile Api (50km, 2hrs), anticlockwise. Stops enroute at Situs Tulang Paus (whale squeletton), pantai Jotona, pantai Wena (we expected to snorkel from there, but wind was very strong that day), situs Watu Nale, Selat Sonia. The western coast is far less interesting. Road conditions : bad (C) on the eastern side (up to Riangbeda), good (B/A) afterwards. Night @Elmany Homestay.
D10 : Lewoleba – Lamalera via the western and south coast (70km, 2h30). Good road (B) for roughly the first 55km (up to Tapobali), then eroded track for the last 15km (in some parts steep and dangerous) up to Lamalera (D/C). Notes : 1/ Kuma resort denied us the entry for some drink ; 2/Pantai Waijarang « complex » is abandonned but closed with fences ; you can still sneak in ; 3/ some reports advise to skip Bukit Cinta (foreigner entry fee) for Bukit Doa Watomiten (stations of the cross) ; well Bukit Cinta has also been abandonned (well spent money…sic) but remains opened with structures falling (quickly) appart. Night @Lamalera Inn (200k per head including meals ; very basic fan room + attached mandi). Planned 2 nights, spent only one, as it’s the only tenant I had difficulties with (only interested in money, initially stated crazy prices, starts loud music at 6am … and drinking moke at 8am…)
D11 : Trip to Wulandoni for the Barter Market (Saturday only). Bad road (C) along the coast. Had to report at the Kantor upon arrival, which quite surprisingly asked 100k per person (foreigner) to go inside the (outside) market. Other « local » tourists (a group from Jakarta) were not asked to pay. Well, since a market is a public space and not a zoo, we refused payment and enjoyed the activity from the kopi stall next to it. Returned then to Lamalera for the catches of the day, then to Lewoleba via the mountain road (45km, 2 hours). First 10km to Puor is in very bad condition and uphill (D/C). The remaining is on a newly constructed road (A). Note : Air Panas Sabutobo is abandonned and falling apart (again…) but there are still some water pipes along the river that you can enjoy (depending how lucky you are, just with the forest sounds as companion). Night @Elmany Homestay
D12 : Chill day alond the northern coast (Batu Payung, Pantai Hadakewa with lot of snorkeling, drove till Wailolong and backtracked to Pantai Lewolein for more snorkeling (nice canyons there !) and another fantastic sunset over Ile Api (see GMaps pictures)). Night @Elmany Homestay
D13 : Monday weekly market at Pada, southwest of Lewoleba. Renowned but honnestly dont plan any itinerary specifically for it, just an ordinary Kampung weekly market. Returned to Larantuka and Flores with the 12pm local boat (the same boat that leaves from Larantuka at 8am). Same prices as the first leg. Night @ Dewy Onong Homestay
D14 : Larantuka – Waiterang along the northern coast (100km, 3h) via Pantai Kawaliwu, Tewuk Lewokluok (trail is easy to find, very nice snorkelling in a lagoon), Pantai Lato (to my opinion the most beautiful beach on Flores and you’ll be the only visitor, as opposed to Pantai Koka) and Pantai Hia, until rejoining the TransFlores near Nebe. Grade C on the costal eroded road / track. 3 nights @Lena Guesthouse (booked ahead as it fills up quickly, but we prefered its neighbour Sunset Beach Guesthouse)
D15 : Snorkeling trip organised by Lena Guesthouse (200k per head excluding NP fees and lunch)). The drop-off near Pulau Babi is a very nice spot.
D16 : scooter day trip around the Egon Range (too lazy to hike it…), through nice Sikka villages (route : Watublapi, Umauta, Bola, pantai Doreng, Nakatoli, foot of Gn Egon, Air panas Blidit). The track from Natakoli to the foot of Gn Egon is very steep, damaged and wet (with moss) ; I would recommend not to attempt that in case of bad weather.
D17 : Waiterang – Moni (130km, 3h30, transflores grade A/B) via Pantai Koka (refused to pay the mafia entry fee…) and Jopu (some rumah Adat Lio). Stopped at Museum Bikon Blewut, south of Maumere. Very nice artefacts (especially wooden statues from Papuan, great ikat collection) although very disorganized and sadly non-visited (hence masterpieces fall into oblivion). 2 Nights @Liahz Lodge (150k for fan room, basic bathroom… but right next to Air Panas Liasembe (free, no closing time) !!!).
D18 : Sunrise from Kelimutu with a nice weather (stayed until 8.30am). I don’t know if the sunrise is really worth it (lot of people ascending and watching the sunrise – a lot but nothing compared to e.g. Gn Bromo), nearly everyone going down around 7am, then there is virtually nobody. Trip (20km one way, good road B) to Kampung Adat Nggela (Lio). Although the village is habited and mostly out of the beaten path, I have mixed fillings due to the fact that most ladies (some are pushy) try to sell you (bad) pieces of ikat.
D19 : Moni – Ende via Detusoko paddy fields, Kampung Adat Saga (Lio) and Puncak Ndona ; 75km 2h30. We really liked Saga (nice setting on the mountain, friendly villagers, no selling, mix between traditional and more modern houses in that lively village). Sunset from Bukit Raja, on the peninsula with a 360 view on Gn Iya, Gn Meja Kota Ende and the mountains behind. Note : at the end of the road (search for Gunung Meja Tourist Info Center), there is a (sand) track leading to the path. 1/ only intend the track if you have off road driving experience ; 2/ dont trust the walking time stated by Maps.me. Took us 45mins on a steady pace to reach the summit. Night @Hoja Homestay, 300k for a comfortable AC room with bathroom.
D20 : Ende – Bajawa, via Air Panas Mengeruda ; grade A, 120km, 3 hours. Note : don’t plan to short in Mengeruda (Soa), very easy to spend a half day there, especially if playing with local kids. Stay @Cinnamon GH, 250k for double with fan and hot shower (cheaper options with shared hot shower availlable).
D21 : First day in Bajawa : Watu Nari Wowo (Avatar Hill, sic…), Kampung Adat Ngada Tololela & Gurusina (very very friendly people, complementary views of Gn Inerie & Wolo Deru). Sunset from Puncak Manulalu (well… Heaven’s door Bar & Restaurant)
D22 : Second day in Bajawa : Kampung Adat Ngio (hardly visited, best view on Gn Inerie), Air Panas Malanage, Kampung Adat Bena (the most visited Ngada village (after Bela ?) in the area, we went there at the end of the afternoon to avoid tours, early morning would be fine too), and Gunung Wolobobo for a terrific sunset
D23 : returned to Gunung Wolobobo for sunrise with Gn Ebulobo in the distance (search for a track on the eastern slope, near the communication antenna). You can circuit the rim to the usual viewpoint (westside, sunset spot), the path is easy to find. Then took again the road to Aimere, visiting Kampung Adat Belaraghi enroute (the setting is maybe less rewarding than all the previous villages). 56km ; 1h30. The road to Belaraghi is fine, except the final part.
D24 : Aimere – Ruteng (105km, 3h30). Nice detour by the paddy fields of Wodo (southwest of Golo Loni) of Sunset from Golo Curu (nice encounters with locals). Night @Tange GH, 130k for room with outside (private) bathroom, no breakfast.
D25 : Surroundings of Ruteng (paddy fields north and east of ruteng ; Maps.me has funny tracks starting from Kenda), and the rather pleasant city itself (pasar, churches, lapangan). We finally skipped Liang Bua.
D26 : Ruteng - Labuan Bajo (130km, 3h30). No visits of the waterfalls close to the TransFlores (entry fee (with bule prices) + mandatory guide etc…). Sunset from Bukit Hercadi with very few locals (Bukit Sylvia & Bukit Amelia, just south, were packed). 2 nights @Wellamas Homestay, away from the harbour and its advantages/disadvantages. 230k for comfortable AC room with hot shower.
D27 : New road to Golo Mori Convention Center (another big money well spent…), with nice views on the strait separating Flores from Pulau Rinca. Some empty beaches (e.g. Pantai Pasir Pajang ; we were there on a weekday perhaps frequented by people from LBajo only). 30km (40 mins) one way, perhaps the fastest road of Flores…
D28 : Morning on the peninsula north of Labuan Bajo before taking a flight to Jakarta in the afternoon. On Google maps, the asphalt road only goes to Teras Langit ; it now (august 2026) continues to Puncak Basok and is still in progress towards the eastern part of the peninsula. On the way back, two other nice Bukit where you can enjoy nice views on the bay (and the resorts…) : Bukit Lontar & Bukit Beta. Note : we only found one public (and nice and quiet) beach in the area ; tagged as Sunset Point Beach on Gmaps. All the rest was closed by fences ; they are privately owned (although the Indonesian consitution grants the coastline as public space).
We're a family of five: one dad, one mom, and three kids aged 10, 15, and 18.
Before diving into each stop in more detail, here are a few general thoughts:
We wanted to sample a bit of everything Japan has to offer in terms of landscapes, accommodation, and transport. We were after walks, temples, restaurants, shopping, and some downtime—but no "all-inclusive experiences" or museums for this first visit.
Three medium-sized (60x42x25) canvas suitcases, plus a duffel bag and a few small backpacks. 23 kg in the hold on the way out, 60 kg on the way back. 36 kg of shopping, without even trying. I think this is the maximum suitcase size if you don’t want to stress on the Shinkansen: they fit easily in the overhead racks.
Round-trip with Cathay Pacific, layover in Hong Kong: no need to collect luggage in Hong Kong—we checked it in at departure and picked it up in Tokyo, and the same on the way back (checked in Osaka, picked up at our final destination). This let us explore Hong Kong without worrying about our bags. Food and entertainment were pretty good—meals included a little Häagen-Dazs on each flight, and the entertainment had way more Asian cinema than you’d find on a Western airline, which was a nice way to see how much weight Western culture carries in Asia.
The original plan was to fly directly from Ishigaki to Hong Kong, but due to Typhoon Dolphin, we had to cancel the Ishigaki leg. Cathay didn’t bat an eye about swapping the Ishigaki-HK flight for an Osaka-HK one, even though it was twice as long.
We were a bit too attached to the idea of ending the trip with some beach time and replaced Ishigaki with Shirahama. It was a mistake—we should’ve visited Hiroshima or spent a little more time in Tokyo instead.
Last February, I made a trip using "public transport" from France to southern Senegal via Spain, Morocco, Western Sahara, and Mauritania.
It’s a journey of about 5,000 km, where I took trains (as far as Marrakech), ferries (to cross Gibraltar and then to reach Casamance from Dakar), and mostly buses on the long desert straightaways. I hadn’t planned any stops in advance or booked any hotels, except for the very first train to Spain, which left plenty of room for the unexpected.
Why travel by land and sea? In recent years, flight-free travel has been gaining popularity. On social media, posts explaining how to cross Europe by train as quickly as possible go viral. Traveling without flying—and making sure people know about it—has become a great way to earn a badge of eco-responsibility: an essential totem for anyone wanting to prove both their dedication to the ecological cause and the wisdom of slow travel.
I haven’t flown in years, and this journey to West Africa could easily be filed under "responsible travel." But it wouldn’t be honest to say that: in reality, it wasn’t really my aversion to flying that motivated this long trek. I see overland travel primarily as a way to experience the world’s geography at a grounded, earthly pace—the pace of the locals. Besides, I’ll be flying back, which disqualifies any claim to being a model of sustainability.
So no eco-badge, and no adventurer’s badge either: you won’t find any heroic tales of camel rides in lost lands or mineral train wagons in this account (popular with influencers, the Mauritania iron ore train now attracts tourists from all over the world, turning "the experience" into something you "have to do at least once in your life"). This five-part story, written on the road, has no other ambition than to recount a journey through places and people, and to share the thoughts they inspire in me. As simply and, I hope, as humbly as possible.
I’m posting the episodes here, which you can also find on my blog (with more photos) at the following links:
Episode 1: Spain, from Avignon to Algeciras
Episode 2: Morocco, from Tangier to Tarfaya
Episode 3: Western Sahara, from Tarfaya to Guerguerat
Episode 4: Mauritania, from Guerguerat to Nouakchott
Episode 5: Senegal, from Rosso to Saloulou
To help those who might want to make the same trip, I’ve also put together a summary of the route with recommendations—you can read it at the end of the story and on the blog:
From France to Senegal Without Flying: Route and Itinerary Recommendations
Hello and welcome aboard this new travel journal!
We’re heading off to Ireland together—a country I’ve wanted to explore for a very long time.
The moment has finally arrived.
We’ll be traveling as a family—my wife, my husband, and our 7-year-old daughter.
Here’s our itinerary:
24/07: Flight from Marseille to Dublin, overnight in Dublin
25/07: Dublin, overnight in Dublin
26/07: Dublin, overnight in Dublin
27/07: Pick up rental car, drive to Dingle, overnight near Tralee on the peninsula
28/07: Visit the Ring of Kerry
29/07: Adare, Bunratty Castle, Galway, overnight in Outheragh, near Galway
30/07: Cliffs of Moher, overnight in Outheragh
31/07: Connemara, overnight in Outheragh
01/08: Drive to Sligo via Westport and Downpatrick Head, overnight in Sligo
02/08: Slieve League, Silver Strand Beach, Glencolmcille, overnight in Sligo
03/08: Drive to Derry via Glenveagh National Park, overnight in Derry
04/08: Giant’s Causeway, Dunluce Castle, Portrush, Derry, overnight in Derry
05/08: Drive to Belfast, visit Belfast, overnight in Lisburn (Belfast suburbs)
06/08: Game of Thrones filming locations: Dark Hedges, Carrick-a-Rede, Ballintoy, etc., overnight in Lisburn
07/08: Drive to the Wicklow Mountains, visit Wicklow Mountains National Park, overnight in Blessington
08/08: Drive back to Dublin and return to Marseille.
Cost breakdown:
Flights:
Outbound flights with KLM via Amsterdam for 3: 175 € + 40,000 Flying Blue miles (so essentially a free ticket)
Return flight with Aer Lingus for 3: 489 €
Rental car:
10 days booked with Enterprise via Carigami: 443 € including zero-excess insurance.
Accommodation:
Dublin: 3 nights at Maldron Hotel New Cross: 394 €
Tralee: 2 nights in a caravan (Ocean Trail Oasis): 292 €
Outheragh: 3 nights Airbnb, family room with private bathroom: 430 €
Sligo: 2 nights at Clayton Hotel: 456 €
Derry: 2 nights at Belfray Inn: 255 €
Lisburn: 2 nights at Temple Golf Club: 232 €
Blessington: 1 night at Baltyboys Lodges B&B: 158 €
That brings our total to 3,325 € for three.
On the ground, visits, fuel, and food cost around 2,500 €.
So this was quite an expensive trip.
A few price examples:
1 liter of unleaded fuel: 1.89 €
3-day pass in Dublin: 18 €
1 scoop of ice cream: 5 to 6.5 €
Castle visit: 15 € per person
A coffee: 3-4 €
A glass of wine at a restaurant: 8-10 €
A half-pint of Guinness: 7-12 €
Now, here’s the day-by-day account of our adventure in Ireland:
Our decision is our decision. And it’s firm and final. Next winter, our plane will spread its great wings toward the island of Ceylon! "Wait a minute... Ceylon... Ceylon... that name rings a bell, but I can’t quite place it on the globe Grandma gave me for Christmas! Ceylon... Oh right, I’ve got it: Ceylon is the name of my tea!" Exactly. But the name on your pretty tea box is also the one used until 1972 for this island nation, a speck on the Indian Ocean at the southern tip of the Indian subcontinent: Sri Lanka!
For this new adventure, I’m exceptionally leaving my Flo behind, cowardly replaced by a double dose of testosterone. To write the book of this journey with me, I’m bringing along my brother, who’s used to this kind of thing, and... a guest star: My model of resilience. My dad! All aboard! Or rather, all aboard our tuk-tuk! Yes, you read that right: A real tuk-tuk, a little colorful rolling box that putters along at two miles an hour. The idea? Well, Sri Lanka and its winding roads overlooking the vastness of lush nature are tailor-made for this kind of vehicle. And since it’s one of only two countries in the world that allow foreigners to rent and drive these mini speedsters, we’ll be crisscrossing the island in our two-square-meter rolling box. Plus, adopting this mode of transport is a surefire way to connect directly with the locals, who’ll surely be curious to see a foreigner driving their iconic vehicle. Not to mention the... let’s say... spicy anecdotes it might generate. I mean, heading into a subtropical zone with my jet-black dad and his unpredictable digestive flora while deliberately choosing the tuk-tuk as our *only* means of transport? That’s the winning combo for an unforgettable adventure! "More seriously, Dad, Sullivan, I’m already loving the idea of living this adventure together, the three of us—brothers and father..."
So, does the intro to this new adventure get your salivary glands going? Yes? Too bad. Because unfortunately, the program handed out by the lady at the entrance has been slightly... let’s say *crumpled*. Some might even say "scrunched up and nearly tossed in the trash." First, six days ago, as the countdown echoed in us like a call to adventure, Cyclone Ditwah grabbed Sri Lanka, played with it like a rag doll, and left it battered on the ground. The toll is devastating: over a thousand dead, thousands of homes wiped out by relentless rains, roads and railways swallowed by massive mudslides. A country wounded once again, after the civil war, the 2004 tsunami, and the post-Covid economic crisis.
But as if this weather disaster wasn’t enough to shake our unbreakable adventurer spirit, fate decided to mess with us further by cutting our trio down to two. The victim? My brother, violently turned away because of a simple date on his passport that didn’t match the border officials’ expectations. Return to sender!
So now it’s just the two of us allowed to board the Qatar Airways Airbus A380 for this trip. If he were here, Denis Brognart would say, "And in the end, only one remains!" Except I know you’ll be with us, following our adventures! Right?
Hello everyone, I’m happy to welcome you to this new travel journal.
We’re heading to Costa Rica together—a Central American destination that dreams are made of for many French travelers and attracts crowds from France.
It was the country’s wild nature and safety that convinced us to go, since we’re traveling with our 7-year-old little one.
We didn’t have much vacation time in February 2026 (only 12 days), so we optimized as much as possible.
Here’s the itinerary:
Wednesday, February 11: Flight from Marseille to San Jose via Paris and Atlanta
Thursday, February 12: Pick up the car, drive to Poas Volcano, visit La Paz Waterfall Gardens
Friday, February 13: Poas Volcano and drive to Manuel Antonio
Saturday, February 14: Manuel Antonio National Park
Sunday, February 15: Nauyaca Waterfall and Playa Linda
Monday, February 16: Drive to Monte Verde and Santa Elena Reserve
Tuesday, February 17: El Tigre Waterfall Reserve and Treetopia Park
Wednesday, February 18: Monte Verde Reserve with a guide and drive to La Fortuna
Thursday, February 19: Sloth guided tour, Observatory Lodge Park
Friday, February 20: Arenal Volcano National Park, Termalistas del Arenal hot springs, and night tour
Saturday, February 21: Return to San Jose, flight to Paris via Atlanta
Sunday, February 22: Arrival in Paris and flight to Marseille.
That gives us a solid 9 days in the country.
Budget breakdown:
Costa Rica is an expensive country, but no more so than France. However, almost all hikes and waterfalls are paid entry, which can really add up.
For meals, sodas (6–10 €) are cheaper than restaurants (10–20 € per dish).
Flights:
We chose Delta Airlines for the price: Marseille to San Jose was 740 € per person (modifiable, with checked baggage and seat selection included).
Other direct flights from Europe were priced between 1200 € and 1600 € with more restrictive conditions.
That’s 2220 € for the family.
Accommodations:
Alajuela, first night: 139 € (1 night) at Rodeo Estancia Boutique Hotel, with personalized airport pickup, transfer to the hotel, and a briefing from Vert Costa Rica agency the next day.
Poas: 66 € (1 night) at Cabañas Tierra Fértil (entire apartment).
Manuel Antonio: 394 € (3 nights) at La Palapa Ecolodge (hotel in the jungle).
Monte Verde: Chalet Aloha Monteverde Cloud Forest (2 bedrooms): 125 € (2 nights).
La Fortuna: Arenal Dream Garden (1 bedroom): 217 € (3 nights).
Total: 941 €.
Car rental:
I went through Vert Costa Rica agency (Vincent is a French expat who set up the agency in Costa Rica and makes great YouTube videos with useful tips).
I rented a 4x4 that was delivered to the hotel the day after arrival and returned at the airport before the flight. The total was 772 €, including full insurance (zero deductible), a child seat, and a phone with a Costa Rican SIM and WhatsApp. The rental company was Poas Rent a Car. The vehicle was well-maintained—no complaints.
Gas: 100 € for the whole trip (3 fill-ups).
Activities:
To get discounts, I bought the pass offered by Vincent, which paid for itself after just one activity. It cost me 30 € (promo since I rented the car through him).
Prices are for 3 people. I’ve added stars to rate them:
La Paz Waterfall Gardens ****: 112 €
Poas Volcano National Park *: 33 €
Manuel Antonio National Park ****: 35 €
Nauyaca Waterfall ***: 25 €
Santa Elena Reserve **: 45 €
El Tigre Waterfall Reserve ****: 141 € (with meal)
Treetopia (ziplining, suspension bridges) **: 250 €
Guided tour of Monte Verde Reserve ***: 113 €
Sloth guided tour (with breakfast) ***: 115 €
Arenal Observatory Lodge (with meal) ****: 102 €
Arenal Volcano National Park *: 34 €
Termalistas del Arenal ****: 20 €
Night tour ***: 116 €
Total: 1171 €.
Meals: 600 €
My favorite restaurants:
Poas: Food court Mercaditas in Fraijanes
Manuel Antonio (near La Palapa): La Langosta and also El Patio
Near Nauyaca Waterfall: Ricar2 el Avión
Between Manuel Antonio and Monte Verde: Soda D’Calle
Santa Elena: HG’s Food
Guadalupe (between Monte Verde and La Fortuna): Soda Río Piedras
Arenal Observatory Lodge restaurant
Arenal Oasis Ecolodge restaurant
Other expenses: 300 € (groceries for breakfast, drinks, ice cream, souvenirs, etc.)
Total overall: 6065 € (about 2020 € per person).
Now, here’s the day-by-day account of this beautiful trip.
In early March, full of carefree joy and happy to return to Morocco, we landed in Marrakech under the sun.
We spent just one night in Marrakech at the Hôtel Toulousain, as we did on our previous trip. And we booked our 3 nights for the end of our trip, the second half of March... Ouch! Ouch! Ouch! But we’re not there yet...
Our first goal is to reach Magdaz, a mountain village in the Tessaout Valley, sometimes called the lost valley.
We discovered the village of Magdaz on this forum, and we were charmed by the photos and comments from travelers who came before us.
The road is easy—it’s dry, and the tarmac takes us right to the village gates at over 2,000 meters above sea level.
We arrive in the afternoon and are left speechless by the beauty of the place. A jewel of Berber architecture! Perfectly restored granaries and kasbahs!
A young man from the village guides us on the visit and opens the doors to the terraces overlooking the village.
Several magnificent collective granaries have been beautifully restored. The warm colors of the stone capture the light wonderfully. It’s stunning!
We won’t find anything decent to stay overnight there, so we head back down a bit and settle in at the Assounfou guesthouse. Lovely welcome. The place is in excellent condition and very clean. It’s spacious, but we’re the only ones there.
First day full of promise!
This travel journal is therefore intended solely for my photos, to present a consistent style.
All the shots were taken with a simple Samsung Galaxy smartphone and with whatever was at hand.
All stays combined, I’ve spent the equivalent of a year at most in Thailand, and I’m no great expert.
However, after many trips, lots of reading on VoyageForum and other sites, and conversations with many locals as well as expats, my view of the country is becoming clearer, though it’s constantly evolving. You never stop discovering and learning.
I guess I wanted to deliver a puzzle, mainly for those who want to get an idea of the country here and for those who feel nostalgic about it.
I don’t know if this minimalist sharing will interest anyone, but it’ll do me good to put it together. After so many months without traveling and then these other long months with VF closed, there’s plenty of material available.
There’ll be a mix of places, periods, and subjects, but it might well be intentional.
I suspect many Thais have dogs because they make excellent guardians for the home. Nothing better to deter burglars or to signal the presence of a snake. You’ll often see Thais tapping the top of their dog’s head, but don’t be fooled: it’s a sign of affection from them. Judging by the dogs’ reactions, they’re used to it.
Thailand is one of the countries on the planet where rabies is still present, so keep that in mind. It’s not just bites that can be dangerous, so don’t let just any dog lick you. Especially on a wound, of course.
Even though dogs often fear humans—this dangerous and unpredictable predator—we still need to stay cautious.
Be careful when walking into alleys because the dog will defend its master’s big yard. Be careful at night, and be careful when they’re in packs.
It sometimes crosses our minds that Thailand isn’t all that made for walking around, and dogs are one of the reasons.
That said, it’s not uncommon to see them chasing bikes or scooters. Cars, though? Much rarer—they’re too big.
It seems Thais prefer to give their dogs freedom by not locking them behind gates. Though sometimes the gate is closed, the little side door is wide open. Oh, and sometimes there’s no gate in front of the property, or it’s been full of holes for years.
You’ll often see dogs sleeping on the roadside, sometimes right on the road. When you approach, they move aside nonchalantly—or not at all. It’s less funny when they suddenly appear from thick vegetation, reminding visitors not to drive too fast. As a result, you’ll notice that dogs with injuries or missing legs aren’t that rare.
Since they believe in reincarnation and respect for all forms of life, they don’t chase dog packs away too much, and they don’t sterilize them enough. When you see a small pack roaming freely in the countryside, you think twice about running into them at the edge of a field.
A darker side of this is that euthanasia isn’t often practiced. Twice, we saw dogs at death’s door in temples, enduring terrible suffering with no one to help. The image (and the smell) of one of them, agonizing and exuding the stench of death, still comes back to me sometimes.
Some of you may have seen the YouTube vlog of a French woman living in Phuket who was given a little pig by her Thai friends. The animal, well-fed, quickly became a happy and enormous beast with its own garden. Yet it didn’t take long for it to fall seriously ill and become incurable. In her video, the French woman described how difficult it was to find a vet willing to perform euthanasia.
You’ll often see bowls by the side of the road. Thais leave food and water there for stray cats and dogs. Overall, they have a big heart for animals.
If you ever pop into a shopping mall, you might see people pushing their small dogs in strollers. It’s not just for fun—these strollers are provided for customers to put their pets in, otherwise you can’t bring them inside. It looks a bit odd when you expect to see a baby.
Hi everyone,
We (two adults, 74 and 70 years old) had already shared a travel journal about our first trip to the Philippines in February/March 2019 on this forum (https://voyageforum.com/v.f?post=9377175;search_string=carnet%20philippines). We had visited Manila, the Banaue rice terraces, Sagada, the Visayas (Bohol, Siquijor, Dumaguette), and on our way back to Luzon, the Taal volcano before returning to France. Delighted by this trip, organized by the French-speaking agency Alizé, we decided to further explore this beautiful country, this time focusing on Coron and Palawan.
Before writing this journal, I should mention that these are personal comments and don’t reflect any differing opinions. Without any literary or photographic talent, I’ll stick to the facts and share a few details about the visits, hotels, and restaurants.
Preparations
We decided to return in mid-January 2025 and consulted three French-speaking tour operators to create a trip based on our wishes (places to visit, type of accommodation) and budget. Comparing three operators helped us weigh their advice and make our choices. Only our first operator respected the budget, a second came close, and the third proposed a slightly more upscale trip. In the end, we chose the agency from our first trip. Our discussions helped refine our itinerary, and when we reviewed it point by point, the document provided was perfect, full of great tips. The most debated point was a 3-day, 2-night cruise between Coron and Palawan. We were tempted but worried about being the only "older" travelers among younger people and feared two uncomfortable nights. Reassured by our tour operator, we finally opted for this "exploration." We’ll come back to that later.
Once the choice was made and dates set, we booked our international flights with Cathay Pacific for 750 € per person, which offers the best schedules (short layovers) at an acceptable price for flights arriving in Cebu. Our trip started on February 25 and returned to Paris on March 15.
International flights
The round-trip flights went smoothly. Cathay does the job well, without frills. The service quality seems to have slightly declined compared to our previous trips with them. Hong Kong Airport is huge but very practical.
Note that not all airlines serve Cebu.
Recommendation: Fill out your Philippine entry form within 72 hours before your flight. This can prevent issues with the airline (possible boarding refusal) and saves a lot of time upon arrival (see the Philippine embassy website).
Domestic flights
For our two domestic flights—Cebu to Coron and Puerto Princesa to Cebu—our tour operator chose Philippine Airlines and their propeller planes. No problems there.
Day 1:
We landed around 12 PM (local time) after 17 hours of travel. A driver was waiting for us at the airport exit and took us to our hotel, intentionally chosen near the airport (Mandaue, about 10 minutes away) to help us recover and get a good night’s sleep before our early morning domestic flight the next day. The Mayoo Hotel, reasonably priced, was perfect for this. Large, beautiful room in a new building—clean, comfortable, with a spa. We could relax by the pool on the 16th floor and enjoy the city view. The breakfast was exceptional, and the staff was smiling, attentive, and helpful. An ATM in the lobby allowed for withdrawals. However, the hotel is in a neighborhood with nothing to see or do. We dined at the Korean restaurant K-GOGI across from the hotel—a real attraction and a great discovery.
Day 2:
After a restful night, we were driven to the airport around 6:30 AM for an 8:10 AM flight from Cebu to Busuanga (Coron).
The flight was uneventful. Upon arrival, we paid 200 pesos per person for the Coron tourist fee before a 40-minute transfer to our hotel: Natura Resort, located outside the city in a secluded spot. The setting is stunning—a beautifully maintained tropical garden, a pleasant pool, and the option to book massages. The cottages are tropical-style with thatched roofs, simple and unpretentious.
The owner, who speaks French, told us that given the heat and our ages, climbing the 721 steps to the top of Mount Tapyas wasn’t necessary. She gave us a few rooftop recommendations to watch the sunset over Coron Bay. After a good swim in the pool and a meal at the resort’s pleasant restaurant, we hired a tricycle to go into town. We were told it costs 150 pesos one way, and depending on the return time, it could exceed 250 pesos. But our driver gave us his WhatsApp number and charged the same price regardless of the time. He just earned two days’ worth of customers.
He dropped us off at the port where bangkas (local boats) gather for day trips. It was the end of the day, so there was a rush. A few shops around the port sold waterproof bags for marine excursions at reasonable prices (compared to back home), after some bargaining. We wandered the town’s alleys looking for the Top Hotel, whose rooftop is famous. Indeed, it’s perfectly located to admire the sunset and enjoy a refreshing drink.
We dined nearby at a small Chinese restaurant, then just had to call our driver to head back.
The night wasn’t entirely restful—our hotel had a soundtrack of all the countryside animals, and it seemed they had no set bedtime! :
If you're looking for great tips and offbeat spots, if you love exploring uncharted parts of a country, if the exotic is your adrenaline, then move along!
Our 15 days in early May in this part of Turkey (a country I first discovered during a city trip to Istanbul in 2017) will only tread well-worn paths and revisit popular routes. Simply because I kept hoping until the very end that our flight to Jordan wouldn’t be canceled. Events in the Gulf proved me wrong, so we left with:
Zero preparation.
Not a single hotel booked (well, except the first one), no visits planned, just a flight ticket bought three weeks earlier. No guidebook, no app—just the desire to explore southern Turkey and Cappadocia, whose images and the chance to stretch our legs had caught my eye.
Oh, wait—I did bring along a new guide: Gemini! Yes, my friends, generative AI was my chief advisor throughout the trip for sites to visit, accommodations, routes, and even restaurants! An experiment I wanted to try to form my own opinion on using this new technology. And what better way to test it than a Turkish getaway?
The verdict? You’ll have to wait for the trip recap to find out!
The main idea of the trip is also relaxation.
So, the plan is Antalya for a few days, the Turkish Riviera for a few more, Cappadocia as the highlight, and a return via Antalya to wrap up the trip. And it was all planned by AI!
So, if you're ready, fasten your seatbelts—cabin crew, doors to automatic and cross check—boarding for Turkey now!

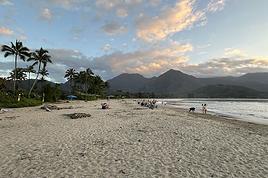
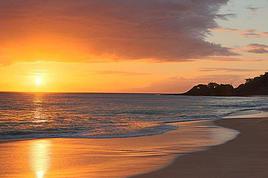
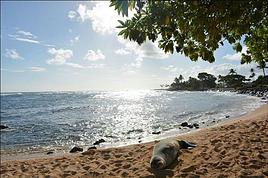
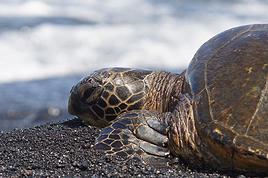
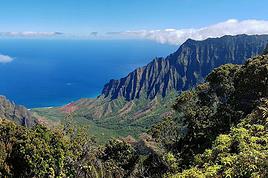
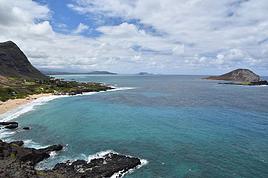
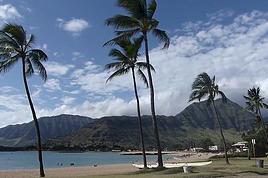

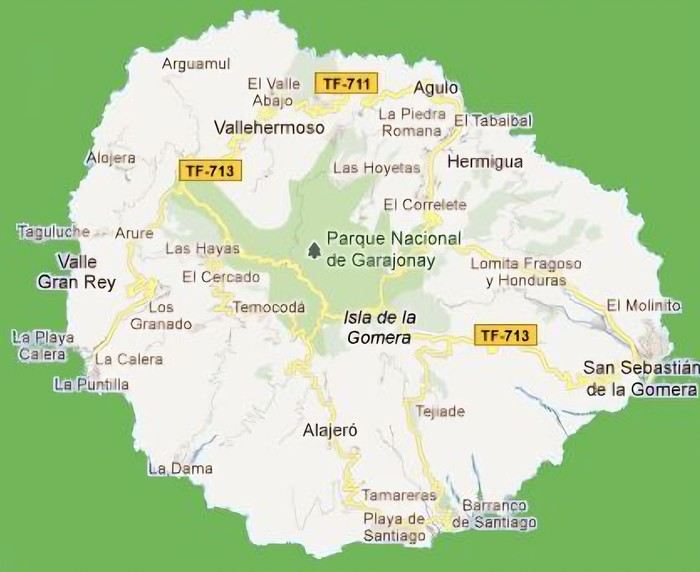 The large solidified magma massifs that shape the heart of the island have created a large depression more protected from the sun at its center, allowing the growth of a vast laurel forest, today grouped within the Garajonay National Park, La Gomera’s green lung, which has earned it the status of a World Biosphere Reserve. Its completely European appearance contrasts sharply with the rocky and tropical landscapes of the rest of the island. Thus, the climate varies greatly from one point to another on the island: in summer, you can quickly go from a dry and sunny valley at 35°C to a humid forest area at altitude at 18°C.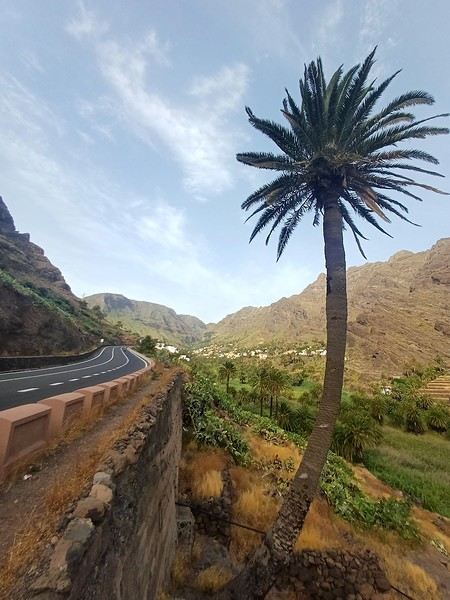
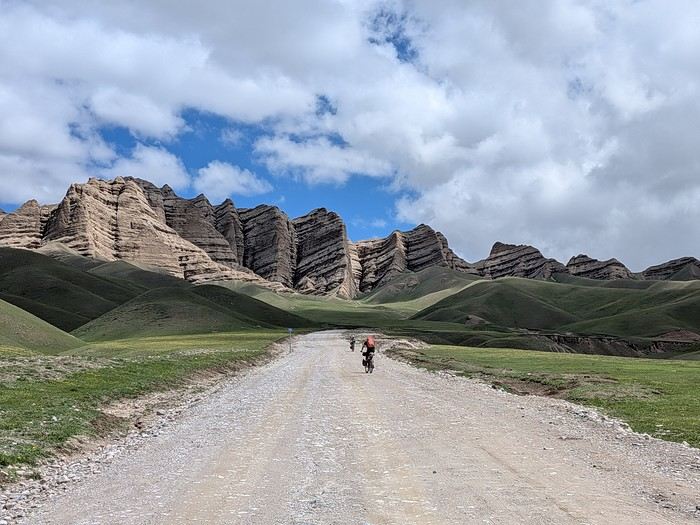
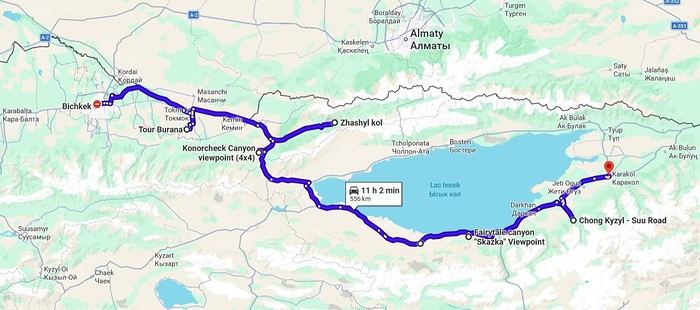



 Come along, I'm taking you to this country where it's so nice to wander and slow down...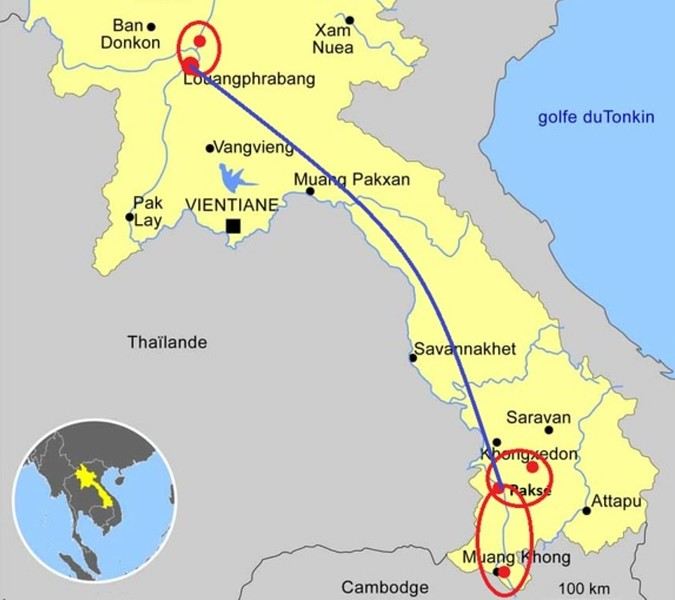
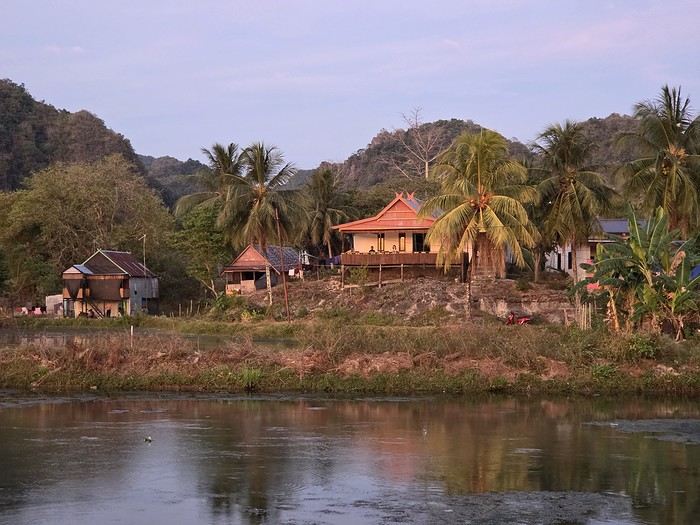
 The karst site:
 (In the heart of Albergheria, on a street every visitor walks down—lovely message from an unidentified artist)
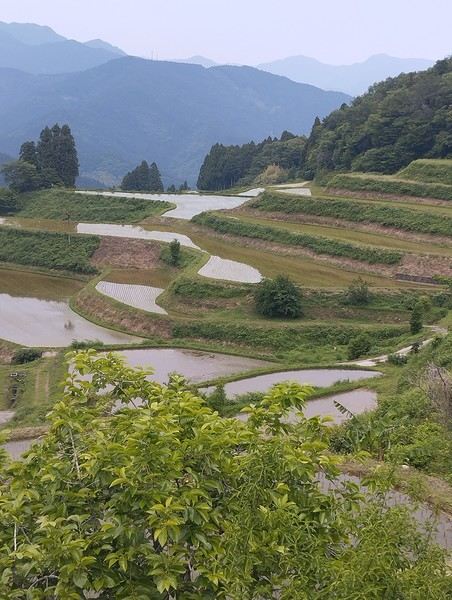
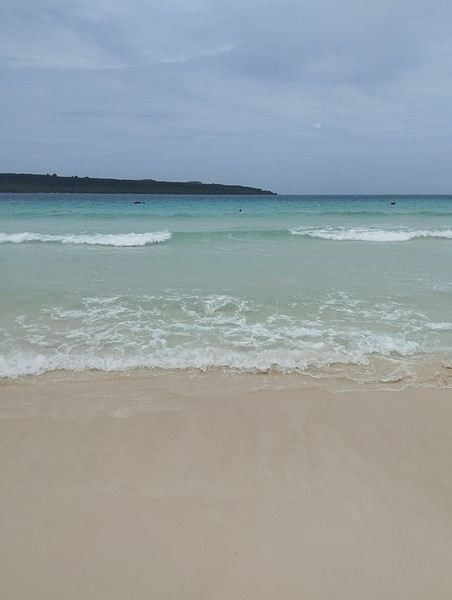


 Laundry and trucks washed in the same stream.
 We’re greeted dozens of times with “Hello Mister”—a daily routine in the Moluccas. Every time we stop, we pose for photos to be saved on locals’ smartphones. They don’t see tourists often.





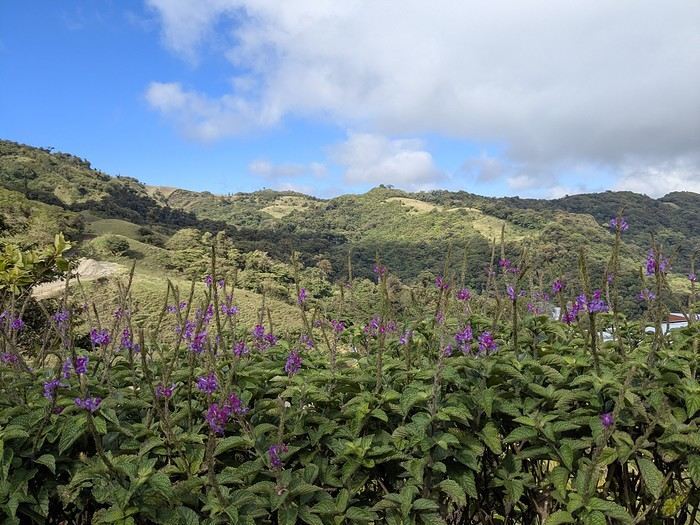
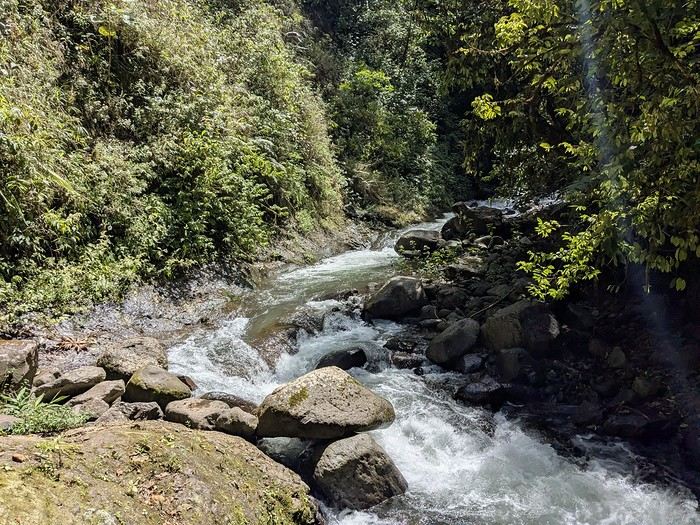
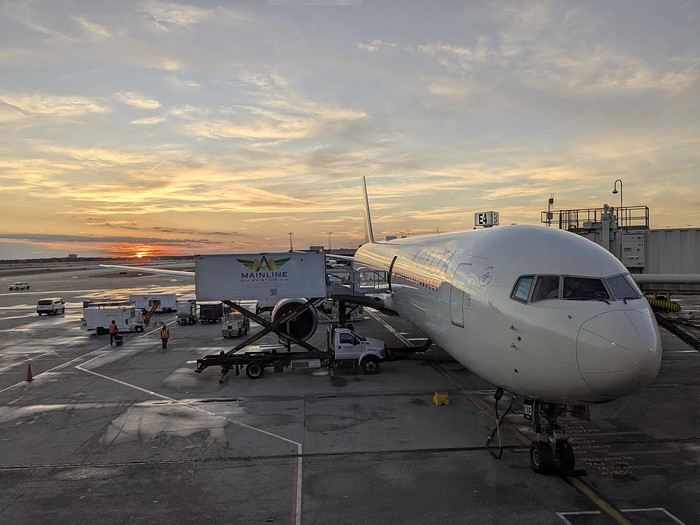
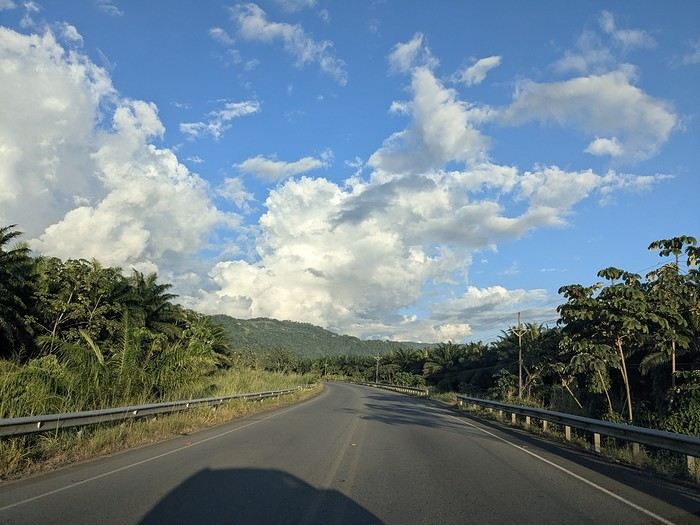
 Several magnificent collective granaries have been beautifully restored. The warm colors of the stone capture the light wonderfully. It’s stunning!

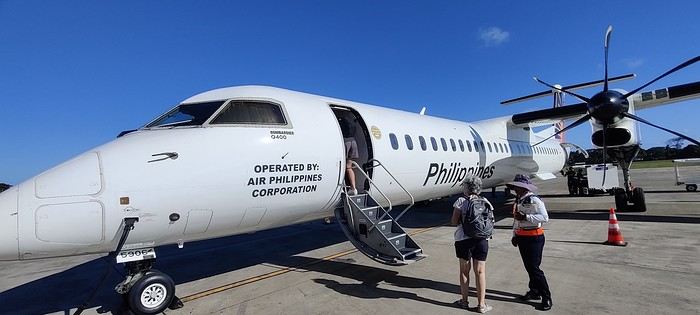
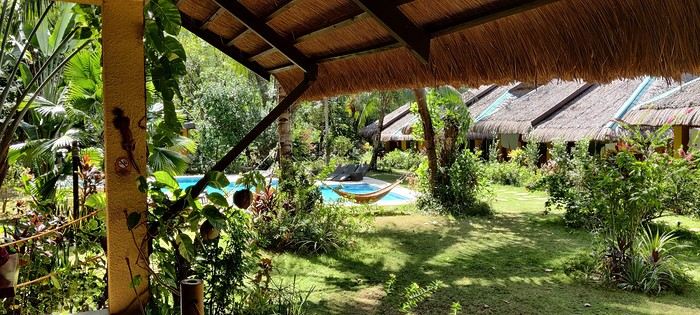
 A little sneak peek?