Des vidéos sont insérées dans le texte. Veuillez cliquer sur l'image pour démarrer la vidéo.
Nous avons séjourné à Waianae sur l'île d'Oahu à Hawaii du 7 au 21 mai 2018.
Plusieurs personnes nous ont demandé si l'éruption du volcan situé sur l'île de Big Island nous avait importuné. Et bien non, nous n'avons subi aucun dommage collatéral. Bien dommage cependant pour les habitants de cette superbe île d'Hawaii.
Je vais d'abord vous entretenir sur les préparatifs de notre voyage et par la suite, je vous ferai la description des différents attraits touristiques que nous avons visités lors de notre séjour.
Vols
Nous avons à prime abord réservé nos billets d'avion auprès de la compagnie Wesjet plusieurs mois avant notre départ, i.e. au mois d'août 2017 au coût de CAD 604 $. Départ de Montréal avec une escale à Vancouver.
Au départ, trois personnes faisaient partie du voyage: mon conjoint, notre fille Mélanie ainsi que moi-même.
Cependant, en décembre dernier, nos deux autres filles, Claudia et Karine, ont décidé également d'embarquer dans l'aventure.
Elles ont donc acheté leurs billets d'avion correspondant au même itinéraire que le nôtre. Le prix était cependant plus élevé. Elles ont déboursé chacune un montant de CAD 753 $.
Au mois de février dernier, nous avons reçu un courriel de la compagnie Westjet nous annonçant que l'itinéraire était modifié et que nous avions une escale supplémentaire à Toronto pour l'aller seulement.
Je ne vous cacherai pas que cette journée passée dans les airs et en attente dans les aéroports a été plutôt épuisante.
Le retour a été plus facile puisque nous n'avons eu aucune attente à notre arrivée à l'aéroport de Vancouver pour notre vol de connexion en direction de Montréal. Aussitôt arrivés, aussitôt repartis.
Voici une petite vidéo du survol des Rocheuses canadiennes lors de notre vol en direction de Vancouver ainsi que le survol de Vancouver lors de notre décollage en direction d'Honolulu.
youtu.be/7pRgiOsStlg
Comme nous sommes arrivés à Honolulu à 21h30, nous n'avons pas eu l'opportunité d'avoir une vue aérienne de l'île d'Oahu.
Location du véhicule
Nous avons effectué une première location au mois de février 2018. Nous avons opté pour un véhicule Nissan Rogue avec climatisation et transmission automatique. Le prix initial était de CAD 574$.
Cependant, cette location pouvant être annulée en tout temps avant notre départ et sans aucune pénalité, nous avons profité d'une baisse de prix pour annuler cette réservation existante et en effectuer une seconde pour le même véhicule au prix de CAD 382 $.
Nous avons effectué cette location auprès de la compagnie Thrifty. Lorsque nous avons récupéré nos bagages, nous nous sommes dirigés à l'extérieur de l'aéroport pour prendre une navette qui nous a mené au bureau de location de la compagnie Dollar puisque les bureaux de la compagnie Thrifty étaient fermés. Il y a une entente qui existe entre ces deux compagnies.
La majorité des assurances sont incluses dans le contrat de notre carte de crédit. Cependant, comme l'assurance dommage à un tiers (LIS) n'était pas comprise lors d'un accident dans lequel nous sommes responsables, alors nous avons préféré l'acheter sur place. Un surplus de CAD 261 $, ce qui correspond sensiblement au prix de la location!!!
Nous possédions déjà un GPS qui contenait les cartes de cette région. Alors, nous avons pu profiter d'économies substantielles.
Hébergement
Coordonnées GPS: 21°28'49.7"N 158°12'14.2"W
Nous avons opté pour un condo situé dans la vallée de Makaha à Waianae. Nous ne l'avons pas regretté, bien au contraire. Il est situé dans un environnement paradisiaque.
Le coût de la location a été plus élevé que celui que nous avions prévu au départ puisque nous étions maintenant 5 voyageurs et nous désirions être logés dans un endroit paisible.
Nous avons donc déboursé un montant de CAD 2496 $ ((15 nuits) ) pour ce condo qui peut accueillir 7 voyageurs puisqu'il contient 2 chambres, trois lits doubles, un sofa-lit ainsi que 2 salles de bain, une cuisine et un salon. Nous avons également un très grand balcon.
Comme nous sommes arrivés tard en soirée, nous avions pris entente pour récupérer les clés du condo.
Le site est sécurisé. On retrouve en permanence un gardien à l'entrée du site.
Il contient tous les accessoires nécessaires et bien plus puisque de l'équipement de plongée en apnée, des petites planches de surf, des tapis de plage ainsi que des chaises de plages sont également mis à notre disposition.
Le wifi est également disponible et il fonctionne très bien.
Un point très important: l'eau est potable sur l'île d'Oahu! :)
Comme nous étions arrivés très tard en soirée, ce n'est que le lendemain matin que nous avons pu admirer les majestueuses montagnes entourant la vallée de Makaha.
Waianae est située sur la côte ouest d'Oahu et le climat est très favorable. Le soleil était toujours au rendez-vous jour après jour.
De plus, le parfum exotique des fleurs des frangipaniers venaient caresser nos narines à chaque fois que nous sortions à l'extérieur du condo.
Nous avons également accès aux piscines et jacuzzi, barbecues et terrain de tennis.
Laveuses et sécheuses sont également à notre disposition moyennant des frais minimes.
Le site est fréquenté par plusieurs espèces d'oiseaux, d'insectes et de paons qui défilent devant nous à notre grand plaisir. La nature est resplendissante à cet endroit.
Concernant la voiture de location, vos assurances de voiture personnelle au Québec ne vous couvrent pas aux USA?
Lors de nos deux derniers voyages, à Hawaï en août 2017 et dans l'ouest américain en avril dernier, nous n'avons pris aucune assurance puisque la nôtre couvre aux USA, même sur les routes non bitumées. Une belle économie.
Bravo pour vos vidéos, c'est beaucoup de travail.
Nous avons la majorité des assurances gratuites avec notre carte de crédit.
Nous avons longuement hésité avant de prendre cette assurance additionnelle sur place car nous avions oublié de nous renseigner auprès de notre compagnie d'assurance personnelle avant notre départ.
Nous n'avons donc pris aucune chance et l'avons achetée.
Cependant, je vais prendre toutes les infos nécessaires pour nos futurs voyages! Merci!
Une aventure en famille. Pour ce séjour sur l'île d'Oahu, nous sommes partis, mon conjoint et moi, en compagnie de nos trois filles.
Notre itinéraire comprend plusieurs randonnées en montagne afin d'atteindre des belvédères qui permettent de jouir de vues panoramiques époustouflantes.
Nous allons également parcourir plusieurs sentiers dans de magnifiques forêts pour atteindre des cascades. Les filles s'y baigneront, nous nous contenterons de les observer! 🙂
Ces randonnées comportent certains risques puisque les sentiers sont parsemés de roches, de racines ainsi que de la boue. Tous ces éléments peuvent mettre votre équilibre en péril. Nous avons vu quelques personnes faire des chutes.
Certains sentiers sont très étroits et d'abrupts ravins bordent chaque côté. La vigilance est de mise.
Nous allons faire de la plongée en apnée à plusieurs endroits sur l'île. La vie marine est spectaculaire. Nous avons d'ailleurs pu nager avec des tortues à maintes reprises.
Les filles feront du surf à Waikiki. Nous nous contenterons de les observer! 🙂
Nous allons nous baigner dans des piscines naturelles formées en bordure de l'océan. Un endroit très dangereux si l'on s'approche trop près du bord. Les vagues frappent avec une force étonnante. Nous allons d'ailleurs être témoins d'un accident lors de notre passage.
Nous allons visiter plusieurs plages tout aussi belles les unes que les autres. Certaines très sécuritaires, d'autres très dangereuses!
Comme vous pourrez le constater à la lecture de ce récit de voyage, nous ne visiterons aucun musée, ni monument. Nous serons en contemplation avec la nature!
Nous contemplerons d'ailleurs la nature sous toutes ses formes puisque nous visiterons également le zoo et l'aquarium d'Honolulu.
Nos journées seront bien remplies. Départ aux alentours de 07h30 tous les matins et retour vers 18h30.
Sans plus tarder, je vous invite à embarquer dans l'aventure avec nous afin de découvrir les beautés que recèle l'île d'Oahu.
Important: Peu importe où vous vous trouvez sur l'île, ne laissez aucun objet de valeur à la vue dans votre véhicule. J'ai lu à maintes reprises que les vitres des véhicules étaient fréquemment brisées. Nous nous sommes stationnés à plusieurs endroits où il y avait du verre brisé sur le sol.
Cette immense grotte est située à Waianae, sur la côte sud-ouest d'Oahu. Elle porte le nom de Lower Cave puisqu'une seconde grotte, Upper Cave, se situe pratiquement au sommet de cette même montagne.
Plusieurs espaces de stationnement sont disponibles en face de cette grotte, de l'autre côté de la rue.
L'accès à cette grotte est très facile. Il suffit de traverser la rue et la grotte est déjà visible.
Même si l'ouverture de la grotte est énorme, il fait de plus en plus sombre lorsque l'on s'avance à l'intérieur de celle-ci. Donc, munissez-vous d'une lampe frontale si vous désirez vous aventurer dans les profondeurs de la grotte.
Le plafond de la grotte est très haut. On peut se promener aisément debout, sauf si on se dirige vers la gauche. Le petit sentier devient de plus en plus étroit et il faut s'abaisser pour poursuivre notre chemin.
Certaines légendes sont rattachées à cette grotte.
Une de ces légendes raconte que c'est à cet endroit que l'humanité serait née de l'utérus de la déesse de la terre. La grotte porte d'ailleurs le nom de Kaneana Cave (grotte de Kane). Kane est le lieu de la création.
Une autre de ces légendes raconte qu'un couple vivait jadis dans cette caverne. L'homme, Kamohoali'i, pouvait se transformer en requin. Ils ont eu un fils qu'ils ont appelé Nanaue.
Un jour, Nanaue aurait découvert son goût pour la viande, comme tous les requins mangeurs d'hommes. Il aurait d'ailleurs eu un faible pour la chair humaine.
Pour assouvir sa faim, il se transformait en humain pour leurrer ses victimes. Il les entraînait ensuite dans la caverne et les dévorait.
Lorsque les résidents ont découvert la véritable identité de Nanaue, ils l'ont capturé et l'ont tué.
Heureusement pour nous! Je n'aurais pas aimé rencontré Nanaue dans les profondeurs de cette grotte!
youtu.be/GIthI59sTyQ
Upper Makua Cave - Waianae - Hiking on Oahu - Hawaii
Coordonnées GPS: 21°31'11.9"N 158°13'39.7"W
Après avoir visité Lower Cave, nous allions maintenant gravir la montagne pour nous rendre jusqu'à Upper Cave.
Cette randonnée n'a pas été facile! Vous comprendrez pourquoi à la lecture du texte suivant.
Pour atteindre le sentier qui mène à Upper Cave, il suffit de tourner à droite sur la route lorsque l'on revient de Lower Cave.
Le sentier se trouve approximativement à 130 m de Lower Cave.
Nous sommes arrivés rapidement sur les lieux. Surprise! Il semble y avoir deux sentiers qui mènent à la grotte.
Les deux sentiers doivent certainement mener au même endroit. Alors, on prend le second.
Au début de la randonnée, le sentier serpente dans de l'herbe haute et la montée est progressive. C'est facile.
Nous nous arrêtons quelques fois pour admirer le sublime paysage qui nous entoure: plages, montagnes escarpées et vallée verdoyante.
J'avais lu qu'il fallait prendre un sentier à droite au bas de la montagne. Nous ne l'avons pas aperçu.
Alors, nous continuons notre montée qui s'apparente maintenant à de l'escalade. Certaines sections sont composées de roches que nous devons surmonter.
Certaines roches ne sont pas bien ancrées dans le sol et on prie pour qu'une de celles-ci ne tombent pas sur la tête d'une personne située à un niveau plus bas. Encore moins sur la mienne puisque je suis la dernière du groupe!
Le sol est très glissant puisqu'il y a du sable qui rend la montée plus difficile. La pente est très abrupte. Pas question de se tenir debout! On rampe à 4 pattes (mains et pieds) pour aller encore plus haut.
Des personnes nous ont vu randonner dans le sentier et ont pris le même sentier que nous. Elles nous demandent si c'est bien le sentier qui mène à Upper Cave. On répond dans l'affirmative!!!
Certaines de ces personnes ne poursuivront pas la randonnée. Elles portaient des sandales!
Ne jamais entreprendre ce type de randonnée sans porter des chaussures adéquates. C'est primordial!
Les filles sont déjà arrivées à un premier palier. Nous les rejoignons après avoir multiplié nos efforts. Heureusement, il y a de l'ombre. Repos bien mérité!
Les filles reprennent la route et entreprennent d'escalader d'autres rochers. Un son de cloche se fait entendre dans ma tête! C'est impossible que ce soit le bon sentier puisque la grotte est située au milieu de la montagne et non au sommet.
On arrête tout et on regarde si un sentier n'est pas apparent dans les parages.
Mon conjoint part en éclaireur et trouve un sentier faiblement tracé dans de l'herbe haute. On prend cet étroit sentier bordé d'un ravin abrupt et sans fin.
Une de nos filles s'écrit: voulez-vous me dire dans quelle genre de randonnée vous nous amenez? C'est très dangereux!
Il faut dire que pour une première randonnée, le niveau de difficulté a été surélevé, étant donné que nous n'avions pas pris le bon sentier. Elle avait raison! Il y avait un risque évident et il fallait être très vigilant et se déplacer lentement.
Nous avons enfin aperçu le sentier qui mène à Upper Cave à un niveau plus bas. Il a donc fallu descendre à ce niveau pour poursuivre note randonnée.
La descente a été ardue. Le sol était très glissant et il y avait le ravin devant nous. Alors, encore une fois, nous sommes descendus en rampant sur les fesses.
Enfin, il nous est permis de respirer un peu plus librement puisque nous retrouvons le sentier approprié.
Après avoir atteint le tronc d'un arbre qui émerge du rocher et qui s'étend à la verticale dans le vide, je savais que la grotte était à proximité.
Nous atteignons enfin le but que nous nous étions fixé: Upper Cave. La vue panoramique du littoral et de la vallée est éblouissante.
Et c'est l'endroit par excellence pour les amateurs de selfie! L'intérieur de la grotte offre un cadre tout à fait original!
La descente est plus zen car la vue sur la vallée envahit notre esprit. Cependant, la prudence est de mise car le sentier comporte plusieurs sections très glissantes. On descend alors sur les fesses.
Une fois rendus sur la route, il est maintenant facile de constater que le sentier que nous devons prendre pour nous rendre à Upper Cave est le premier sentier que l'on aperçoit lorsque l'on arrive de Lower Cave. Celui situé à droite du panneau de limitation de vitesse (Speed Limit 25).
Mermaid Cave and Zablan Beach - Waianae - Oahu - Hawaii
Coordonnées GPS: 21°22'30.0"N 158°08'25.3"W
La superbe plage de Zablan est située sur la côte ouest de l'île d'Oahu, plus précisément à Waianae. Vous aurez un aperçu de cette plage dans cette vidéo.
En ce qui nous concerne, nous sommes plutôt intéressés par la grotte sous-marine (Mermaid Cave) située à gauche de cette plage.
Pour s'y rendre, il suffit de prendre le petit sentier situé près des arbustes qui délimitent le secteur (à proximité des résidences) ou tout simplement déambuler sur les roches volcaniques qui bordent le littoral.
La prudence est de mise car ce secteur a subi de fortes érosions et plusieurs trous se sont formés. Par le fait même, la surface du sol est inégale et possède des pointes acérées à plusieurs endroits.
Plusieurs croix jonchent le sol en souvenir de personnes disparues.
Il suffit de parcourir environ 200 m pour atteindre l'entrée de cette grotte. Vous y verrez certainement des personnes tenter d'y accéder.
Au départ, il est impossible de s'imaginer que ce trou mène à un long tunnel dont l'ouverture donne directement sur l'océan Pacifique. La distance est tout de même assez importante.
Le trou est relativement profond et nous n'osons pas sauter à l'intérieur de ce trou. Des personnes s'y trouvaient déjà et nous ont gentiment aider à descendre.
Il n'y a pas beaucoup de place à l'intérieur de cette grotte et le plafond est très bas. Les filles sont déjà dans l'eau. Je m'avance tranquillement et je m'assoies sur les toutes petites roches qui tapissent le sol.
La marée est plutôt basse et quelques vagues pénètrent à l'intérieur de la grotte et viennent se fracasser sur le rivage.
Le site est magnifique et envoûtant. Le soleil s'infiltre à travers les multiples trous et illumine ainsi l'intérieur de la grotte.
Pour sortir de la grotte, il a fallu encore une fois avoir l'aide de gentils samaritains. Deux personnes à l'intérieur du trou m'ont servi de piliers et deux personnes au haut du trou m'ont tirée vers l'extérieur.
Certaines personnes réussissent à s'extirper de la grotte par un trou beaucoup plus petit. Il me manquait encore quelques centimètres pour y accéder.
Lorsque la marée est basse et qu'aucune vague n'est visible, il est possible de sauter dans l'océan et nager jusqu'à l'intérieur de la grotte.
Cependant, il est important de comprendre que pénétrer dans la grotte lorsque la marée est haute ou qu'il y a des vagues, que ce soit par le trou mentionné précédemment ou via l'océan, est potentiellement dangereux. Vous risquez d'être projetés sur les rochers.
Cette superbe plage est située à environ 7 km de notre lieu d'habitation. Nous y sommes allés deux fois: la première ainsi que la dernière journée de notre séjour.
Elle est située dans un décor paradisiaque. Elle est entre autres bordée par d'abruptes montagnes verdoyantes.
Le sable est fin et devient très chaud lorsque le soleil culmine.
Il y a quelques arbres sous lesquels il est possible de s'abriter pour avoir de l'ombre.
Un muret a été érigé à gauche de la plage. Celui-ci sert de brise-lames, ce qui rend la baignade plus sécuritaire car les eaux y sont plus calmes.
Les jeunes grimpent d'ailleurs sur ce muret et s'amusent à sauter ou à plonger dans l'océan.
On retrouve à proximité de la plage un ancien temple hawaiien (Heiau de Kuilioloa). Il s'agit en fait d'une structure de roches volcaniques. Il servait jadis d'un lieu de refuge sacré.
De l'autre côté de cette petite péninsule s'étend une seconde baie. L'érosion est plus visible. La roche s'est désagrégée et une arche s'est formée.
Le stationnement est vaste et on y retrouve également des salles de bain et des douches.
youtu.be/k5kwzO3VrS0
La plongée en apnée est réellement exceptionnelle sur l'île d'Oahu. Nous en avons fait à plusieurs endroits et l'eau était cristalline et on a pu y voir une diversité étonnante de poissons.
Nous avons donc tenté l'expérience ici même.
Nous avons fait de la plongée en apnée près du muret. L'océan étant un peu agité, le sable se mélangeait à l'eau et diminuait la visibilité.
Cependant, nous avons pu nager avec quelques tortues et avons vu plusieurs bancs de poissons.
La journée s'annonce belle. Nous allons alors en profiter pour faire l'ascension du cratère Diamond Head.
Mélanie a été malade cette nuit. Elle tient tout de même à nous accompagner car elle ne veut pas rater cette activité.
Le parc ouvre à tous les jours de 06h00 et à 18h00, la dernière entrée permise étant à 16h30.
Des frais de US 5$ sont exigés par véhicule ou US 1$ par piéton (espèces seulement).
Il est recommandé d'arriver très tôt car le stationnement se remplit rapidement, qu'il y fait chaud et qu'il y a peu d'ombre.
Nous sommes arrivés vers 08h30 et nous avons dû patienter dans une file d'attente car le stationnement était déjà plein. Cependant, il y a une excellente organisation. Dès qu'une voiture quitte le stationnement, un préposé nous dirige vers l'espace qui s'est libéré.
Ce large cratère a été formé il y a plus de 300 000 ans. Le sentier qui mène au sommet du cratère a été érigé en 1908 dans le cadre de la défense côtière d'Oahu.
De nos jours, on s'y rend pour admirer les superbes vues panoramiques du littoral, de l'intérieur du cratère ainsi que de la région d'Honolulu (Waikiki entre autres).
La distance de cette randonnée est de 2,6 km aller-retour. Le début de la randonnée est relativement facile car la montée est graduelle.
Par la suite, nous devons monter une série d'escaliers et traverser de sombres tunnels afin d'atteindre la station de contrôle incendie.
Cette activité étant très prisée, il y a énormément de monde sur le sentier. Une vraie autoroute.
La température est idéale aujourd'hui. Il ne fait pas trop chaud et le vent est omniprésent.
Au sommet, les points de vue à 360° à partir des différentes terrasses sont vraiment impressionnants: Waikiki, le phare de Diamond Head qui surplombe l'océan pacifique, les montagnes, l'intérieur de l'île qui est largement peuplé et plus encore.
Le temps suggéré que l'on accorde à cette randonnée est de 1,5 h à 2h.
Sur place, il y a une boutique, des toilettes, un abreuvoir et un grand parc pour se reposer.
youtu.be/apQim59g-Xg
Dans ce parc, nous avons d'ailleurs pu observer une mangouste avec ses deux bébés. Ils étaient vraiment adorables.
Nous en avons d'ailleurs aperçu souvent lors de notre séjour sur l'île d'Oahu.
Il y a un petit stationnement privé situé à proximité du sentier. Des frais de US 5$ (en espèces seulement) sont exigés si vous garez votre véhicule à cet endroit.
Si vous désirez économiser de l'argent, il est toujours possible de se trouver un stationnement dans le quartier avoisinant.
Mélanie nous attendra dans la voiture le temps que l'on fasse cette randonnée. L'ascension de Diamond Head l'a affaiblie, étant donné qu'elle avait été malade toute la nuit.
A partir du stationnement, il suffit de continuer à pied sur la route principale. Celle-ci conduit à l'entrée du sentier qui est très bien indiquée.
Le sentier qui mène à Moana Falls est d'environ 2,5 km aller-retour. Le sentier ne comportant pas de difficulté majeure, il est très fréquenté.
La randonnée s'effectue dans une forêt tropicale luxuriante. Les filles diront d'ailleurs que c'est le plus bel environnement dans lequel elles ont eu l'opportunité de randonner.
Tout est verdoyant! Même les troncs et les branches de plusieurs arbres sont entièrement recouverts de feuilles. C'est tout simplement grandiose!
Nous avons eu droit à quelques averses dispersées durant notre randonnée, ce qui a rendu le sentier boueux et glissant.
Il faut dire que la vallée de Manoa est la région qui reçoit le plus de précipitations sur l'île d'Oahu.
Il y avait déjà passablement de monde lors de notre arrivée à la cascade. Celle-ci a une hauteur de 46 m et lors de notre passage, l'eau qui s'écoulait de la cascade était abondante.
Karine a eu l'audace de s'élancer sous la cascade. D'autres personnes l'ont suivie par la suite.
Lorsque nous sommes revenus vers le stationnement, les filles ont aperçu une liane et ont décidé de s'y suspendre. Tarzan au féminin...
Comme vous pouvez le constater, il y a des espaces de stationnement gratuits disponibles à chaque lagon. Cependant, à certains endroits, le nombre n'est pas très élevé.
Il est conseillé de s'y rendre en semaine puisque le taux de fréquentation est beaucoup plus bas.
Sinon, il y a la marina qui offre des espaces de stationnement, mais des frais sont exigés.
Nous nous sommes rendus directement au lagon # 4 puisque c'est à cet endroit qu'il y a le plus grand nombre de stationnements disponibles et nous avons pu en trouver un assez rapidement.
Ko Olina est situé sur la côte ouest d'Oahu et comprend quatre plages artificielles en forme de croissant. Une promenade a été érigée et celle-ci relie chacune de ces plages.
Nous avons donc emprunté cette promenade afin de visiter les quatre lagons qui font partie de Ko Olina.
Ces lagons sont composés de plages artificielles. Le sable de ces plages provient de Lanai, une île hawaiienne voisine. Des rochers ont même été placés dans l'océan afin de servir de brise-lames. C'est pourquoi les eaux de ces quatre lagons sont aussi calmes.
Je ne sais pas si la plongée en apnée est satisfaisante à cet endroit. Cependant, plusieurs personnes en faisaient.
Lors de notre passage, le ciel était variable. Lorsque le soleil réapparaissait, le sable semblait s'illuminer et l'océan retrouvait sa belle couleur turquoise.
On y retrouve quatre hôtels de renommée: Four Seasons, Aulani (Disney Resort), Beach Villas et Marriot.
Lors de notre promenade, nous avons pu apercevoir deux belles mangoustes à des endroits différents.
Veuillez prendre note que des douches et des toilettes ont été installées à proximité de chaque lagon.
Le temple Byodo-In est situé dans le parc commémoratif Valley of Temples, au pied des majestueuses montagnes Ko'olau.
Le décor est tout simplement enchanteur. Une allée de palmiers royaux bordent la route et la beauté des montagnes devant nous nous laisse bouche bée. La nature est si belle!
Le site est ouvert de 08h30 à 17h00 et des frais d'entrée de US 5$ par personne sont exigés (espèces seulement).
Nous sommes arrivés à l'ouverture et il y a peu de monde. Le préposé à l'accueil a accepté gentiment de prendre la famille en photo devant ce magnifique temple.
Celui-ci a été créé en 1968 pour commémorer le centenaire des premiers immigrants japonais à Hawaii.
Il est d'ailleurs une réplique (à plus petite échelle) du même temple situé à Uji au Japon, temple de plus de 950 ans qui fait partie du patrimoine mondiale de l'UNESCO.
Il s'agit d'un temple bouddhiste (non pratiquant) qui accueillent les gens de toutes religions. On y vient pour méditer ou tout simplement le visiter. Le site est vraiment paisible.
Devant le temple, se trouve un grand étang dans lequel défilent d'élégants cygnes noirs, une multitude de carpes japonaises et même des tortues.
De magnifiques jardins ainsi que des cascades ont également été aménagés afin d'agrémenter les lieux.
Pour entrer à l'intérieur du temple, il faut enlever ses chaussures.
A l'intérieur du temple, se trouve la sculpture du bouddha Amida de près de 3 m de hauteur. Quelques-uns font brûler de l'encens et font une prière.
Une immense cloche sacrée est située à proximité du temple. Pour faire tinter cette cloche, il suffit de propulser un long rondin de bois sur la cloche.
Il est mentionné que le fait de faire tinter cette cloche vous apporte bonheur, bénédiction ainsi que longue vie.
Un pavillon de méditation est situé sur la petite colline derrière le temple.
J'ai appris que ce temple est apparu dans plusieurs séries télévisées tels qu'Hawaii Five-O, Magnum, P.I. et même Lost.
Le site est tellement photogénique que certaines personnes y célèbrent même leur mariage!
Après cette visite, nous sommes retournés sur le stationnement pour récupérer notre véhicule et nous rendre à Ocean View Terrace qui fait également partie du site.
Nous découvrons à cet endroit de magnifiques jardins et bénéficions d'éblouissantes vues panoramiques de cette région.
Bonjour
Cest avec beaucoup d'attention que je vais suivre ce compte rendu car je vais passer quelques jours dans cette île cet Été.
Le plus difficile sera de choisir les visites...
Mes 25 ans de séjours au japon! http://www.soleilrouge.org/
Okinawa et Miyakojima: https://voyageforum.com/v.f?post=6477376;idl3=9084144203&idl=3731943&idl2=8709057
Sakura: Balade de printemps: https://voyageforum.com/v.f?post=6988760;idl3=9084144203&idl=3731943&idl2=8709057
Effectivement, les attraits touristiques sont nombreux sur l'île d'Oahu, surtout pour les personnes qui aiment la randonnée comme nous!
Même si nous avons eu l'opportunité d'en voir plusieurs, il en reste encore tant à découvrir!
J'espère que la lecture de ce carnet vous aidera dans le choix de vos activités!
J'ai ajouté l'adresse de votre blogue sur le Japon dans mes favoris. Il me sera certainement utile un jour si nous avons l'opportunité de nous rendre au Japon! 🙂
Merci pour l'intérêt porté à mon petit blog estampillé Japon.
Cependant comme je ne suis pas tellement adepte de la randonnée vous n'y trouverez quequelques balades nature.
Nota: je m'étais grandement inspiré de votre CR sur Tenerife pour organiser mes visites de l'île et c'est avec beaucoup d'intérêt que je suivrai ce billet.
J'en profite pour louer la somme de travail que vous consacrez à la préparation et la rédaction de vos compte rendus. Le résultat est exceptionnel.
Mes 25 ans de séjours au japon! http://www.soleilrouge.org/
Okinawa et Miyakojima: https://voyageforum.com/v.f?post=6477376;idl3=9084144203&idl=3731943&idl2=8709057
Sakura: Balade de printemps: https://voyageforum.com/v.f?post=6988760;idl3=9084144203&idl=3731943&idl2=8709057
Votre blogue nous sera très utile j'en suis certaine si nous visitons cette destination un de ces jours.
Nous vieillissons. Alors, souhaitons que la santé soit "éternellement" au rendez-vous !
Merci également pour vos bons commentaires concernant mon carnet sur l'île de Tenerife et par le fait même sur le travail que j'accomplis. C'est vraiment apprécié! 😊
Coordonnées GPS: 21°26'10.0"N 157°49'36.4"W (stationnement du centre d'achat)
Coordonnées GPS: 21°26'02.8"N 157°49'28.7"W (début du sentier)
Le sentier est situé tout près du Byodo-in Temple que nous avons d'ailleurs visité en premier lieu.
Il est possible de garer son véhicule dans le stationnement du centre d'achat situé à proximité du sentier.
Pour accéder au sentier, il faut revenir sur la route principale et tourner à gauche sur Kahekili Hwy.
Il suffit de longer le parapet qui borde la route. Le début du sentier est à gauche, peu avant la fin du parapet.
Le sentier a une longueur d'environ 2,4 km aller-retour et est en majorité ombragé. Il est plutôt facile.
Cependant, il y a quelques montées abruptes et des cordes ont été installées afin de nous aider. Elles ne sont pas toujours nécessaires, mais peuvent s'avérer vraiment utiles, surtout lorsque le sol est humide.
Il faut dire que cette région reçoit passablement beaucoup de pluie. Donc, le sentier peut devenir très glissant.
Nous avons pu le constater à certains endroits lors de notre randonnée. Dans certains secteurs, le sol était asséché tandis qu'à d'autres endroits, le sol était imbibé d'eau et nous tentions d'éviter les mares de boue qui s'étaient formées.
Les filles ont été quelques fois incommodées par les insectes. En ce qui me concerne, les insectes ne m'ont pas approchée. Bizarre, puisque d'habitude, ils se gavent de mon sang. Ils ont opté pour de la "viande" plus fraîche! 😉 J'en ai bénéficié!
Il est possible d'observer quelques points de vue lors de la randonnée: les montagnes Ko'olau ainsi qu'une vue partielle de l'océan.
Les filles et mon conjoint se sont suspendues à une liane située à proximité du sentier. Heureusement que cette liane était très solide car ils auraient pu se retrouver au fond du ravin.
C'est fini pour moi ces folies-là. Je préfère les regarder! J'ai tellement ramené de cicatrices lors de mes précédents voyages que j'essaie, je dis bien j'essaie de ne pas faire d'excès.
A certains endroits, la vigilance est de mise car le sol est parsemé de racines et les branches des arbres se sont entremêlés au-dessus du sentier.
Le sentier mène à un ancien poste de garde en béton que l'on appelle "pillbox". La vue de cet endroit est tout simplement phénoménale.
La baie de Kaneohe est vraiment splendide!
A gauche, on peut apercevoir une toute petite île appelée Chinaman's Hat. Sa forme ressemble à un chapeau!
L'océan est parsemé de bancs de sable qui créent un paysage haut en couleur.
Nous nous sommes assis confortablement à l'extrémité du pillbox et avons pris le temps d'admirer la baie sous toutes ses formes.
Nous sommes ensuite repartis par le même chemin. Cependant, nous avons pris un petit raccourci à la fin du sentier. Ce ne fut pas une bonne idée. Mélanie et Karine ont glissé et tombé dans la boue. Heureusement, l'incident était mineur.
A noter: J'avais lu que l'on pouvait rencontrer un essaim d'abeilles vers le sommet. Heureusement, elles n'étaient pas au rendez-vous lors de notre passage.
Salut,
J'embarque avec un peu de retard, une chance que ton CR a été placé dans les suggestions de lecture, je l'ai tout de suite repéré avec la formulation du titre qui est ta ''signature'' 😉
Je vais avec plaisir ''voyager dans mon fauteuil'' en te lisant 😛
"Homme libre, toujours tu chériras la mer" (Baudelaire)
Je suis bien contente de retrouver mon carnet dans les suggestions de lecture. Je remercie VF à cet effet.
Comme tu peux le constater, j'ai mis de côté la finalisation du carnet des Iles-de-la-Madeleine afin de me consacrer à celui d'Oahu, étant donné que c'est tout frais dans ma tête. Je continuerai lorsque j'aurai terminé celui-ci.
Bon visionnement et surtout bonne fin de semaine! 🙂
Cette plage possède plusieurs commodités: espaces de stationnement, salles de bain, douches de plage ainsi que des tables de pique-nique qui sont situées dans le parc.
Elle arrive au second rang des plus belles plages d'Oahu. Lanikai Beach, sa voisine, est au premier rang.
Il y a tellement de superbes plages sur l'île que j'aurais bien de la difficulté à les classer. Elles ont chacune certaines particularités qui font leur charme.
Kailua Beach est une longue plage de sable blanc et la couleur de l'océan est d'un bleu turquoise qui varie au gré du soleil et/ou des nuages.
Lorsque nous y sommes allés, les nuages recouvraient le ciel en grande partie, ce qui ne rendait pas totalement justice à sa beauté.
Lors de nos déplacements, j'ai pu apercevoir cette plage lorsqu'elle était complètement ensoleillée. Elle est vraiment d'une exceptionnelle beauté.
Ses eaux sont calmes et propices à la baignade. Il y a de petites vagues dans lesquelles les enfants s'amusent à chevaucher leurs planches de bodyboard.
Le cours d'eau Ka'elepulu se déverse dans l'océan. Ses eaux proviennent de l'étang du même nom. Il est possible de louer des embarcations pour naviguer dans ce canal. C'est un excellent moyen pour les débutants de se familiariser avec l'eau.
Ceux qui sont expérimentés peuvent plutôt pratiquer ces activités dans l'océan.
On peut observer quelques poissons ainsi que de petits crabes dans le cours d'eau Ka'elepulu. Un de ces crabes semblait plutôt arrogant et il s'approchait sans cesse près de moi. Je pense qu'il convoitait mes orteils.
Merci de nous partager ce merveilleux voyage à Hawaï! C'est mon entroit préféré sur Terre. J'y suis allée 2 fois (3 fois si on compte mon premier voyage à 1 an 🙂) et on a fait un long séjour de 3 mois en 2007. Inutile de dire que ce fut extraordinaire.
Ça me réjouit de voir ce carnet surtout que vous êtes avec vos filles âgées de ?? (nous en avons une de 10 ans).
Un jour, nous y retournerons c'est sûr.
Aloha!
"Aloha!Guide sur Hawaii.
Nouveau! Visitez notre blogue "Vivre au Mexique". Aventures et conseils sur la région de Riviera Maya
Aucun stationnement n'a été aménagé pour cette plage. Il faut donc se stationner dans les rues avoisinantes en respectant bien sûr les panneaux où il est clairement indiqué "No Parking". Sinon, vous risquez d'obtenir une contravention car le secteur est patrouillé.
L'accès à la plage se fait par différentes allées aménagées entre les résidences. Fait à noter: il n'y a aucune salle de bain, ni douche à cet endroit.
Comme je le mentionnais précédemment, Lanikai Beach est considérée comme étant la plus belle plage de l'île d'Oahu et même une des plus belles plages au monde.
Certes, elle est très belle, fait office de carte postale et vaut certainement le détour.
Cependant, comme les nuages jouaient du coude avec le soleil, possiblement que les couleurs de l'océan que j'ai pu observer sur certaines photos n'étaient tout simplement pas au rendez-vous lors de notre passage sur cette plage.
youtu.be/poNak16CIOo
Rien ne laissait présager au départ que la plongée en apnée était exceptionnelle à cet endroit. C'est notre fille Karine qui est venue nous aviser de la présence de nombreux coraux dans l'eau.
Il faut dire qu'à cet endroit, la clarté et la température de l'eau offrent d'excellentes conditions pour cette activité.
J'ai donc enfilé mon "kit de survie", pas moyen de passer incognito avec la couleur fluo de mon gilet de sauvetage, et je suis partie explorer les fonds marins.
Petite parenthèse: Je ne me départis plus de ce gilet depuis plusieurs années. En fait, ça remonte à notre voyage à Huatulco au Mexique. Je ne portais pas de gilet de sauvetage à cette époque. Je m'étais passablement éloignée du littoral et des méduses microscopiques s'étaient amusé à me "torturer". J'avais pris panique et j'avais péniblement réussi à nager jusqu'à la rive. J'étais exténuée!
Les coraux se présentent sous différentes formes et couleurs et j'ai pu observer plusieurs espèces de poissons tropicaux.
Je crois même avoir aperçu une murène, ou un serpent de mer (je ne sais trop), se tenant immobile près d'un rocher au fond de l'océan (voir 5:22 ).
Hiking Makiki Valley Loop Trail (Secret Waterfall) - Honolulu - Oahu - Hawaii
Coordonnées GPS: 21°18'50.1"N 157°49'45.0"W
Cette fois-ci, je vous invite à venir découvrir la vallée de Makiki et sa cascade secrète puisque nous avons effectué une randonnée dans cette magnifique forêt tropicale.
Cette cascade est difficile à localiser et rien ne laisse présager qu'un sentier y mène. J'ai visionné plusieurs vidéos avant d'être en mesure de savoir approximativement où elle se trouvait.
Donc, après avoir garé notre véhicule dans le stationnement, nous avons d'abord pris la Makiki Arboretum Trail qui débute justement à cet endroit.
Ce sentier est relativement court et mène au point de départ du sentier que nous allons parcourir aujourd'hui, soit la Kanealole Trail.
A cet endroit, il y a des salles de bain et des abreuvoirs, mais aucun centre d'accueil.
Après avoir traversé le pont piétonnier, il faut tourner à gauche pour poursuivre notre randonnée.
La nature est verdoyante et les feuilles, les arbustes ainsi que les arbres sont immenses. Je regarde les filles déambuler devant moi et elles semblent tellement petites dans cet univers hors nome.
Nous devons enjamber à plusieurs endroits de grosses racines d'arbres qui recouvrent le sentier.
Nous arrivons enfin à une intersection. Nous allons tourner à gauche pour poursuivre notre randonnée sur la Kanealole Trail.
Nous aurions pu tourner à droite pour prendre d'abord la Maunalaha Trail, mais nous prendrons plutôt ce sentier à notre retour pour ainsi faire une boucle.
Nous traverserons un autre petit pont et découvrons un muret de pierres recouvert d'un tapis végétal verdoyant.
Nous pénétrons maintenant dans un environnement totalement différent de celui dans lequel nous venions de randonner.
Nous ne voyons presque plus les arbres. Ceux-ci sont recouverts d'une végétation dense et luxuriante.
Nous poursuivons notre route sur le sentier qui est maintenant bordé de hautes herbes et nous pénétrons dans un sombre tunnel végétal. Cet endroit est tout simplement phénoménal.
Nous traversons ensuite une forêt de bambou et demeurons à l'affût d'une cascade qui nous indiquerait le début du sentier qui mène à notre cascade secrète.
Nous avons entendu le bruit d'une cascade se déversant dans la rivière. Nous avons donc quitté le sentier principal et avons pris le petit sentier qui mène à cette première cascade.
Celle-ci est plutôt photogénique et nous avons pris quelques photos à cet endroit.
Et oui, il faut traverser à gué cette rivière peu profonde à cet endroit pour poursuivre notre chemin vers la cascade secrète.
Le sentier est bien tracé par la suite, mais la végétation est très dense. Cependant, le trajet est court. On arrive donc rapidement à la cascade secrète.
Celle-ci se déverse sur quelques paliers. Elle est haute, mais très étroite. Son débit est important, étant donné l'étroitesse du parcours qu'elle emprunte pour se déverser dans la rivière.
Nous avons mis à "rude épreuve" notre courage en en nous assoyant, chacun notre tour, directement sous la cascade. L'eau était très froide. Les fous rires ont jailli, je vous l'assure!
Je me suis assise sous la cascade, mais vous ne le verrez pas dans cette vidéo. Je fais tellement de grimaces, que j'ai préféré gardé le tout secret!
Après la baignade, nous sommes retournés sur le sentier principal et avons poursuivi notre chemin en direction de la Makiki Trail.
Les arbres sont de retour parmi nous ainsi que leurs grosses racines qui entravent totalement le sentier à plusieurs endroits.
Le décor est aussi enchanteur. Il est prudent de s'arrêter lorsque l'on désire admirer les éléments de la nature. Avec toutes les obstructions que l'on rencontre sur notre chemin, il est primordial de garder les yeux sur le sentier lorsque l'on se déplace.
Le sentier est en pente ascendante et demande un peu plus d'efforts. Lorsque nous sommes arrivés à l'intersection de la Makiki Valley Trail, nous avons tourné à droite sur ce sentier afin d'aller rejoindre la Maunalaha Trail qui nous conduira à notre point de départ.
La Maunalaha Trail est également recouverte d'immenses racines qui n'attendent qu'un petit moment d'inattention de notre part pour nous projeter vers elles.
Cependant, se sentier traverse une forêt que je qualifierais d'enchanteresse tellement elle est jolie.
D'innombrables arbres à la hauteur phénoménale composent cette forêt. L'écorce des arbres semble former des tresses.
Chemin allant, nous avons pu observer une belle chenille vert fluo qui effectuait elle aussi une randonnée sur ce sentier.
Tantalus Lookout & Round Top Dr Lookout - Honolulu - Oahu - Hawaii
Coordonnées GPS: 21°18'48.4"N 157°49'22.3"W
Nous avons fait un circuit en voiture qui comprend Tantalus Dr ainsi que Round Top Dr dans les hauteurs d'Honolulu.
J'ai pris quelques vidéos de ces routes qui comprend des virages très serrés et qui sont bordées d'une végétation très dense. Cependant, la qualité laisse à désirer car j'avais oublié le pare-soleil de mon appareil photo à la maison. J'ai donc préféré m'abstenir de vous les présenter.
Nous avons fait un arrêt au Tantalus Lookout qui est en fait un belvédère situé dans le parc Pu'u'Ualaka.
Celui-ci offre une superbe vue panoramique d'Honolulu ainsi que du cratère Diamond Head.
Il est facilement accessible car le stationnement est situé à proximité.
Il semblerait que l'endroit est idéal pour observer le coucher de soleil. Nous n'avons cependant pas tenté l'expérience.
Nous avons ensuite fait un arrêt à un belvédère situé sur la route Round Top Dr qui offre également une superbe vue panoramique de ce secteur.
Ce parc est situé entre le centre-ville d'Honolulu et Waikiki. On y retrouve un grand stationnement (gratuit), des salles de bain, des douches, des tables de pique-nique, des abreuvoirs.
Il y a également de petits restaurants à proximité. Nous avons d'ailleurs mangé au resto L&L Hawaiian BBQ situé derrière la plage Ala Moana. Les prix sont très raisonnables et les portions sont très généreuses.
Une promenade a été érigée en bordure du littoral et longe les deux plages qui sont situées dans ce parc, i.e. Ala Moana Beach ainsi qu'Aina Beach, cette dernière étant connue également sous le nom de Magic Island.
Il y a d'ailleurs de belles opportunités de photos à faire le long de cette promenade.
Aina Beach (Magic Island)
Aina Beach est une toute petite plage protégée par des murets de pierres qui empêchent les vagues de déferler dans ce lagon artificiel.
Ses eaux turquoises sont véritablement calmes. Elle est donc idéale pour les familles avec de jeunes enfants.
Elle est bordée par de jolis cocotiers longiformes et c'est l'endroit idéal pour admirer le "skyline" d'Honolulu ainsi que le cratère Diamond Head.
youtu.be/dIKQ8VROWuI
On peut également y observer les surfeurs qui défient les vagues devant les plages de Waikiki.
youtu.be/eyqXkWynkQo
Ala Moana Beach
Cette plage de sable blanc mesure près d'un kilomètre de long et ses eaux sont calmes, étant donné la présence d'un récif. Des sauveteurs surveillent cette plage.
Cependant, la prudence est de mise car la profondeur de l'eau augmente très rapidement dès que l'on s'éloigne du rivage.
Son taux de fréquentation est beaucoup moins élevé que les plages du secteur de Waikiki, un facteur très important pour ceux qui désirent avoir un peu plus de tranquillité.
Comme toutes les plages situées sur la côte Ouest de l'île d'Oahu, c'est l'endroit idéal pour observer le coucher du soleil.
youtu.be/gFg3KWYbgwc
Feu d'artifice
Le soir venu, nous sommes retournés du côté d'Aina Beach. Nous nous sommes assis en bordure de la promenade qui longe le stationnement et avons assisté au feu d'artifice présenté chaque vendredi à 19h45 sur la plage de Waikiki par l'hôtel Hilton Hawaiian Village.
Ce feu d'artifice dure environ 4 minutes. Comme tout bon feu d'artifice, il démarre lentement et déploie par la suite tout un arsenal d'explosifs dont certaines formes sont plutôt originales.
Cette attraction est très prisée. Les gens arrivent très tôt à cet endroit et s'installent confortablement.
Plusieurs familles s'y regroupent autour d'un barbecue. C'est la fête à plusieurs endroits sur le site.
C'est dans ce quartier que j'ai réservé mon hébergement cet été...
Merci pour la découverte en avant première!
Mes 25 ans de séjours au japon! http://www.soleilrouge.org/
Okinawa et Miyakojima: https://voyageforum.com/v.f?post=6477376;idl3=9084144203&idl=3731943&idl2=8709057
Sakura: Balade de printemps: https://voyageforum.com/v.f?post=6988760;idl3=9084144203&idl=3731943&idl2=8709057
Hanauma Bay Ridge Hike & HIDDEN Rock Bridge - Honolulu - Oahu - Hawaii
Coordonnées GPS: 21°16'30.4"N 157°41'36.6"W
Ce sentier, d'une longueur approximative de 6 km aller-retour, débute sur un étroit chemin pavé qui est situé entre la route Kalanianaole Hwy et Hanauma Bay Rd.
Il mène au sommet d'une montagne qui offre de superbes vues panoramiques de la baie d'Hanauma et la plupart des randonneurs effectuent le parcours en boucle.
Cependant, peu de gens savent que s'ils poursuivent leur chemin vers le littoral, ils y découvriront une caverne ainsi qu'un pont naturel (arche) qui surplombe l'océan.
Ce sentier n'est pas officiellement ouvert aux randonneurs. C'est pourquoi il y a des panneaux qui indiquent que ce n'est pas ouvert au public. Néanmoins, ce sentier est très fréquenté.
Nous sommes arrivés vers 09h00 à Hanauma Bay et il y avait des places disponibles sur le stationnement. Nous avons donc garé notre véhicule à cet endroit pour la modique somme de US 1$.
Nous avons remonté à pied Hanauma Bay Rd pour accéder au chemin pavé qui mène au sentier de randonnée.
Il y avait deux gardiens qui contrôlaient la circulation près de cet endroit et un de ceux-ci est venu nous aviser que si nous désirions effectuer cette randonnée, c'était à nos propres risques et que nous devions aller nous stationner à un autre endroit.
J'avais effectué quelques recherches auparavant et il était mentionné que les gardiens ne portaient généralement aucun commentaire lorsqu'ils voyaient les gens se diriger vers le sentier.
Celui-ci était très insistant et je n'avais vraiment pas l'intention de le contrarier.
Nous sommes donc revenus sur nos pas et avons hésité à savoir si nous allions récupérer notre véhicule ou bien prendre un petit sentier perpendiculaire à Hanauma Bay Rd qui nous mènerait à un niveau supérieur sur le chemin pavé.
Je respecte habituellement les consignes, mais cette fois-ci, d'un commun accord, nous avons décidé de poursuivre notre randonnée.
Nous avons donc passé à travers les arbustes et en peu de temps, nous avons atteint le chemin pavé. J'étais plutôt inquiète car j'avais peur de rencontrer ce gardien, mais heureusement, cela ne s'est pas produit.
De plus, nous avons croisé plusieurs personnes qui terminaient leur randonnée à cet endroit.
Si jamais vous désirez faire cette randonnée, je vous conseille plutôt de vous stationner sur la rue Nawiliwili qui est située dans un quartier résidentiel à environ 700 mètres d'Hanauma Bay Road. Retournez ensuite sur Kalanianaole Hwy et prenez un petit sentier à votre droite qui vous mènera également au chemin pavé.
La montée peut être éreintante pour certaines personnes car le chemin pavé a une forte pente ascendante à l'aller.
En peu de temps, nous accédons déjà à de magnifiques points de vue de la baie d'Hanauma, connue pour sa plongée en apnée dans des eaux cristallines.
Et si nous nous retournons, nous bénéficions également d'un panorama éblouissant. Nous apercevons la Koko Crater Railway Trail dans lequel nous avons prévu effectuer une randonnée ainsi que plusieurs autres superbes baies.
Juste avant d'atteindre le flanc de la montagne, vous verrez à votre gauche un sentier de terre qui mène à travers les champs. C'est le sentier qu'il faut prendre pour se rendre au pont naturel.
Nous nous arrêtons fréquemment pour admirer le paysage.
Le sentier que l'on doit suivre est très bien tracé. Il nous mène au bas de cette colline et conduit ensuite au sommet d'une autre.
Ce sentier peut s'avérer très glissant car il y a du sable et plusieurs petites roches lousses sur le sol. De bonnes chaussures sont à privilégier afin d'éviter tout risque de chute.
Nous nous retournons parfois pour regarder tout le chemin parcouru et nous nous apercevons que nous aurons bien quelques efforts à effectuer lorsque nous retournerons sur nos pas.
Au sommet de la seconde colline, nous nous rendons compte qu'il y a encore bien du chemin à parcourir. Nous sommes encore dans les hauteurs et nous devons descendre au niveau de la mer.
Nous descendons donc l'autre versant de cette colline et traversons une zone herbeuse. Nous remontons encore une petite pente et apercevons enfin le littoral.
Le pont naturel (arche) est situé à l'extrémité droite d'une plate-forme de roche noire qui s'avance dans l'océan.
Il suffit de localiser cette plate-forme et se diriger vers ce point de repère.
Pour cela, il faut alors déambuler dans un secteur hautement touché par l'érosion qui s'avère d'une beauté naturelle sans pareil.
Le pont naturel n'est visible que lorsque nous sommes rendus au niveau de la mer. N'oubliez pas, il est à droite de la plate-forme.
Je n'encourage personne à monter sur ce pont. Quelques-uns d'entre nous s'y sont rendus, mais je dois vous aviser que c'est très dangereux. De plus, les vagues étaient très puissantes lors de notre passage.
Par la suite, nous nous sommes rendus à l'extrémité gauche de la plate-forme pour observer les vagues de l'océan pénétrer dans une profonde caverne.
Pour le retour, nous avons repris sensiblement le même sentier et avons encore effectué de fréquents arrêts pour admirer le paysage.
Les couleurs de l'océan varient sans cesse. Et lors de notre retour, le soleil était évidemment beaucoup plus haut dans le ciel , illuminant ainsi la baie d'Hanauma.
Lors de notre passage, c'était très venteux. Nous n'avons pas souffert de la chaleur. Cependant, je sais qu'il peut faire très chaud dans cette région et il n'y a pas d'ombre.
Alors, il est important d'apporter beaucoup d'eau ainsi qu'un chapeau et de la crème solaire.
Halona Blowhole Lookout - Honolulu - Oahu - Hawaii
Coordonnées GPS: 21°16'56.4"N 157°40'37.5"W
Halona Blowhole Lookout est en fait un belvédère duquel nous pouvons observer un souffleur (geyser maritime).
C'est qu'à cet endroit, il y a une grotte sous-marine qui se termine par une ouverture par laquelle l'eau est propulsée à l'extérieur lorsque l'air présent dans cette cavité est mise sous pression.
C'est dans cette région que les vagues de l'océan sont les plus dangereuses. En hiver, lorsque la marée est haute, le souffleur peut propulser l'eau qui y pénètre jusqu'à une hauteur de 9 m.
Comme nous avons passé quelquefois dans ce secteur, nous nous y sommes arrêtés à trois reprises. La troisième tentative a été la meilleure puisque les vagues étaient beaucoup plus fortes.
La patience est de mise car le souffleur prend parfois son temps avant de propulser l'eau de ses entrailles. Je suis patiente!!!
Il a craché son eau à plusieurs reprises à des hauteurs différentes. Parfois à la hauteur du sol, libérant quelques embruns, parfois à quelques mètres dans les airs où il est alors possible de saisir toute l'énergie qui s'y dégage.
Le belvédère est situé entre deux superbes plages, soit Sandy Beach (une des plages les plus dangereuses sur l'île d'Oahu) ainsi que Halona Beach Cove. Il offre d'ailleurs une superbe vue sur ces deux plages. Vous pourrez le constater dans les deux prochaines vidéos.
Halona Beach Cove est une toute petite plage située à droite du Halona Blowhole Lookout, un belvédère qui permet d'observer un souffleur situé en bordure du littoral sur la côte sud-est de l'île d'Oahu.
Elle est entourée de hautes falaises et ses eaux sont de couleur aquamarine, contrastant ainsi fortement avec la couleur de l'océan qui est d'un bleu profond.
Il y a plusieurs espaces de stationnement. L'accès à cette plage se trouve à droite du stationnement. Il n'y a aucun sauveteur, ni aucun service.
Elle est située au pied des falaises et aucun escalier n'a été aménagé. Il suffit de descendre sur les rochers pour y accéder. Portez des chaussures car la surface des rochers peut s'avérer glissante.
La baignade est cependant hasardeuse à cet endroit surtout lorsqu'il y a de forts vents. L'océan est très agité et les vagues viennent fréquemment se fracasser violemment sur les rochers.
Et il ne faut surtout pas trop s'éloigner du rivage car les courants sont très dangereux à l'extérieur de la crique.
Il y a une longue grotte dont l'entrée est derrière la plage. Celle-ci passe sous la route et mène à une sortie dans la colline. Elle a été formée il y a de cela des millions d'années par des coulées de lave. Nous ne l'avons cependant pas visitée.
Cette plage a servi de lieu de tournage dans quelques films dont "From Here to Eternity" (1953) et, plus récemment, dans "Pirates of the Caribbean 4", "50 First Dates" ainsi que dans "Journey to the Center of the Earth II".
Sandy Beach est une très belle plage située également sur la côte sud-est d'Oahu. Elle se trouve à proximité du belvédère du souffleur (Halona Blowhole Lookout). D'ailleurs, nous avons une excellente vue de cette plage à partir de ce belvédère.
On y retrouve plusieurs espaces de stationnement, des salles de bain, des douches ainsi qu'un grand parc dans lequel ont été placées quelques tables de pique-nique.
Nous y sommes allés à quelques reprises sur l'heure du dîner car quelques Food Trucks sont installés à cet endroit. Ils sont d'ailleurs très populaires. La nourriture offerte est excellente, les portions sont généreuses et les prix sont abordables.
Cette plage est très populaire auprès des surfeurs ainsi que des bodyboardeurs. Nous en avons donc profité pour les regarder s'élancer dans les vagues.
Il faut que je vous dise que cette plage est considérée comme étant l'une des plages les plus dangereuses d'Hawaii. On l'appelle d'ailleurs Broke Neck Beach, i.e. la plage des cous cassés.
Plusieurs personnes sont devenues paralysées après avoir été frappées par les vagues ou se sont tout simplement noyées.
Lorsque nous sommes arrivés sur la plage, nos trois filles désiraient évidemment aller s'amuser dans les vagues.
Vous comprendrez pourquoi j'ai répondu par un "non" catégorique à leur demande. Il n'en était pas question.
L'ambulance s'est d'ailleurs pointée à quelques reprises à cet endroit.
Des panneaux sont érigés sur la plage afin d'avertir les gens des dangers existants (rivage dangereux, forts courants, présence de coraux acérés, etc.).
Les vagues sont vraiment imprévisibles. L'océan semble parfois plus calme et les vagues se font plus petites. Et puis, sans avertir, de gros rouleaux se forment et viennent s'abattre sur le rivage.
youtu.be/RERMfVdg9ms
Les vagues sont beaucoup plus imposantes dans la seconde vidéo.
J'adore! 🙂
Je pense que je vais bien m'éclater sur cette plage! (au sens figuré, j'espère 🏴☠️ )
Si je survis, je mange double portion. (manière différente de s'éclater... le bide! 😛 )
Ton compte rendu est toujours aussi cool et détaillé, merci!
Mes 25 ans de séjours au japon! http://www.soleilrouge.org/
Okinawa et Miyakojima: https://voyageforum.com/v.f?post=6477376;idl3=9084144203&idl=3731943&idl2=8709057
Sakura: Balade de printemps: https://voyageforum.com/v.f?post=6988760;idl3=9084144203&idl=3731943&idl2=8709057
L'entrée de ce sentier est située à proximité du belvédère du souffleur (Halona Blowhole Lookout).
Des espaces de stationnement sont disponibles à cet endroit. Cependant, lors de mes recherches, j'avais lu certains commentaires qui mentionnaient que l'on pouvait recevoir une contravention si l'on stationnait notre véhicule à cet endroit.
Nous avions alors prévu nous stationner à Sandy Beach Park puisque nous allions dîner à cet endroit.
Cependant, nous sommes allés vérifier s'il était possible de nous stationner près de l'entrée du sentier. Nous avons pu effectivement garer notre véhicule en bordure de la route, du côté océan, près de la statue Japanese Fishing Shrine.
Le sentier se trouve de l'autre côté de la route que l'on doit traverser avec prudence car les véhicules se déplacent assez rapidement dans ce secteur.
Pour accéder au sentier, il suffit de grimper sur les rochers juxtaposés au parapet et de monter sur le dessus de cette falaise.
Le sentier est plus ou moins bien défini. Cependant, en sachant que l'arche se trouve au centre de la crête, il suffit d'avancer dans cette direction.
Plus vous avancerez, plus celle-ci deviendra visible.
La longueur du sentier est d'environ 2 km aller-retour et la randonnée est facile tout le long du parcours, sauf lorsque l'on doit escalader la montagne du côté droit de l'arche.
La pente est très abrupte et le sol très glissant. Aucun risque à prendre puisqu'une chute peut être mortelle car le sentier est délimité par un profond ravin.
L'arche est immense et nous profitons d'un moment de répit pour nous asseoir en-dessous d'elle afin d'admirer le magnifique panorama.
Le sentier offre d'ailleurs de magnifiques vues panoramiques de Sandy Beach ainsi que du littoral, notamment sur les baies d'Halona et d'Hanauma.
Certains randonneurs osent s'aventurer sur le dessus de l'arche. Cependant, nous n'avons pas tenté l'expérience.
Au retour, on emprunte le même chemin. Lorsqu'il a fallu longer l'arche, je suis redescendue sur les fesses, à ras le sol, pour éviter de chuter dans le ravin. Le sol est très glissant à cet endroit. A éviter d'ailleurs pour ceux qui pourraient avoir le vertige.
Il n'y a pas d'ombre sur ce parcours. Alors, même si le trajet est court, apportez de l'eau et munissez-vous d'un chapeau et de crème solaire.
Hiking Ka'ena Point Trail - Waianae - Oahu - Hawaii
Coordonnées GPS: 21°33'22.5"N 158°14'54.9"W
Ce sentier, d'une longueur d'environ 8 km aller-retour, mène à la réserve naturelle de Ka'ena Point située à l'extrémité ouest de l'île d'Oahu.
Cette réserve est protégée et abrite des plantes indigènes, des oiseaux de mer ainsi que des phoques moines.
Il est même possible d'y apercevoir des baleines durant les mois d'hiver.
Il y a deux possibilités de randonnée et elles mènent toutes les deux à la réserve naturelle: soit partir de Waianae, soit partir de Mokuleia.
Comme nos sommes logés à Waianae, c'est de cet endroit que nous débuterons notre randonnée.
Le sentier débute à la fin de la route 93 (Farrington Hwy).
Il ne faut pas garer son véhicule près du sentier, mais plutôt en bordure de la route ou dans la zone herbeuse qui borde la plage.
La randonnée s'effectue sur une route qui n'est accessible que par les véhicules à quatre roues motrices. Nous en avons rencontré quelques-uns lors de notre promenade.
La route longe le littoral et elle est bordée à sa droite par d'immenses falaises. La randonnée est facile car il n'y a aucune élévation majeure.
Le paysage est sans contredit phénoménal. Nous nous retournons à maintes reprises pour admirer les falaises verdoyantes qui surplombent les superbes plages de sable blanc de la côte ouest.
Les phénomènes d'érosion sont nombreux sur le parcours. Nous avons pu voir entre autres deux arches sur lesquelles les filles ont décidé de grimper.
La première est beaucoup plus petite et plus étroite, ce qui rendait l'accès moins sécuritaire.
La seconde, située sensiblement à mi-chemin du parcours, était beaucoup plus imposante. Cependant, elle comportait de nombreuses fissures.
Nous poursuivons notre route vers la réserve. Nous apercevons enfin la clôture qui délimite son périmètre et qui protège ainsi la faune en empêchant l'accès aux prédateurs.
Peu après avoir franchi la porte de cette clôture, nous avons tout de suite pu observer plusieurs albatros, dont un couple ainsi que leur bébé qui paraissait beaucoup plus gros que ses parents, étant donné l'épais plumage qu'il arborait.
Nous avons emprunté ensuite le sentier sablonneux qui mène au phare de Ka'ena Point et nous nous sommes approchés du rivage afin de vérifier si des phoques moines hawaiiens s'y trouvaient.
J'en ai finalement aperçu un qui se prélassait sur une petite plage. Comme il était totalement immobile, je croyais que c'était plutôt un rocher. Cependant, l'inscription N1 sur son corps a attiré mon attention. Je me suis approchée et j'ai eu le bonheur de découvrir que c'était bien un phoque moine.
J'ai donc interpellé Alain et les filles pour qu'ils puissent venir l'observer. Une petite session de photos a été effectuée. Claudia s'est approchée trop près du phoque et celui-ci a émis un grognement pour l'aviser qu'elle devait reculer.
Nous avons ensuite repris le même chemin pour le retour, en effectuant cependant une randonnée supplémentaire vers les pillboxes (bunkers) situés dans la falaise. Celle-ci vous sera présentée dans une autre vidéo.
Hiking Ka'ena Pillbox Trail - Waianae - Oahu - Hawaii
Coordonnées GPS: 21°33'22.5"N 158°14'54.9"W (début du sentier de Kea'ena Point à Waianae)
Il faut d'abord parcourir environ 4 km pour accéder au début du sentier qui mène au bunker situé au haut de la montagne à Ka'ena Point (voir la section précédente).
Une fois que vous êtes rendu à la clôture qui délimite la réserve naturelle, n'entrez pas à l'intérieur de la réserve. Longez plutôt la clôture vers la droite.
Soyez attentif. Après avoir parcouru une certaine distance le long de la clôture, vous verrez un sentier, à votre droite, qui mène vers la montagne.
Prenez ce sentier, il vous mènera rapidement à une première plate-forme. Le panorama est déjà splendide à cet endroit.
Nous aurions pu nous arrêter là et serions revenus très satisfaits des points de vue observés à cet endroit.
Cependant, pour respecter la devise "Toujours plus haut", nous avons donc poursuivi notre chemin vers la seconde plate-forme puisqu'elle est facilement accessible, étant située à une courte distance de la première plate-forme.
Les filles s'installent à cet endroit pour prendre quelques photos. Alain et moi poursuivons la montée vers le bunker situé au sommet de la montagne.
Là, ça se corse. La montée est beaucoup plus raide et demande plus d'efforts de notre part.
Nous arrivons enfin au bunker et en profitons pour reprendre notre souffle. Évidemment, à cette hauteur, la vue est tout simplement phénoménale.
Nous avons une vue complète de la réserve naturelle ainsi que du littoral.
En faisant demi-tour, il est possible d'admirer en même temps la côte nord ainsi que la côte ouest de l'île d'Oahu.
Karine et Mélanie sont venues nous rejoindre tandis que Claudia a décidé de nous attendre à la seconde plate-forme.
Vous pouvez avoir un excellent aperçu de la hauteur à laquelle se situe le bunker en regardant la descente qu'effectuent Karine et Mélanie à la fin de cette vidéo.
Electric Beach (Kahe Point Beach Park) - Kapolei - Oahu - Hawaii
Coordonnées GPS: 21°21'11.1"N 158°07'48.8"W
Kahe Point Beach Park, connue également sous le nom d'Electric Beach, est une charmante petite plage située sur la côte ouest d'Oahu. On y retrouve des espaces de stationnement, salles de bain, douches et abreuvoir.
Il y a peu d'ombre sur la plage. Cependant, il y a quelques arbres dans le parc sous lesquels vous pouvez vous abriter.
Nous y sommes allés à trois reprises. Parfois, l'océan était calme, aucune vague n'était présente.
Cependant, à d'autres occasions, les vagues étaient assez imposantes, suffisamment pour faire du bodyboard.
youtu.be/oeMGFC4wjjc
Electric Beach est un lieu très populaire pour la plongée (en surface ou sous-marine). En fait, cette plage porte ce nom étant donné la présence d'une centrale électrique située à proximité.
La centrale électrique évacue ses eaux chaudes propres au large des côtes et l'eau chaude attire une multitude de poissons.
Le départ se fait directement à partir de la plage. Déjà, les poissons sont au rendez-vous. Cependant, il faut sortir hors du canal puisque la visibilité devient de plus en plus excellente en s'éloignant du rivage.
Sachez cependant que vous nagerez dans des profondeurs de plus de 10 m.
Une abondance de coraux tapissent l'océan et une grande diversité de poissons tropicaux peuplent les fonds marins.
A chaque sortie en mer, nous avons pu nager avec une tortue. C'est le paradis marin et c'est gratuit en plus!
Nous passerions des heures à flotter dans cet océan pour observer les créatures marines évoluer dans ce magnifique environnement.
Snorkeling at Hanauma Bay - Honolulu - Oahu - Hawaii
Coordonnées GPS: 21°16'26.6"N 157°41'38.0"W
Stationnement: US 1 $
Admission: US 7,50 $
Cette baie est un des endroits touristiques les plus fréquentés de l'île d'Oahu. Le site accueille en moyenne 3000 visiteurs par jour. Ceux-ci viennent y pour découvrir une faune marine exceptionnelle.
La baie d'Hanauma se trouve au fond d'un cratère volcanique. Elle abrite plus de 300 espèces différentes de poissons qui vivent dans des récifs coralliens peu profonds.
Comme le nombre de visiteurs est limité à 3000 visiteurs par jour et que le taux de fréquentation est très élevé, je vous suggère d'arriver très tôt, non seulement pour obtenir un espace de stationnement, mais également dû au fait que l'eau devient brouillée avec toutes ces personnes qui se déplacent dans l'eau.
Le site est ouvert à tous les jours dès 06h00 le matin, sauf le mardi, à Noël ainsi qu'au jour de l'an.
Nous avions l'intention d'arriver très tôt à cet endroit. Cependant, ce ne fut pas le cas. Nous sommes arrivés vers 09h00 et le stationnement était déjà complet.
Nous sommes donc allés nous stationner dans une rue d'un quartier résidentiel située un peu plus loin et nous nous sommes rendus à pied à la baie d'Hanauma.
Avant d'accéder à la plage, chaque visiteur est intégré à un groupe et celui-ci doit visionner une courte vidéo sur le comportement à avoir en présence des poissons et des coraux.
Entre autres, il est formellement interdit de nourrir les poissons et de grimper sur les coraux. Nous constatons malheureusement que certains n'ont vraiment rien compris!
Il y a une bonne pente à descendre pour se rendre à la plage. Plusieurs prennent la navette pour s'y rendre au coût de US 1 $ par trajet.
C'est vraiment incroyable de découvrir la diversité et la multitude de poissons tropicaux que l'on retrouve dans cette baie.
Dans toutes mes expériences de plongée en apnée, c'est la première fois que j'en vois autant. Des poissons de toutes les formes, de toutes les grosseurs, de toutes les couleurs, tous plus beaux les uns que les autres.
Seul bémol, comme nous sommes arrivés sur le tard et qu'il y avait déjà beaucoup de personnes dans l'eau, on retrouvait une bonne concentration de sable en suspension dans l'eau à plusieurs endroits.
Malgré cela, nous avons adoré notre expérience de plongée en apnée dans la baie d'Hanauma.
Si vous pensez passer la journée à cet endroit, je vous conseille de vous apporter un lunch car le prix de la nourriture que l'on peut se procurer au restaurant est très élevé.
Hiking Pink Pillbox Trail (Aka Pu'u O Hulu Trail) - Waianae - Oahu - Hawaii
Coordonnées GPS: 21°24'13.6"N 158°10'28.5"W
Cette randonnée commence au 10e lampadaire situé sur le côté droit de Kaukama Rd. Il est facile de localiser ce poteau car le numéro 10 est inscrit sur celui-ci.
Ce sentier mène au sommet de la montagne sur lequel des pillboxes (bunkers) ont été érigés.
Le sentier n'est pas très long, environ 3 km aller-retour. Cependant, il est situé à Waianae sur la côte ouest de l'île d'Oahu. Il s'agit de la région la plus chaude de l'île.
Nous y sommes arrivés en fin d'après-midi et il faisait encore très chaud.
Le sentier est très bien tracé. Cependant, la montée est assez abrupte et exige quelques efforts.
Il offre de superbes vues panoramiques sur le littoral et ses nombreuses plages, les secteurs de Maili et Nanakuli ainsi que sur les abruptes montagnes verdoyantes.
A mi-chemin du trajet, nous avons découvert un arbre dont les nombreuses racines s'étalent le long de la falaise. Vraiment spécial!
C'est également l'endroit pour vous reposer, si nécessaire, car on y retrouve un peu d'ombre.
Nous avons poursuivi notre montée jusqu'au premier pillox. Les murs intérieurs du pillbox sont ornés de multiples graffitis multicolores.
Nous prenons une petite pause à cet endroit pour admirer le panorama qui est vraiment sensationnel.
Par la suite, nous avons parcouru l'étroit sentier qui mène vers le second bunker surnommé le Pink Pillbox qui est situé encore plus haut que le premier.
Ce bunker a été peint en rose en 2015 et arbore le dessin d'un ruban rose, symbole représentatif de la fondation du cancer du sein.
Il offre une vue à 360 degrés de cette magnifique région.
Nous n'étions pas les seuls à avoir grimpé au sommet de la montagne. Plusieurs personnes s'y trouvaient déjà lors de notre arrivée.
Karine et Mélanie se sont rendues au troisième bunker. J'ai préféré m'abstenir car le terrain était très accidenté. Il fallait entre autres traverser un escarpement rocheux et il y avait un profond ravin de chaque côté du sentier.
Je suis donc restée, en compagnie d'Alain et Claudia, au Pink Pillbox dont la localisation offre une vue à 360 degrés non seulement de cette magnifique région, mais également d'une vue plus étendue de la côte ouest, comprenant entre autres les lagons de Ko Olina.
C'est l'endroit idéal pour y observer le coucher du soleil. En ce qui nous concerne, avec toutes les activités que nous avions faites dans la journée, la fatigue se faisait ressentir et nous avons préféré redescendre en utilisant le même sentier.
Note: Ne laissez aucun objet de valeur à la vue dans votre véhicule lorsque vous vous stationnez dans ce secteur car il a été rapporté qu'il y a un haut taux de bris de vitre. Nous avons d'ailleurs constaté de nombreux éclats de verre sur le sol lorsque nous y sommes allés.
Hiking Ehukai Pillboxes Trail - Haleiwa - Oahu - Hawaii
Coordonnées GPS: 21°39'52.2"N 158°02'58.2"W
Vous trouverez plusieurs espaces de stationnement et des toilettes au parc Sunset Beach situé juste à côté de l'école primaire.
Le sentier, d'une longueur de 2,5 km aller-retour, débute à proximité de ce stationnement. Vous verrez une panneau orange à l'orée de la forêt sur lequel est indiqué entre autres Mahalo! C'est à cet endroit que débute le sentier.
Le sentier est situé dans une forêt et il est ombragé la majorité du temps.
L'ascension vers les bunkers (pillboxes) est tout de même assez laborieuse car la pente est raide et le sentier est envahi par les racines des arbres, les souches et les roches.
A certains endroits, des escaliers ont été creusés à même le sol et des cordes ont été installées pour nous aider à maintenir notre équilibre en cas de besoin.
Heureusement que le sol est sec car par temps de pluie, il devient certainement très glissant.
Environ à mi-chemin, une petite éclaircie dans la forêt nous permet d'avoir une vue partielle du littoral.
Le temps d'une petite pause pour admirer le panorama, nous repartons ensuite vers le premier bunker. Celui-ci offre également une vue partielle de la côte Nord de l'île d'Oahu.
Karine et Mélanie profitent du moment présent pour faire une petite danse endiablée! La folie des hauteurs!
Nous savons qu'il y a un second bunker à environ 5 à 10 minutes de marche. Nous poursuivons donc notre route vers celui-ci.
Le chemin n'est pas très bien identifié, mais comme le bunker est situé en bordure du littoral, nous continuons notre chemin. Nous finirons bien par trouver le second bunker.
Nous arrivons sur le dessus d'une petite colline et nous hésitons à poursuivre notre chemin. Finalement, nous amorçons la descente et apercevons le second bunker.
Celui-ci offre une superbe vue panoramique de la plage Ehukai appelée également Pipeline Banzai, l'un des endroits de surf les plus renommés mondialement.
Nous avons repris ensuite le même sentier et avons fait un petit arrêt près d'un curieux abri confectionné dans la forêt. Peut-être servait-il à un sans abri! Qui sait!
Lorsque nous avons atteint la petite éclaircie dans la forêt, l'océan revêtait de belles couleurs turquoises.
La descente est plutôt rocambolesque avec toutes ces racines qui entravent le sentier. Il faut être très prudent dans nos déplacements.
Notre randonnée a duré environ 90 minutes, comprenant toutes les pauses que nous avons prises.
Fantastic Snorkeling at Shark's Cove - Pupukea - Oahu - Hawaii
Coordonnées GPS: 21°39'03.9"N 158°03'42.2"W
Shark's Cove est un site de plongée situé sur la côte nord de l'île.
Un seul mot pour résumer notre expérience de plongée en apnée à cet endroit: FANTASTIQUE!
Encore mieux qu'à Hanauma Bay qui a pourtant la réputation d'être l'endroit le plus approprié pour ce type d'activité.
L'eau est cristalline et il y a une grande diversité de poissons tropicaux. Nous avons d'ailleurs pu observer de gros bancs de poissons. C'était vraiment impressionnant!
Il y a deux secteurs où il est possible d'observer la vie marine.
Le premier secteur est composé de petite bassins d'eau entourés de rochers dans lesquelles il est possible d'observer les poissons tout simplement en marchant dans l'eau puisque celle-ci est peu profonde à cet endroit.
Le second secteur est une crique beaucoup plus profonde et c'est à cet endroit que nous avons fait de la plongée en apnée.
L'entrée dans l'eau est un peu rocambolesque car il y beaucoup de rochers et, s'il y a des vagues, elles peuvent nous projeter sur ceux-ci. Alors, on se dépêche de s'éloigner du rivage.
Dès que j'ai mis ma tête dans l'eau, j'ai toute de suite été émerveillée par l'arrivée d'un immense banc de poissons flottant à la surface de l'eau. C'était tout simplement magique.
youtu.be/0UkPdQRbzz0
A quelques mètres plus loin, un gigantesque banc de poissons a attiré notre attention. De magnifiques poissons rayés ainsi que plusieurs autres espèces de poissons multicolores, tels que les poissons-chirurgiens, tentaient de se nourrir sur un corail.
youtu.be/j31vgt6cXzc
Peu importe la direction que l'on prend, les bancs de poissons sont omniprésents et il est très facile de les approcher.
Nous avons aperçu entre autres un énorme poisson qui semblait être le garde du corps d'un plus petit. Le plus petit suivait le plus gros dans tous ses déplacements.
L'abondance ainsi que la diversité de la vie marine font de ce site une expérience de plongée exceptionnelle.
youtu.be/vL5bowPQkUo
Nous avons pu apercevoir un poisson-coffre tacheté, un Humuhumunukunukuāpuaʻa qui est le poisson emblématique d'Hawaii ainsi que plusieurs autres dont je ne connais pas le nom.
youtu.be/BtTW-H2rVOM
Pour ceux qui ne sont pas tentés par la plongée en apnée, il y a une petite plage juste à côté du site et on y retrouve également des salles de bain.
Il y a également plusieurs food trucks installés à proximité de ce site. On peut y aller à pied. Ils sont situés de l'autre côté de la route. Ils sont très fréquentés. Donc, l'attente peut être parfois assez longue. La nourriture y est excellente!
Laniakea Beach est également connue sous le nom de Turtle Beach en raison de la présence de tortues de mer qui viennent se nourrir des algues qui poussent sur les rochers le long de cette plage. Elle est située sur la côte nord de l'île d'Oahu.
J'avais lu certains commentaires qui mentionnaient qu'il était préférable de s'y rendre en début d'après-midi et c'est ce que nous avons fait.
Mon conjoint était plutôt sceptique à l'idée que l'on verrait des tortues directement sur la plage, mais moi j'étais confiante.
Le stationnement est situé à proximité de la plage, mais de l'autre côté de la route. Même s'il semble y avoir un petit espace pour stationner votre véhicule tout près de la plage, évitez de le faire car vous pourriez avoir une contravention.
Lorsque nous sommes arrivés à la plage, les tortues étaient déjà sur place. Une d'entre elles se prélassait sur la plage.
Lorsque cela se produit, un gardien place un cordon autour du périmètre de la tortue afin que les gens ne s'en approchent pas trop. Heureusement, elles sont protégées.
Nous avons ensuite aperçu quelques tortues dans l'océan, dont une qui était vraiment énorme. Cette dernière se trouvait sur le bord du rivage, se laissant porter par le va-et-vient des vagues, et était parfois poussée sur la plage.
youtu.be/jCfy8xMUko0
Nous avons donc enfilé masque, tuba et palmes et avons profité de l'occasion pour aller nager à proximité des tortues.
Cette plage est située sur la côte nord d'Oahu. Durant l'hiver, elle attire les meilleurs surfeurs du monde entier. Idem pour les plages d'Ehukai (Banzai Pipeline), Haleiwa et Sunset Beach.
Cependant, durant l'été, les vagues perdent leur amplitude et il est possible de s'y baigner.
On retrouve à cet endroit un grand stationnement, des toilettes et des douches ainsi qu'une aire de pique-nique.
Comme cette plage est très populaire, les espaces de stationnement se font rare. Il a fallu faire le tour quelques fois avant qu'un espace se libère.
Il est également possible de stationner son véhicule le long de la route principale.
La plage de sable doré n'est pas très longue, mais elle est très large et elle est surveillée.
A son extrémité droite, la rivière Waimea vient rejoindre l'océan.
Cet endroit attire beaucoup les jeunes adultes car il y a un immense rocher qui part du rivage et qui s'avance dans l'océan. Ceux-ci grimpent au sommet du rocher (environ 10 m de hauteur) et s'élancent dans l'eau. Karine et Claudia ont justement tenté l'expérience.
Cependant, cette activité comporte des risques et plusieurs ont déjà subi des blessures, par le passé, en effectuant leur saut.
Nous sommes allés à cet endroit à deux reprises. La première fois, l'océan était très calme. La seconde fois, il y avait de grosses vagues qui venaient se fracasser fortement près du rivage.
Les filles se sont amusées dans l'eau. Karine avait apporté un flotteur sur lequel elle se laissait "bercer" par les vagues. Je dois vous avouer qu'elle s'est fait malmenée à quelques reprises.
C'est également l'endroit idéal pour admirer le coucher du soleil. Cependant, nous n'y avons pas assisté puisque nous préférions revenir à notre condo avant que la noirceur arrive.
Surfeurs à la plage Ehukai (Banzai Pipeline) - Haleiwa - Oahu - Hawaii
Coordonnées GPS: 21°39'54.1"N 158°03'02.6"W
Ehukai Beach est une belle longue plage située sur la côte nord d'Oahu. Elle est également connue sous le nom de Banzai Pipeline.
Elle est reconnue mondialement pour ses énormes vagues qui attirent chaque année les meilleurs surfeurs au monde. Durant les mois d'hiver, les vagues peuvent atteindre une hauteur de plus de 9 mètres.
Durant l'été, il semblerait que l'océan est beaucoup plus calme et qu'il est possible de s'y baigner.
En ce qui me concerne, je ne m'y serais pas aventuré lorsque nous y sommes allés. Les vagues étaient bien présentes et venaient se fracasser durement près du rivage.
Plusieurs surfeurs que je qualifierais d'aventureux défiaient les immenses vagues qui les projetaient d'ailleurs fréquemment hors de leur planche.
C'est tout un spectacle de voir ces surfeurs qui osent rivaliser d'adresse pour glisser sur ces vagues tumultueuses.
J'aimerais bien revenir sur l'île d'Oahu en hiver, m'asseoir sur cette plage et regarder évoluer les meilleurs surfeurs au monde!
Hiking Lanikai Pillbox Trail - Kailua - Oahu - Hawaii
Coordonnées GPS: 21°23'24.1"N 157°43'08.2"W (265 Kaelepulu Dr, Kailua)
Stationnement sur la rue Alapapa Dr: 21°23'27.7"N 157°43'03.6"W (Parc Lanikai)
Ce sentier d'environ 1,6 km aller-retour, est également connu sous le nom de Ka'iwa Ridge Trail. Il n'y a pas d'ombre sur le sentier.
Il mène à deux bunkers (pillboxes) situés au sommet de la montagne. Leur localisation offre un panorama exceptionnel sur toute la région.
A proximité du sentier, il n'y a que quelques espaces de stationnement en bordure de la route. Il est donc préférable de stationner son véhicule sur la rue Alapapa.
Il y a un panneau qui indique le début du sentier. La randonnée n'est pas vraiment difficile, mais la montée est constante.
Le sol peut devenir très glissant s'il a plu précédemment. Par ailleurs, même lorsque le sol est sec, il faut être prudent car il y a de petites roches lousses ou du sable sur le sentier qui peuvent provoquer une chute.
Le sentier offre de superbes vues panoramiques sur la baie de Kailua, notamment des plages Lanikai et Kailua, ainsi que sur la plage Waimanalo et les montagnes Ko'olau.
Nous apercevons également au loin deux îles. Ce sont les îles Mokulua. Plusieurs s'y rendent en kayak.
Une superbe randonnée à ne pas manquer si vous visitez la côte nord-est de l'île d'Oahu.
Randonnée sur le sentier Judd (Jackass Ginger Pound) - Honolulu - Oahu- Hawaii
Coordonnées GPS: 21°20'49.2"N 157°49'14.9"W
Nous devons garer notre véhicule sur le bord de la route car il n'y a aucun stationnement disponible à cet endroit.
La longueur du sentier (en boucle) est d'environ 1,6 km aller-retour et le niveau est facile. Il mène à une jolie cascade.
Pour accéder au sentier, il faut cependant traverser à gué une rivière. Alain et les filles ont sauté de roche en roche pour atteindre l'autre rive.
En ce qui me concerne, j'ai contourné les roches et traversé la rivière les deux pieds dans l'eau car j'avais peur de perdre l'équilibre et tomber.
Avec l'équipement photographique, pas de chance à prendre.
De l'autre côté de la rivière, nous arrivons à une fourche. Il y a des panneaux qui indiquent que vous pouvez tourner à gauche ou à droite.
Peu importe la direction que vous prendrez, comme le sentier est en boucle, vous reviendrez au même endroit.
Par contre, si vous désirez vous rendre en premier lieu à la cascade, le chemin le plus court pour s'y rendre est celui de droite. C'est cette direction que nous avons prise.
C'est un endroit où il pleut fréquemment. Alors, le sentier, recouvert de racines et de branches d'arbres, était boueux à plusieurs endroits, ce qui rendait le sol plutôt glissant.
Le sentier longe la rivière et offre de beaux panoramas.
Nous atteignons enfin la cascade. Un des rochers sert de glissade et les filles en profitent pour s'élancer dans l'eau.
Après avoir profité de cette baignade, nous avons monté un petit promontoire et avons retrouvé le sentier. Nous avons tourné à droite pour poursuivre notre randonnée.
La forêt est majestueuse. La hauteur des arbres est vraiment impressionnante.
En cours de route, un panneau nous indique qu'il y a possibilité de bifurquer vers le sentier Nuuanu. Cependant, nous continuons sur le sentier Judd car nous voulons revenir à notre point de départ.
Le sentier serpente ensuite dans une belle forêt de bambous et nous ramène à la rivière que nous devrons traverser à nouveau.
Nu'uanu Pali Drive (Scenic Route)- Honolulu - Oahu - Hawaii
Coordonnées GPS: 21°20'52.7"N 157°49'09.9"W
Lorsque nous nous sommes rendus au sentier Judd pour faire notre randonnée vers la cascade (voir section précédente), nous avons passé par une route très pittoresque qui s'appelle Nu'uanu Pali Drive plutôt que de prendre l'autoroute Pali.
Elle serpente dans une forêt tropicale et la végétation est luxuriante. Il y a même des tunnels végétaux qui se sont formés au-dessus de la route.
INTRODUCTION Des vidéos sont insérées tout au long du résumé. Veuillez cliquer sur l'image pour démarrer la vidéo. En septembre dernier, nous avons séjourné 15…
Allez je me lance dans ce carnet Hawaïen! J’espère que vous serez nombreux à me suivre car la destination ne manque pas de charme. Je préviens par avance que…
Que faire de mieux par un dimanche d’automne où il ne fait pas bon mettre le nez dehors (pluie, vent, grêle sont de la partie)? Et pourquoi ne pas commencer un…
J'ai passé un mois à Hawaii à parcourir 4 îles, oahu, Maui, Big Island et Kauai, je vous propose le récit de mes aventures dans ce bel état américain ainsi que…
Hi everyone, I’m Patrick, 67 years old, a seasoned traveler (already 22 trips outside Europe).
In autumn 2025, I took my first 3-week trip to Japan, with stops in Tokyo, Kamakura, Matsumoto, Kamikochi, Takayama, Kanazawa, Kyoto, Nara, Osaka, Koyasan, Tokyo again, and Nikko.
I wanted to go back in May 2026 and explore some lesser-known places to complement my first trip.
Last year, there were four of us traveling together to discover Japan (a fairly classic itinerary). This time, I’ll be traveling solo for part of the trip and with a couple of French friends for the rest.
The weather was gorgeous in May, averaging around 25°C, with two very hot days in Kyoto and only two rainy days.
As usual, I organized everything myself, gathering plenty of information from various sites, including this one.
Transportation:
An ICOCA card is essential.
I got a 5-day Kansai-Hiroshima pass because I took the shinkansen between Hiroshima and Osaka three times, and it paid for itself quickly.
Accommodations:
Mostly through Booking. No issues at all. Average cost was 46 € per night.
Meals:
For breakfast, I alternated between buying food at a konbini to eat in my room or on the train and grabbing something at local cafés.
For lunch and dinner, I tried to vary my meals as much as possible—lots of sashimi, sushi, and ramen.
Okonomiyaki in Osaka and Hiroshima.
Oysters in every form (raw, grilled, fried) in Onomichi and Hiroshima.
A variety of seafood (shrimp, shellfish) in Hiroshima and Matsumoto.
Fish whose names often escaped me, but notably mackerel and eel (unagi).
Tempura and gyoza.
Chicken skewers (yakitori) and one teppanyaki meal.
One omakase meal (9 different dishes).
In the end, not much meat aside from a few yakitori skewers. No splurges on super expensive wagyu or Kobe beef.
Average dinner cost: 4,800 yen, drinks included.
The Itinerary:
Day 1: Departure from Brussels
Day 2: Arrival in Osaka
Day 3: To Himeji, then Kurashiki
Day 4: To Fukuyama, then Tomo no Ura, then Onomichi
Day 5: Cycling the Shimanami Kaido
Day 6: To Takahara, then Hiroshima
Day 7: To Kyoto to attend the Aoi Matsuri parade
Day 8: To Miyajima
Day 9: Hiroshima, then Kyoto
Day 10: Southern Kyoto
Day 11: Northern Kyoto
Day 12: Final day in Kyoto, then to Nagatsugawa
Day 13: Start of the Nakasendo Trail (Magome to Tsumago)
Day 14: Second day of the trail (Kiso Fukushima)
Day 15: Third day of the trail (Narai), then Matsumoto
Day 16: To Mt. Fuji (Kawaguchiko)
Day 17: To Tokyo
Day 18: Excursion to Enoshima and Kamakura
Day 19: Flight home, with a 10-hour layover in Hong Kong
Day 20: Arrival in Brussels
My buddy Christian and I (Patrick) are off for 28 days in Argentina in March.
We’ve already shared several trips as a duo (Bolivia Peru, Namibia, Laos, Costa Rica).
Since we’re starting from the idea that at our age (65) we won’t be coming back here—there are just too many other corners of the world to discover—we did the "grand tour" of Argentina, with 6 domestic flights to make the most of our 28 days.
Here are our stops:
1) Departure from Brussels to Buenos Aires via Madrid
2) Arrival and first contact with Buenos Aires
3) Early morning flight to Ushuaia. Boat trip on the Beagle Channel
4) Ushuaia: hikes in Tierra del Fuego National Park
5) Ushuaia: last hike and flight to El Calafate
6) El Calafate to El Chaltén by bus. First hike
7) El Chaltén: hike
8) El Chaltén: hike
9) El Chaltén: hike and bus back to El Calafate
10) El Calafate: Perito Moreno Glacier
11) Flight to Bariloche. Car rental and surrounding areas
12) Seven Lakes Region
13) Nahuel Huapi National Park region
14) Flight to Salta. Car rental
15) To Tilcara
16) To Humahuaca
17) To Purmamarca
18) To Jujuy via the salt flats
19) To Cafayate
20) Around Cafayate
21) To Cachi
22) Back to Salta
23) Flight to Iguazu
24) Waterfalls on the Argentine side
25) Waterfalls on the Brazilian side and flight to Buenos Aires
26) Buenos Aires
27) Return flight
28) Morning arrival
Happy reading!..
If I close my eyes and think of the Sultanate of Oman, I first smell a light scent of incense, feel the warmth of a sunbeam on my skin, before sand slips through my fingers. I taste the sweetness of a date, a real candy, then the flavor of coffee with a hint of cardamom and rosewater... I hear the desert wind whistling in my ears, the distant call of a muezzin, then the murmur of water. I open my eyes to see smiles, welcoming gestures, a turquoise sea, rocks ranging from ochre to purple, deep wadis where torrents burst forth, orange dunes, white sandy beaches where tiny crabs scurry at full speed. I see incredible oases emerging between arid mountains. I see abandoned villages that I’d dream were full of life, imposing fortresses overlooking valleys, and lively souks where offers are delicate and negotiation is a mutual courtesy.
All that, and so much more.
This is what I tried to capture in my illustrated travel journal, which I’ll fill in here and there with photos.
I drew this journal “cold,” after my return (actually, I made it this summer, while our trip was last winter). It’s a pretty special format—I bought it in Japan without really knowing what I’d do with it. Well, it found its purpose! Below is a photo of this accordion-style journal: here, it’s only partially open, because when fully unfolded, it’s 5 meters long!
For drawing enthusiasts: The accordion format is both a constraint (each sheet is 9 cm x 27 cm) and a freedom (you can create a fresco). The paper is also a bit special: it doesn’t allow for fine lines, but it takes ink well (liner pen). However, everything has to be done almost in one go (with a very light pencil sketch) because it erases poorly. It absorbs too much water for coloring with markers or watercolors (unless you avoid soaking it), but it works well with oil pastels and their use with a brush and solvent. Since it’s yellowish, it allowed me to create contrasts even with white pastel.
On the right, the "welcome marker"—those dates offered everywhere as a sign of hospitality. On the left, a tribute to those stunning doors worn by time, admired all over the old quarters, including the abandoned ones.
Oman is one of the world’s largest producers of frankincense resin. Incense burners are everywhere, from the simplest clay ones to the most precious handcrafted silver ones...
Hospitality will often lead you to accept a small coffee, an "Omani coffee," very light, subtly flavored with cardamom, maybe a touch of saffron, and occasionally rosewater.
Here, I’ve depicted a man in the common everyday attire of Omanis: the dishdasha, mostly white (during the week and daytime; colors are more common in the evening or on Fridays and Saturdays). While you’ll see some men dressed in Western clothes, they’re very few. The white dishdasha is truly the shared attire of all men. The dishdasha, which has no hood, is distinguished by a small pom-pom attached to the collar, the furakha, which is soaked in perfume. And believe me, Omanis go overboard with it! "It smells like the pom-pom" is an expression that’s now part of our shared language, my husband and I.
Another must of men’s attire is the kuma, a small round head covering, usually white with brightly colored patterns. The keffiyeh is also worn (but without the cord called an agal in Arab countries), and it’s mostly worn by those with roots in the desert, from what I understood.
And what about the women, you might ask? Some are veiled, some in full black (but not a burka—more like a chador + abaya), due to the influence of Saudi Arabia and the United Arab Emirates, whereas the traditional outfit used to be a layering of very colorful dresses. Most of the women we saw wore neutral clothing, a plain veil over their hair, but with their faces uncovered. We also saw many saris and colorful veils—don’t forget that 40% of the population consists of Indian, Nepalese, and Bangladeshi immigrants, who work a lot in tourism, hospitality, restaurants, services, and construction.
Just to clarify, as a tourist, there’s no pressure to wear a veil, and never any disapproving looks. Of course, you’ll save the mini shorts, plunging necklines, bare shoulders, and midriffs for the hotel terrace—but I’d say that’s the same for men and women, and with the sun being strong, it’s better for your skin too.
Here’s the introduction! In the next post, I’ll tell you about my itinerary, and we can dive in!
Hi everyone, we're back from a DIY USA road trip we organized from July 31, 2026, to August 26, 2026.
The destination: The Southwest USA, including Texas, Arizona, and New Mexico. Roughly 7,000 kilometers covered.
The car: A Chevrolet Equinox for two, rented through BSP Auto and Avis. Inside, we had 2 suitcases, a travel bag, two carry-on bags, a Walmart cooler, photo gear, and water bottles (a 40-pack).
The route: Dallas DFW, Fort Worth, Houston, Austin, San Antonio, Alpine, El Paso, Tucson, Sedona, Albuquerque, Amarillo, and back to Dallas to finish with a departure from DFW.
The travelers: Two seniors well advanced in years (73 and 75) but still active (nothing too physically demanding—to stay alive and fund our trips), fully independent physically, though a bit less so mentally. Big USA fans, a country where anything is possible. More walkers than hikers, preferring 3-star hotels over roadside motels, Italian restaurants over US food, frequent stops for photos, museums over nothing, naps over forced marches. Not too whiny, just enough to stay French in the land of the "great Satan," as they say.
Not great with languages—street English (but handy), and my Spanish is non-existent except for: "Hola! Una cerveza por favor!" That’s about it. My wife understands everything but refuses to speak.
The cost of the road trip: Around 12,000 €, including AF flights, the car, gas, gifts, visits, and everything else. Well managed, since we’d budgeted 13,500 € initially.
The positive side: A delight, with those endless open roads. Museums to discover. The realization of the Hispanic presence and its important history in this part of America. Lovely locals. Tourists who were more or less friendly. A terrible Texan accent that was hard to understand. Gas stations that were like real stores, with prepared food, alcohol sold in Arizona and New Mexico, and employees who were always up for a laugh!
The negative side: The heat throughout the trip... 43°C in Dallas at the end. Impossible to walk the streets. Lots of homeless people in downtown Dallas. Hotel breakfasts that were always the same. You get used to it.
So, it was positive overall, but the concept is starting to wear us out. We might rethink the DIY road trip model for next time. If the man upstairs grants us more time.
Next up, we’ll wait for the first batch of sorted photos to go through the wringer.
We landed in Victoria Falls, Zimbabwe, and headed straight to Kasane in Botswana to pick up our car.
Our vehicle is a 4x4 because in Zambia, it's practically impossible to use anything else, especially in the national parks. I’ve already had the pleasure of visiting South Luangwa National Park—it’s one of the reasons for this trip, the main one being to travel in Africa with one of my sons.
First stop: Livingstone on the banks of the Zambezi River. Along the way, we discovered a lovely restaurant at Socrates with a super-friendly owner (we’ll actually stop there again on our way back). We spent our first night in the rooftop tent after a stunning sunset, accompanied by the grunting of hippos in the river.
The next day, we set off early, heading to Kafue NP. In fact, we’ll always leave early—waking up between 5:00 and 5:30 AM and hitting the road an hour later. Kafue is a lesser-known park, mostly forested, and the animals are skittish because they’re not used to human presence. We crossed the park from south to north and came across various antelopes. Near Lake Itezhi-Tezhi, there are plains where wildlife is easier to spot.
After Kafue, we headed to South Luangwa. This journey requires stops in Mumbwa and Petauke. Two pleasant stops where we found lodges (a nice change from the rooftop tent) at affordable prices and met welcoming people.
For me, South Luangwa is Zambia’s most beautiful park—the river is stunning, the landscapes are gorgeous, and there’s a wide variety of wildlife, including, of course, big cats. A tip for those, like us, who aren’t with a guide: if you’re staying near the park for several days, don’t hesitate to do a "game drive" to scout out where the animals are so you can return the next day with your own vehicle. Of course, in the dry season, you’ll want to focus on waterholes to see the animals—and you’ll need a bit of luck too. The elephant population is growing, and we were lucky enough to see around sixty elephants crossing the Luangwa at dawn, spread across several groups. South Luangwa is the westernmost point of our trip, and we’re now heading east to Lower Zambezi.
Lower Zambezi is Zambia’s side of Mana Pools on the Zimbabwe side. We took a boat ride on the Zambezi to see elephants, hippos, crocodiles, and a multitude of birds living along the water and on the river’s islands. The sunset there is also magnificent.
To explore the park, we followed the waterways parallel to the Zambezi, mostly on the western side (see our route). Lower Zambezi is the last park we visit, and the final leg of our trip will be Victoria Falls.
Victoria Falls—or Mosi-Oa-Tunya ("The Smoke That Thunders")—are truly impressive, even during the dry season. We saw the falls from both countries: in Zambia for the overall view and the bridge that serves as the border, and in Zimbabwe to get as close as possible to the most spectacular parts of the falls.
This marks the end of our trip, which, despite a blown tire on the road, went off without any major issues. Zambia is a beautiful country that immerses you in wild, still-preserved nature.
"So, my little wanderers, back at the decks? What’s this mystery destination you’ve got in store for us at the start of the year?"
Yes, the schoolyard bell’s ringing again! We’re hitting the road... or rather, the skies! At first glance, our destination might surprise more than a few. First off, simply because I was here exactly twenty years ago, and I don’t usually like retracing my own footsteps. Secondly, because the name of this place screams mass tourism—basically the opposite of what Flo and I look for.
Despite that, in this land of backsheesh, I’d promised myself I’d come back one day to experience it my way. And since Flo told me, during our wanderer chats, that this destination straddling Africa and the Middle East was in her top 2 travel dreams, the stars aligned for this roots-style trip to quickly make it onto our pharaonic festivities program! Unless you’re totally clueless in general knowledge, you’ve probably guessed by now—we’re off to Egypt! Of course, a few classics will be on our itinerary, but above all, we want to soak up a culture that can’t be appreciated in four-star resorts or on a Nile cruise boat. And let’s be clear, these next two weeks won’t be a walk in the park—neither for our two daughters who are joining us, nor for our bodies!
And that’s clear from the get-go: after our first flight, eight hours of trying (and failing) to sleep on Milan airport’s metal seats, our second flight, landing, passport stamps, our Uber ride, and our first Cairo kilometers, we finally drop our exhaustion at the little guesthouse we booked in Giza. Doesn’t all that energy deserve a little reward?
Oh, absolutely! And here it is: a full-on slap in the face for everyone! But just look at this view from our hotel terrace? For 20 € a night for four, even with this incredible view, I figured the room must be pretty shabby, right? Nope... Is the staff rude, then? Nope... Okay, so what’s the catch? You’re gonna tell me breakfast is included too? Well, yes! Honestly, this Egypt trip is off to a great start.
And the rest of the afternoon, spent rubbing shoulders with locals, only confirmed this vibe. After digesting our pyramid view, we dove into the hustle and bustle of our neighborhood with the goal of exchanging money, eating at street stalls, and testing the hospitality of the locals. Ten out of ten!
Eight little sun breads with baba ganoush and falafel? 80 pounds, or 1.5 €. A dozen Middle Eastern pastries? Same! 80 pounds! Two hawawshis, those little pita breads stuffed with meat and spices? 10 pounds each, or about twenty cents! Not to mention all those smiles and free "welcomes" left and right!!!
What a welcome! We end this first day with a sunset over the three sisters of Giza—where we’ll obviously be gawking tomorrow...
The latest travel journal about Turkmenistan dates back to 2019. Here’s a quick update on this vast desert country, which is now a bit easier to visit than before.
This is my first travel journal. If you have any questions, don’t hesitate to ask. The country is slowly opening up, but it’s still possible to visit sites where you’ll be completely alone. In five days, I saw two Hongkongers, a few Germans, and a Chilean at the crater, ten Chinese people in a capital bazaar, and that’s it!
It’s possible to visit Turkmenistan from Uzbekistan. The easiest and most economical way is to take a taxi to the border from Bukhara. The trip takes a little over an hour.
Crossing the border takes quite a while because many Turkmen bring back items bought in Uzbekistan to resell in Turkmenistan. For example, diapers, baby products, or beauty products.
It took me over 2.5 hours to cross the border. To visit Turkmenistan, it’s mandatory to have a guide and go through a travel agency. British agencies often offer three-, five-, or seven-day trips for over 1,500 or 2,000 €.
But if your budget is more limited, you can contact a few Turkmen agencies directly by email, and they’ll make you an offer between 700 and 1,300 € for three to seven days. I took a five-day trip from Turkmenabat in the northeast of the country to Dashoguz in the north. The goal was to visit the main UNESCO-listed sites, including Merv, and archaeological sites like Nisa or Gonur Tepe.
Your guide will also be your driver. They’ll pick you up at the border. The formalities are very long because customs officers have to stamp multiple documents, and obtaining the visa you previously requested from your travel agency requires several checks. But the process goes relatively smoothly, even if each step takes a while.
Once on the other side, the first surprise is the brand-new highway all the way to Turkmenabat. A very long line of trucks stretches for several kilometers on the Turkmen side to cross the border into Uzbekistan. According to my guide, Turkmen trucks transport gas and cotton (though not this season, since the harvest is in September), but they mainly fill up their tanks because fuel is much cheaper in Turkmenistan. A full tank for a car costs about 3 €, which is unbeatable.
From the Farap border post, the goal is to reach the city of Mary, which is home to the UNESCO-listed site of Merv in its suburbs, about thirty kilometers away. This city is known as a foundation by Alexander the Great in the 4th century BC under the name Alexandria of Margiana. Several fortresses are visible.
After more than three hours on the road, we have lunch at a Turkish restaurant called Aladdin. Several quotes from the president are visible along the highway, but the road is in good condition, and we move along easily. This will be by far the best road in the country—things will get much worse later.
Roundabouts are particularly interesting because they feature emblems of Turkmen culture, like the dog, a carpet, the Ahal Teke horse, or Muslim symbols, even though the presence of Islamic artifacts is quite limited.
I’m sharing a little recap of this new 4-week trip to China—nothing fancy, just my experience.
We’re taking advantage of the extended visa exemption to return to China for the 4th time. I loved last summer’s trip so much that I’m a bit worried about being disappointed this year. Plus, I’ve had a few hiccups before this departure: my WeChat account got blocked, and I couldn’t recover it (luckily, Alipay still works fine); I couldn’t verify my 12306 account for weeks; Trip.com failed to book our second train; and I’ve got an injury that’ll slow me down during the trip... Ugh, I hate starting a trip with these kinds of issues. Then, oh surprise! Just before leaving, my 12306 account got verified! Super easy to use from that point on—I could book a few train tickets without fees.
We’re sticking with Free’s e-SIMs, which work great in China.
August 2–3
Anyway, on the morning of August 2nd, we took the RER to CDG. As usual, we couldn’t check in online. It’s always a bit frustrating, especially since we didn’t have any checked luggage. We flew with Air China. We arrived at the check-in counter at 9:50 AM, 2 hours and 40 minutes before the flight. The line for our check-in stretched 300 meters across the airport in both directions. What a joke!! We spent 1 hour and 45 minutes in that line just to reach the counter and get our boarding passes. By then, it was 11:35 AM, and boarding had already started at 11:20 AM. The screens showed a 25-minute walk to our gate—on the other side of the airport, of course—plus we had to go through passport control and security... Long story short, the plane didn’t leave without us 🙂 We boarded among the last passengers, and we took off at 12:30 PM. We’d flown Air China four times before, but this time, it felt *really* low-cost. The check-in chaos, the cramped seats (12 seats per row), no music by artists known outside China, mediocre food, and a boarding area at Beijing Airport with only 10 seats—worthy of Ryanair or EasyJet. And yet, the price was sky-high. Again, D.’s vacation requests were denied outside of July and August, so we’re traveling from August 2nd to 30th. We couldn’t have picked a worse time for inflated prices, and with the situation in Iran, we got hit with a 390 € fuel surcharge. I’ve never paid so much for flights—I felt like I’d bought business class, but nope, far from it!!
We landed in Beijing around 4:15 AM. It was 28°C with thick fog. We drove and drove and drove for 20 minutes, as usual in Beijing. Then we went through a first check, a second check, a third check, and waited for our connecting flight at 6:40 AM. A small Airbus A320, but way more space than in the Boeing 777 from the first flight. We landed in Kunming, Yunnan, around 10:15 AM in the rain.
We headed to the subway. You can’t pay at the machines with Alipay here either, so we set up the transport QR code directly in Alipay to scan at the subway gates. The process is a bit long the first time if you haven’t entered your info before, but once it’s done, it’s *so* much easier! We took Line 6 to the terminus for 6 yuan each.
We’d booked a hotel nearby, on the 16th floor. It’s actually studios on different floors of a huge residential building. The view’s pretty nice from here. We settled in quickly—back to those wooden beds, or rather, mattresses as hard as wood, which we *hadn’t* missed...
Then we went out for our first bowl of noodles of the trip and wandered through the shopping streets of the old town.
It was crowded, and the weather was cool—around 19–20°C. We tried a local specialty: milk skin, thick, dried, then grilled with rose jam. Yeah... we won’t be having that again. The taste and texture of the milk skin... no thanks.
We saw a lot of wild mushroom hotpot too. It’s on our list for later. We also passed through the Jinma and Biji gates, where I played with reflections in puddles. I *love* doing that 🙂
At the end of the day, we headed to a temple advertised as open 24/7 on Amap. Of course, when we got there, it was closed. We’ll go back tomorrow. That was the first of many disappointments with Amap this trip—I hadn’t had that issue on previous visits.
We were exhausted after that sleepless flight. Night was falling, and we decided to grab a quick bite without much appetite. We shared a delicious vegetable fried rice for 12 yuan—we even left half of it. The portions are *huge*.
After a couple of small purchases, we headed back at 9 PM, wiped out, after walking 17 km between the airports and these first steps in Kunming. I expected to see quite a few Western travelers here, but we didn’t spot a single one. Instead, we met lots of curious Chinese people, many of them super friendly and helpful—almost *too* eager, like when they’d run to serve us as fast as possible. It’s a bit much, but it’s great to be back!
After as many weeks as I have fingers on my right hand, we're hitting the road again, fully recovered from our pharaonic adventure. Back in France to drop off our daughters (sorry, girls!), this time it's just the two of us, ready to be welcomed by a new destination. They say it offers one of the richest cultural heritages in the world for those willing to put in the effort. It's the land of the ancient Silk Road, where we'll follow a journey steeped in history and discoveries straight out of *One Thousand and One Nights*. A former Soviet bloc region independent only since 1991, we'll be walking in the footsteps of Genghis Khan, Tamerlane, Alexander the Great, Marco Polo...
Another fun fact about this country: it's strictly forbidden to import porn on your phone. True story. The same goes for painkillers! Unless it's about sodomy—though the two don’t seem connected, that’s just how it is. Don’t ask me why! Anyway, I’m getting off track. Here’s the big question: Where do you think we’ve just landed?... To give you a hint, the locals are known for being incredibly welcoming. No sooner said than done—our first taxi driver, proud to transport French travelers, refused to let us pay for the ride. Great vibes for these two weeks ahead. So, any guesses?
Uzbekistan!!!
"How about a Christmas market this year, huh? A little romantic weekend getaway...
- Yes! That’d be cool! Strasbourg? Colmar?
- Feels a bit déjà vu, doesn’t it? Plus, slim chance of snow there... And I’d love something a bit more exotic with a touch of originality..."
"Okay, Google, give me the list of the five most beautiful Christmas markets in Europe.
- In fifth place, the Christmas market in Vilnius, the capital of Lithuania.
- Save your breath! Lithuania, here we come!"
We wanted cold, and cold is exactly what we got the moment we set foot in this new, unknown land. As for landscapes, forests and lakes stretch as far as the eye can see across this vast plain, its vegetation scorched by the frost of a winter that’s clearly already well underway here.
Lakes, in fact, set the scene for our first visit to Trakai Castle, whose brick-red towers and walls rise proudly against the azure sky of our first day. Lakes, because this castle was built on an island and is only accessible on foot via a series of walkways spanning half-frozen lake offshoots. I couldn’t have picked a better spot to build my castle! Translation: We’re totally sold! Proof is we spend two hours hiking around the area, alternating between forests, reeds, and cozy houses tastefully decorated for Christmas.
This time, I landed in Monastir on a direct flight from Nice, again with Tunisair. We left about ten minutes late, and the flight lasted around 1 hour 30 minutes. A meal was served on board (cucumber salad with Edam-like cheese, carrots, and two small portions of dishes I couldn’t identify—semolina with peppers, olives, and parsley, two small rolls, a square of processed cheese, and a chocolate cake). It’s worth noting because it’s not common on flights this short.
In February, France and Tunisia were in the same time zone, but now Tunisia is one hour behind. This time difference and the flight duration work perfectly for a short 15-day trip since it takes me a few days to adjust to jet lag.
Luckily, I’d asked my hotel about the taxi fare from the airport because the drivers (there were several around me) didn’t hesitate to quote outrageous prices. The actual fare is 20 dinars, but one asked for 120 dinars. I refused, and another offered 60 dinars. I replied, "That’s too expensive—I’ll take the metro!" (Having tried the Tunis metro, I had no desire to repeat the experience in Monastir with a suitcase!). I started walking toward the metro, and one of the drivers caught up with me, saying, "20 dinars is fine!" I’ll skip the details, but the negotiation took a little while.
When I arrived at the hotel, I told the receptionist someone had asked for 120 dinars. He put his hands to his head and said, "They’re awful!" He remembered our phone call two days earlier when I’d booked (he’s the one who told me I could take the metro).
The Mezri Hotel isn’t expensive. I got a sea-view room for 75 dinars (22 €). (I’d booked a balcony room for 90 dinars but wouldn’t have had time to enjoy it.) It’s well-located but noisy because there’s no double glazing.
The receptionist is a very kind older gentleman. He called a friend whose wife is from Tozeur to find out if I should take a bus or a *louage* tomorrow and what time.
I arrived at the hotel around 7:00 PM and had time to stroll along the corniche to the ribat. Despite some run-down buildings, the seaside seemed livelier and cheerier than Sousse’s.
Monastir is the hometown of former president Bourguiba. I passed his mausoleum by taxi. There are Tunisian flags along the avenue by the sea because every year on April 6—the anniversary of Habib Bourguiba’s death—the president of the Republic visits the Bourguiba Mausoleum in Monastir to pay respects.
The taxi driver mentioned other Tunisian presidents. He complained about rising prices and insecurity, blaming President Kaïs Saïed (I’d already heard that security was better under Ben Ali).
At the end of my stay, I’ll take time to explore Monastir, but tomorrow morning, I’m off to Tozeur—a long bus ride awaits me.
With my girlfriend Christelle, we’ve chosen South Africa for our first trip to Southern Africa, focusing on safaris—after a long debate with a Cape Town/Kruger combo.
But that would’ve meant cutting out St Lucia, which would’ve been harder to fit into another trip.
And St Lucia—thanks to Michel and all those travel journals—we really wanted to go there.
So our 11-night itinerary ended up like this, mostly shaped by school holidays:
- 3 nights in St Lucia
- 1 night in Hluhluwe
- 1 night at Mkhaya Game Reserve (Eswatini)
- 1 night at Hlane Royal National Park (Eswatini)
- 3 nights in Kruger (Berg en Dal / Satara / Tamboti)
- 1 night at Shindzela Tented Camp in the Timbavati private reserve
- 1 final night in Kruger at Lower Sabie
All of this in the off-season and rainy season, just a month after catastrophic floods that killed over 150 people and seriously damaged Kruger’s infrastructure.
I’ll jump straight to St Lucia and skip the loooong journey to get there (with a layover in Frankfurt, landing in Johannesburg, a domestic flight to Durban, and the rest by rental SUV—First Car Rental, perfect, no complaints).
To motivate readers—especially some familiar faces here—I’ll drop in a first photo.
Here we go!!!
I left home at 4 AM on October 31st and headed to Barcelona. Driving through Barcelona on the ring road stresses me out a bit, but at 6 AM the traffic is smooth, and I arrive at the airport without any issues. I call the valet, who quickly comes to pick up my car. He takes photos of it from all angles before letting me go.
Baggage check-in hasn’t started yet, and there are already several of us waiting.
Once free, everything happens very quickly. The flight to Abu Dhabi is on time and goes smoothly. I’ve never had any problems with this airline, which I’ve been using for several years.
The flight to Bangkok arrives at 7 AM as scheduled. This is my first time in Thailand and Bangkok. I’m used to traveling in India, and I notice that everything here is well organized—the customs process is quick, and the luggage is already on the carousel.
I booked a taxi on Booking. All I have to do is find the right exit and door based on the agency’s instructions. A large sign with the names of people who booked is posted on a wall. A hostess greets me and calls the taxi, which arrives 5 minutes later. I booked one night at the Lost Inn BKK hotel in the Phra Nakhon district, and we arrive at 9 AM. The welcome isn’t warm, and I have to wait until noon, sitting on a chair, before I can check into my room. I’m exhausted, and sleeping sitting up isn’t ideal. Noon finally arrives—the room is small but clean, which is fine for one night. I quickly take a shower to wake up because I plan to spend the afternoon visiting the Grand Palace. First, I need to exchange some money, and the banks are all close together on the same street, which is very convenient. When I enter one, a hostess gives me a ticket and invites me to sit down. There are about twenty counters, and I wait quietly until my number is called. The exchange is quick, so I can head out to find the Royal Palace. It’s actually very easy, and the walk is pleasant.
Entry to the Royal Palace (500 baht).
It’s magnificent and grand, and there are quite a few of us visiting. The sky is gray, it’s very humid, and a shower interrupts the visit. It’s a vast complex of temples and palaces. The buildings are colorful and sparkling, with a great sense of serenity (without the tourists, of course). I quietly enjoy the place and try to take photos without tourists, which isn’t easy.
Very close to the Grand Palace is Wat Pho, one of the oldest Buddhist temples in the capital.
It’s very famous for its 46-meter-long reclining Buddha statue.
Walking around the temple, you can see different representations of Buddha, all covered in gold leaf.
Inside the temple, on one side, monks recite their prayers, while the other side is reserved for tourists who come to meditate in silence.
Before returning to the hotel, I have dinner at an Indian restaurant. I go to bed early because tomorrow’s wake-up call will be very early again.
Saturday, November 2nd
Wake-up at 4 AM, departure from the hotel at 4:30 AM. The taxi I booked via Booking is waiting for me and takes me to the airport. The trip is fairly quick—he takes small roads, and at this hour, there’s no traffic.
The flight to Phnom Penh is on time. Before boarding, I realize I left my fleece jacket on the carousel, but it’s too late to go back for it.
The flight goes well, and customs is quick.
At the exit, I take a tuk-tuk to Julieka’s GH near the museum. The welcome is friendly. I won’t be able to check into my room until noon, so I take the opportunity to exchange some euros on the market street. The street is lined with restaurants, and I’ll have my first meal there.
The museum is right across the street, so I don’t waste any time visiting it.
The representations of Hindu deities are very different from those in India, and I don’t recognize them. Many beautiful Buddhas are on display.
The museum is very pleasant, and there aren’t too many people, which is a plus.
At the exit, I return to the GH, settle into my room—which is decent and clean.
The Royal Palace is 1 km away. I walk along a garden, and at the end of the street is the Tonlé Sap, but I turn right. I arrive at a large esplanade and see the buildings with tiered roofs and glazed tiles. The entrance to the palace is a little further away.
At the entrance, I notice there isn’t the same crowd as at the one in BKK.
Khmer architecture is magnificent. The complex consists of gardens, palaces, pagodas with golden roofs, and slender spires.
The Silver Pagoda houses the small Emerald Buddha, which is actually made of jade. The silver flooring is covered with carpets. Photos are not allowed.
The walls surrounding the pagoda are covered with frescoes depicting scenes from the Ramayana.
My partner and I traveled from Sunday, July 5, 2026, to Wednesday, July 22, 2026.
We spent a long time debating whether to rent a car or use public transportation. In the end, after reading so many posts about travelers getting scammed by police or rental companies—even those recommended by blogs and reviews—we decided to stick with public transport. It worked out really well. Sure, we had a little less freedom to go where we wanted, but it was way less stressful for us.
Sunday, July 5:
Arrived at Cancun Airport. Withdrew cash from the ATM in the terminal just before exiting. The ADO bus counter (they pronounce it "A-Jee-O") is right behind you when you're facing the ATM. Bus to downtown Cancun cost 145 pesos per person.
Stayed at "Rose 5," booked on Booking. The studio was super clean and perfect for one night. The owner’s instructions for accessing the place were very precise, with photos included. Check-in was self-service with a code. The ADO bus terminal isn’t far, and there are shops and restaurants nearby. We really appreciated that the AC was already on when we arrived. By the way, I’d recommend always booking places with AC—it’s *really* hot in Mexico.
Monday, July 6:
Bought a SIM card with data from a TELCEL store. My partner, who’s on Free Mobile, was able to use her regular plan. Just so you know, I found the network pretty unstable. As soon as we left the cities, neither of us—me with TELCEL or her with Free—had any signal.
Another thing to watch out for: roaming charges. I had to turn my SIM back on for less than 30 seconds to get a bank SMS code, and my phone apparently connected to the internet—resulting in an 8-euro roaming fee.
Left on an ADO bus to Chiquila for 278 pesos per person. During our trip, ADO buses were always on time, comfortable, and clean. The AC is *cranked* though, so bring something to cover up with—it gets cold. Some routes were fully booked even in the low season, so try to reserve 1 or 2 days in advance either via the app (when it works) or at the counter.
When we arrived at the ADO terminal in Chiquila, the ferry company counters were right next to it. Ferries leave every 30 minutes, alternating between companies, so no need to book ahead. Just take whichever one is leaving next (330 pesos per person).
When we got to Holbox (pronounced "Hol-bosh"), we’d booked a place via Booking called "Casa de Nana." It was a huge studio with a fridge, cooking plate, and utensils. The best part? The *location*. It was 100 meters from the beach and 200 meters from a Chedraui supermarket. They provided bath towels and beach towels, and the AC worked perfectly. There’s a key box so you can leave your keys inside when you go out. The only downside was that no one was there to let us in when we arrived, so we had to wait a while. The Wi-Fi was good, which was lucky because during our 4-day stay in Holbox, the phone network *never* worked. According to locals, that’s pretty common in Holbox, along with water outages.
Luckily, I’d had the good idea to download an offline map, which helped us find our way back to the place more easily. You can walk there from the dock.
The restaurant next to our place (La Barracuda) was great if you like seafood—I’d recommend their octopus dishes.
Tuesday, July 7:
We did a kayak tour in Holbox’s mangroves at 6 AM. We were looking for a sunrise kayak tour with a French-speaking guide. That’s exactly what we got with "Kayaking Holbox," where Diego, the owner, speaks English and French. He was joined by Gustavo, another guide.
We’d booked for a group tour, but we were the only ones. Diego still went ahead with it instead of canceling due to lack of participants, so we got a private tour at the group rate—really professional of him. They showed us this amazing ecosystem for over 3 hours. We saw all kinds of birds: pink flamingos, pelicans, egrets, frigatebirds... rays, a horseshoe crab, and a little crocodile that was *so* well hidden. Diego and Gustavo have a real eye for spotting animals—I could’ve passed by the crocodile 100 times and never seen it, it blended in so well. Their explanations about the flora and fauna were super interesting. We also got a little break where we tasted mangoes and bananas that taste *nothing* like the ones in France. A real treat—those little Mexican yellow mangoes! I’d definitely recommend Diego and his agency for a French-language kayak tour (1000 pesos per person).
In the evening, we walked to Punta Coco to see the bioluminescence. No need for a guided tour—if you really don’t want to walk, you can take a taxi. At Punta Coco, you have to pass the beach bar/restaurant and then go left into a kind of inlet that forms a lagoon. You have to wiggle your feet or move your hands in the water to create movement, which makes the light appear. Just don’t expect the kind of photos you’ve seen online—they’re all edited! It’s fun to see, but you won’t be dazzled by the light...
Wednesday, July 8:
Whale shark tour with "My Holbox Tours." Why recommend this agency over others for swimming with whale sharks? Simply because Valérie surrounds herself with top professionals to make your experience unforgettable. We were with Captain Fernando, who does everything to position the boat perfectly and make your swim easier. In the water, we were with Humberto, who also goes above and beyond to make sure you have an incredible time. He doesn’t just "supervise" like some guides from other companies who leave you on your own. No, Humberto reads the whale shark’s trajectory and guides you—all you have to do is follow him. He really puts in the effort, even holding your hand to guide you through this quick but intense encounter. Humberto also films the moment and will offer to show you the videos and sell them to you. His footage is really high quality.
Fernando and Humberto also prepared food for us. Special mention for their guacamole! Valérie is there to make sure everything goes smoothly on the boat and to answer your questions in French, English, or Spanish about these animals. If you choose My Holbox Tours, you can be sure you’ll get a top-notch experience.
About the tour itself: before you go, you should know that the sharks can be *really* far away. The day we went, it took 3.5 hours by boat to reach them. The boats are small, and let me tell you—on the way there, when we weren’t going with the waves, it was *rough*. Out of 9 passengers, 4 got seasick. But once you’re face-to-face with the shark, you forget all about that. Even if swimming with a whale shark isn’t exactly a walk in the park—they swim pretty fast, so you need some endurance to keep up. You’ll usually get 2 turns. Our first swim lasted a little over 4 minutes, and the second about 2 minutes because the shark was moving fast and we were still tired from the first swim. It might seem short, but when you’re swimming, it feels *long*. Either way, it’s an experience you *have* to do—but choose your company wisely. On the way back, there’s a stop at Cabo Catoche. Honestly, the snorkeling is pretty disappointing if you’ve done it elsewhere in the world. But the lunch stop at Cabo Catoche is really nice for relaxing (white sand and hammocks).
Thursday, July 9:
Short morning walk to Punta Mosquito at 6 AM. Really nice.
Ferry to Chiquila (330 pesos per person) + ADO bus to Valladolid (300 pesos per person).
In Valladolid, we booked "Casa Lucia" via Booking. The hotel is gorgeous, with a colonial style, and very close to the ADO bus terminal and downtown. It’s super quiet and clean. There’s a shared kitchen you can use with a fridge, microwave, and water dispenser, plus a big table by the pool and a nice indoor terrace. Breakfast was simple but included. The only small downsides were the tiny room and bathroom, no mirror in the room, and a noisy fan.
Friday, July 10:
Not far from the ADO bus terminal is the colectivo station for Chichen Itza. They offer a round-trip to Chichen Itza with an option to stop at Ik Kil cenote on the way back and then drop you off in Valladolid for 370 pesos per person (Ik Kil entrance included).
For the Chichen Itza visit, we’d booked a tour with a guide often mentioned in groups—his name is Juan Pat. He’s a Maya who lives near the site and speaks excellent French. He reserves spots in advance for you and queues up to be the first on-site. It cost 500 pesos per person + entrance fees. His tour lasts 2 hours and focuses mainly on the main pyramid and the ball court. He’s passionate and fascinating, even if some of his claims, as a Maya, might be a little biased. I think it’s *really* important to have a guide—otherwise, you’ll miss so much. You can contact Juan Pat on WhatsApp at +52 985 121 2381.
Afterward, we went to Ik Kil cenote (showers and life jackets mandatory, lockers available). It’s *very* crowded, but still really beautiful with its lush vegetation.
Saturday, July 11:
Since we didn’t have a car but still wanted to visit other cenotes that seemed hard to reach by public transport, we decided to book a taxi for the day. We agreed on 1200 pesos to take us to 3 different cenotes and wait for us at each one. (To find taxis, just look where they park near the ADO bus station.)
He picked us up at Zaci cenote, which we’d walked to. We got there at opening time and were the first ones there—had the place to ourselves for a while! 150 pesos per person. A pretty cenote in the city center with lush vegetation. It’s a bit like Ik Kil but without the deep cylindrical effect.
Cenote Xcanahaltun: the most beautiful cenote we visited. Entry 250 pesos per person. It’s a closed cenote with a hole that lets light in—a cave-like setting. You can kayak inside. There are little fish at the edge that nibble dead skin off your feet. Since it’s closed, the water is *freezing*!
Cenote Palomitas: entry 250 pesos per person. Another stunning closed cenote, even more enclosed than Xcanahaltun. The hole in the ceiling is smaller, so it was pretty dark when we arrived—kind of an eerie vibe. But when the staff turned on the lights, it looked like a "Gothic cathedral" full of bright stalactites.
Cenote Sac Aua: entry 290 pesos per person. The ticket includes a guided cave tour (tip-based). This cenote is really unique with its central island and way less crowded than Suytun. Just so you know, the water is *really* cold in cenotes. In these three, in July, we had the place to ourselves for a while and never saw more than 2 families at once—so peaceful!
Sunday, July 12:
ADO bus to Bacalar (536 pesos per person).
In Bacalar, we stayed via Airbnb with a host named Luli, who offers several rooms with shared bathroom and kitchen.
The room is nicely decorated in a pleasant setting. It’s ideally located near the lagoon and downtown. The shared kitchen is handy. The mosquito net over the bed is useful because there are *a lot* of mosquitoes in Bacalar. Luli provides a water jug, which is really nice. The only big downside is the lack of water pressure in the shower—we had to rinse off by filling a bucket. Also, there’s no real door separating the room from the bathroom. We never met Luli in person, but she was very responsive via messages. The terrace in the middle of the vegetation is lovely.
From the ADO terminal to the place, we took a taxi for 40 pesos. Since this driver was honest about the price (we’d checked beforehand), we decided to use him every time we needed a taxi in Bacalar. Here’s his WhatsApp: +52 983 184 3585.
Monday, July 13:
We did a boat tour on the lagoon with "Bacalar Francophone Activities." Since we were just the two of us, it cost 3500 pesos. If we’d managed to be 4 people, it would’ve been 1000 pesos per person.
We had a private 4-hour tour on the lagoon with Steeve and his very comfortable boat. He’s from Quebec, so his French is perfect. During those 4 hours, Steeve showed us the lagoon’s iconic spots *and* places other boats don’t go. He told us about the lagoon’s history and gave great tips on where to go and where to eat. As a little bonus, he gave us a video taken with his drone during our swimming break.
Tuesday, July 14:
We went to Los Rapidos by taxi (400 pesos round trip) and entry was 225 pesos per person. It’s *very* touristy but really beautiful. You can eat there (expensive), relax, and go down the "rapids" as many times as you want. It’s worth it if you spend a few hours there. You can’t bring in food or drinks—you leave them at the entrance and pick them up on the way out.
Wednesday, July 15:
On Wednesdays, navigation is banned on Bacalar Lagoon, so we’d planned another excursion.
Visit to Calakmul from Bacalar with ABCtours (WhatsApp +52 983 319 8359).
This agency organized a trip from Bacalar to Calakmul with a French-speaking guide. Communication beforehand via WhatsApp was smooth. Mr. Checo, the driver, and Fernando, the guide (who spoke great French), picked us up on the day. Mr. Checo drove very carefully on the long road and always made sure we were comfortable. Fernando is passionate about flora and fauna—he’s a biologist with a degree in ornithology, so he knows *everything* about animals. The slightest sound or song, and he knows what it is. He’s got an eye for spotting them, from the biggest to the smallest.
During the trip, we stopped at km 27 for a short forest walk, then went to see the two main pyramids on the site. On the way back, we stopped at the bat cave for the magical spectacle of millions of bats flying out at dusk. In the end, we saw or glimpsed (some briefly) spider monkeys, howler monkeys, a toucan, 2 tapirs, turkeys, 2 deer, and lots of birds. If, like us, you’re more into flora and fauna than archaeology, I’d *highly* recommend this agency and tour with Fernando.
It’s not cheap, but the road between Bacalar and the site is *long* (3.5 hours). Price: 3900 pesos per person for 2 (3500 for 3, 3200 for 4).
Thursday, July 16:
ADO bus to Playa del Carmen (614 pesos per person).
In Playa del Carmen, we stayed in an Airbnb. The building is on the town hall square, next to the casino.
The best thing about this place is the *location*—super close to Fifth Avenue (La Quinta). The kitchen is pretty basic, but the fridge works well. There are supermarkets nearby. The rooftop pool is really nice. The two big downsides, though, are the soundproofing (you can *hear* the neighbor’s alarm and all the events on the square) and the *total* lack of water pressure in the shower. We had to fill a trash can with water to pour over ourselves. When we told the owner, he said it wasn’t normal and someone would come fix it, but we never heard back. Based on previous reviews, this seems to be a known issue that never gets resolved.
Playa del Carmen is *very* touristy on Fifth Avenue, but in a fun, musical vibe—we never felt unsafe. There are *tons* of little souvenir shops for tourists on this street. There’s a beautiful monumental sculpture on the beach (the two figures meeting in the air), next to which you can see the Voladores show (men climbing a pole, tying themselves with ropes, and descending headfirst while "flying" around the pole). The show is tip-based and happens several times a day. In our opinion, Calle 38 is prettier than Fifth Avenue—it’s lush, green, and quieter, with the sea at the end. Great for an early evening stroll. We had really good meals at great prices at "El Tio Noy" tacos, just a few meters from Fifth Avenue in a side street.
For souvenirs, we’d recommend going to Walmart instead of Fifth Avenue—you’ll find skulls, tequila, mezcal, keychains, mugs, glasses... at good, fixed prices.
Friday, July 17:
We did the excursion to Isla Contoy. Isla Contoy is an uninhabited, highly protected island. Only 200 people are allowed to land per day on a rotating basis, so only a few companies have permission to dock there. Most agencies subcontract the day to a third-party company.
We booked through VRM (Viviendo Riviera Maya), but it was Ocean Tours Mexico that handled the tour. Contoy is a little paradise. We were accompanied by multilingual guides, including French speakers, throughout the day. Steffy gave us info about the island during a short walk on the marked trails, and Leño Tlatemoa kept the mood up on the boat rides with music and dancing. Isla Contoy is *truly* stunning, and the lunch was delicious: grilled fish and chicken, guacamole and tortilla chips, rice, fruit, drinks (everything is brought and taken back by the guides). The snorkeling part was pretty disappointing if you’ve done it in Cozumel, though. The stop at Isla Mujeres isn’t very interesting either—it’s too short to explore, and the island is *extremely* touristy. Still, the excursion was very well organized, and we had a great day (2970 pesos per person).
Saturday, July 18:
We wanted to go snorkeling in Cozumel but thought the prices from French-speaking agencies were too high. Plus, for snorkeling, we figured we didn’t *need* a French-speaking guide.
So we found a much cheaper solution by taking the ferry from Playa del Carmen ourselves and choosing an agency in Playa. The round-trip ferry cost 663.50 pesos per person. Then we took a taxi to the snorkeling boat (100 pesos). The agency we chose is called Mystic Snorkel—they don’t have a physical office. The tour cost 1400 pesos per person. It was a small boat, but that day we were the only ones, so we got a private tour at the group rate. We stopped at 4 different sites, all very different and beautiful. We saw all kinds of fish, corals, a nurse shark, and turtles. El Cielo, with its huge starfish, is *exceptional*. If you’re going snorkeling in the Yucatan Peninsula, this is *the* tour to do—the other sites are pretty "poor" in comparison.
Sunday, July 19:
Morning dive with Triton Diving. I chose the Cozumel dive option. Great experience.
Booking via WhatsApp was easy. On the day of the dive, Selene, who speaks French, was our guide. She’s *very* attentive to the group’s safety. The briefings are clear and precise. In Cozumel, we did 2 very different sites: the first was a drift dive with lots of life—beautiful corals and fish. The second was a wreck, the C53, a 56-meter boat you can enter. Not much marine life, but a beautiful wreck intentionally sunk for divers—still in great condition. An unforgettable moment. Selene even took videos during the dive, which the club sends you for free afterward. I’d *highly* recommend this club.
Just so you know, in Playa del Carmen, the beaches were full of sargassum during our stay, despite barriers and daily cleanup. Locals told us the problem is getting worse and the sargassum is arriving earlier in the season. Tourism has taken a *big* hit this summer, and they’re wondering if tourism can even survive the sargassum season anymore. A lot of tourists are heading to the islands—Isla Mujeres and Cozumel—to enjoy the beaches, as the west side of those islands is sargassum-free.
Monday, July 20:
Colectivo to Puerto Morelos. First, a colectivo toward Cancun that drops you off between Puerto Morelos town and Puerto Morelos beach (40 pesos per person), then another from that junction to the beach (10 pesos per person).
In Puerto Morelos, we’d booked a room via Airbnb at "Piedra del Caribe." *Best* place we stayed in Mexico. It’s an aparthotel. Our room was ready before check-in, so they let us in early. The place matched the description—spacious, with a comfortable king-size bed. The shower had *great* pressure, which isn’t a given in Mexico. The staff was super friendly and welcoming. They let us use the pool, restrooms, and rooftop shower after check-out while we waited for our ride to Cancun Airport. They even kept our luggage. I *highly* recommend this place.
In Puerto Morelos, there was *way* less sargassum than in Playa del Carmen—it was actually swimmable.
We did the snorkeling tour with the fishermen’s cooperative for 450 pesos per person for 2 hours. The reef is close to the beach (you’re not allowed to swim there), so the boat ride is short. It’s not as pretty as Cozumel, but it’s nice and affordable. On Puerto Morelos’s page, you can also access a small, not-very-well-preserved reef. There’s also a cenote in the sea where fresh water mixes with saltwater—the water is murky there. We had a great dinner and excellent cocktails at "La Choza del Puerto."
Tuesday, July 21:
Wandered around Puerto Morelos (check out the church and read everything—it’s entertaining!), relaxed by the hotel pool, and left for Cancun Airport by taxi (400 pesos) booked via InDrive to head back to France.
Our highlights:
- Holbox
- The whale shark tour
- The cenotes
- The local flora and fauna (so present!)
- Isla Contoy
- Cabo Catoche (except for the snorkeling)
What we liked least:
- The bioluminescence (barely visible despite good conditions)
- The food—we found it not very diverse in taquerias
- The constant tipping
- The lack of water pressure in showers (fixed, wall-mounted, no hose or showerhead)
Don’t hesitate to ask if you have any questions while it’s still fresh in our minds.
Traveling with just one spare pair of underwear, considering a hot shower a miracle, never staying in the same place too long by sleeping wherever night catches us, taking whatever local, improbable, and rickety transport we can find—this is the DNA of us wanderers. Except this time, the script for our movie is going to be a whole different genre. On paper, the destination doesn’t exactly scream epic adventure: Réunion! And what’s more... we won’t be two, or four, or even ten. We’ll be a solid thirty. All from the same family. Yes, thirty. At this point, it’s not just a trip—it’s a summer camp on the move! Why inflict this on such a peaceful island? Because my brother decided to get married there with his lovely bride. A great idea, you might say... especially when it involves relocating the equivalent of a small Ardennes village 10,000 kilometers from home for three weeks! So who’s stepping up to be the guide and wave the little flag?
So, for an exceptional trip, exceptional stories! Don’t worry, the debates at the supermarket over whether to choose plain chips or roast chicken chips, the beach picnics washed down with ti’ punch, and other rougail sausages to digest by the pool will only make it into the family archives. Here, I’ll stick to the tales of our beautiful escapes, the ones where we explore the wild corners of this little volcanic rock planted in the middle of the Indian Ocean. So where exactly are we headed?
For the first week—the subject of this first installment—we’re taking it easy. We’ll start by rediscovering the coastline, from the Souffleur in Saint-Leu to the Hermitage lagoon, before a little trip to the Cirque de Cilaos and its legendary road with 400 turns, just to get our legs warmed up.
This travel journal is therefore intended solely for my photos, to present a consistent style.
All the shots were taken with a simple Samsung Galaxy smartphone and with whatever was at hand.
All stays combined, I’ve spent the equivalent of three years at most in Thailand, and I’m not a big expert on the country.
However, after many trips, lots of reading on VoyageForum and other sites, and conversations with many locals as well as expats, my view of the country is becoming clearer, though it’s constantly evolving. You never stop discovering and learning.
I guess I wanted to piece together a puzzle, mainly for those who want to get an idea of the country here and for those who miss it.
I don’t know if this minimalist sharing will interest anyone, but it’ll do me good to put it together. After so many months without traveling and then these other long months with VF closed, there’s plenty of material available.
There’ll be a mix of places, periods, and subjects, but it might well be intentional.
I suspect many Thais have dogs because they make excellent guards for the home. Nothing better to deter burglars or to signal the presence of a snake. You’ll often see Thais tapping the top of their dog’s head, but don’t be fooled: it’s a sign of affection from them. Judging by the dogs’ reactions, they’re used to it.
Thailand is one of the countries on the planet where rabies is still present, so keep that in mind. It’s not just bites that can be dangerous, so don’t let just any dog lick you. Especially on a wound, of course.
Even though dogs often fear humans—this dangerous and unpredictable predator—we still need to stay cautious.
Be careful when walking into alleys because the dog will defend its master’s big property, be careful at night, and be careful when they’re in packs.
It sometimes crosses our minds that Thailand isn’t really made for walking around, and dogs are one of the reasons.
That said, it’s not uncommon to see them chasing bikes or scooters. Cars, though, are much rarer—they’re too big.
It seems Thais prefer to give their dogs freedom by not locking them behind gates. Though sometimes the gate is closed, the little side door is wide open. Oh, and sometimes there’s no gate in front of the property, or it’s been broken for years.
You’ll often see dogs sleeping on the side of the road, sometimes right on the road. When you arrive, they move aside nonchalantly—or not at all. It’s less funny when they suddenly appear from thick vegetation, which reminds visitors not to drive too fast. As a result, you’ll notice that dogs with injuries or missing legs aren’t that rare.
Since they believe in reincarnation and respect for all forms of life, they don’t chase dog packs away too much, and they don’t sterilize them enough. Seeing a small pack roaming freely in the countryside, you might think it’s best not to cross paths with them at the edge of a field.
A darker side of this is that euthanasia isn’t often practiced. Twice, we saw dogs at temples on the brink of death, enduring terrible suffering. No one did anything about it. The image (and the smell) of one of them, dying and emitting the stench of death, still comes back to me sometimes.
Some of you may have seen the YouTube vlog of a French woman living in Phuket who was given a little pig by her Thai friends. The well-fed animal quickly became a happy, enormous beast with its own garden. Yet, it didn’t take long for it to fall seriously ill and become incurable. In her video, the French woman described how difficult it was to find a vet willing to perform euthanasia.
You’ll often see bowls by the side of the road. Thais leave food and water in them for stray cats and dogs. Overall, they have a big heart for animals.
If you ever pop into a shopping mall, you might see people pushing their small dogs in strollers. It’s not a gimmick—it’s just that these strollers are provided for customers to put their pets in, otherwise you can’t bring them inside. It looks a bit odd when you expect to see a baby.
It was winter, a winter with beautiful weather,
A season that only exists in the southwest of America,
I remember very well what I told you that morning
A month ago... A century ago, an eternity ago...
We’ll go... wherever you want, whenever you want...
Well, yeah, back from our adventure in our enchanting American West just a month ago, we’re already taking a bite out of one of its lesser-known competitors. "Flo, if you had to pick just one reason to justify your love for the U.S., what would it be?" The greasy, dripping burgers? No, I don’t think I’m going out on a limb by saying it’d be the wide-open spaces... And that’s exactly what our new quest is taking us to—a land on the other side of the globe where the horizon also seems endless, where silence tastes like salty wind and sand, where freedom is measured in kilometers of desert tracks, where the GPS is mostly there to confirm you’re lost in the middle of nowhere... Add to that magic formula the fact that you’ll see more zebras, giraffes, wildebeest, and elephants than people per square kilometer, and you can imagine us setting foot in Southern Africa for the first time, more precisely at the small airport in Windhoek, capital of... of...? Brush up on your geography, damn it! We’re landing in Namibia!!!
To be honest, Namibian landscapes have been flirting with me for ages. So how did I resist this island of temptation for so long? First, the budget. Let’s just say that for the same amount of effort (and kidneys), the bank lets you choose two other adventures almost anywhere else on the planet. Then there were my girls. Yeah, back then, they were too little to dose up on Malarone, the only malaria remedy at the time... Long story short, ten years later, all the planets have aligned. First, I won the Euromillions! Well, almost... Let’s just say my girls are now old enough... not to take Malarone, but to stop following me on all my adventures! Jackpot! "Flo, how about a little two-person caprice, just the two of us, tackling the Namibian tracks?"
As we landed on the runway, first wow effect: The horizon is immense. It’s flat as can be, incredibly flat... So much flat space! Did I mention it was flat?... Looking into the distance, it feels like your gaze could circle the Earth without hitting a single obstacle—until you end up staring at your own backside. "Oh, what a nice view!" Well, it’s the first time I’ve seen my butt from this angle! Touching moment... Sorry, I’m rambling—must be the exhaustion from the three-flight marathon we just powered through via Ethiopia and South Africa... And yet, no time to philosophize about my anatomy. As usual, we want to rack up our first kilometers to be front and center at dawn tomorrow. After wrapping up the tedious Namibian immigration formalities and meeting the 4x4 that’ll be our companion day and night for the next fifteen days, we’re off! We’re not exactly fresh, but we’re ready to tackle the next five hundred kilometers in night mode, cruise control set due south! Just outside Windhoek, the local wildlife—a jackal—welcomes us with a smile: "Welcome to Namibia!" That’s what it said! Honest... Okay, first endless straight road, first flaming sunset, first corrugated dirt track, first Milky Way with zero light pollution... You get it—it’s definitely the day of firsts... First night camping, too, in the big trunk of our Toyota Fortuner parked by the side of the track... The real adventure, the kind that smells under the arms, can finally begin...
Here we go—finally, the big day has arrived! A trip the whole family (my two kids, my husband, and me) had been looking forward to for so long.
To keep it short, we left from Nice, arrived in Namibia on June 25, 2025, and left again on the 21st—four weeks later.
We used an agency for all the camping reservations, activities, and the car rental. At least that side of things was taken care of. Michaël was our contact throughout the planning and the trip itself.
We spent our first night at Londiningi BB. A bit out of the city center but very quiet. The rooms were spacious and clean, and we could eat on-site that evening. Perfect for recovering from the flight.
This travel journal is our second on VoyageForum, following last year’s where we recounted our four weeks in Vietnam.
The goal remains the same: since some members on this site share tips, experiences, and great deals that help us prepare for our trips, we do the same after returning—both to give back a little and in the hope that our experiences might be useful to others in some way.
Our route was as follows: Bangkok, Siem Reap, Krabi, Suratthani, Koh Phangan, Koh Tao, Chumphon, Bang Saphan, Prachuab Khiri Khan, Sam Roi Yod, Hua Hin, Phetchaburi, Bangkok.
Beyond rediscovering Bangkok, our objectives were the long-held dream of seeing Angkor and exploring southern Thailand, much of which isn’t overly touristy.
A quick big thank-you to Barbot, who took the time to answer several of our questions.
12/07/2013
The cheapest flight we found earlier this year was a Paris-Bangkok route with a layover in Moscow for 1440 €, total for two people.
So, this time we tried Aeroflot. Airbus A318 for the first leg, A330 for the second. Nothing particularly annoying to report—the passengers were very calm, the cabin temperature was comfortable, and we had enough legroom.
That said, the quality of the meal trays was pretty mediocre, and the flight attendants weren’t exactly comedians.
We’d like to remind everyone that it’s best to exchange as little money as possible at the airport upon arrival, since the rate is about 5% worse than at city banks.
Of course, we made sure to take the airport exit where you can catch official taxis to avoid getting scammed. So, we queued up, a little lady gave us the ticket, and off we went with the driver.
Generally, this system works well because these drivers are registered, know their duties, and the risks they face if they break the rules. Except that day, right off the bat, we got the scammer of the day. His first move was to snatch the ticket from my wife’s hands—the one you’re supposed to keep in case of a complaint. My husband saw it, but after a full day of travel, we were a bit out of it, and honestly, there was no reason to be suspicious. But once we started driving, the guy refused to turn on the meter. We insisted more and more firmly, but nothing. So, I used the famous method of opening the door and starting to step out of the car. At 40 km/h, that scares the driver more than the passenger. He finally turned on the meter, but that didn’t calm him down—quite the opposite. For the next half-hour, he ruined the ride by demanding extra fees here and there. Having dealt with several scam attempts last year in Vietnam, this wasn’t exactly new, and we were proud of ourselves for staying pretty zen. Still, this guy was a little scary—he was completely wired and aggressive. Honestly, it was hard not to think he was on something. He’d be perfect for a *Scarface* remake. When we finally arrived at the hotel, he followed us to the entrance. We paid the two tolls (25 and 45 baht), gave him the usual 100 baht extra for the ride, and stayed polite but firm. So, meter: 245 baht + 100 baht + 25 and 45 baht for tolls—we paid the exact amount, no way we were tipping this guy. He left furious, but he was already like that before picking us up... Anyway, avoid Mr. Chartree Chidchen, number 089 826 7308, car E2663!
We were so relieved to finally settle in at Feung Nakorn Balcony hotel in the temple district. 42 € per night, great reception, all the staff is friendly. The AC works fine, the bed seemed hard at first but turned out to be comfortable. The hotel is quiet, away from the nightlife, but at this time of year, many places are less crowded than in high season. Even with a nice fish pond and outdoor breakfast area, it’s a decent hotel, though we felt we could’ve found something better.
After a night on the plane, the first afternoon is always a bit of a slog. We napped for a few hours, and when we woke up—guess what—we were starving. We visited a temple across from the hotel (nothing special) and then decided to take the Chao Phraya Express, the river shuttle that serves many piers along the river. It was a really enjoyable experience. The steel gangway wobbles when you board and disembark, the boat sits low in the water, and sometimes you get splashed. During peak times, you’re packed in like sardines, but most of all, there’s that exotic urban landscape passing by, especially the temple rooftops.
At that exact moment, the boat was packed. We didn’t see a ticket booth at the pier, and we tried in vain to pay the few baht for the ride. The cashier on the boat was too busy, and another employee we called didn’t have time to help us. Oh well, we weren’t going to force the issue. Still, this mode of transport is super practical for avoiding traffic, and at the piers, the lines with station names are clearly marked, with colors matching the flags on the boats. Combined with a map like the *Routard* guide, it’s easy to navigate.
We easily made it to the restaurant *Harmonique*, located near one of these piers. It’s a unanimous favorite on this forum, and let us tell you—it’s well-deserved. What a wonderful experience that evening! We only saw the outdoor gazebo because there was no way we were dining inside. It’s not flashy, so those looking for a luxurious setting should look elsewhere.
That night, the staff was a bit slow, and we had to track them down several times to move things along. But oh, my friends—what a feast on the plate! Start with the appetizer platter for two at 250 baht, featuring four specialties, each more tempting than the last, followed by their famous crab curry for 200 baht. There’s *so much* crab in there! The dish is so delicious and rich that when you finish, you feel—how to put it—like it was almost *too* good, to the point where you’re almost put off eating for days. And also, oh yes, we *will* be back. Their satay chicken is just as amazing, and it would be a crime not to mention their generous dessert with ice cream, warm banana, and chocolate, plus their *excellent* almond milkshake.
Later, we took a taxi to Kao San Road, mainly to book a Ko Tao-Chumphon trip for 600 baht per person at the Lomprayah counter. In hindsight, we should’ve booked all three of our trips there right away.
Kao San Road is *ultra*-touristy—better for younger crowds, but it’s still worth seeing. There’s rock ‘n’ roll, hippies, and crowds everywhere.
We walked back to the hotel, and when we got a little lost near a canal, a really nice older Thai man spontaneously appeared out of the night to kindly point us in the right direction.
Finally, a real long night of sleep ahead—we cranked up the AC. Sweet, the vacation has begun!
Hi there,
I just got back from a trip to Sri Lanka from December 18th to January 1st with 2 adults and 2 kids (12 years old).
If it helps, here’s my itinerary.
We left on December 18th from Madrid with Qatar Airways. No complaints. I booked my tickets back in March for 800 € per person. (I flew from Madrid because I live near the Spanish border and was too worried about strikes in France.)
We arrived on December 19th at 4 PM (local time). Before leaving France, I’d booked a taxi through MyTransfer for 59 € to Sigiriya. A van was waiting for us at the airport exit.
A never-ending 3-hour drive to Sigiriya. We stayed at Samana Guesthouse—very simple, clean, with a pool and an excellent Sri Lankan breakfast. Shower and straight to bed.
Friday, December 20th: Beautiful weather, but very humid and hot. We visited Lion Rock (36 € for adults) and then Pidurangala.
I loved both sites—they’re a must-do in my opinion.
Spent the late afternoon by the pool.
Saturday, December 21st: Another gorgeous day. The guesthouse manager offered us a free 2-hour tuk-tuk tour. We first visited a lake, rice fields, the temple, and the Sigiriya market, plus the usual tourist trap—the botanical garden (no pressure to buy anything at the end).
Then we took a tuk-tuk to Dambulla Temple, the Golden Buddha, and the wholesale market.
Sunday, December 22nd: Still beautiful weather. I’d booked a taxi for 8 AM. We did all the long trips by taxi to save time. I’d ask for prices from 2 or 3 WhatsApp taxi agencies 2 days or the day before—super responsive, always got replies within 5 minutes. We headed to Ella (4-hour drive) for 22,000 LKR.
Arrived in the afternoon at Rest Full Homestay—a small, family-run guesthouse. Clean, cozy, and an amazing Sri Lankan breakfast.
In the afternoon, we went to Nine Arches Bridge. It was a Sunday, a Sri Lankan holiday, so it was *packed*—mostly locals and very few white tourists! Even though it was crowded, it was cool because it was all Sri Lankans. We waited an hour for the train. It’s worth seeing, but honestly, I didn’t think it was that amazing.
Then we headed to the station to check if we needed to book tickets for the train to Haputale—turns out, no.
Monday, December 23rd: Beautiful weather. We hiked Ella Rock—a gorgeous trek. The final stretch is steep but shaded, so it wasn’t as tough as I’d read. The whole hike is stunning from start to finish. We saw the train pass twice (one blue, one red) and lots of women picking tea.
After that, we did Little Adam’s Peak. It’s not hard, but it was *packed* with tourists—meh. Luckily, at the top, you can walk a bit farther (down one side and back up) to get some space to yourself.
What I *didn’t* like was the commercial vibe at the big café/restaurant with a pool at the entrance of Little Adam’s Peak. Loud music, all that money being made right next to little souvenir stands run by Sri Lankans or tea-picking women. Felt off.
Ended the day buying souvenirs at one of the few shops we found during the trip.
Tuesday, December 24th: Beautiful weather. Took the train to Haputale. We got to the station 30 minutes before the 9:30 AM train. We could’ve taken 2nd or 3rd class—I went with 2nd (160 LKR per person).
It was crowded, but we managed to get seats—first 2, then 3. Only a 1-hour ride, but I *loved* it—windows and doors open the whole time.
Arrived in Haputale around 11 AM, and the mist was already rolling in.
We walked to our guesthouse, The Mist Holiday Bungalow. Simple but clean, with a great view of the tea plantations. The owner’s wife is Vietnamese and used to work for French tour operators, so her French is still pretty good—helpful for us since our English is terrible. They booked us a tuk-tuk for 4:45 AM the next day (2,000 LKR) to Lipton’s Seat.
Spent the afternoon wandering around Haputale. Not much charm, but there’s a nice fruit and veggie market and a short walk through the tea plantations.
Wednesday, December 25th: Beautiful weather. The tuk-tuk was on time to take us to Lipton’s Seat. We were the first ones there—the sky was just starting to turn pink. In the end, only about ten of us watched the sunrise. The guesthouse had packed us breakfast, and we walked back down (half on the road, half through the plantations). Didn’t see any tea picking since it was Christmas, but the walk was still incredible. We took detours through villages full of kids.
After that, we visited the tea factory. The tour was really interesting, and we took the bus back down to Haputale. Such a great moment—whole families were heading to mass, dressed up and made up. All so beautiful.
At noon, we left for Udawalawe National Park. Taxi for 14,000 LKR. Stayed at River Inn Safari Cottage. *Warning*: It’s the same place as Eagle Safari Cottage. I don’t recommend it. We’d always stayed with families before, but here it was just staff—totally different vibe. The pool was nice but not very clean (water was murky). The bungalow was big and fine, but it was brand new—so new the asphalt floor wasn’t fully dry. It’s in the middle of nowhere, so we had to eat on-site. Couldn’t leave a review on Booking because they never confirmed we’d stayed, and they canceled our reservation the next day.
Thursday, December 26th: Beautiful weather. I’d booked a safari through the hotel for 5:30–10 AM for 54 USD. Honestly, yes, there are a lot of jeeps, but it was great. The kids loved it—we saw everything there was to see.
Left by taxi at 11:30 AM for Welligama (12,000 LKR).
We didn’t stay in Welligama city but at Coconut Beach, between Welligama and Midigama. *Total crush* on the guesthouse: Sky Mountain Café with View. Such a lovely family. The mom makes amazing meals at reasonable prices. The view from the hill over the sea is unreal.
Spent the afternoon walking along the beach.
Friday, December 27th: Beautiful weather. My kids are surfers. Unfortunately, there weren’t any boards their size to rent at Coconut, so we took a tuk-tuk to Welligama Bay (1,000 LKR). They surfed from 8 AM to 5 PM—rental was 5,000 LKR for the day. Meanwhile, we walked the beach and swam. Water was 29°C.
Saturday, December 28th: Beautiful weather, rain from 4 PM until midnight. Same surf day. They were so well-behaved the whole trip, so this was their reward.
Sunday, December 29th: Beautiful weather. Beach day at Coconut. *Warning*: It’s a reef break. For surfers, there are three spots (Coconut Left, Middle, and Right). The boys bodysurfed (with fins) all morning, and at 1 PM, we took the bus to Hikkaduwa.
Stayed at Hotel Universal Beach. Nothing special—right on the water, but the rooms were dark even though they were clean. The manager was super nice, but the rest was meh, and breakfast was mediocre compared to what we’d had before (2 eggs and 3 slices of toast). Plus, it was late—8 AM.
First impression of Hikkaduwa wasn’t great—way too many Russians for our taste.
Monday, December 30th: Beautiful weather. Spent the whole day exploring. Turtle Beach, then the other side of the beach (toward Galle) near the fishing port. The beach there is much wider, with scattered hotels and super quiet. It’s beautiful—I should’ve booked somewhere in that area. Ended up having a great day away from the crowds.
Tuesday, December 31st: Overcast, then beautiful, rain at 4 PM. Had to end the year (and the trip) with some surf. Rented boards for the kids (3,000 LKR per board for the day). Bad luck—the waves were on a reef break but small. Not great for them, but no big deal. They still got out of the water by 2 PM. Walked the beach (which is gorgeous), had a juice, and went for a swim. Then back to surfing in the rain at 4 PM.
Wednesday, January 1st: Left by taxi at 5 AM (18,000 LKR). Flight at 10 AM. Arrived in Madrid at 8 PM.
I could have titled my travel journal like Carmen: "Some trips are born twice." Indeed, we had considered this destination back in February 2020. However, an honest tour operator advised us against traveling at that time due to the climate. So, we gave up and opted for Guatemala instead (see "On the Mayan Lands" on this site).
So, why this title? When I was in primary school, over 65 years ago, the illustrations in my history books (Machu Picchu) and geography books (Lake Titicaca) made me dream, and those images stayed in my mind. It took until 2026 to finally make this dream come true!
We prepared our trip with Tout Pérou, a French-speaking "agency." Everything was handled via email and WhatsApp exchanges with our contact: Laurent, who was both competent, friendly, and full of good advice.
For 200 €, Tout Pérou provided us with drivers and guides whenever we wanted, helped us buy our domestic flights (cheaper when purchased in Peru), booked shuttles between airports and hotels, and got us a discount on the train ride to Aguas Calientes, as well as on the buses between Chivay and Puno and between Puno and Cusco. In short, Laurent took care of all the logistics and the Machu Picchu tickets. It was up to us to book our hotels. Tout Pérou provided a list, but we weren’t obliged to follow it. Another advantage of the package: we didn’t have to pay in advance; we paid the service providers directly day by day.
We didn’t meet Laurent in person because he was on vacation in Europe. Before his departure, he gave us a briefing, provided a summary table with the entire program, the service providers, their phone numbers, their fees, the schedules, and gave us plenty of advice (money, exchange, safety, etc.). After returning at the end of our stay, he kept checking in on us.
Lastly, we had also gathered information from Arnaud Lagadec, who runs a hotel in Cusco and offers tours of the region. He gave us a lot of useful information. Another contact: Thomas Montaigne, very friendly, who runs an agency in Arequipa (Agence Pérou Exclusif).
Day 1 – Paris to Lima
Foreword
I’ll share our trip without any pretension—I don’t have the talent of some contributors on this forum—and I’ll illustrate it with a few photos (taken with an ordinary smartphone). My comments are personal and only reflect my own views. So, please be kind! Feel free to comment on my story as you like, but let’s avoid pointless debates.
Even though we live in the south of the Paris region, true to our habits when the flight is in the morning, we chose to spend the night before our departure in a hotel near CDG and parked our car in a parking lot in Garches. This way, we avoid the stress that often comes with traveling around Paris (accidents, roadworks, traffic jams, etc.).
Check-in and border control went smoothly on that Sunday morning. Our Air France flight was uneventful. In Lima, border control took a particularly long time, and for the first time, we didn’t get an entry visa stamped in our passports.
As planned, a driver took us to the Miraflores district, where our hotel was located. We were surprised by the numerous signs about possible tsunamis, having forgotten that Peru is prone to such events and regularly experiences earthquakes. We’d see the consequences of these during our journey.
Exhausted from the early wake-up, the 13-hour flight, and the 7-hour time difference, we had dinner at the hotel before a restful night.
Note that this day was Peru’s presidential election day. As a result, we weren’t served beer—the sale of alcohol was banned that Sunday.
We did the Langtang trek (hike) from September 10th to 17th, with the first and last days being the trip from Kathmandu and back—so 6 days of actual walking. It’s a fairly well-known trek but certainly not as famous or crowded as those in the Annapurna or Everest regions, which is why we chose it.
In theory, it’s mandatory to have a guide for this trek. In reality, it seems there are ways to bypass the regulations: we met at least two people hiking without a guide—a South Korean, a New Zealander, and possibly also a couple of English women and an American couple, though we’re not sure if they had a guide.
The agency we booked with had told us it was an affordable trek for relatively older people in good shape—which is our case (I’m 72 myself). I have to say upfront that we found it quite challenging, maybe because we didn’t have good weather—it was the end of the monsoon season. To be clear, no matter your fitness level, I’d say doing this trek in the middle of the monsoon season would be suicidal.
Day 1 – Journey from Kathmandu to Syapru Besi
On Monday, September 8th, there had been violent protests in Kathmandu against the government, which had, among other things, blocked access to social media and been accused of nepotism and corruption. There were 19 deaths. The situation was very tense on the day of our departure, Wednesday the 10th. The agency warned us that public transport was very unreliable. So, we decided to take a jeep, at an additional cost of $100 ($160 minus what was already budgeted for the bus).
We left a little before 7 a.m. and it took us a good hour just to reach the outskirts of Kathmandu. Along the way, we saw several houses and vehicles set on fire by protesters.
The road to Syapru Besi is only 120 km, but it’s frankly awful. It’s always narrow, winds through endless mountains, and the shoulders range from bad to confusing to nonexistent. Several sections are just dirt tracks. We didn’t regret opting for the jeep, as we could stop several times at our convenience—if only to let Y (my Thai partner) throw up everything she had. She’d taken her usual motion sickness medication, but the constant turns, accelerations, and braking eventually made her terribly carsick.
In Nuwakot, we stopped for breakfast at a nice little restaurant, Jimbu. It was around 8:30 a.m., and we’d barely covered 60 km. The restaurant has a lovely garden overlooking the Trishuli Ganga, the river flowing down from Syapru Besi. First photo: the river in the bottom right corner, mist and clouds over the mountain on the other side.
An hour later, my second photo: the hills along the Trishuli Ganga. You can see the different crops—lush green rice paddies in the lower right and corn, already yellowed and likely harvested, in the foreground on the left. And of course, the mist and clouds through which you can glimpse the mountain on the other side of the river.
When we started looking for a summer destination a few months ago, our first criterion was to avoid extreme heat and heatwaves. We had already been to Norway two years ago and are considering going back in the future for other occasions. So, we had some fun asking ChatGPT which destinations enjoyed a mild climate during the summer without going too far. Among the list provided by the AI were the Canary Islands... The idea of a place we wouldn’t have thought of first, both not too far away and exotic enough, appealed to us: “Hmm, why not?”
This destination had never really attracted me, though Magali was a bit more interested. Five years earlier, COVID had caused a short break in my professional activity, and I had planned a trip because the flight price was attractive, and I was looking for a destination different from what usually appeals to me, more than out of deep interest. From a distance and with a social judgment I acknowledge (it’s not great, but it’s not completely wrong), I had the image of a destination for party-goers enjoying the sun without the slightest interest in local culture, with concrete coastlines and denatured landscapes—everything I detest the most. Still, I had done some quick research on the different islands and spotted Lanzarote for its beautiful volcanic landscapes, hiking trails, beaches, and the impression of a good balance between activity and fewer crowds than Tenerife or Gran Canaria. Then I dropped the idea of going, without ever reconsidering traveling to the Canaries...
Until now! Because we started researching the different islands of the archipelago to see which ones might appeal to us the most. It was La Gomera, the third smallest island of the archipelago, more praised for its hiking trails and preserved nature than for its beaches, away from mass tourism (fifty times fewer tourists than Tenerife) but still a bit more developed than its wild neighbor El Hierro, that caught our attention. Contrary to what might be suggested later, I’m not at all addicted to AI, but I use it from time to time to synthesize quick research or simply for experimentation. Since ChatGPT had started anticipating my tastes lately as if it had become my buddy (often successfully, sometimes off the mark), I asked which Canary Island would suit me best for a trip with my family. The tool answered first with... La Gomera. So, I tested it and teased it a bit to see if this suggestion was well-founded, as the method sometimes makes it contradict itself. But no luck: “You’d appreciate the wild nature of El Hierro, but with family, you’ll find little activity for the kids. You won’t like the touristy vibe of the big islands like Tenerife, Gran Canaria, Lanzarote, and Fuerteventura. You could consider La Palma, but it’s really La Gomera that will suit you best, based on your interests and the criteria given.” So, we dug deeper into our research and were convinced without a shadow of a doubt that this island was the one waiting for us.
Without knowing it, we had Canarians in our circle who revealed their origins when they heard about our travel plans. One from Tenerife insisted we’d be better off choosing Tenerife (obviously...) because it also has preserved spots and that La Gomera, “you can explore it in two or three days, you’ll get bored quickly...” The other, a colleague from Gran Canaria who had never visited La Gomera, still recommended it without hesitation because it turned out her parents had just gone there on vacation: they loved it and had encountered few tourists. She also tended to think this destination was usually the subject of short stays, but according to what her parents told her, taking your time there was also a great idea. However, in our research, the idea that La Gomera is an island you can explore in three or four days max kept coming up. So, we considered combining its visit with La Palma or El Hierro, the other two that caught our eye. But hopping between islands by ferry represents a significant budget for non-Canarians, even more so for a family of four. Then, scrutinizing Google Maps, it seemed obvious that two weeks were too short to discover two islands as they deserve, and that there seemed to be plenty to see in La Gomera, given its very unique culture. After all, we read that some people spend several months a year there, others never even leave... Finally, these landscapes and this atmosphere, which seemed to us a mix of Europe, North Africa, and Latin America, tempted us. So, it would be two weeks in La Gomera, deal!
La Gomera is therefore the second... well, the third smallest island of the Canaries since La Graciosa was recently recognized as a fully inhabited island. It has the shape of a rough circle about 20 to 25 kilometers in diameter and has just over 20,000 inhabitants, half of them in its capital, San Sebastián de la Gomera, the only real town. Like its Canarian sisters, La Gomera is a volcanic formation that rose about 10 million years ago. The island is very mountainous and rugged, covered with red and black rocky landscapes. Geological activity has shaped, between the sprawling massifs that end in steep cliffs in the ocean, six coastal valleys with tropical vegetation that have favored human settlement. They divide the island like slices of a cake; from the north clockwise: the agricultural Vallehermoso, the rustic Agulo, the green, humid, and fertile Hermigua, the sunny capital San Sebastián de la Gomera, the southern and isolated Alajeró-Santiago, and the seaside Valle Gran Rey. They constitute the six municipalities (more like cantons to our French understanding) of the territory.
The large solidified magma massifs that shape the heart of the island have created a large depression more protected from the sun at its center, allowing the growth of a vast laurel forest, today grouped within the Garajonay National Park, La Gomera’s green lung, which has earned it the status of a World Biosphere Reserve. Its completely European appearance contrasts sharply with the rocky and tropical landscapes of the rest of the island. Thus, the climate varies greatly from one point to another on the island: in summer, you can quickly go from a dry and sunny valley at 35°C to a humid forest area at altitude at 18°C.
La Gomera was populated late. As with the rest of the Canaries, human presence is thought to have begun about 2,000 years ago. Groups of animist Berbers, probably fleeing persecution, gradually populated the archipelago, especially the western islands and La Gomera, becoming its small aboriginal population: the Guanches (or later Gomeros). The animist and pastoral civilization of the Guanches thrived until the Spanish takeover in the 15th century, which, after a short period of harmony and mixing with the indigenous people, suddenly ended in bloodshed... La Gomera later became the “Columbus Island” after Christopher Columbus’s stopover, increasing the blending of populations. In the 20th century, many Gomeros emigrated to Cuba and other Latin American countries in search of a better life, bringing back a mix of cultures and traits quite palpable in today’s Gomeran culture. It is, however, in La Gomera that the vestiges of Guanche culture seem to have left the most traces, in the language, gastronomy, social practices... Moreover, most Gomeros, especially in remote villages, have a particular identifiable type and proudly claim their ancestral roots, even making La Gomera a bit exotic in the eyes of other Canarians.
Perhaps that’s why it has never really wanted to develop its tourist infrastructure too much. If we set aside the tourists who visit for the day by bus or boat from Tenerife on a marked itinerary (and whom we ultimately rarely encounter), La Gomera has remained a hidden gem, a destination focused on nature discovery that attracts hikers, nature-loving divers, and scientists for its fauna and flora, and to a lesser extent, beachgoers who don’t seek overly developed coastlines. Tourist activity is therefore limited. Roughly speaking, you’ll find a majority of Spaniards, including a substantial number of residents from other Canary Islands, many Germans who have a particular fondness for La Gomera and spend long stays there or own second homes, to the point that the German cultural footprint is clearly noticeable in some places (it’s said to be Angela Merkel’s favorite holiday spot), and still quite a few French. The presence of other nationalities seemed negligible to us. Most travelers come mainly for hiking, but it’s also a prime spot for whale watching. Additionally, the seaside resorts of La Gomera—San Sebastián, Santiago, and especially Valle Gran Rey—are well-known destinations for hippies, especially German ones, ranging from chic boho hippies to old-school hippies who’ve been there for decades, quite similar to those you’d meet in India in Goa, Rishikesh, or Paharganj. Thus, practices like naturism, vegetarianism, and local organic production are quite well established in some areas.
Some practical info:
- The round-trip flight from Paris to Tenerife cost us 365 € per person (outbound with Transavia, return with EasyJet), including checked luggage and three seats reserved side by side.
- We chose two bases to explore the island: one week in Valle Gran Rey, reputed to be the most pleasant of the three seaside resorts, and one week in Hermigua, more mountainous and close to the natural park. We booked two houses with balconies and views: the first at 120 € per night, the second at 99 €.
- The round-trip ferry between Tenerife and La Gomera cost us 270 € with the company Baleària Canarias, including discounts for children aged 4 and 12, but I don’t have the exact details. It was a bit cheaper than with the other company, Fred Olsen.
- Finally, we rented a car through the agency Cicar for 360 € for 16 days, which comes to 22.50 € per day.
- Apart from that, we didn’t plan anything and decided the day before or even the morning of what we wanted to do. We didn’t invest in any paper guide on the Canaries, as information on La Gomera was scarce, but we used the very comprehensive site La Gomera Travel, a travel guide published by the Canary Islands Tourism Council, a real goldmine of almost exhaustive information on the island.
Alright, off we go for 16 days of adventure discovering La Gomera!
Last October, we landed in Marrakech to spend a few days with family exploring Morocco’s roads.
Transport: a rented Dacia.
Accommodations: small guesthouses.
Our first stop was just a few kilometers from Marrakech, at a lovely house perfect for relaxing and recharging before continuing. It’s called Bleu House, a little paradise on the outskirts of Marrakech. The welcome was very warm, with a beautiful pool and a lovely garden.
Next, we headed toward the Tichka Pass. The road has really improved in recent years—it’s much easier to drive now. No more getting stuck behind trucks, and today, the construction is practically finished.
Morocco has turned green after the recent rains. It’s a joy for the herds and shepherds.
I hesitated about writing this travel journal...
This summer, we only did the classics (the 3 northern parks and Zanzibar) and let a local agency take care of everything from start to finish.
No craziness, no risks, no sleeping under the stars, no self-drive, no venturing off the beaten path, no incidents, and not even any delays in the pre-planned itinerary...
But don’t think we were disappointed!
The whole family (there were 6 of us) came back with smiles and memories of great moments spent together.
So, if you're looking for a "classic" way to discover Tanzania, this is the place to be.
Our 2-week itinerary:
- Arusha (1 night upon arrival)
- Tarangire (1 night)
- Ngorongoro (2 nights in Karatu then Irmisigiyo)
- Serengeti (3 nights in Robanda, Togoro Plains, and Seronera)
- Zanzibar Stone Town (1 night)
- Zanzibar Matemwe (3 nights)
- Zanzibar Jambiani (3 nights)
Come along, I'm taking you to this country where it's so nice to wander and slow down...
This trip was in 2023, but when I wanted to write my travel journal, VF was still closed to contributions...
So, now that I've just finished my Japan travel journal here, I figured it was high time to honor this destination we came back from so enchanted.
Disclaimer 1: This is a written travel journal. There’ll be text! Too much, for some!
Disclaimer 2: This is an illustrated travel journal. There’ll be photos! Too many, for some!
I have to say, every time I try to discipline myself, to keep it shorter, to include fewer photos... I end up adding more. It feels like my dear Aunt Nicole, who exhausted us with her slide-show evenings in the 70s/80s, decided to take her revenge. The upside for you, readers, is that you can slip away anytime without offending Aunt Nicole. I won’t even notice!
Anyway, since I love maps, here’s one to give you an idea of where I’m taking you. As you can see, we only saw a tiny part of Laos (the areas circled in red); we only had 3 weeks for ourselves (my husband’s newly retired, I still work), and we prefer taking our time over rushing around like crazy.
In broad strokes, it was very classic:
First, we “settled in” at Luang Prabang (8 days), because we wanted and needed to.
From there, we took three days to venture a little further north—not far in kilometers, but as we know, distances aren’t just about km!
Then we flew south to Paksé, letting ourselves drift down to the 4,000 Islands while stopping by the pre-Angkorian archaeological sites.
We wrapped up with the Bolaven Plateau.
A few practical notes: We arrived via Bangkok, then took a Bangkok-Luang Prabang flight, having picked up our luggage in Bangkok to check it in for Luang Prabang. No issues—the Bangkok airport, which many of you know, is very well organized.
We got our visas on arrival in Luang Prabang. Quick, but to be fair, we were on a “small” plane, and the big flights had arrived earlier, so we weren’t too crowded in line!
At the end of our trip, we didn’t fly out of Paksé but from the nearby airport in Thailand, Ubon Ratchathani (a 2.5-hour drive from Paksé), then Bangkok and Paris.
You’ll notice we skipped Vientiane to stay longer in Luang Prabang. That said, there’s now a high-speed train between Vientiane and Luang Prabang—good to know—and soon the (Chinese) train will go all the way to Bangkok and even Kuala Lumpur!
With that intro out of the way, let’s dive into the heart of the matter.
To be continued: Slowing down the pace... in Luang Prabang
It’s an ancient city that breathes, a living spring.
Here, no kitschy signs like “I miss you in Fengyu,” nor mass-produced fake antiques.
The century-old houses still bear the marks of wind and rain; in the morning, you hear roosters crowing, and at dusk, smoke gently rises from the kitchens.
This city doesn’t try to please anyone—like the spring water flowing through it, it simply keeps living at its own pace.
Located in Eryuan County, in the Dali Prefecture of Yunnan, the ancient town of Fengyu is a nationally designated historical and cultural city. It’s nicknamed the “land of scholars and ink”—during the Qing Dynasty, the Fengxiang Academy produced four *jinshi* and eleven *juren* in the imperial examinations. The Bai families made studying and farming a true legacy. Even on market days, you’ll find stalls of calligraphy and paintings, while lintels and screen walls are covered with family mottos.
Fengyu was also an important stop on the ancient Tea Horse Road. It preserves the second-largest Bai architectural complex in China, just after Xizhou. The famous traveler Xu Xiake spent seven days here and compared it to the “peach blossom paradise.”
I’m inviting you on a stroll through my drawings—a completely subjective, far from exhaustive, and totally personal take, since it’s based on my own sketches. I put this travel journal together after returning in late 2024, mostly using felt-tip pens and pencils, with a few collages thrown in. I worked from our personal photos.
Let’s start with the shotengai...
Our first "wow" moment came as we stepped out of the subway in Asakusa, the Tokyo neighborhood where we’d booked our hotel for our first five nights. Exhausted after our long flight, we finally arrived and took an exit that led straight into a shotengai—one of those covered shopping streets that pop up in city centers and flourished between the 1950s and 1980s.
It was an instant aesthetic shock, like a close encounter of the third kind between the modern city, a typical Asian market with its street stalls, the vintage vibe of the arcade, the sheer abundance of goods, and the bustling crowd—a mix of tourists, pilgrims (thanks to nearby Senso-ji Temple), and locals (it’s a very working-class area).
In the end, it set the tone for a feeling we’d experience throughout the trip. Wherever we went, shotengai turned out to be fantastic spots for finding little restaurants, shops, or even fresh produce. Some are like real mazes, like in Kyoto, where we spent ages trying to relocate a restaurant we’d loved ;-)
In Kanazawa, the Omicho Market:
And in Kyoto, Nishiki Market:
Preamble:
Africa was calling to me, so a year ago, with our usual travel companions, we decided to return to the continent we love so much.
Where to go?
Uganda quickly caught our attention—wildlife we’re used to seeing, plus gorillas and the shoebill we missed in Zambia.
We got in touch with Paul, who’s been mentioned several times on the forum back in September, booked our flight tickets, secured the gorilla permits, and by early October, the most important things were done.
We still had plenty of time to hold our "prep meetings" for the final itinerary.
Three days before departure, I sprained my ankle (my weak spot, as you’ll recall from our Colombia trip).
I wasn’t in great spirits, but after a year of waiting, nothing was going to stop me.
We’d see how it goes!
Off we went for our new adventures
If you're looking for great tips and offbeat spots, if you love exploring uncharted parts of a country, if the exotic is your adrenaline, then move along!
Our 15 days in early May in this part of Turkey (a country I first discovered during a city trip to Istanbul in 2017) will only tread well-worn paths and revisit popular routes. Simply because I kept hoping until the very end that our flight to Jordan wouldn’t be canceled. Events in the Gulf proved me wrong, so we left with:
Zero preparation.
Not a single hotel booked (well, except the first one), no visits planned, just a flight ticket bought three weeks earlier. No guidebook, no app—just the desire to explore southern Turkey and Cappadocia, whose images and the chance to stretch our legs had caught my eye.
Oh, wait—I did bring along a new guide: Gemini! Yes, my friends, generative AI was my chief advisor throughout the trip for sites to visit, accommodations, routes, and even restaurants! An experiment I wanted to try to form my own opinion on using this new technology. And what better way to test it than a Turkish getaway?
The verdict? You’ll have to wait for the trip recap to find out!
The main idea of the trip is also relaxation.
So, the plan is Antalya for a few days, the Turkish Riviera for a few more, Cappadocia as the highlight, and a return via Antalya to wrap up the trip. And it was all planned by AI!
So, if you're ready, fasten your seatbelts—cabin crew, doors to automatic and cross check—boarding for Turkey now!



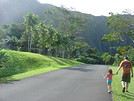
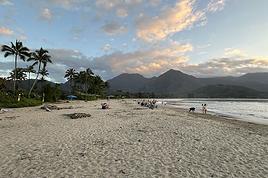
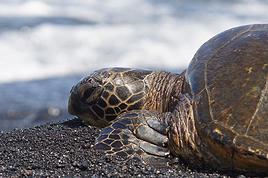
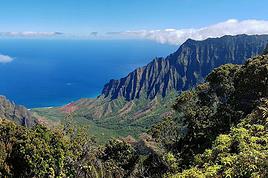
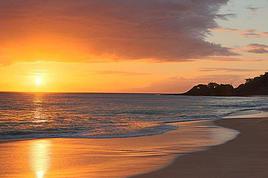
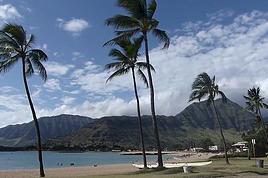
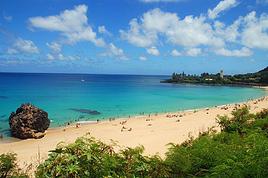
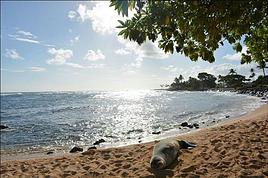

 On the right, the "welcome marker"—those dates offered everywhere as a sign of hospitality. On the left, a tribute to those stunning doors worn by time, admired all over the old quarters, including the abandoned ones.
 Hospitality will often lead you to accept a small coffee, an "Omani coffee," very light, subtly flavored with cardamom, maybe a touch of saffron, and occasionally rosewater.
Here, I’ve depicted a man in the common everyday attire of Omanis: the dishdasha, mostly white (during the week and daytime; colors are more common in the evening or on Fridays and Saturdays). While you’ll see some men dressed in Western clothes, they’re very few. The white dishdasha is truly the shared attire of all men. The dishdasha, which has no hood, is distinguished by a small pom-pom attached to the collar, the furakha, which is soaked in perfume. And believe me, Omanis go overboard with it! "It smells like the pom-pom" is an expression that’s now part of our shared language, my husband and I.
Another must of men’s attire is the kuma, a small round head covering, usually white with brightly colored patterns. The keffiyeh is also worn (but without the cord called an agal in Arab countries), and it’s mostly worn by those with roots in the desert, from what I understood.
And what about the women, you might ask? Some are veiled, some in full black (but not a burka—more like a chador + abaya), due to the influence of Saudi Arabia and the United Arab Emirates, whereas the traditional outfit used to be a layering of very colorful dresses. Most of the women we saw wore neutral clothing, a plain veil over their hair, but with their faces uncovered. We also saw many saris and colorful veils—don’t forget that 40% of the population consists of Indian, Nepalese, and Bangladeshi immigrants, who work a lot in tourism, hospitality, restaurants, services, and construction.
Just to clarify, as a tourist, there’s no pressure to wear a veil, and never any disapproving looks. Of course, you’ll save the mini shorts, plunging necklines, bare shoulders, and midriffs for the hotel terrace—but I’d say that’s the same for men and women, and with the sun being strong, it’s better for your skin too.
Here’s the introduction! In the next post, I’ll tell you about my itinerary, and we can dive in!
Hospitality will often lead you to accept a small coffee, an "Omani coffee," very light, subtly flavored with cardamom, maybe a touch of saffron, and occasionally rosewater.
Here, I’ve depicted a man in the common everyday attire of Omanis: the dishdasha, mostly white (during the week and daytime; colors are more common in the evening or on Fridays and Saturdays). While you’ll see some men dressed in Western clothes, they’re very few. The white dishdasha is truly the shared attire of all men. The dishdasha, which has no hood, is distinguished by a small pom-pom attached to the collar, the furakha, which is soaked in perfume. And believe me, Omanis go overboard with it! "It smells like the pom-pom" is an expression that’s now part of our shared language, my husband and I.
Another must of men’s attire is the kuma, a small round head covering, usually white with brightly colored patterns. The keffiyeh is also worn (but without the cord called an agal in Arab countries), and it’s mostly worn by those with roots in the desert, from what I understood.
And what about the women, you might ask? Some are veiled, some in full black (but not a burka—more like a chador + abaya), due to the influence of Saudi Arabia and the United Arab Emirates, whereas the traditional outfit used to be a layering of very colorful dresses. Most of the women we saw wore neutral clothing, a plain veil over their hair, but with their faces uncovered. We also saw many saris and colorful veils—don’t forget that 40% of the population consists of Indian, Nepalese, and Bangladeshi immigrants, who work a lot in tourism, hospitality, restaurants, services, and construction.
Just to clarify, as a tourist, there’s no pressure to wear a veil, and never any disapproving looks. Of course, you’ll save the mini shorts, plunging necklines, bare shoulders, and midriffs for the hotel terrace—but I’d say that’s the same for men and women, and with the sun being strong, it’s better for your skin too.
Here’s the introduction! In the next post, I’ll tell you about my itinerary, and we can dive in!



 Roundabouts are particularly interesting because they feature emblems of Turkmen culture, like the dog, a carpet, the Ahal Teke horse, or Muslim symbols, even though the presence of Islamic artifacts is quite limited.



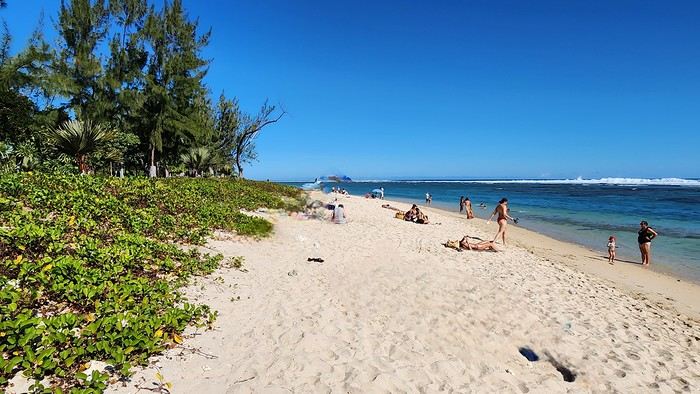
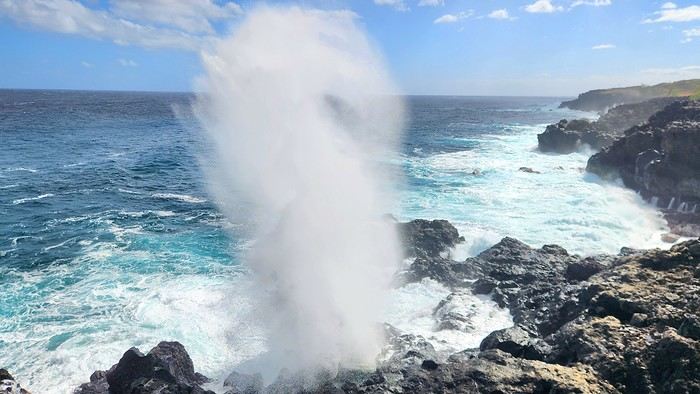
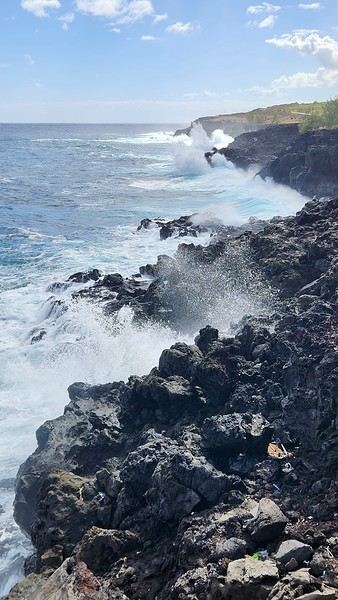
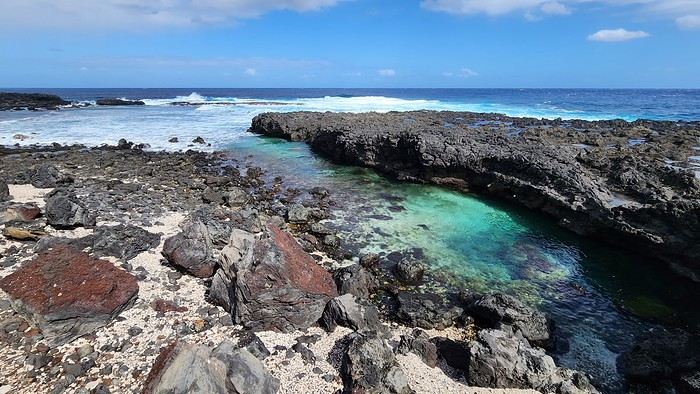
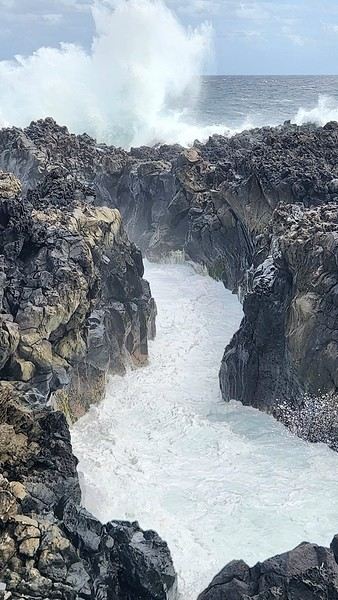


 The large solidified magma massifs that shape the heart of the island have created a large depression more protected from the sun at its center, allowing the growth of a vast laurel forest, today grouped within the Garajonay National Park, La Gomera’s green lung, which has earned it the status of a World Biosphere Reserve. Its completely European appearance contrasts sharply with the rocky and tropical landscapes of the rest of the island. Thus, the climate varies greatly from one point to another on the island: in summer, you can quickly go from a dry and sunny valley at 35°C to a humid forest area at altitude at 18°C.
 Last October, we landed in Marrakech to spend a few days with family exploring Morocco’s roads.
Transport: a rented Dacia.
Accommodations: small guesthouses.
Last October, we landed in Marrakech to spend a few days with family exploring Morocco’s roads.
Transport: a rented Dacia.
Accommodations: small guesthouses.
 Come along, I'm taking you to this country where it's so nice to wander and slow down...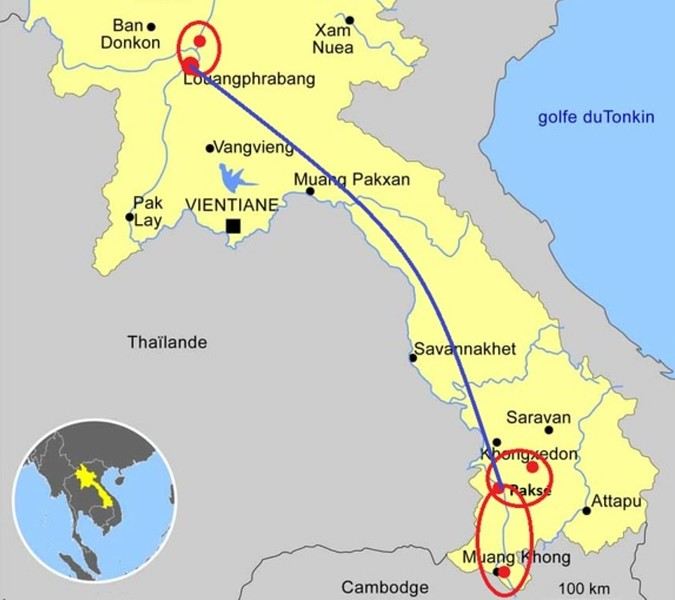
 I’m inviting you on a stroll through my drawings—a completely subjective, far from exhaustive, and totally personal take, since it’s based on my own sketches. I put this travel journal together after returning in late 2024, mostly using felt-tip pens and pencils, with a few collages thrown in. I worked from our personal photos.
 And in Kyoto, Nishiki Market:

 A little sneak peek?